
Still need help?

The following setup guide is specific to Windows users.
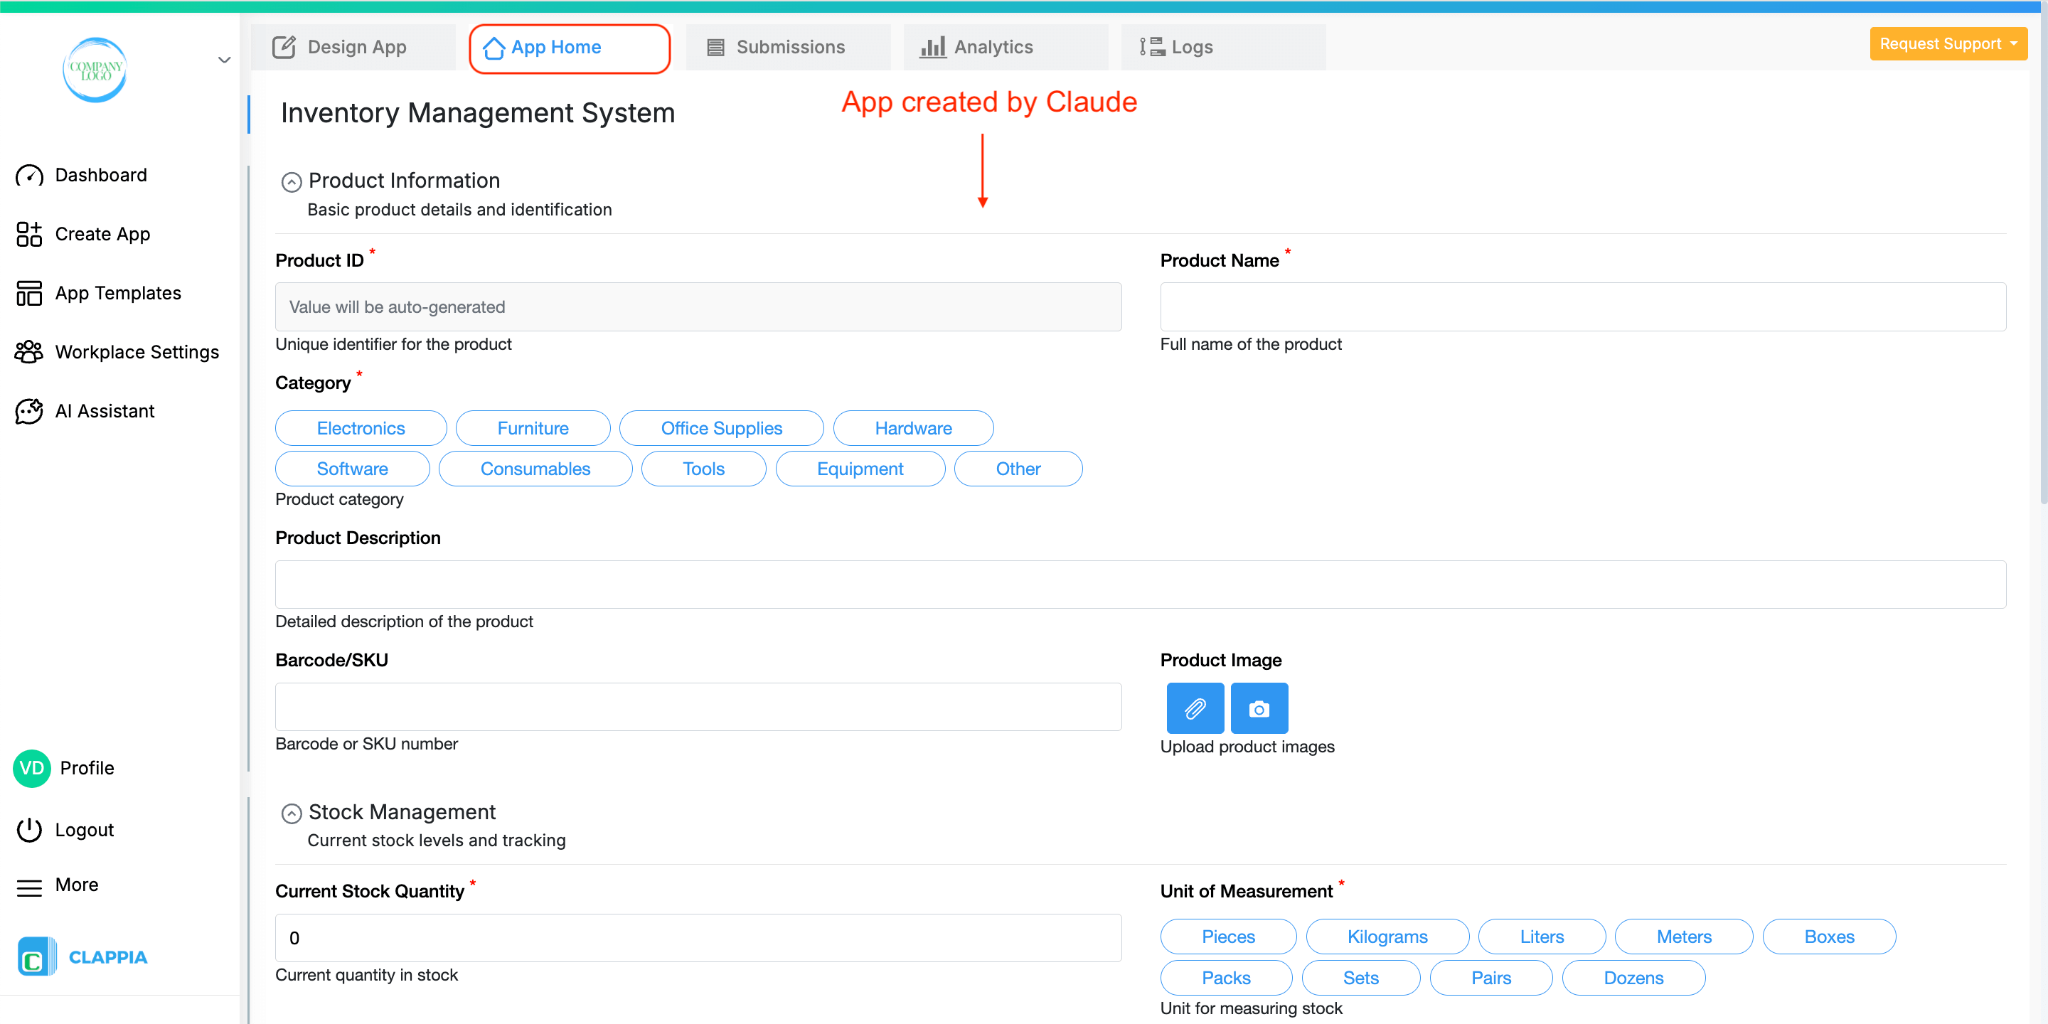
With MCP, you can use AI assistants to create and manage your Clappia apps simply by giving instructions in plain language. Below, we’ll show an example setup of connecting an AI assistant (Claude, in this case) with Clappia using MCP. Once connected, you can give prompts like “Create an Employee MIS app with fields to capture Name, Department, and Joining Date” and the AI will build the app for you.
Before you can start giving prompts to the AI that affect your Clappia workplace, you need to prepare your system with some tools, install Claude Desktop (if using Claude), and configure the AI with Clappia’s MCP details. This is laying the groundwork so that the AI can “talk” to Clappia.
Once set up, the AI can:
Essentially, MCP acts as a bridge between your instructions and Clappia’s app builder. This is especially useful if you want to save time, quickly try out different configurations, or if you’re more comfortable giving high-level instructions rather than manually setting up everything yourself.
To get started, you’ll first need to install a few tools on your Windows system. These will ensure the MCP connection with Clappia runs smoothly.
Open your browser and download Node.js from the official site: https://nodejs.org/en/download/current
Run the installer and complete the setup (accept defaults unless you have a specific reason to change them).
Next, you’ll need Claude Desktop. This is the application where you’ll type your instructions to Claude.
Download Claude Desktop from: https://claude.ai/download
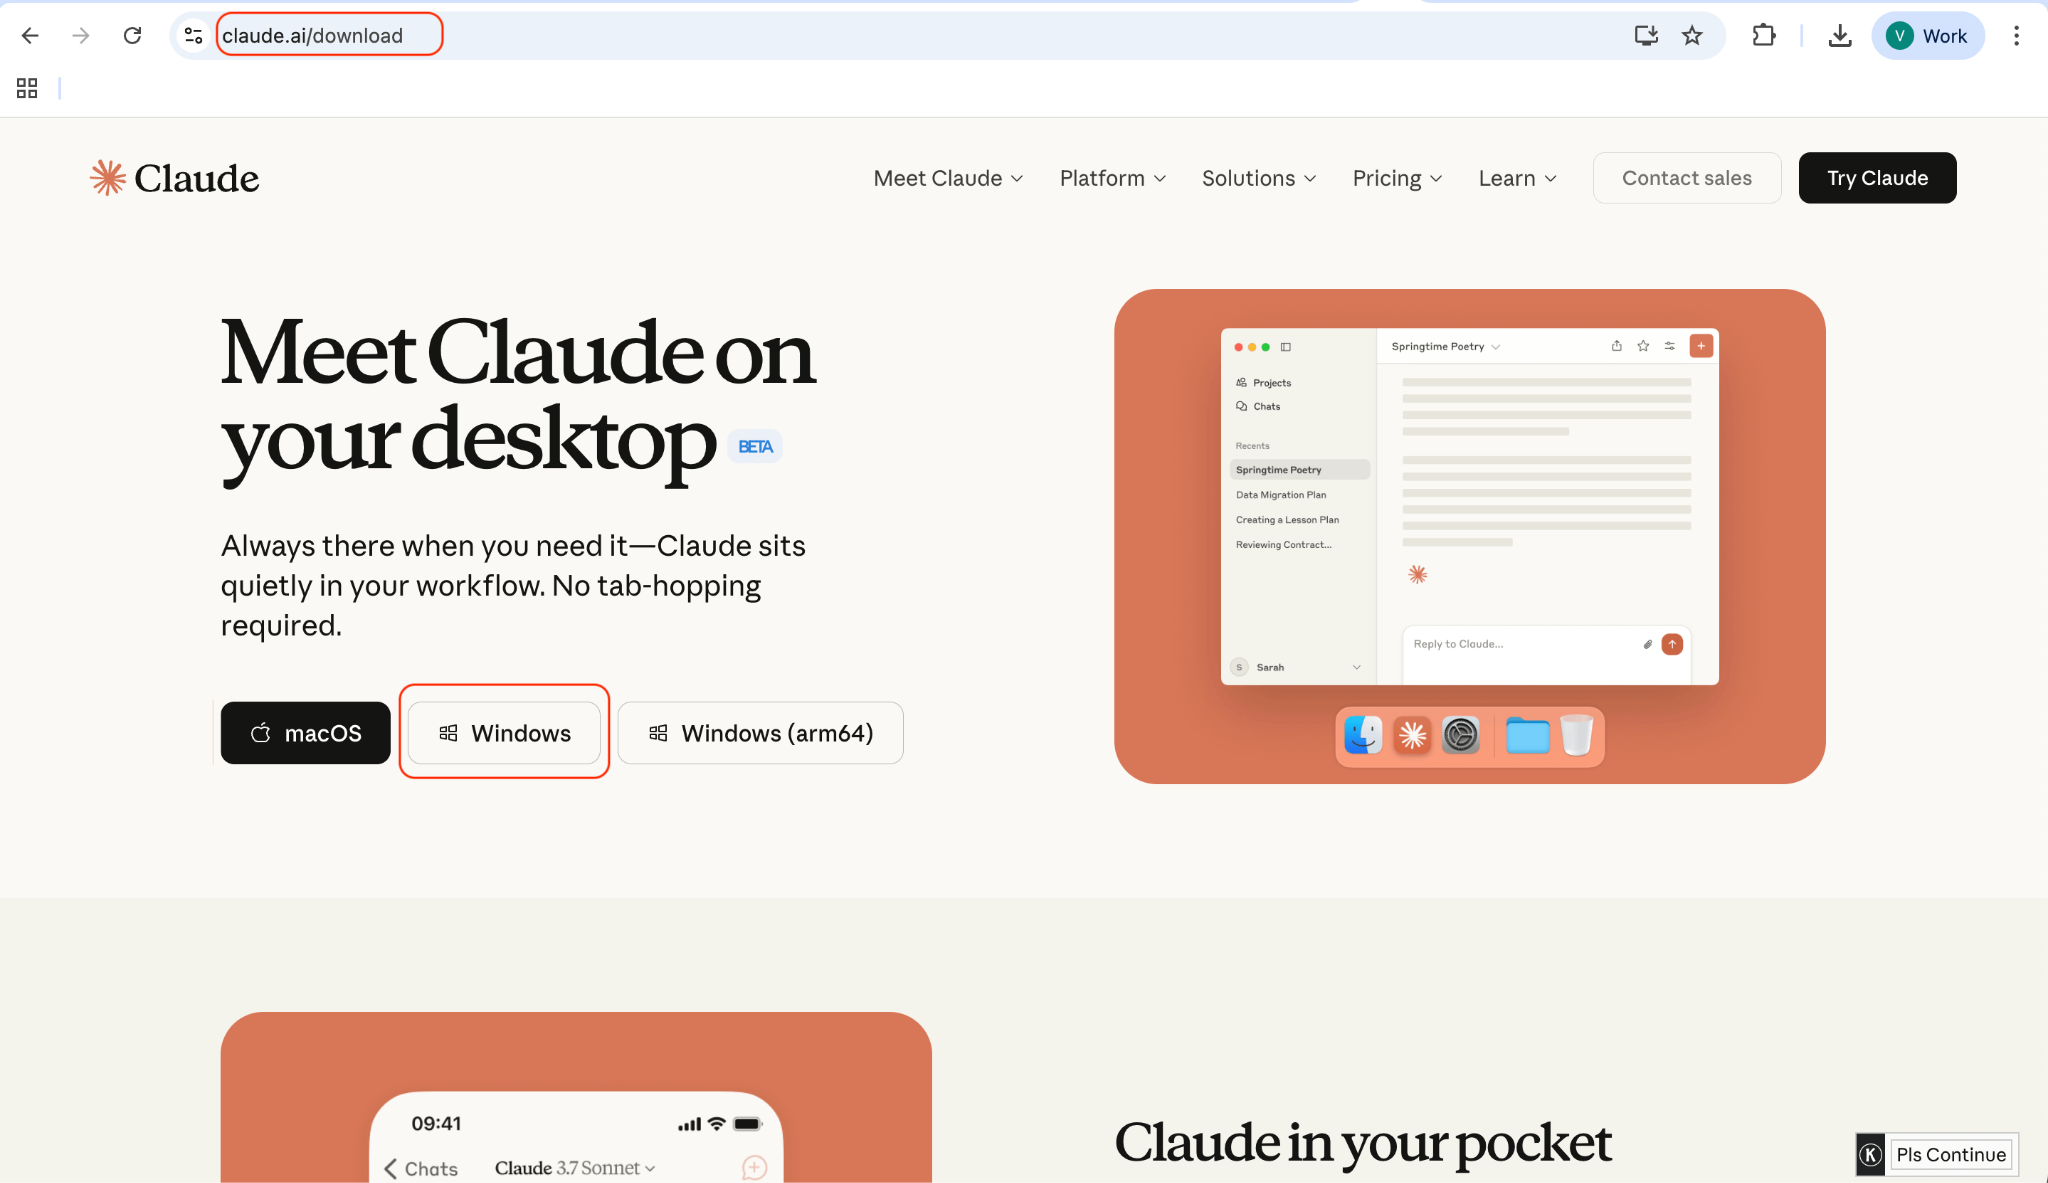
Install it and sign in with your Claude account.
Important: You will need a paid Claude account to use the MCP connection with Clappia reliably. While you can use the free plan for basic testing, MCP consumes more tokens on Claude, so for building and managing actual apps, a paid plan is recommended.
This is where you link Claude to your Clappia account.
Open Claude Desktop > Settings > Developer Options > Edit Config.

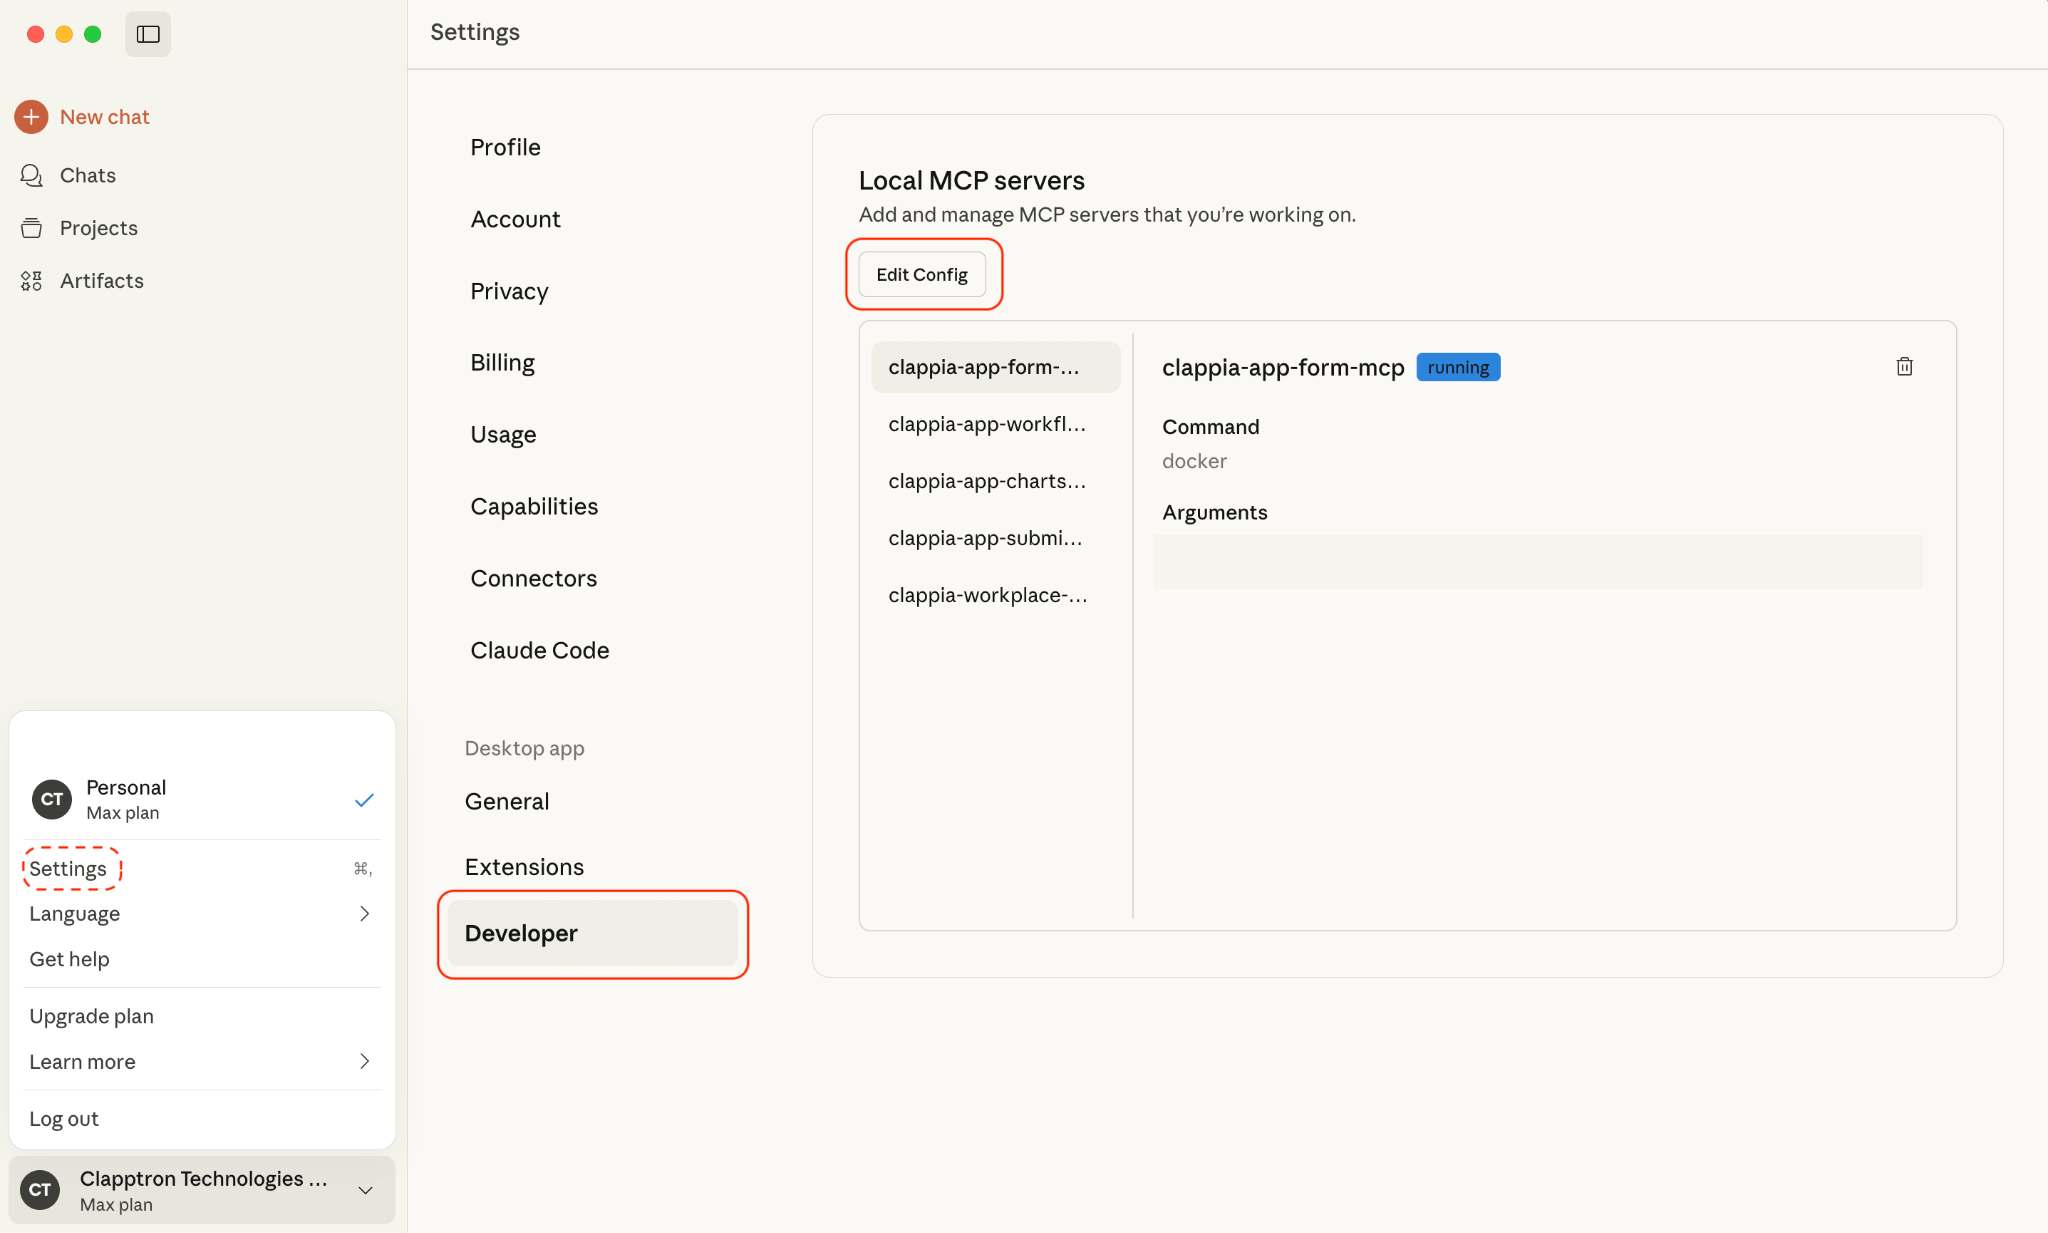
A window will appear with a list of files and folders.
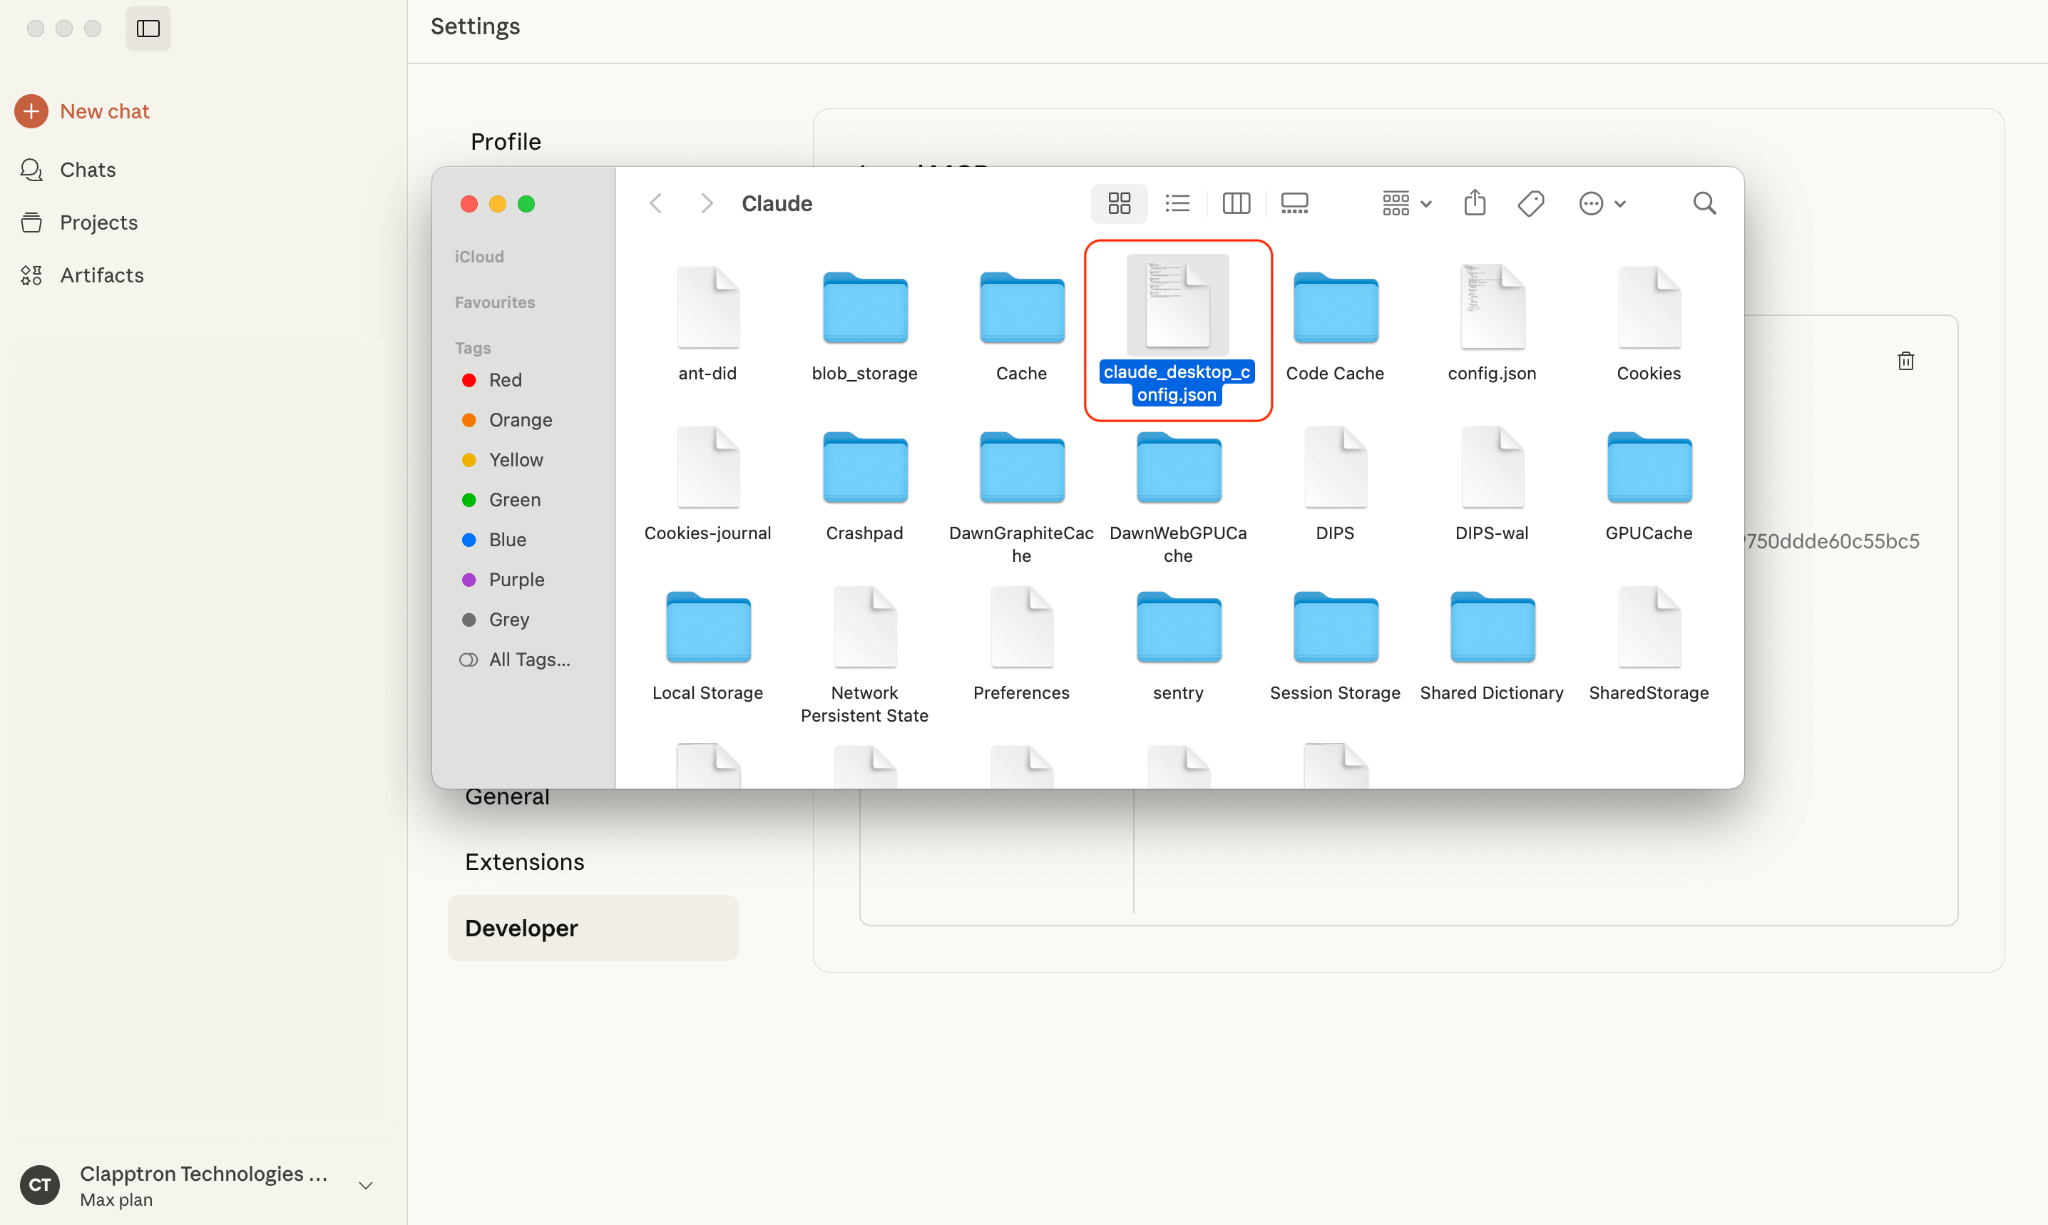
Open the file named claude_desktop_config.json.
Paste the following JSON configuration (replace api_key with your actual Clappia workplace API key):
Save the file.
Force-close Claude Desktop (do not just close the window, ensure the application no longer appears in Task Manager).
Reopen Claude Desktop. After reopening, go to Claude Desktop > Search & Tools (located just below the prompt input area). Here you will see a list of all the Clappia MCP connections available.
At this point, Claude is connected to Clappia. You can now begin using prompts to create or manage apps directly.
Now that the setup is complete, let’s look at how you can actually use Claude to work with Clappia. The basic idea is that you type instructions (prompts) into Claude Desktop, and Claude will perform the actions inside your Clappia workplace.
When creating an app, you need to tell Claude what the app should contain and also include the email address where the app should be assigned. This ensures the app appears in your Clappia dashboard.


For example: Create an Inventory Management app for user@example.com with fields for item code, supplier, quantity in stock, reorder level, and expiry date.
Claude will:
Depending on complexity, this may take a few minutes.
You can also make changes to an existing app.
Note: If you are working on the same app in the same Claude session, you need not give in the App ID in the prompt. However, if you are working on multiple apps in the same Claude session, always provide the App ID so that Claude knows which app it needs to work on. The App ID can be found in the app’s URL or in the right panel inside Clappia.

Add a new field

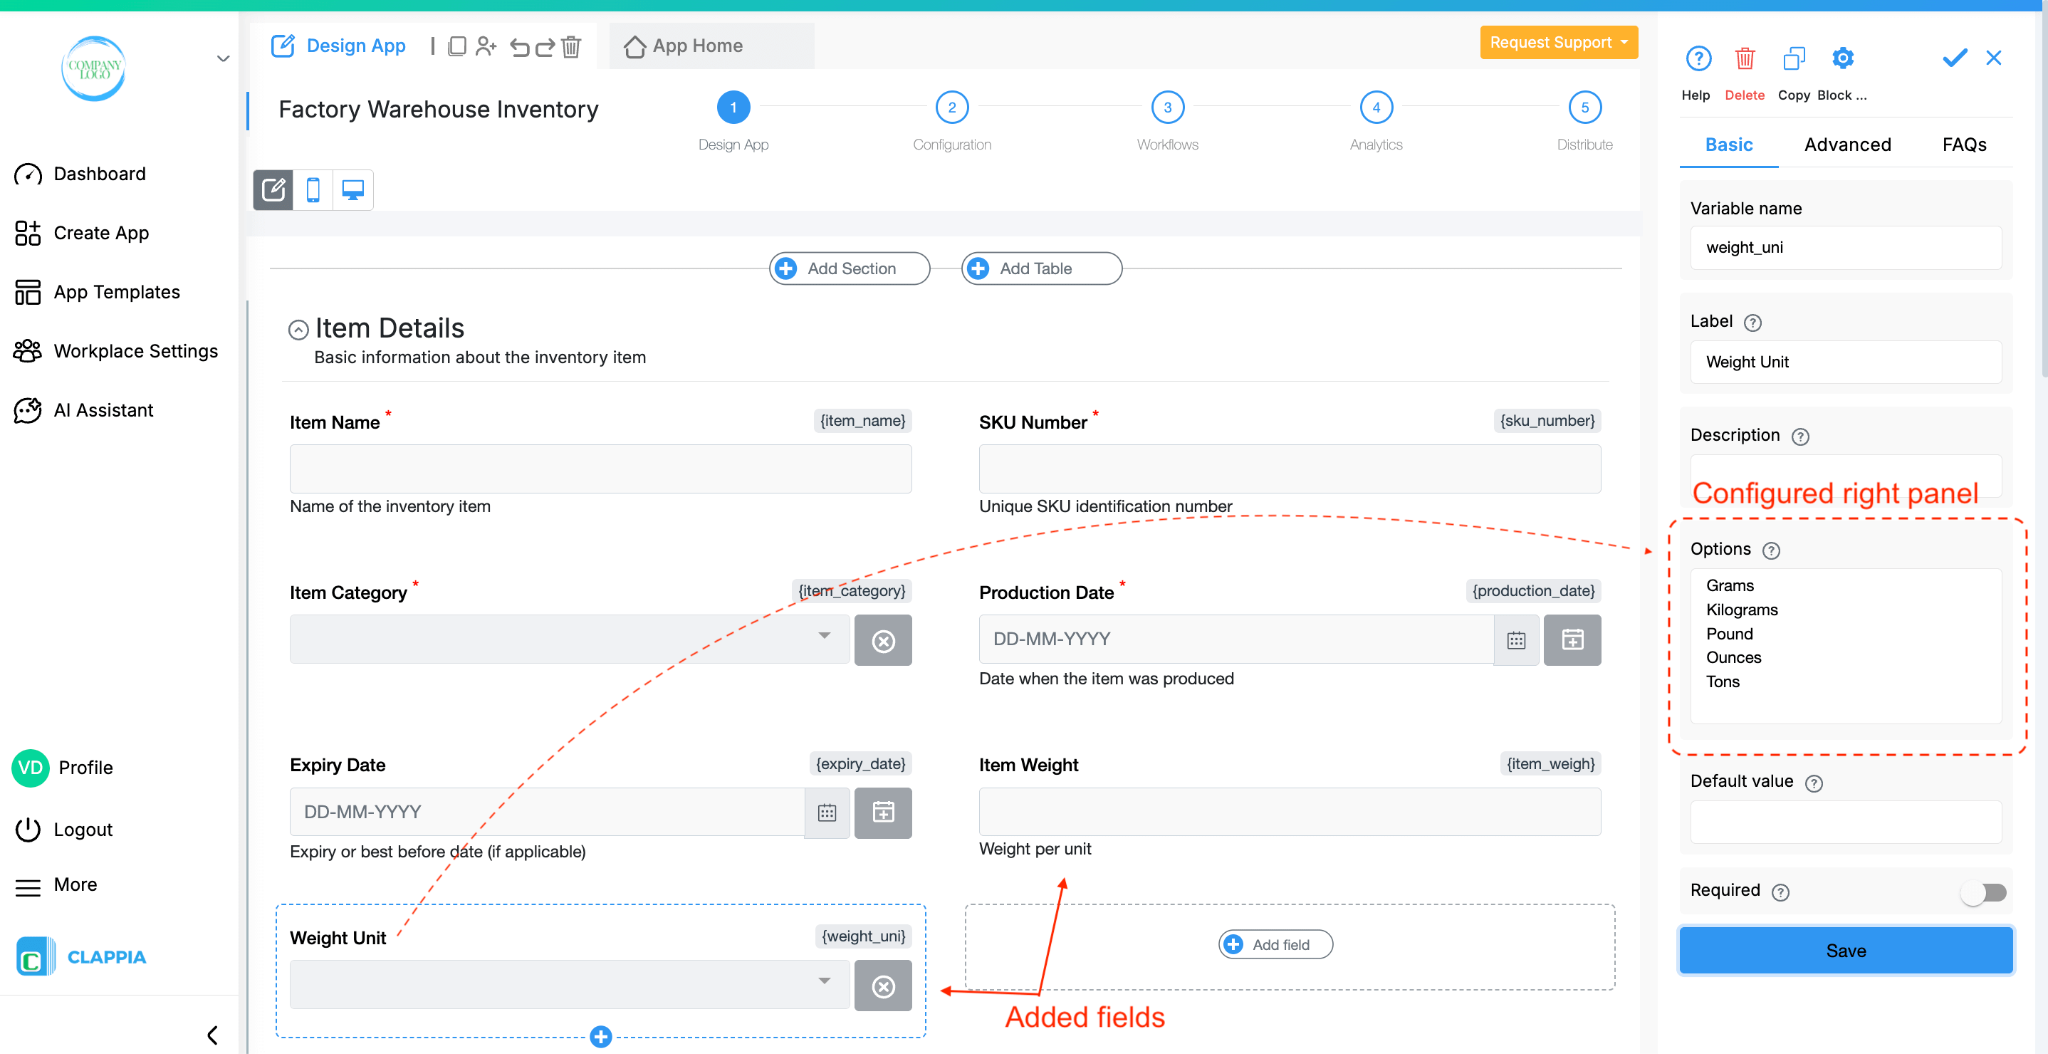
Prompt Example: [APP_ID] Add a field for item weight.
(The same prompt could also be given as “Add a field for item weight.”, without the app id.)
Here, Claude will add a new field to the app with the same name and appropriate configurations on the field’s right panel.
Edit an existing field
Use the variable name of the field (not just the label) so Claude knows exactly which field you want to edit.


Prompt Example: [APP_ID] Edit {part_number} to SKU Number along with variable name.
View the app structure
Prompt: [APP_ID] Show me the structure of this app.
Useful if you have a very long app and need to know what it contains, or want to replicate the same app with modifications.
Replicate an app
Prompt Example: [APP_ID] Create a copy of this app.
Claude can configure workflows and charts in your app. For example:
You don’t always need to be very detailed.
For example: Create a simple CRM app for user@example.com

Claude will still build a complete app and then explain what it added. You can refine it further by giving more instructions or editing it manually in Clappia.
Q. My Clappia tools are not appearing in the AI client after setup.
Reopen the AI (for example: Claude Desktop) after saving the config. If they still don’t appear, quit and reopen the AI again.
Q. Workflows or charts are not being added. What should I check?
Ensure Node.js is correctly installed, your API key is correctly entered in the JSON, and your AI client (e.g., Claude Desktop) has the required Clappia MCP tools enabled.
Q. My field edits aren’t working. Why?
Use the field’s variable name in curly brackets in your prompt. You can also give in the App ID so that the correct app is identified and the field is edited. If using Claude and it cannot apply the change, it will explain how to do it yourself.
Q. The AI is editing the wrong app or getting confused. How do I avoid this?
Always include the App ID when you’re managing multiple apps in the same session.

L374, 1st Floor, 5th Main Rd, Sector 6, HSR Layout, Bengaluru, Karnataka 560102, India

3500 S DuPont Hwy, Dover,
Kent 19901, Delaware, USA


3500 S DuPont Hwy, Dover,
Kent 19901, Delaware, USA
L374, 1st Floor, 5th Main Rd, Sector 6, HSR Layout, Bengaluru, Karnataka 560102, India
.svg)
