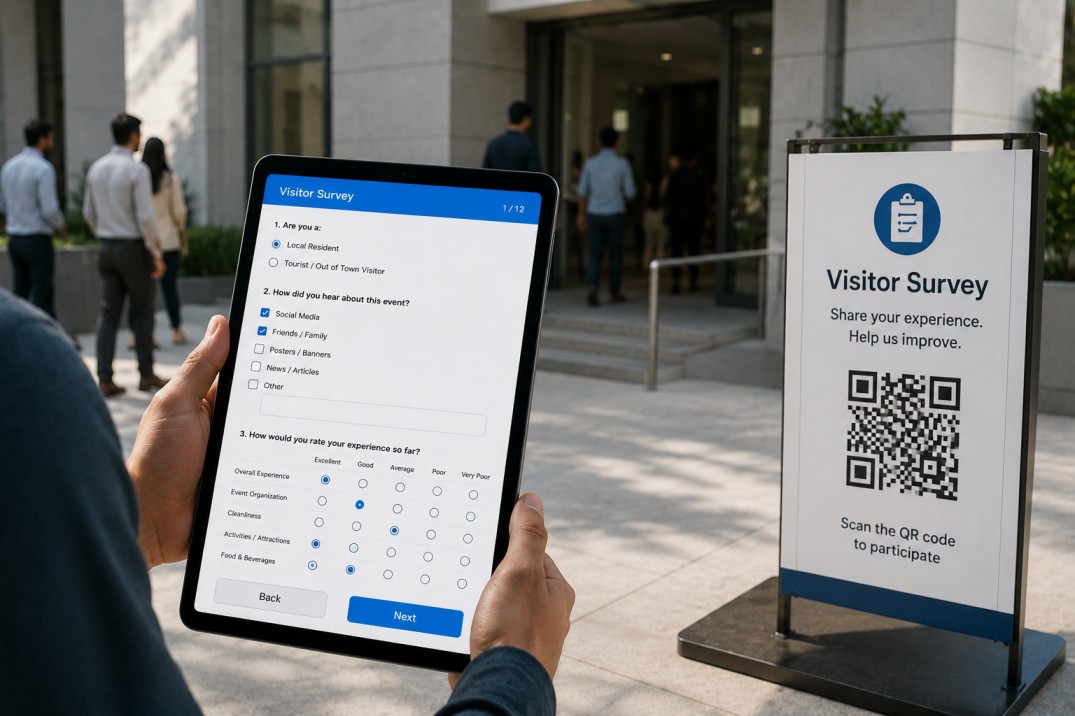
A visitor survey at a festival or fair collects useful data only if it asks the right questions to the right people. A tourist travelling from another region has a completely different relationship with the event than a local resident who has attended every year. Asking everyone the same questions produces a dataset full of irrelevant answers and missing the ones that actually matter for each group.
The solution is a survey with conditional branching: a single question that identifies whether the visitor is local or from out of town, then shows each group a tailored set of follow-up questions. This guide walks through building that survey from scratch in Clappia, a no-code platform for building mobile forms and collecting field data.
If you are new to Clappia, here is the context you need before the steps below make sense. In Clappia, you build a form by adding blocks, which are individual field types: a text input, a multiple-choice question, a phone number field, and so on. Each completed form entry is stored as a submission. Conditional logic is handled through Display Conditions, which are rules you set on individual fields to control when they appear based on the values of other fields. Everything in this guide is configured in Clappia's visual builder without any coding.
The steps below reflect a specific working configuration that can be adapted for any event. You can rename fields, adjust dropdown options, add or remove questions, and change the structure to suit your organisation's needs.
The survey is a single-page form with one section. It moves through five stages:
| Stage | What It Captures | Who It Applies To |
|---|---|---|
| Basic profile | Location, name, gender, age range, optional phone, optional photo | All visitors |
| Visit history and motivation | First visit status, year comparison for returners, primary reason for attending | All visitors |
| Origin branch | Tourist path: origin, transport, accommodation, length of stay, spend; Local path: occupation, spend, community impact | Tourist or Local, not both |
| Awareness channel | How the visitor heard about the event | All visitors |
| Experience and suggestions | Five satisfaction ratings, improvement categories, return intent | All visitors |
Log in to Clappia and create a new app. Give it a descriptive name such as Visitor Survey or Event Feedback Form. Once the app is created, you will be in the form builder, which is a visual canvas where you add blocks to build the form.
Add a single section to the form. In Clappia, a section is a labelled grouping of fields that appears as a heading in the form. Name this section Visitor Profile or a similar label that makes sense to your enumerators. All fields in this guide go inside this one section. The survey is a single-page form with no tabs or multi-step navigation.
These fields appear for every visitor regardless of whether they are local or a tourist. Add them in this order:
Location
Add a Dropdown block labelled Survey Location. A Dropdown block presents a list of options the enumerator selects from. Populate it with the specific survey stations or zones at your event. This field records where within the event the interview took place, which is useful if the event spans a large area and you want to analyse feedback by zone.
Name
Add a Single Line Text block labelled Visitor Name. This is a short text input for the visitor's name.
Gender
Add a Multi-Select block labelled Gender. A Multi-Select block lets the visitor choose one or more options from a list. Include options that reflect the gender categories relevant to your survey context.
Age Range
Add a Radio Button block labelled Age Range. A Radio Button block presents options as chips the visitor taps to select exactly one. Add age band options such as Under 18, 18 to 30, 31 to 45, 46 to 60, and Over 60. Adjust these bands to suit the expected age distribution at your event.
Phone Number (Optional)
Add a Number block labelled Contact Number (optional). Leave this field optional by keeping the Required toggle off. Do not push visitors to provide a phone number if they are hesitant. The field is useful for follow-up contact in specific scenarios but should never be a barrier to completing the survey.
Photo or File (Optional)
Add a File Upload block labelled Photo or Attachment (optional). This allows the enumerator to take a photo of the context, such as a specific stall, a facility issue, or a location that relates to a piece of feedback. Leave it optional. It is not used in standard interviews; it is there for cases where a visual record adds value.
Is This Your First Visit?
Add a Yes/No block labelled Is this your first visit?. A Yes/No block displays as two tappable options. This field is the trigger for the year-comparison question below.
Year Comparison for Returning Visitors
Add a Radio Button block labelled How does this year compare to previous years? with options: Better organised, About the same, and Less well organised.
Now open this field's settings and add an editability condition. In Clappia, an editability condition is different from a visibility condition: the field remains visible on screen, but it is locked (greyed out and unselectable) unless the condition is met. Set the editability condition to: Is this your first visit? equals No. This way first-time visitors see the field but cannot interact with it, while returning visitors can select an option. Enumerators do not need to manually skip the question; the form handles it.
Primary Reason for Visiting
Add a Radio Button block labelled Primary reason for attending with options: Tourism or leisure, Cultural interest, Business or commercial, and Other.
Add a Single Line Text block labelled Other reason (please specify). Open this field's settings and add a Display Condition set to: Primary reason for attending equals Other. A Display Condition controls whether a field is visible at all. This text field will only appear when the visitor has selected Other in the radio question above, keeping the form tidy for everyone who chooses a predefined option.
Add a Radio Button block labelled Where are you from? with two options: Local and Non-local (Tourist). This single field controls which path the rest of the form takes. Every tourist-specific field in Step 5 will have a Display Condition of Where are you from? equals Non-local (Tourist), and every local-specific field in Step 6 will have a Display Condition of Where are you from? equals Local. Neither group sees the other's questions.
Every field in this section must have a Display Condition set to: Where are you from? equals Non-local (Tourist). Set this condition on each field as you add it. The fields will be invisible until that condition is met.
Visitor Origin
Add a Dropdown block labelled Where are you visiting from?. Populate the options with the regions, states, or countries relevant to your event's likely catchment area.
Mode of Transport
Add a Radio Button block labelled Mode of transport with options: Flight, Train, Bus, Private vehicle, Rental vehicle, and Other.
Add a Single Line Text block labelled Other transport (please specify). This field needs two Display Conditions: it should appear only when Where are you from? equals Non-local (Tourist) AND Mode of transport equals Other. In Clappia, you can add multiple conditions to a single field; both must be true for the field to appear.
Ease of Reaching the Event
Add a Radio Button block labelled How easy was it to reach the event? with options: Easy, Moderate, and Difficult. Display Condition: Where are you from? equals Non-local (Tourist).
Accommodation Type
Add a Radio Button block labelled Type of accommodation with options: Hotel, Homestay, Lodge, Guesthouse, Staying with family or friends, and Other. Display Condition: Where are you from? equals Non-local (Tourist).
Add a Single Line Text block labelled Other accommodation (please specify) with two Display Conditions: Where are you from? equals Non-local (Tourist) AND Type of accommodation equals Other.
Length of Stay
Add a Radio Button block labelled How many nights are you staying? with banded options: Same day (not staying overnight), 1 to 2 nights, 3 to 5 nights, More than 5 nights. Display Condition: Where are you from? equals Non-local (Tourist).
Tourist Spend Fields
Add three Radio Button blocks using spend bands (adjust the currency and amounts to match your region) for:
Each of these three fields needs a Display Condition of Where are you from? equals Non-local (Tourist).
Every field in this section must have a Display Condition set to: Where are you from? equals Local. These fields will not appear for tourist visitors.
Occupation
Add a Radio Button block labelled Occupation with options: Student, Salaried employee, Self-employed, Daily wage worker, and Other. Display Condition: Where are you from? equals Local.
Add a Single Line Text block labelled Other occupation (please specify) with two Display Conditions: Where are you from? equals Local AND Occupation equals Other.
Local Spend Fields
Add two Radio Button blocks with spend bands for:
Both fields need a Display Condition of Where are you from? equals Local. Local visitors do not have accommodation spend since they live nearby, so only these two categories are captured.
Community Impact Fields
Add two Radio Button blocks with options Yes significantly, Yes slightly, and No change for:
Both fields need a Display Condition of Where are you from? equals Local. These questions only make sense for residents who live in the community the event is intended to serve.
This question appears for all visitors regardless of the origin branch. No Display Condition is needed on the main field.
Add a Radio Button block labelled How did you hear about this event? with options: Newspaper or print, Word of mouth, Radio, Social media, Television, Official website, and Other.
Add a Single Line Text block labelled Other awareness channel (please specify) with a single Display Condition: How did you hear about this event? equals Other.
These fields appear for all visitors. No Display Conditions are needed unless you want to restrict them to a specific visitor type.
Satisfaction Ratings
Add five Radio Button blocks with options Dissatisfied, Moderate, and Satisfied for each of the following:
Improvement Suggestions
Add a Multi-Select block labelled What would you suggest improving?. Unlike Radio Button, Multi-Select allows the visitor to choose more than one option. Add options: Infrastructure (roads, signage, access), Quality of vendor products, Facilities (water, parking, sanitation), Cultural performances, No suggestions, and Other.
Add a Single Line Text block labelled Other suggestion (please specify) with a Display Condition: What would you suggest improving? includes Other. In Clappia, when the parent field is a Multi-Select block, the condition uses includes rather than equals because the visitor may have selected multiple options.
Return Visit Intent
Add a Radio Button block labelled Would you attend this event again next year? with options: Yes, No, and Maybe. This is the final question in the survey.
Display Conditions in Clappia control whether a field is visible. You set them in each field's settings within the form builder. Here is a reference table of every condition in this survey:
| Field | Display Condition |
|---|---|
| How does this year compare to previous years? | Editability condition: Is this your first visit? = No (field visible for all but editable only for returning visitors) |
| Other reason (please specify) | Primary reason for attending = Other |
| All tourist path fields (origin, transport, accommodation, stay, spend) | Where are you from? = Non-local (Tourist) |
| Other transport (please specify) | Where are you from? = Non-local (Tourist) AND Mode of transport = Other |
| Other accommodation (please specify) | Where are you from? = Non-local (Tourist) AND Type of accommodation = Other |
| All local path fields (occupation, spend, community impact) | Where are you from? = Local |
| Other occupation (please specify) | Where are you from? = Local AND Occupation = Other |
| Other awareness channel (please specify) | How did you hear about this event? = Other |
| Other suggestion (please specify) | What would you suggest improving? includes Other |
In Clappia, user permissions are configured per app in the user management settings. For an on-ground survey team, give each enumerator Submit Only access: they can fill in and submit forms and view their own past submissions, but cannot see other enumerators' records or change the form configuration. The survey coordinator who reviews and analyses the full dataset should have Full Access.
The Clappia mobile app, available on Android and iOS, runs the form optimised for a phone screen. The Display Conditions evaluate on the device itself, so the branching between local and tourist paths responds immediately without needing a network connection. Clappia supports offline mode: the form can be completed and submitted without connectivity, and submissions sync when the device reconnects. Ask enumerators to open the app on Wi-Fi before the event starts to ensure the form is cached on their device and ready for offline use during the survey session.
The survey has five stages: basic profile, visit history, a branching origin question, awareness channel, and satisfaction ratings with suggestions. The branching is handled by a single Display Condition rule on each field: tourist fields appear only when the origin question is set to Non-local (Tourist), and local fields appear only when it is set to Local. Each Other text field has its own condition tied to the parent question.
The result is a form that feels short and relevant to each visitor type, produces clean and consistently structured data across all submissions, and can be built entirely in Clappia's visual form builder without any code. Once deployed to your enumerator team, the same form handles every visitor interaction from the first interview of the day to the last.
To get started, create a new app in Clappia and follow the steps above. The form can be built and shared with your team on the same day.
L374, 1st Floor, 5th Main Rd, Sector 6, HSR Layout, Bengaluru, Karnataka 560102, India
3500 S DuPont Hwy, Dover,
Kent 19901, Delaware, USA


.svg)




3500 S DuPont Hwy, Dover,
Kent 19901, Delaware, USA
L374, 1st Floor, 5th Main Rd, Sector 6, HSR Layout, Bengaluru, Karnataka 560102, India

.avif)


.avif)