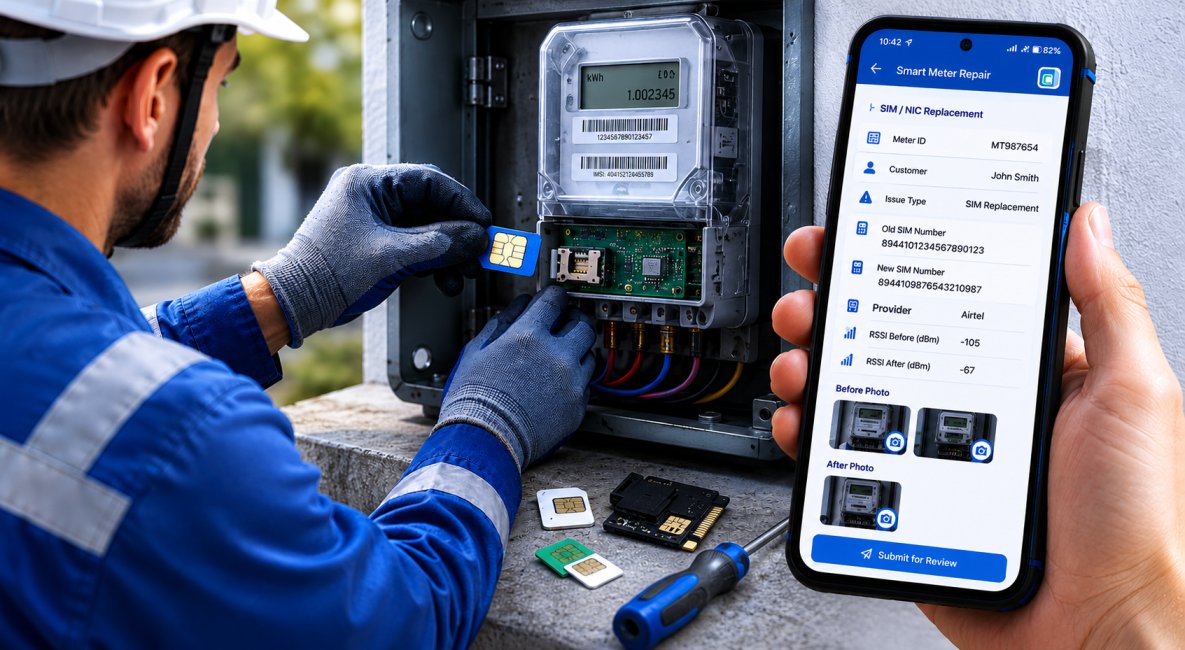
For utilities, energy distributors, and IoT infrastructure teams, smart meter repairs are routine, but the paperwork around them rarely is. SIM swaps and NIC replacements happen in the field, often in basements or remote sites, and the records that should document them end up as handwritten notes, scattered spreadsheets, or photos buried in a group chat. By the time someone in the back office tries to reconcile asset data, the details are incomplete or unverifiable.
Building a dedicated app for this process in Clappia changes that entirely. You can give field technicians a guided, mobile-first form that branches based on what they find on site, validates SIM numbers against your inventory in real time, captures before-and-after evidence with GPS, and routes submissions for image verification the moment they are saved. No coding required, and the whole setup runs on Android and iOS in offline mode.
This guide walks you through the complete setup: the reference master apps, the diagnostic form, conditional logic, and the approval workflow.
A SIM card inside a smart meter connects the device to a telecom network, while the NIC (Network Interface Card) handles the communication protocol layer. During a repair visit, technicians may need to swap either component. In both cases, accurate records must be maintained: the previous SIM number, the replacement SIM number, the telecom service provider (TSP), and the NIC variant all matter for asset management, network reconciliation, and audit trails.
When this data is captured on paper or in generic forms, three problems consistently appear. First, technicians record SIM numbers incorrectly because there is no validation against a known inventory. Second, before-and-after signal readings (RSSI) get skipped or mixed up. Third, photographic evidence is uploaded to messaging apps or email threads and never linked to the specific meter record. A dedicated app with structured fields, smart lookups, and built-in photo capture eliminates all three.
A structured replacement tracking app closes the gap between what happens in the field and what gets recorded in the system, with lookups that auto-fill known data, conditional fields that only appear when relevant, and an approval layer that keeps supervisors in the loop without requiring a return visit.
Before building the main diagnostic form, you need to set up four reference apps in Clappia. Think of these as your MIS tables or master registers: standalone apps whose submission data becomes the searchable database that your field form queries. When a technician searches for a meter ID or SIM number on site, it is these masters that supply the auto-filled values, keeping data consistent across every submission.
This is your primary reference for customer and meter identity. Create a Clappia app and add the following fields using a Single Line Text block for each:
Once set up, populate this app by importing your existing asset records. Field submissions in your main diagnostic app will search this master and auto-fill all linked fields, so technicians do not have to type meter IDs or addresses on site.
This app stores records for SIM cards that have been previously deployed and may need to be identified during a repair. Each entry contains:
When a technician searches by the old SIM number during a repair, this master auto-fills the provider name, removing the chance of recording a mismatched provider against an already-known SIM.
This app tracks SIM cards available for deployment. It uses a Repeatable Section block to allow up to 3 SIM Number entries per submission, accommodating batches of SIMs issued to a field team at once. When technicians search for a new SIM number during a replacement, the lookup validates it against this app, confirming the SIM is a known, inventoried card.
A simple app with a single Single Line Text block for Meter ID. When a meter itself is being replaced, technicians search this app to validate the replacement unit rather than entering the ID manually. This cross-check prevents mismatched records between physical assets and the system.
Reference App
Key Fields
Role in Field App
Asset and Account Master
Account ID, Meter ID, Account Holder Name, Site Address, Communication Status, Installed SIM Number, Installed SIM Provider
Auto-fills account and meter details on site lookup
Legacy SIM Reference App
Provider Name, SIM Number, SIM IP Address
Auto-fills provider name when old SIM is searched
Replacement SIM Inventory App
SIM Number (up to 3 per entry)
Validates replacement SIM number against inventory
Replacement Meter Inventory App
Meter ID
Validates replacement meter against inventory
This is the main field app your technicians will use on site. It is mobile-first, works in offline mode, and uses conditional logic to show only the fields relevant to the situation at hand. Here is a full walkthrough of how to build it in Clappia.
Start with a Dropdown block labelled Region (or Zone, Area, Circle, depending on your organisation's terminology). This field segments submissions by operational division, which makes filtering and reporting significantly easier for supervisors. Configure the dropdown options to match your structure.
Add a Get Data from App block labelled Account ID (Search). Configure it to search the Asset and Account Master by Account ID. In the auto-fill settings, map the following:
Add an optional Get Data from App block for Replacement Meter ID (Search) that references the Replacement Meter Inventory App. This field is only relevant when the meter unit itself is being swapped out. Place an Image Upload block labelled Replacement Meter Photo immediately after it.
Next, add a Dropdown block labelled Issue Type with two options:
This single field drives all the conditional branching below. Use Display Conditions on each downstream section so the technician only sees fields relevant to their situation.
Set this section to appear only when Issue Type equals Infrastructure or Supply Issue. This covers cases where the problem lies outside the meter itself. Include:
Set this section to appear only when Issue Type equals Meter Related Issue. You can configure it to be collapsed by default in the section settings, so the form does not feel overwhelming when it first opens. This section contains three logical sub-parts.
This sub-section documents the state of the meter before the technician attempts any fix. It is critical for audit purposes and helps supervisors understand the original fault severity.
Below these, add the old SIM identification fields:
These conditional fields capture what was actually replaced during the visit. Add a Yes/No block labelled SIM Replaced?. When the answer is Yes, use Display Conditions to reveal:
Add a second Yes/No block labelled NIC Replaced?. When the answer is Yes, reveal:
Once the repair is complete, the technician fills in the post-fix state of the meter. This mirrors the before sub-section and gives supervisors a clear comparison between the original fault and the resolved state.
Clappia's Display Conditions are what make this form smart without making it complicated. Here is a summary of all the conditional logic across the app:
Field or Section
Visible When
Hidden When
Infrastructure / Supply Issue Section
Issue Type = Infrastructure or Supply Issue
Any other selection
Meter Related Issue Section
Issue Type = Meter Related Issue
Any other selection
New SIM Lookup, New SIM Photo, New SIM Provider
SIM Replaced? = Yes
SIM Replaced? = No
NIC Variant
NIC Replaced? = Yes
NIC Replaced? = No
After a technician submits the form, the record needs to be reviewed by a supervisor or quality assurance team, specifically to confirm that the uploaded photos are clear, accurate, and match what was reported. In Clappia, you handle this through the Workflows feature.
In the app's Workflow settings, create a workflow triggered On Save. Add an Approval action node and configure it as follows:
When the reviewer receives the notification, they open the submission link, check all uploaded photos, and mark the record as IMAGE VERIFIED or IMAGE NOT VERIFIED. This updates the submission status in Clappia and creates an auditable record of the review decision.
An On Edit workflow is also configured with a passive start node. This means technicians or admins can edit a submission after the initial save without triggering another approval request, which is useful for correcting minor data entry errors without restarting the verification process.
Every submission moves through a defined set of statuses. Clappia's Submission Status feature lets you track and filter records based on where they are in the workflow.
Status
Meaning
Triggered By
SUBMITTED
Form saved by technician; awaiting review
On Save
IMAGE VERIFIED
Reviewer confirmed images are clear and accurate
Reviewer selects this outcome
IMAGE NOT VERIFIED
Reviewer flagged images as unclear or missing
Reviewer selects this outcome
Admins can filter the submissions view by status to quickly identify records waiting for review or those that have failed verification and need a follow-up visit.
Once the app is built, you configure who can access it and in what capacity. In Clappia, user roles and permissions are managed at the app level. Here is the recommended structure for this workflow:
Role
Access Level
What They Can Do
Field Technician
Submit Only
Fill and submit the form; view own submissions
Supervisor or Reviewer
View and Approve
View all submissions; act on approval requests
Admin
Full Access
Edit master data; configure app settings; view all data
For field technicians, the Clappia mobile app is the primary interface, available on both Android and iOS. Field submissions work fully in offline mode, meaning technicians can fill out the form, upload photos, and capture GPS coordinates even in basements or remote locations with no connectivity. The data syncs automatically once a network connection is re-established.
For lookups to work offline, the relevant reference app data needs to have been synced to the device beforehand. Ask technicians to open the Clappia app on their phone while on Wi-Fi before heading to site, so that master data is cached and available for offline lookups during the visit.
Here is how the complete process plays out from the moment a technician arrives at a site to the moment a supervisor closes the record.
The real power of this setup is not the form itself; it is the data foundation underneath it. Without the reference apps, every field is manually typed, and at scale, manual entry means errors. With the masters in place, the workflow gains three structural advantages.
First, lookup validation reduces entry errors. When a technician searches for an old SIM number and the provider auto-fills, there is no chance of a mismatch between SIM and provider. The same logic applies to new SIM validation against the inventory app: if a SIM number is not in stock, the lookup returns no result, prompting the technician to double-check before proceeding.
Second, account data arrives pre-populated. Technicians do not need to memorise or manually enter meter IDs or addresses. A single Account ID search fills four fields instantly, saving time and ensuring the submission is linked to the correct asset from the start.
Third, the meter inventory app prevents asset mismatch. When a replacement meter is being deployed, searching its ID against the inventory confirms it is a tracked, authorised unit. This matters especially in large networks where meters are issued in batches or reassigned across sites.
Once submissions start coming in, Clappia's Analytics feature lets you build dashboards directly from the submission data. For a smart meter repair workflow, useful metrics include:
These dashboards are available to supervisors and admins directly inside Clappia, without needing a separate BI tool for standard reporting.
Setting up a structured SIM and NIC replacement tracking system in Clappia requires four reference apps, one branching diagnostic form, conditional display logic, and a single approval workflow. Together, these give field teams a guided, error-resistant process for every smart meter repair visit, from the initial fault code to the final GPS stamp.
This setup applies to any organisation that manages connected metering or IoT infrastructure, needs before-and-after evidence for quality assurance, tracks component replacements across a distributed field team, and wants a lightweight image verification step without building a custom application.
To get started, sign up on Clappia and create your first reference app using the structure described above. The entire setup requires no coding, and your team can begin using it on mobile devices the same day.
L374, 1st Floor, 5th Main Rd, Sector 6, HSR Layout, Bengaluru, Karnataka 560102, India
3500 S DuPont Hwy, Dover,
Kent 19901, Delaware, USA


.svg)




3500 S DuPont Hwy, Dover,
Kent 19901, Delaware, USA
L374, 1st Floor, 5th Main Rd, Sector 6, HSR Layout, Bengaluru, Karnataka 560102, India

.avif)
.jpg)

.jpg)