

Meta Description:
Sales teams, merchandising executives, and field auditors who visit retail locations face a documentation problem that starts before they even walk through the door. Verifying that a visit happened at the right store, at the right time, by the right person requires more than a check mark in a spreadsheet. Managers need GPS confirmation, a timestamp, the correct store identifier, and enough context about the site to make the downstream activities meaningful. Without all of that, the visit record is incomplete, and any audit or compliance check that follows it is built on an uncertain foundation.
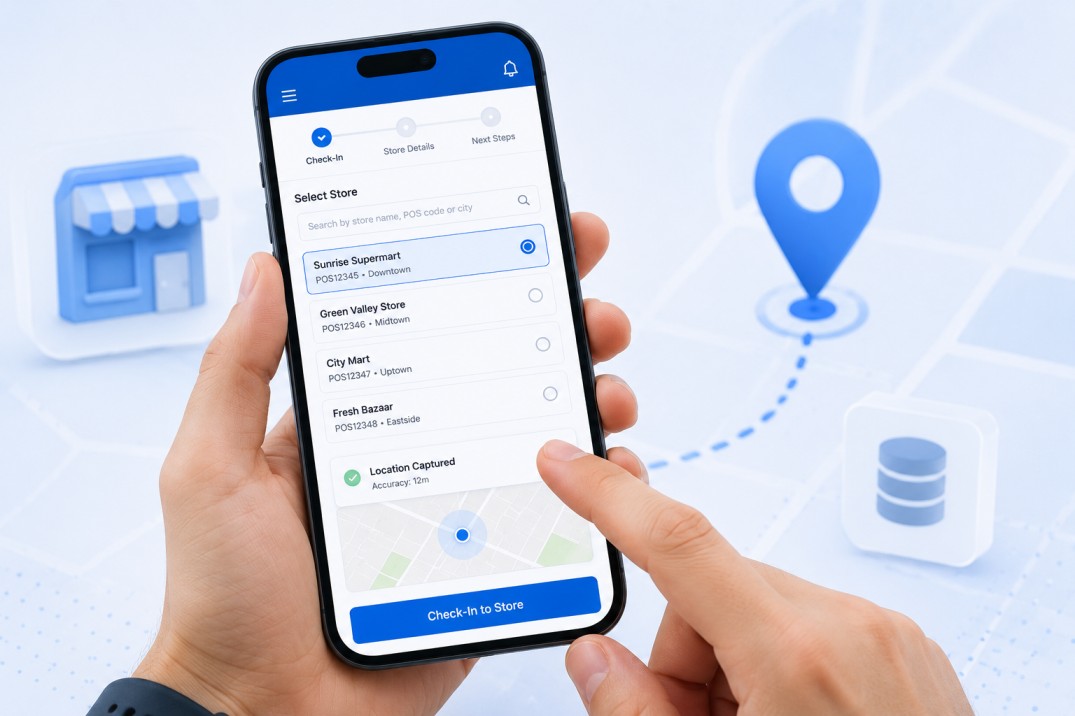
This guide walks you through building a GPS-verified store check-in app in Clappia that handles all of this in a single mobile form. The app auto-fills the user's identity, captures the date, time, and GPS location automatically, lets the user filter and select the correct store from a master list, and pulls the store's details into the submission without any manual entry. Once the check-in is saved, the success screen links directly to the next step in the visit, whether that is a stock audit or a planogram check, so the field user does not need to navigate separately.
This setup applies to any organisation with field teams visiting multiple locations: retail chains, FMCG distributors, pharmaceutical companies running outlet checks, banking or telecom teams doing branch visits, or any operation where a verifiable, location-stamped record of a site visit is needed before further tasks begin.
The check-in app is a short, focused form that a field user completes at the start of every store visit. It sits at the entry point of a larger operational workflow: the check-in confirms the visit and populates the store context, and the downstream apps, a stock audit and a planogram check, carry that context forward into the visit tasks.
| Component | Role |
|---|---|
| Store Master (reference app) | Holds all store records with identifiers, location hierarchy, and planned activity. Queried by the check-in app during store selection. |
| Field Check-In (main app) | The form field users complete on arrival. Captures identity, timestamp, GPS, and store details. Links to downstream apps on save. |
| Store Stock Audit (downstream) | The stock audit app that field users navigate to after check-in. Out of scope for this guide but referenced in the check-in success message. |
| Planogram App (downstream) | The planogram compliance app. Also referenced in the check-in success message. Out of scope for this guide. |
This guide focuses entirely on the Store Master and the Field Check-In app. The downstream apps are part of a broader operational bundle, but configuring the check-in correctly is what makes all of them work with verified, consistent store data.
The Store Master is the reference app that the check-in form queries when a user selects a store. Before building the check-in app, you need the Store Master in place and populated. Create a new Clappia app and add the following fields. Most of these use a Single Line Text block or a Dropdown block depending on whether the value is free-form or from a defined list:
| Field | Suggested Block Type | What It Holds |
|---|---|---|
| POS Code | Single Line Text | The unique point-of-sale identifier for the store; used as the primary store ID in downstream apps |
| Store Name | Single Line Text | The trading or display name of the store location |
| Region | Single Line Text or Dropdown | The regional grouping this store belongs to |
| State | Dropdown | The state or province; used to filter the store list in the check-in app |
| City | Single Line Text | The city where the store is located |
| Zone | Single Line Text or Dropdown | Operational zone; useful for territory-based reporting |
| Branch | Single Line Text | Branch code or name if applicable |
| Address | Multi-Line Text | Full physical address of the store |
| Store Type | Dropdown | Category of outlet, such as Modern Trade, General Trade, or Franchise |
| Activity to be Conducted | Single Line Text or Dropdown | The planned task for visits to this store, such as Audit, Planogram Check, or Replenishment |
You do not need all of these fields active from day one. The fields that the check-in app specifically pulls via lookup are: POS Code, Store Name, Region, City, State, and Activity to be Conducted. The remaining fields are available for reference and reporting, and you can add them as your team's needs grow.
Once the app is created, import your store records using a CSV upload. Every store your field team visits should have a record in this app before the check-in goes live. The quality of this master directly determines the reliability of the store lookup in the check-in form.
The Store Master is the single source of truth for all store identity data across your field operations. If a store is not in the master, it cannot be selected in the check-in app, and any visit to that store will lack verified data. Keep it maintained.
Create a new Clappia app and name it something clear, such as Field Check-In or Store Visit Log. Build it in the following order. Each section adds a distinct layer to the visit record.
Section 1: User Identity (Auto-Filled)
The first three fields identify who is submitting the check-in. In Clappia, you can configure fields to auto-fill from the logged-in user's profile using the User Properties feature. Add three Single Line Text blocks and set each to pull from the user's profile:
Making these fields read-only is important. The purpose of auto-filling identity is to create a submission that is definitively tied to the person who was logged in at the time. If the fields are editable, a user could overwrite the auto-filled values, which undermines the accountability the check-in is designed to provide.
Section 2: Timestamp and GPS Location
These three fields capture when and where the check-in happened. All three default to the current value automatically:
The combination of a named user, an auto-filled timestamp, and a GPS coordinate creates a visit record that is genuinely verifiable. A manager reviewing check-ins can confirm that a named user was at a specific location at a specific time without relying on any self-reported data. All three values are system-generated or device-generated rather than typed by the user.
Section 3: State and City Selection
Before the store lookup, the user selects their State and City. Add two Dropdown blocks:
To make the City dropdown dependent on the State selection, use a Display Condition or configure the City dropdown with cascading values that correspond to each State. This prevents a user from selecting an inconsistent combination, such as a city that does not exist in the chosen state, which would produce a store list that does not match their actual location.
The State field also directly feeds the store lookup in the next section by acting as the filter that narrows the list of selectable stores to those in the user's current state. A field user working in one region never sees stores from another, which keeps the list manageable and reduces the chance of selecting the wrong location.
Section 4: Store Lookup and Auto-Fill
This is the core of the check-in app. Add a Get Data from App block labelled Select Store. Configure it to search the Store Master. In the block's filter settings, apply a filter so the search only returns records where State in the Store Master matches the State the user selected in Section 3. This is what makes the store list state-specific.
In the auto-fill settings for this block, map the following fields so they populate automatically when the user selects a store:
Add each of these as read-only Single Line Text blocks below the Select Store lookup. They display to the user as confirmation that the right store has been selected and provide the store context that the submission record carries forward. None of them should be editable; the data comes from the master, and the submission should reflect that source directly.
The Activity to be Conducted field is particularly useful here. When the user sees it auto-fill, they immediately know what the store expects from this visit: an audit, a planogram check, a replenishment, or whatever activity the store master specifies. This eliminates the need for a separate briefing or for the user to remember what the visit agenda was.
Here is a consolidated view of every field in the app, the block type used, and how the value is populated:
| Field | Block Type | How Populated |
|---|---|---|
| Name | Single Line Text (read-only) | Auto-filled from logged-in user profile |
| Single Line Text (read-only) | Auto-filled from logged-in user profile | |
| Phone Number | Single Line Text (read-only) | Auto-filled from logged-in user profile |
| Date | Date | Defaults to current date on form open |
| Time | Time | Defaults to current time on form open |
| GPS Location | GPS Location | Captures device coordinates on form open |
| State | Dropdown | Selected by user from configured list |
| City | Dropdown | Selected by user; options filtered by State |
| Select Store | Get Data from App | User searches and selects; list filtered by State |
| POS Code | Single Line Text (read-only) | Auto-filled from Store Master on store selection |
| Store Name | Single Line Text (read-only) | Auto-filled from Store Master on store selection |
| Region | Single Line Text (read-only) | Auto-filled from Store Master on store selection |
| City (from store) | Single Line Text (read-only) | Auto-filled from Store Master on store selection |
| State (from store) | Single Line Text (read-only) | Auto-filled from Store Master on store selection |
| Activity to be Conducted | Single Line Text (read-only) | Auto-filled from Store Master on store selection |
After the user submits the check-in, Clappia displays a success message. This is where the check-in becomes a launchpad for the rest of the visit. In your app settings, configure the success message to include direct links to the downstream apps the field user needs to open next.
In the App Settings, locate the submission success message configuration. Write a message such as:
Check-in recorded successfully. Proceed to your next step: tap Store Stock Audit to begin the inventory check, or tap Planogram Check to review shelf compliance.
Include the direct app links for both the Stock Audit and the Planogram app so the user can navigate there with a single tap without returning to the app list. These links are the bridge that turns the check-in from a standalone record into the first step in a connected visit workflow.
The value of this approach is that the check-in submission happens first and is saved before the user moves on. The GPS coordinate, timestamp, and store identity are locked into the record before the user begins any task at the store. Even if the downstream audit or planogram work is not completed, the visit is documented.
The check-in form is intentionally short, but there are two Display Conditions worth configuring to improve the user experience:
Neither of these is strictly required for the app to function, but both improve the experience for field users who are completing check-ins quickly at the start of a busy visit day.
With the app built, configure who can access it. In Clappia, user permissions are set at the app level for each individual. For a check-in app, the appropriate structure is:
| Role | Access Level | What They Can Do |
|---|---|---|
| Field User | Submit Only | Open the app, complete and submit check-ins, view their own past submissions |
| Area Manager or Supervisor | View Only or View and Edit | View all check-in submissions; filter by store, region, date, or user |
| Admin | Full Access | Manage the Store Master, configure the check-in app, manage user access |
Field users access the app through the Clappia mobile app, available on Android and iOS. The check-in form works in offline mode: GPS coordinates are captured by the device without network access, and the submission queues locally until connectivity is available. However, the Select Store lookup requires the Store Master data to be cached on the device. Ask field users to open the Clappia app on Wi-Fi before heading out so that the store list syncs to their device for offline search.
Date and Time defaults also function offline because they pull from the device's clock rather than a server. The full check-in, including store selection, GPS, timestamp, and user identity, can be completed without any network connection and will sync once the user returns to a connected area.
The check-in app is designed as an entry point, not a standalone tool. Once it is in place, the downstream apps in the same Clappia workspace can reference the store context it establishes. Here is how the three-step flow connects:
This three-step sequence, check-in, audit, planogram, is a complete store visit workflow. Each step connects to the next, and the check-in's GPS and identity data serve as the verified foundation for everything that follows.
Once your field team is using the check-in app, Clappia's Analytics feature lets you build live dashboards from submission data. Useful views for a check-in workflow include:
These views do not require any export or manual aggregation. They are built inside Clappia directly on the live submission data and are accessible to managers with the appropriate permissions at any time.
A GPS-verified store check-in app built in Clappia combines three things that most manual processes keep separate: verified identity, a precise location stamp, and a master-linked store record. When all three are captured in a single submission at the start of a visit, every activity that follows is grounded in a verified, auditable context.
The setup requires two apps: a Store Master with your location data, and a Field Check-In app with auto-filled user identity, automatic date, time, and GPS capture, a state-filtered store dropdown, and lookup-driven auto-fill of the store's key attributes. The success message connects the check-in directly to the downstream tasks, so the field user moves through the visit in a single continuous flow rather than navigating between unconnected tools.
This pattern applies to any field operations context where you need a verified, location-stamped record of a site visit before downstream work begins: retail audits, outlet compliance checks, service visits, branch inspections, or any similar process. The specific dropdown values, store fields, and downstream app links are configured to match your organisation; the structure stays the same.
Get started by creating your Store Master in Clappia and importing your store records. The check-in app can be built and deployed to your field team the same day.
L374, 1st Floor, 5th Main Rd, Sector 6, HSR Layout, Bengaluru, Karnataka 560102, India
3500 S DuPont Hwy, Dover,
Kent 19901, Delaware, USA


.svg)




3500 S DuPont Hwy, Dover,
Kent 19901, Delaware, USA
L374, 1st Floor, 5th Main Rd, Sector 6, HSR Layout, Bengaluru, Karnataka 560102, India

.jpg)




.avif)
.png)