
Still need help?

By default, when you use the Email node in Clappia, emails are sent from noreply@clappia.com, or from the email address configured through SMTP settings if you have set that up.
When an email is sent this way, the person who receives the email sees it as coming from that address. If they try to reply, the reply will normally go back to the same address the email was sent from.
In many situations, this may not be ideal, especially if the emails are from noreply@clappia.com. You may want people to reply to the email, but instead of replying back to noreply@clappia.com, those replies should be received at another email address that you monitor.
In this guide, you’ll see how to configure the Email node so that replies are sent to a different inbox using the Reply-To Email Address option.
Let’s say users submit data in an app, and an email is sent out immediately as part of the workflow.
If the recipient replies to that email, it should not be sent as a reply to noreply@clappia.com. Instead, you want all replies to be received at a specific inbox, for example responses@example.com, so that someone can read and respond to them from there.
Open the app where emails are being sent.
Go to Design App > Workflows, and open the workflow where the email is already being sent, or add a new Email node if required.
This setup works the same way regardless of where the Email node is placed, so you can use it wherever your email needs to be sent.
However, for this example scenario, we are placing the email node under the New Submission Flow.
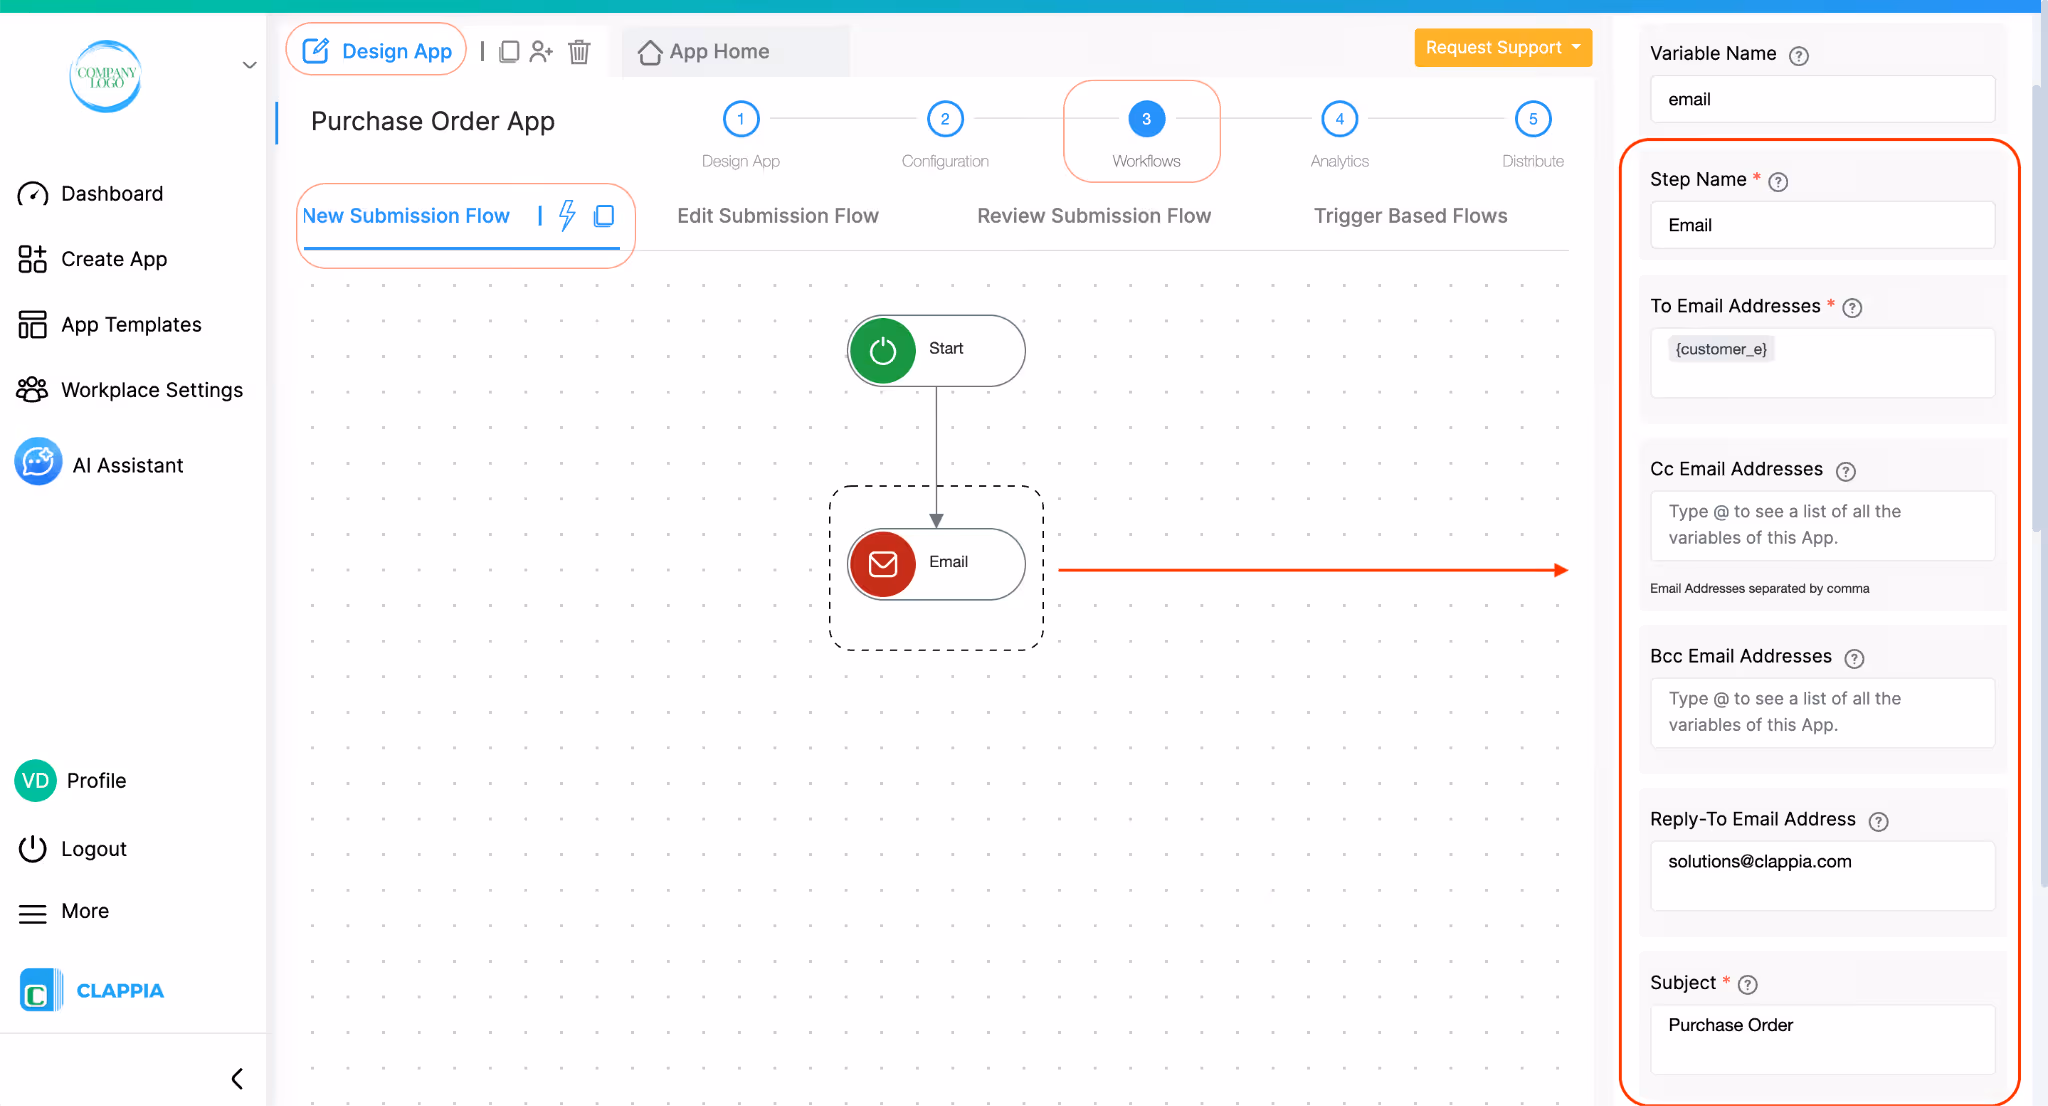
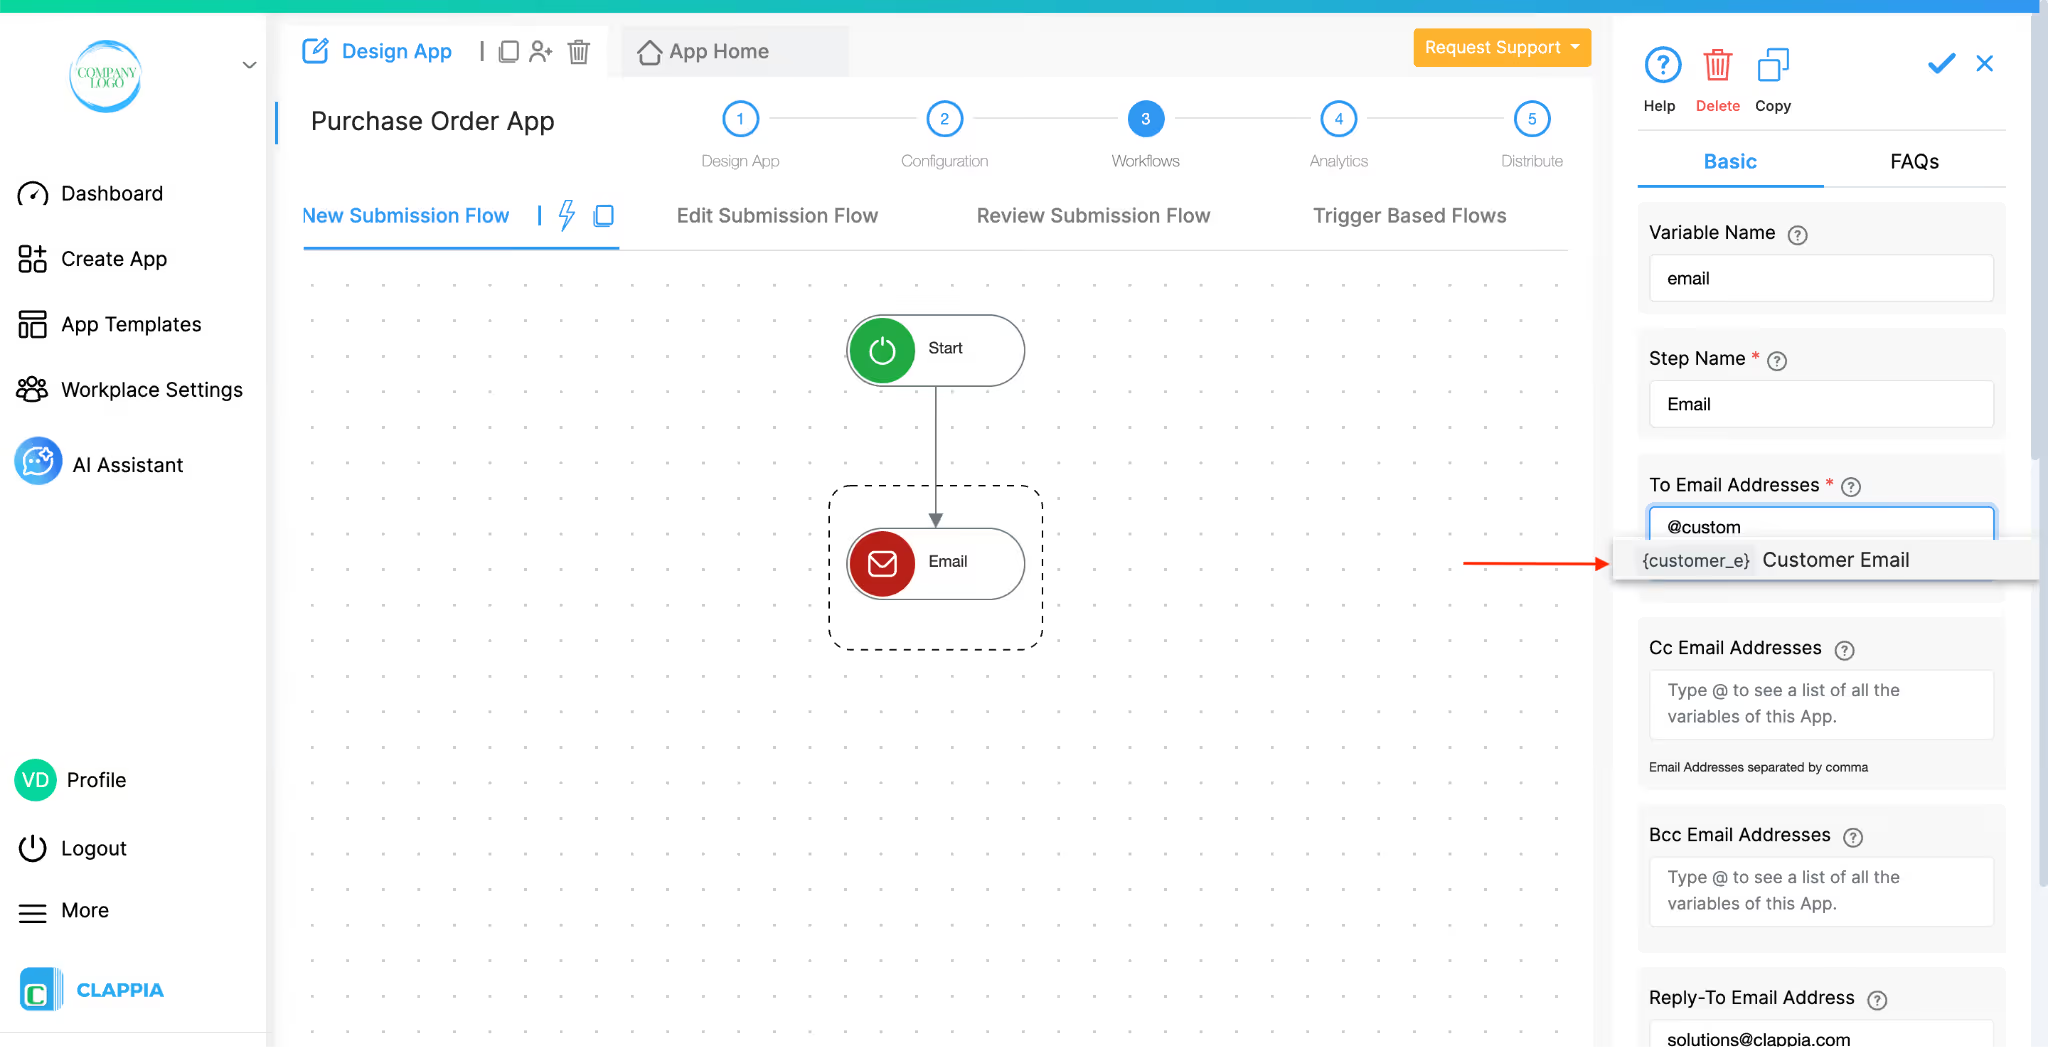
To Email Addresses
Enter the email address of the person who should receive the email.
If the email address is already captured in a field in your app, type @ and select that field so the email address is filled dynamically. Otherwise, you can type the email address manually.
Subject
Enter the subject of the email.
You can type the subject manually, or if you have stored the subject in a field in your app, type @ and select that field. Using the same subject consistently makes it easier for recipients to understand what the email is about.
Body
Enter the content of the email.
You can type the message directly, or pull values from fields in the app by typing @ and selecting the required fields.
This is the option that controls where replies to the email are sent.
In the Reply-To Email Address field, enter the email address where you want replies to be received.
For example: responses@example.com
Even though the email is sent from noreply@clappia.com (or your SMTP sender address), setting this field tells the email client that any replies should be sent to the email address you specify here.
This means:
Once you’ve entered the Reply-To Email Address, save the Email node.
Other options
You can configure any additional options in the Email node as needed, such as attachments, CC Email Addresses, etc.
When a submission is created, the Email node runs and sends an email to the recipient.
The recipient receives the email and sees it as coming from noreply@clappia.com or the SMTP sender address.
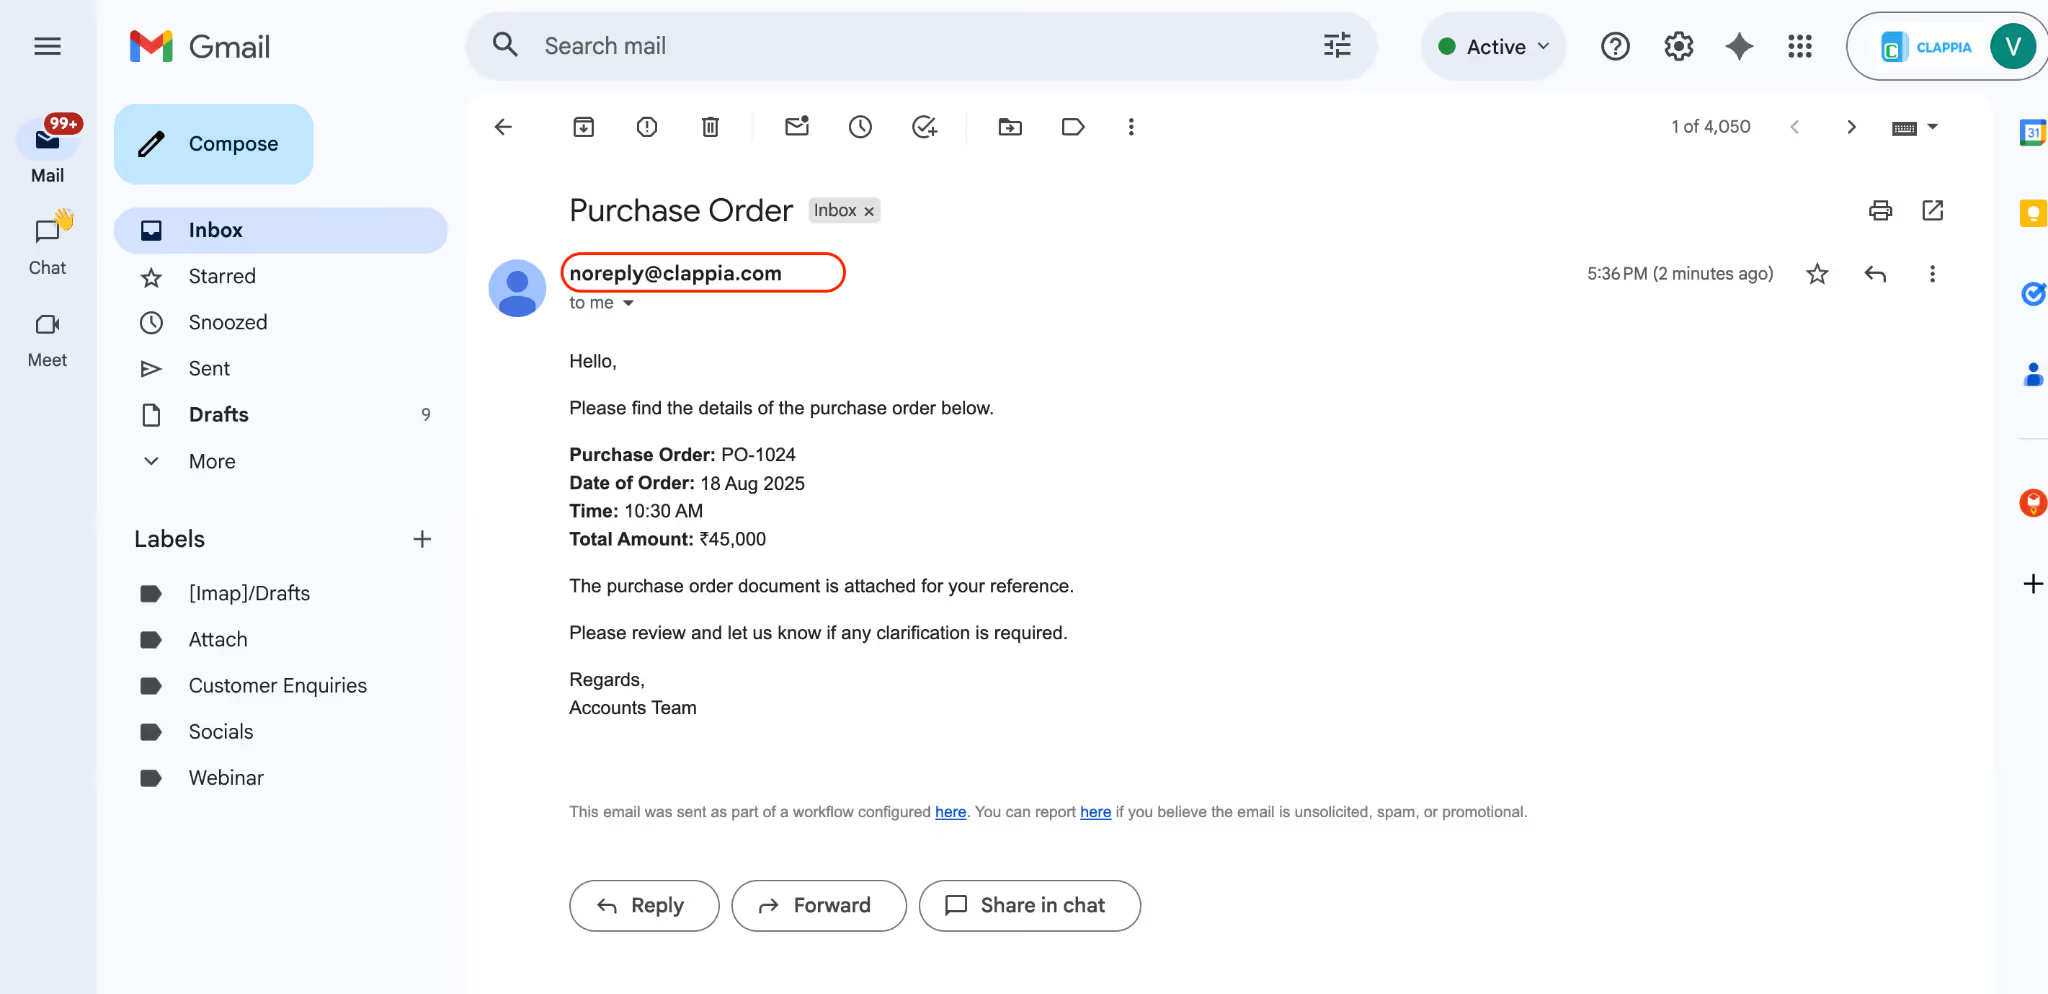
If the recipient replies to that email, the reply is not sent back to the sender address. Instead, because the Reply-To Email Address is set, the reply is sent to the email address you specified, such as responses@example.com.
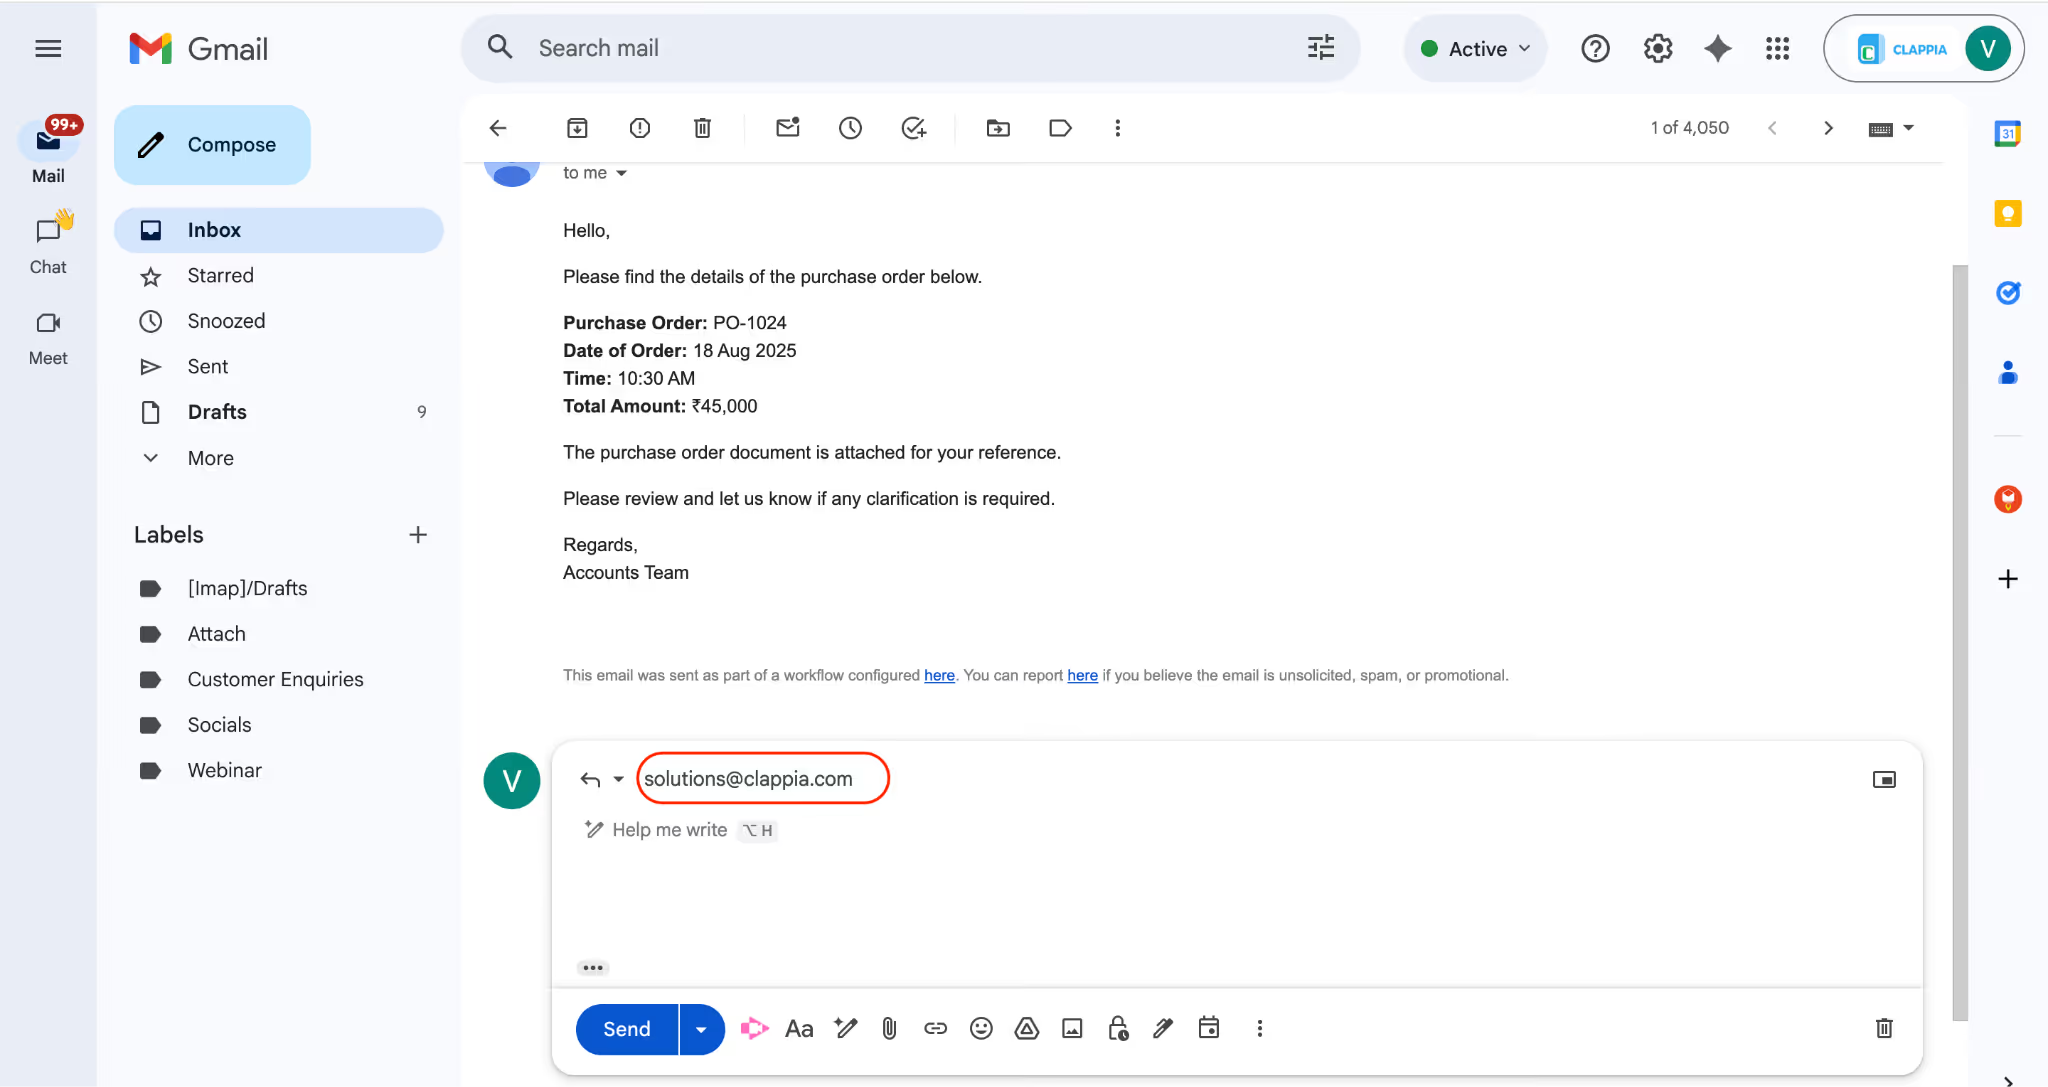
This allows you to receive and manage replies in a separate inbox, without changing how emails are sent from Clappia.
L374, 1st Floor, 5th Main Rd, Sector 6, HSR Layout, Bengaluru, Karnataka 560102, India
3500 S DuPont Hwy, Dover,
Kent 19901, Delaware, USA


3500 S DuPont Hwy, Dover,
Kent 19901, Delaware, USA
L374, 1st Floor, 5th Main Rd, Sector 6, HSR Layout, Bengaluru, Karnataka 560102, India
.svg)
