
Still need help?

Maintaining accurate inventory records requires more than simply updating stock numbers. Businesses need a clear way to track when stock enters the system, when it leaves, and how those movements affect the current stock levels of each item. Without a structured process for capturing these changes, it becomes difficult to understand how stock levels were updated or to review past inventory activity.
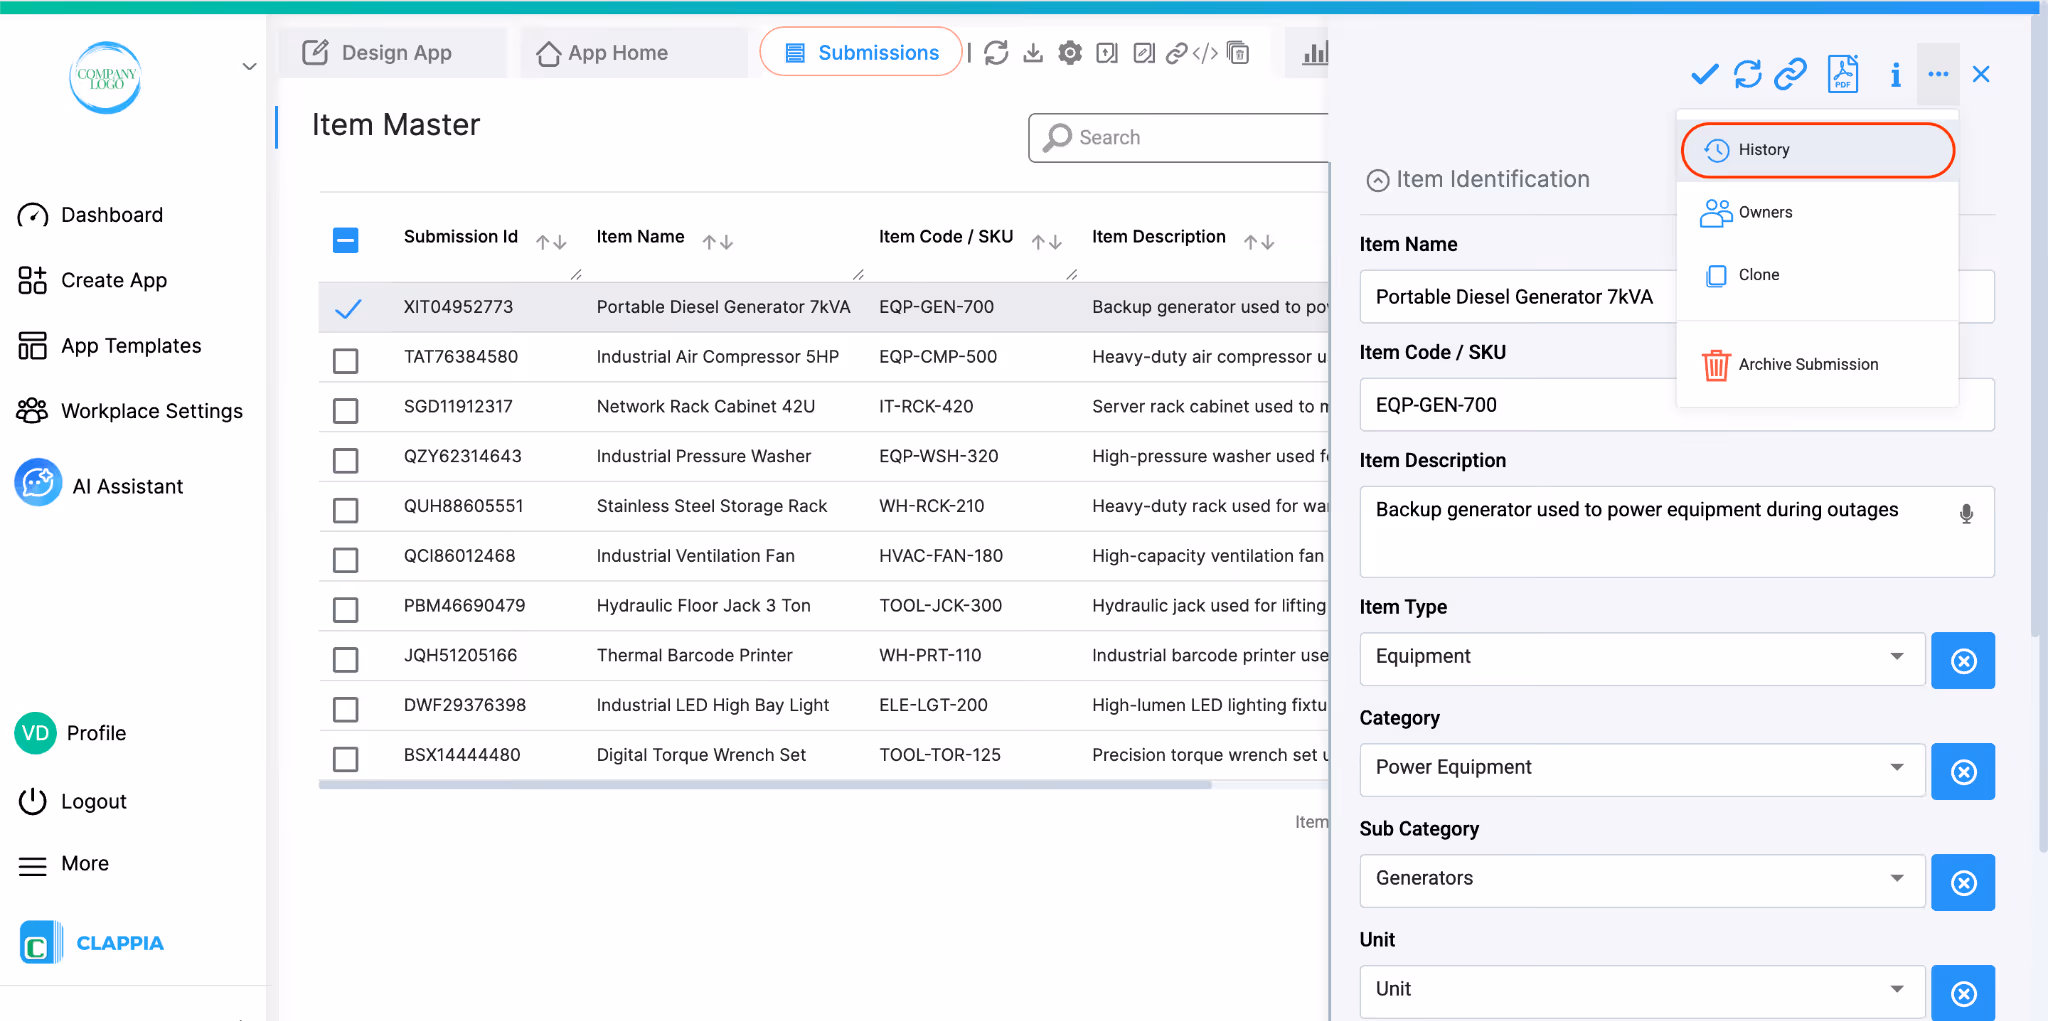
In Clappia, every app naturally maintains a record of the data submitted to it. For example, you can always open the Submissions tab of an app to review all records that have been created or edited. This provides a built-in history of the data stored in that particular app.
However, there are situations where you may want to maintain a more detailed tracker that records specific changes or movements across multiple apps. These details may not always be captured automatically by the system or may depend on how your business wants to track inventory activity. In such cases, Clappia’s workflows and app features can be used to create a separate tracking mechanism that records these movements in a structured way according to your requirements.
This system makes use of the following Clappia features. Each one links to its dedicated help article if you need more detail on configuration.
This system consists of four apps that are all interconnected:
The Item Master is the foundation. The Inward and Outward apps write to it and log to the Transactions app. This means you build the Item Master and Transactions app first before setting up the transaction apps.
From your Clappia dashboard, click Create App. Go to Design App and name it "Item Master".

Section 1 - Item Identification
Click Add Section and name it Item Identification on the right panel. This section captures the core details about each item.
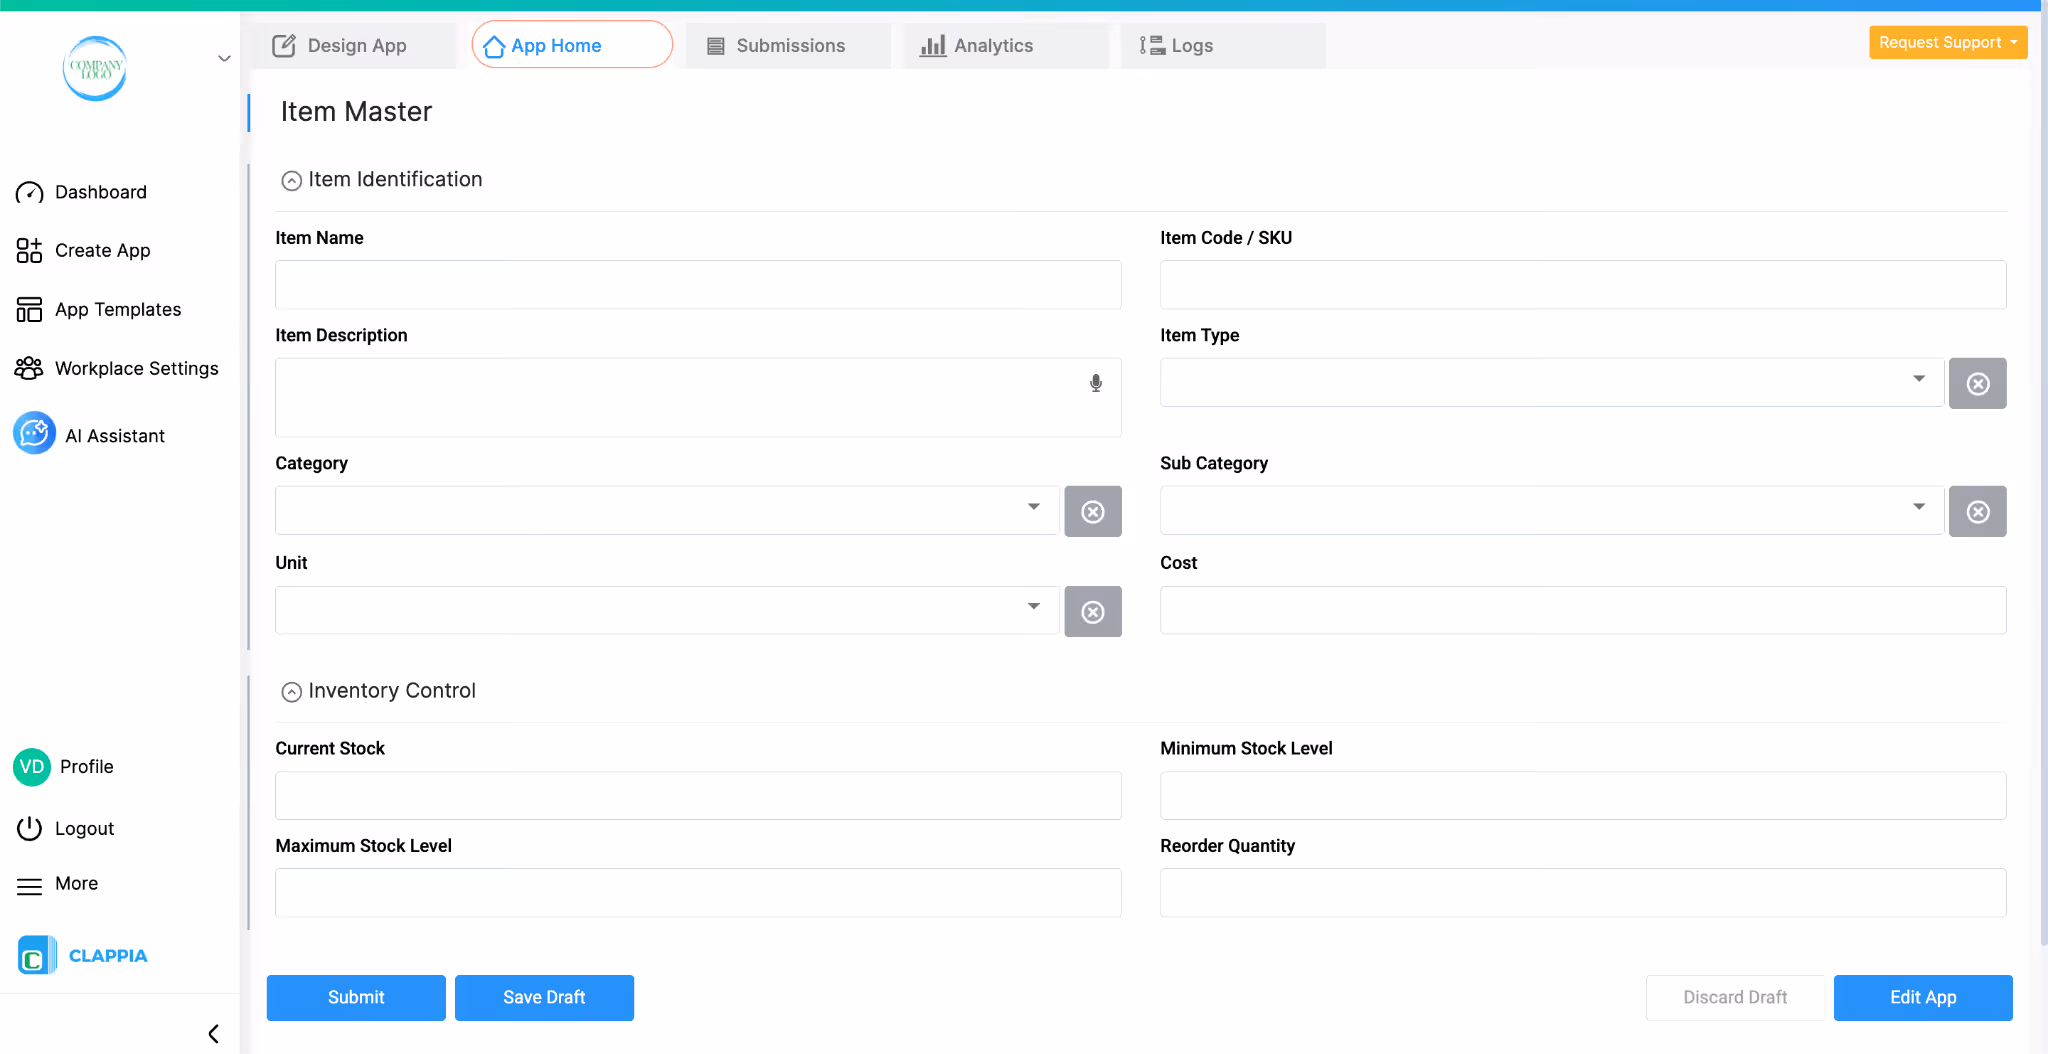
Section 2 - Inventory Control
Click Add Section again and name it Inventory Control. This section holds the stock figures that will be updated automatically by workflows later.
Depending on your business, you can add additional fields like code scanner block, or supplier-specific fields like Lead Time or Preferred Supplier. These are optional but can make the Item Master more complete as a reference database.
Workflow: Low Stock Alert
Once the app is set up, go to Design App > Workflows and select the Edit Submission Flow. This workflow will run every time a stock level is updated, which happens when the Inward or Outward apps submit entries.
Add an IF Workflow with the condition: Current Stock is less than or equal to Minimum Stock Level
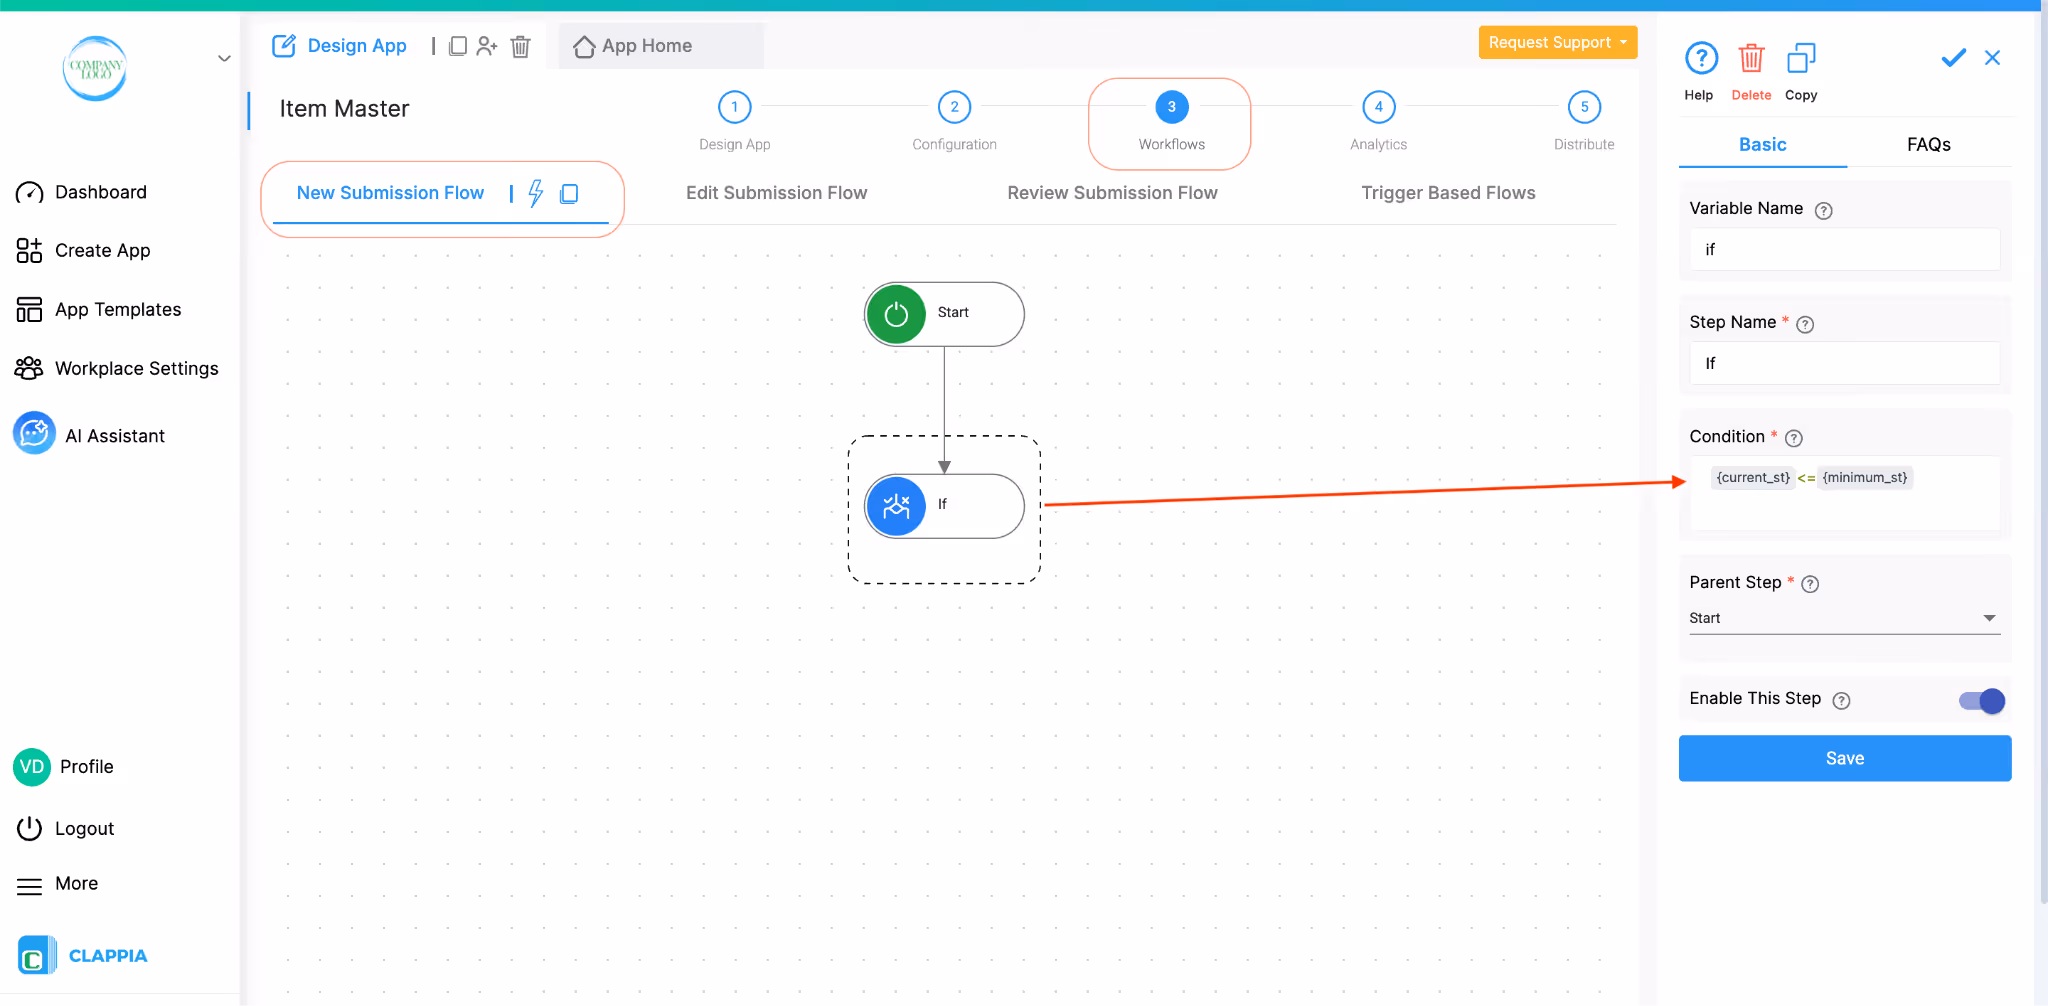
In the configuration panel, simply type @ to pull up field values. it will look like this: {current_stock} <= {min_stock}
Where:
{current_stock} is the variable for the Current stock field.
{min_stock} is the variable for the Minimum stock level field.
Next, add an Email step below the IF workflow step to notify your inventory manager or other relevant team. You can include relevant details in the email body such as the item name, item code, current stock, and minimum stock level using field variables (type @ to insert them).
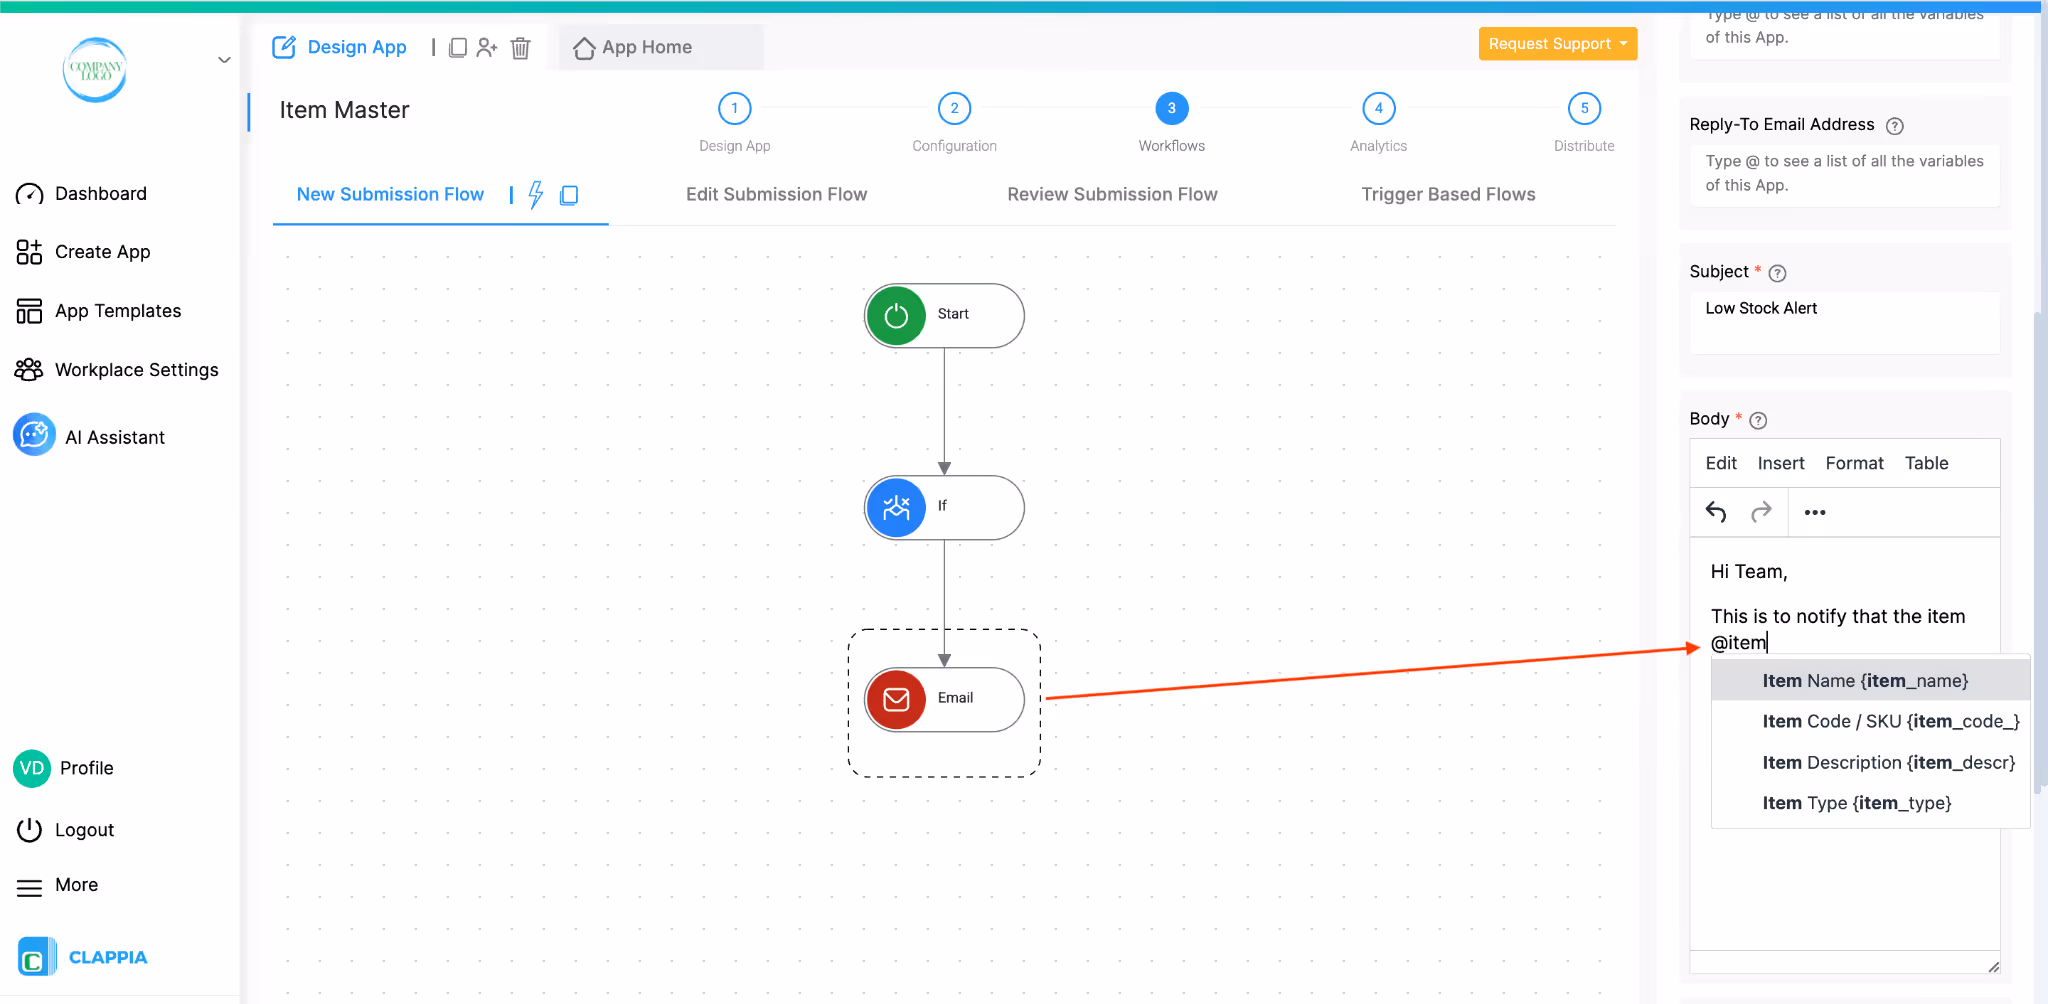
This ensures that low stock is flagged automatically without anyone having to check manually.
From your dashboard, create a new app and name it "Inventory Transactions". This app acts as a ledger or tracker. It does not need to be filled out by a user as every entry here is created automatically by workflows running from the Stock Inward and Outward apps.
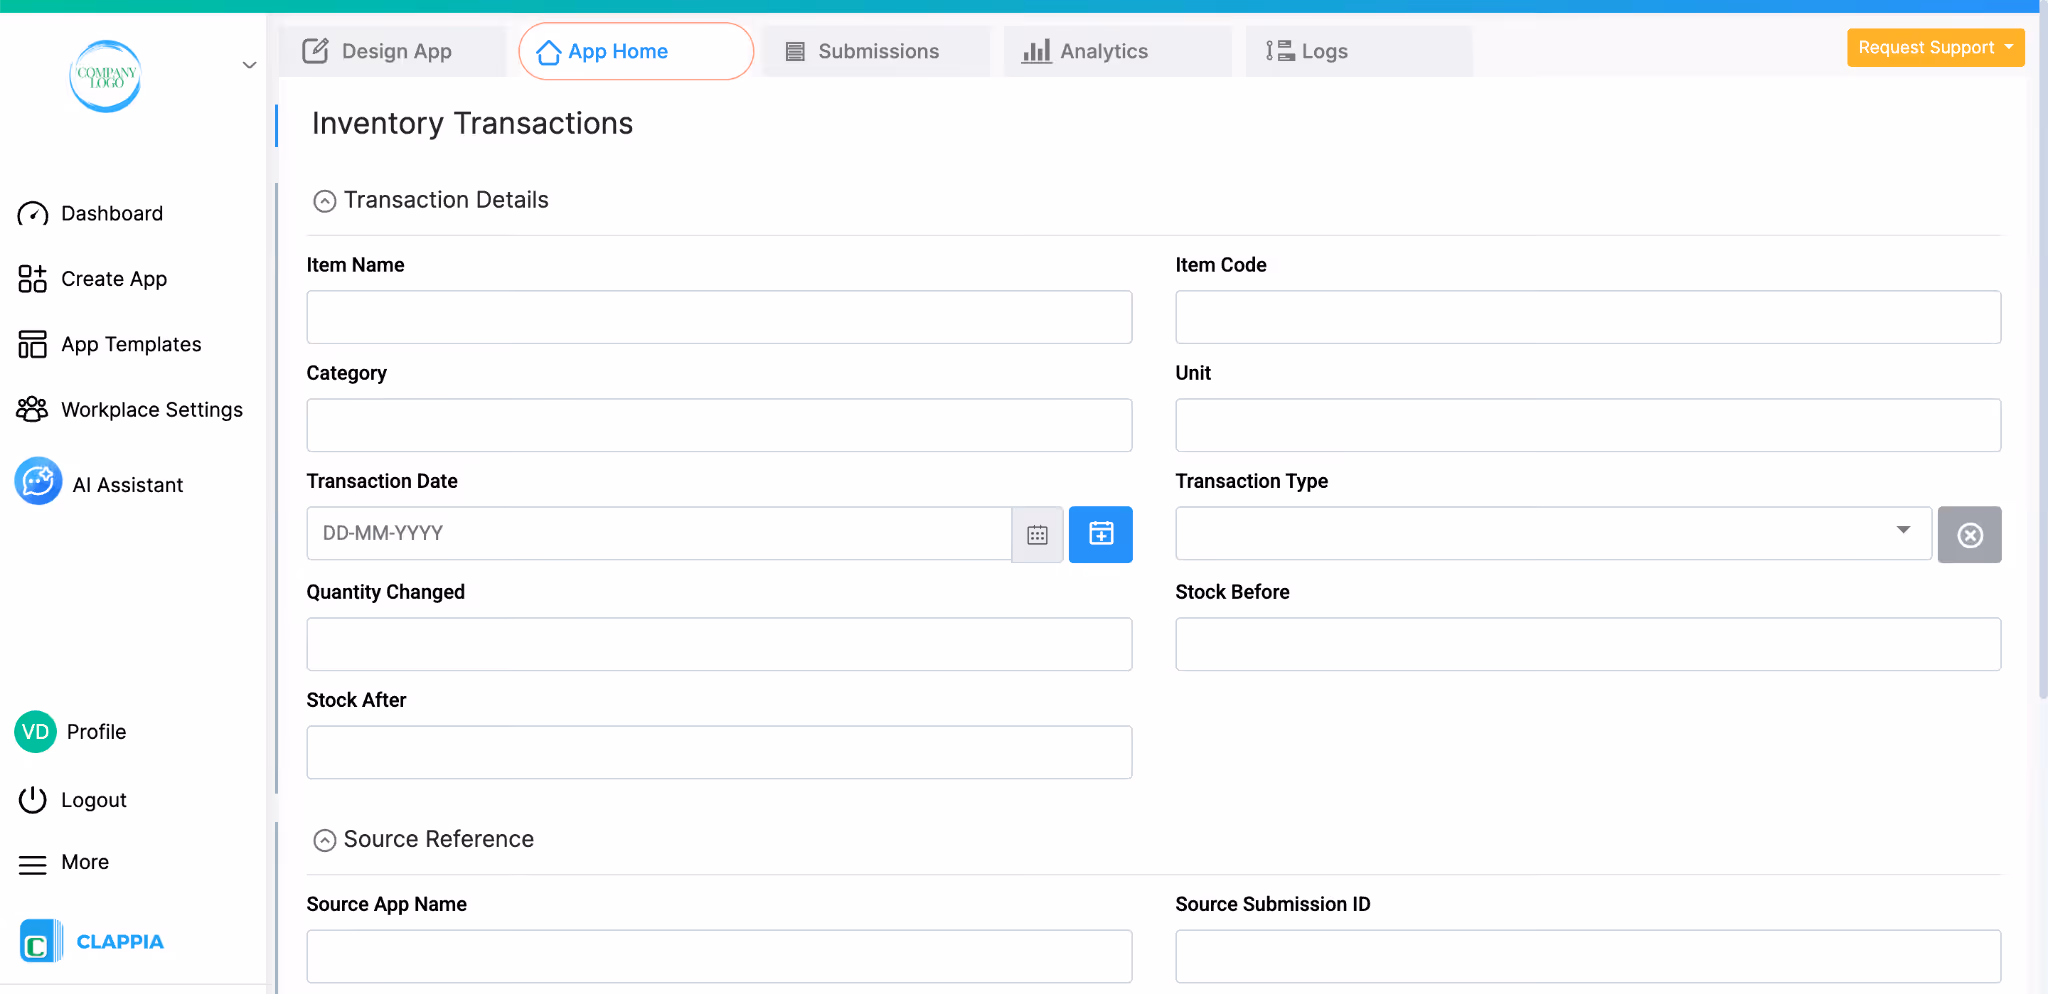
Section 1 - Transaction Details
Click Add Section and name it Transaction Details.
Section 2 - Source Reference
Click Add Section and name it Source Reference.
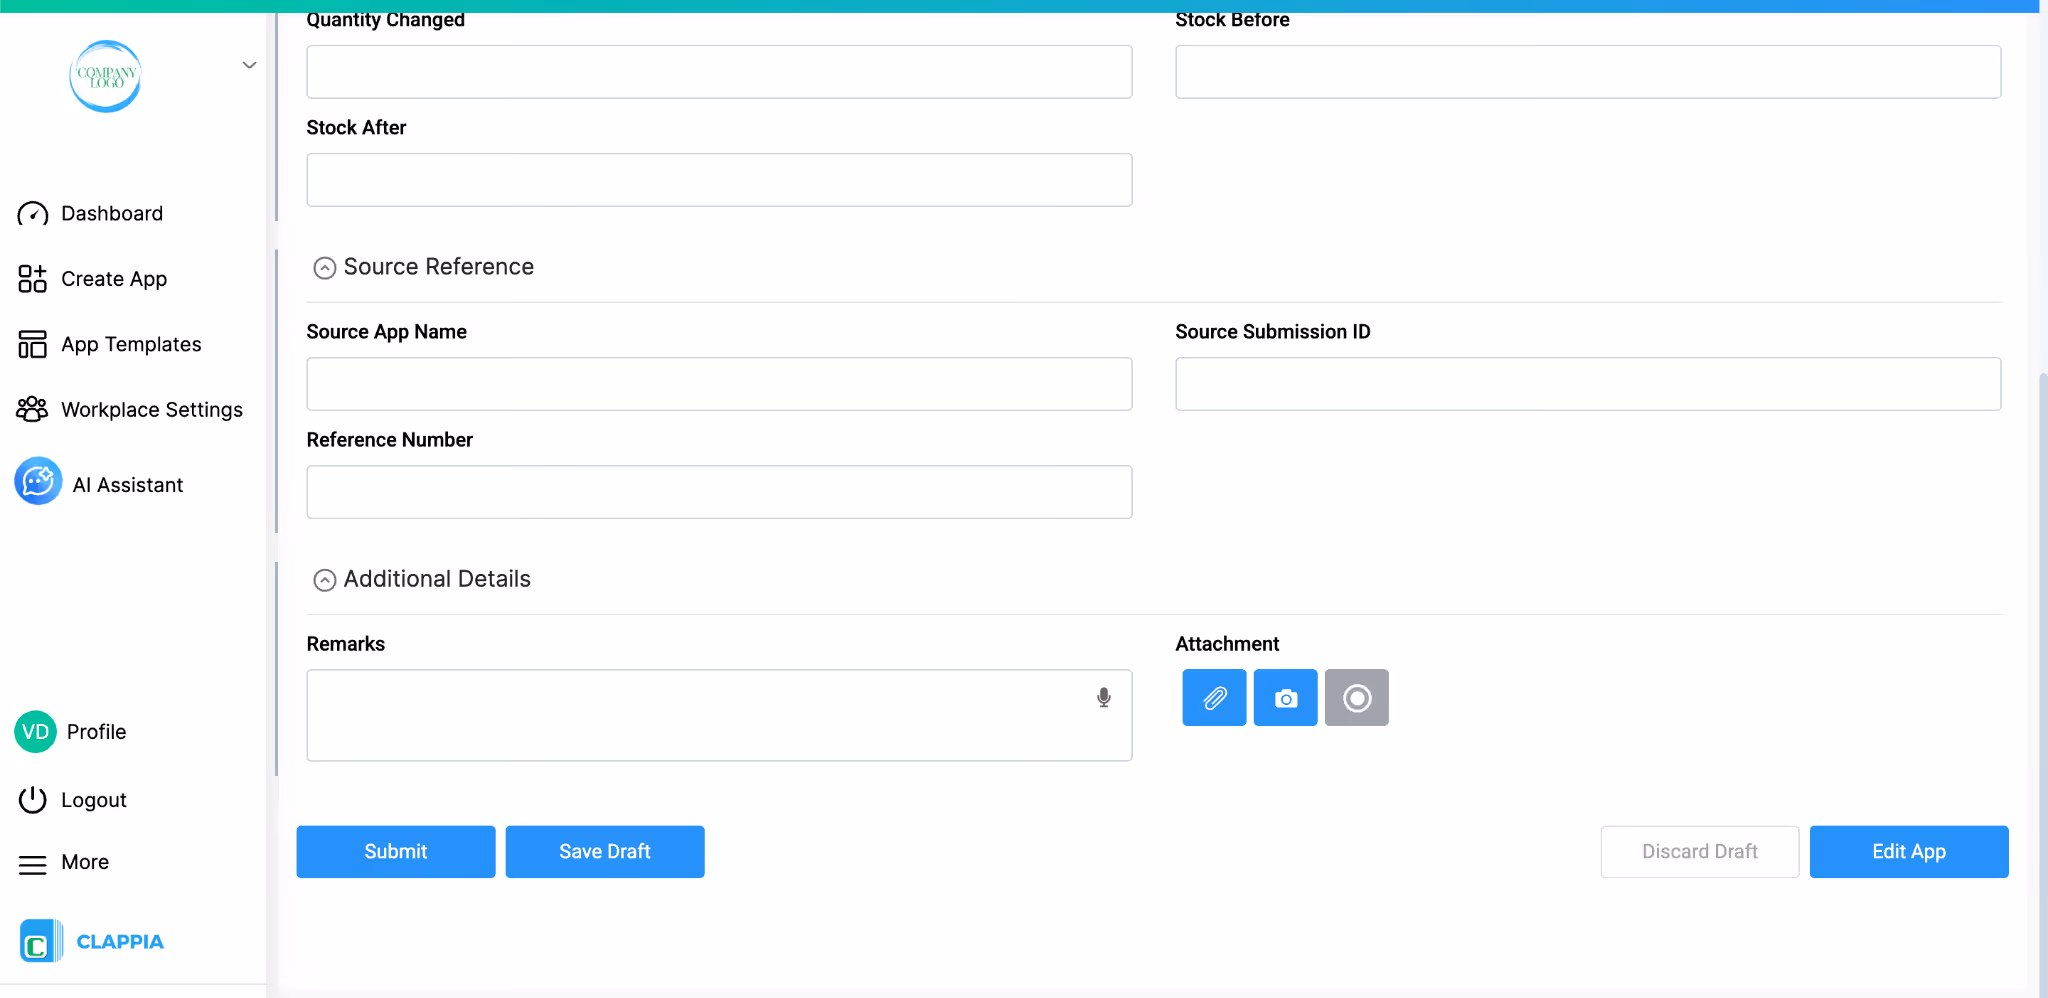
Section 3 - Additional Details
Click Add Section and name it Additional Details.
No workflows are needed inside this app. It is a destination, not a trigger. All entries are pushed into it from the Stock Inward and Stock Outward apps. However you can add workflow steps to trigger notifications by using the Email workflow or through other forms such as Teams, Slack, etc.

Create another app and name it "Stock Inward".
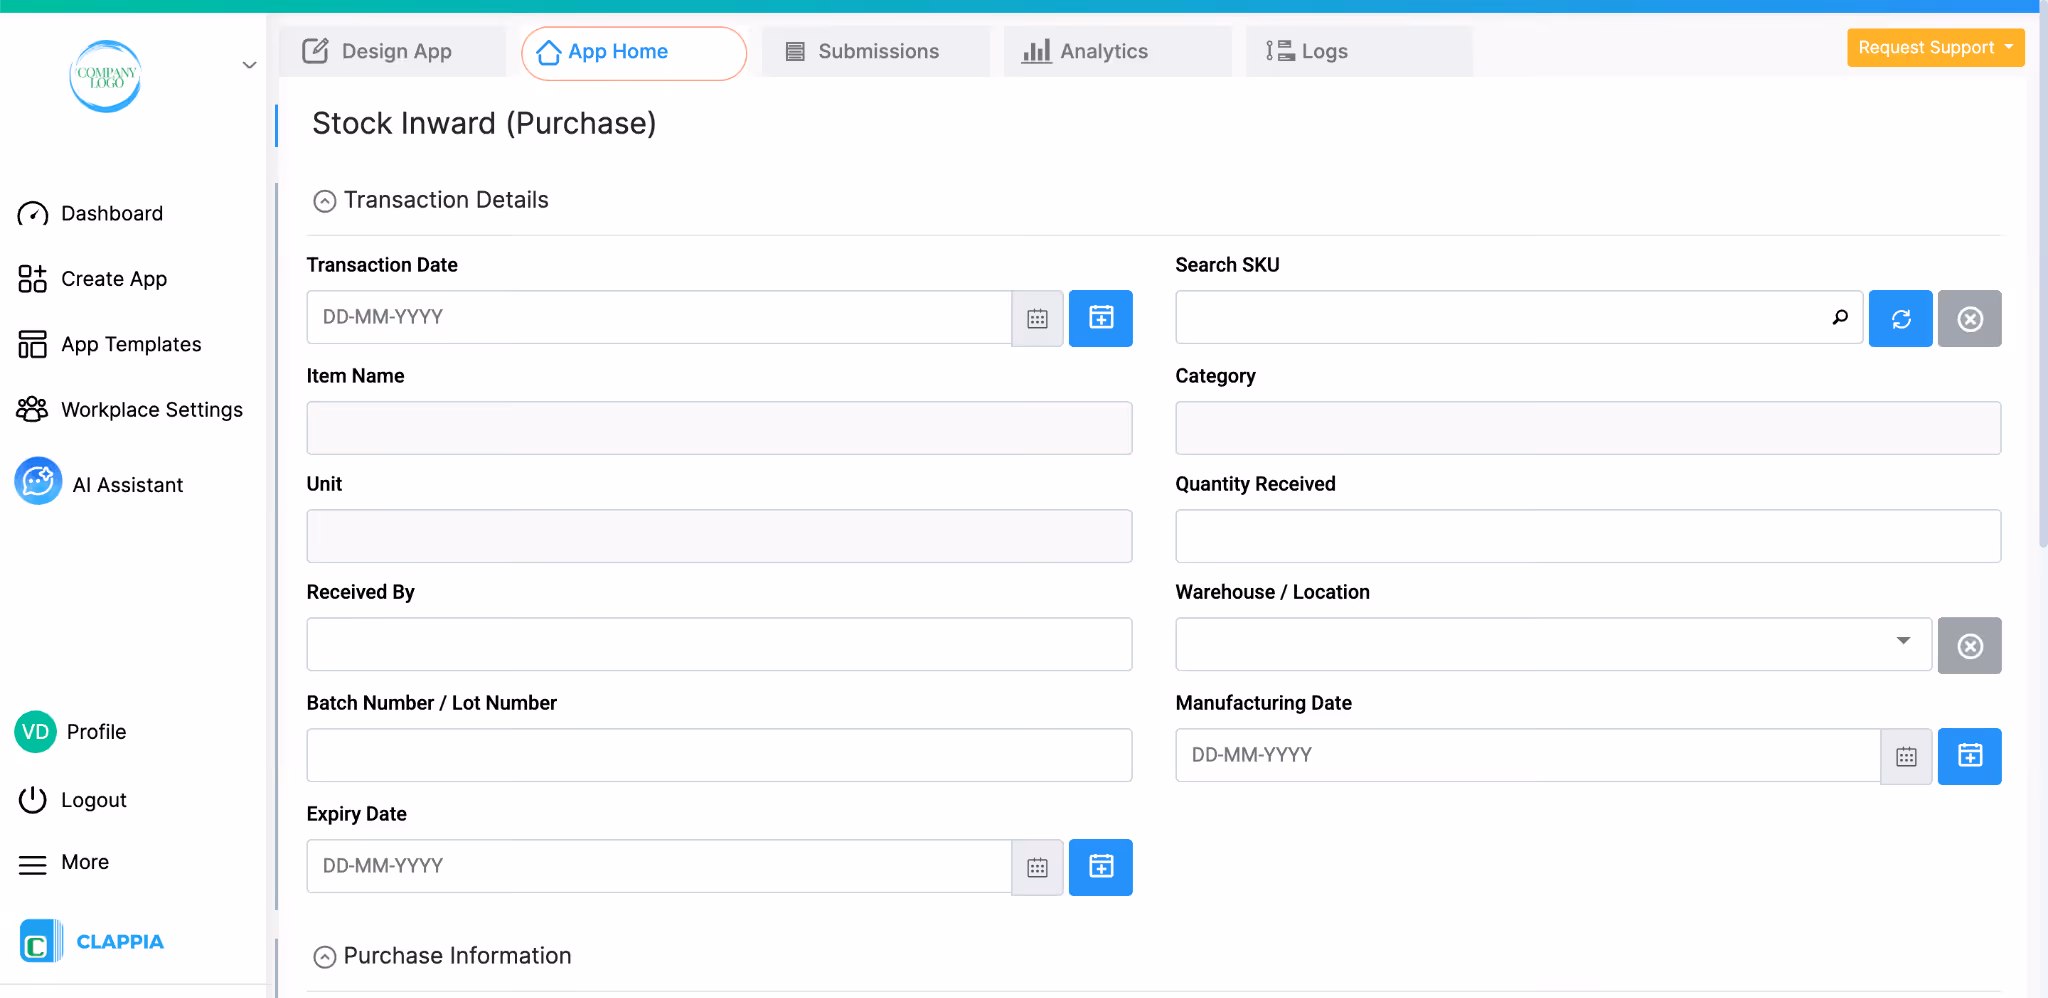
Section 1 - Transaction Details
Click Add Section and name it Transaction Details.

For the Item Code field, add a Get Data from Other Apps block and link it to the Item Master. Set Item Code / SKU as the search column. Set Category and Unit as the pulled columns. This way, when a user selects or types the item code while filling in the app, the category and unit fields fill in automatically from the Item Master record, no manual re-entry needed.
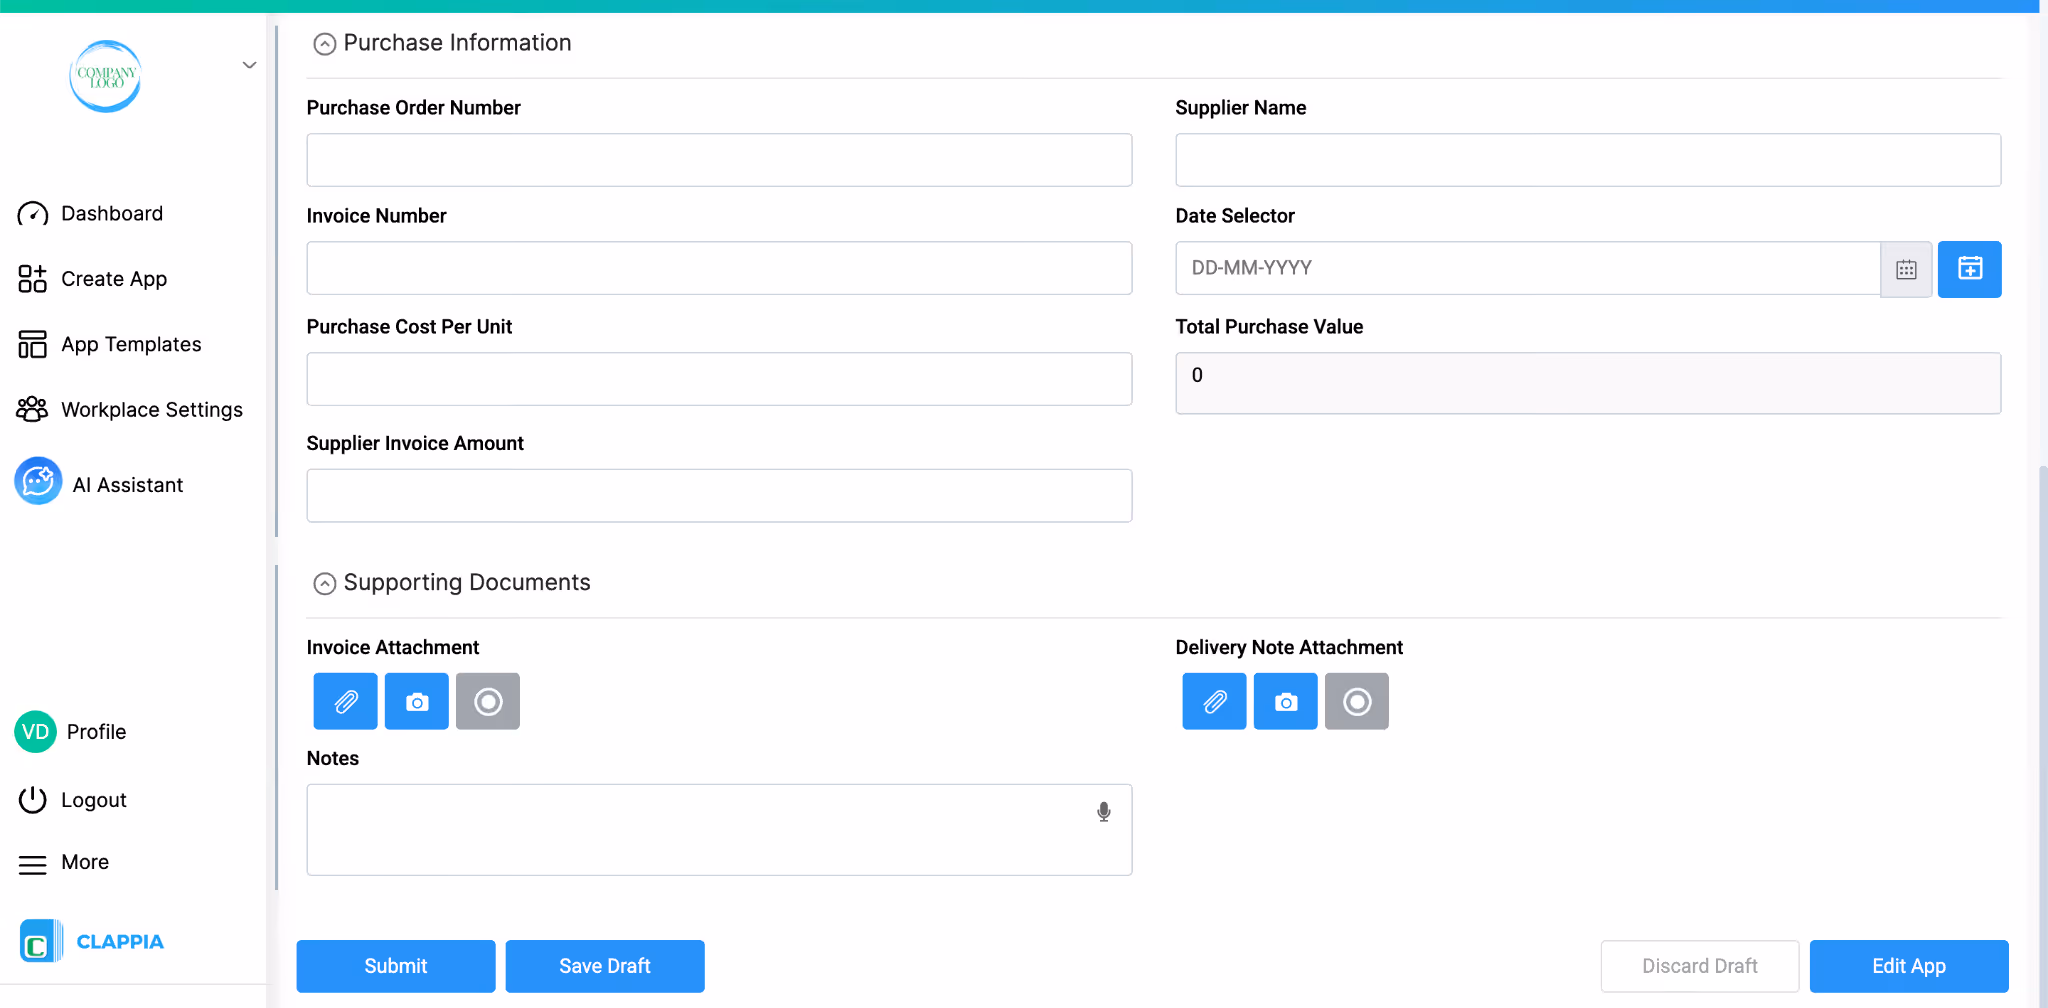
Section 2 - Purchase Information
Click Add Section and name it Purchase Information.
For Total Purchase Value, use the Calculation block and set the formula as:
Purchase Cost Per Unit × Quantity Received

So in the formula field on the right panel, it will look like: {purchase_cost}*{quant_received}
The Supplier Invoice Amount field is useful as a cross-check, if Total Purchase Value does not match the Supplier Invoice Amount, it flags a discrepancy in the entry.
Section 3 - Supporting Documents
Click Add Section and name it Supporting Documents.

Workflow 1: Update Stock in Item Master
Go to Design App > Workflows and open the New Submission Flow.
Click Add Step and select Edit Submission.
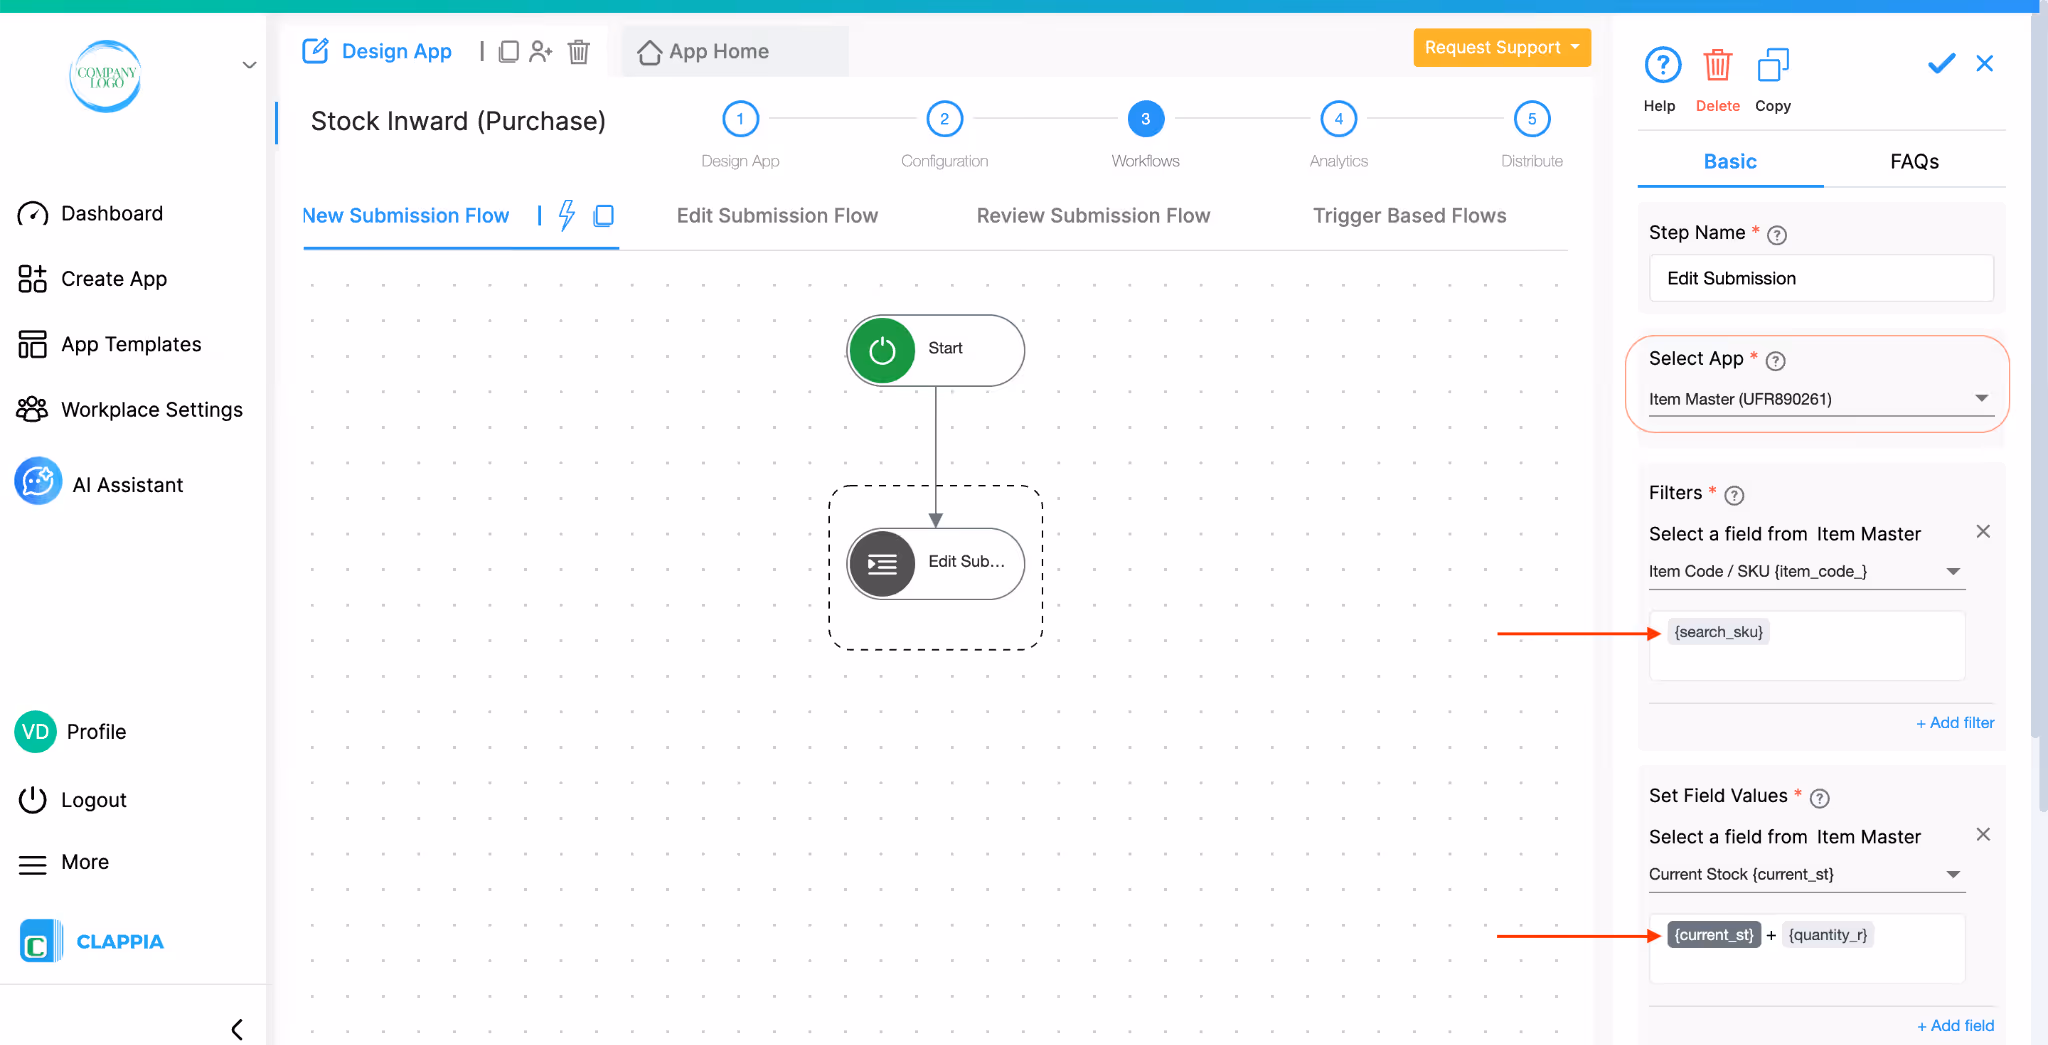
Set the target app as Item Master.
Match Item Code in the Stock Inward app to Item Code / SKU in the Item Master.
Under field updates, set:
Current Stock = Current Stock + Quantity Received

This means every time a new stock inward entry is submitted, the Item Master's current stock for that item increases by the quantity received.
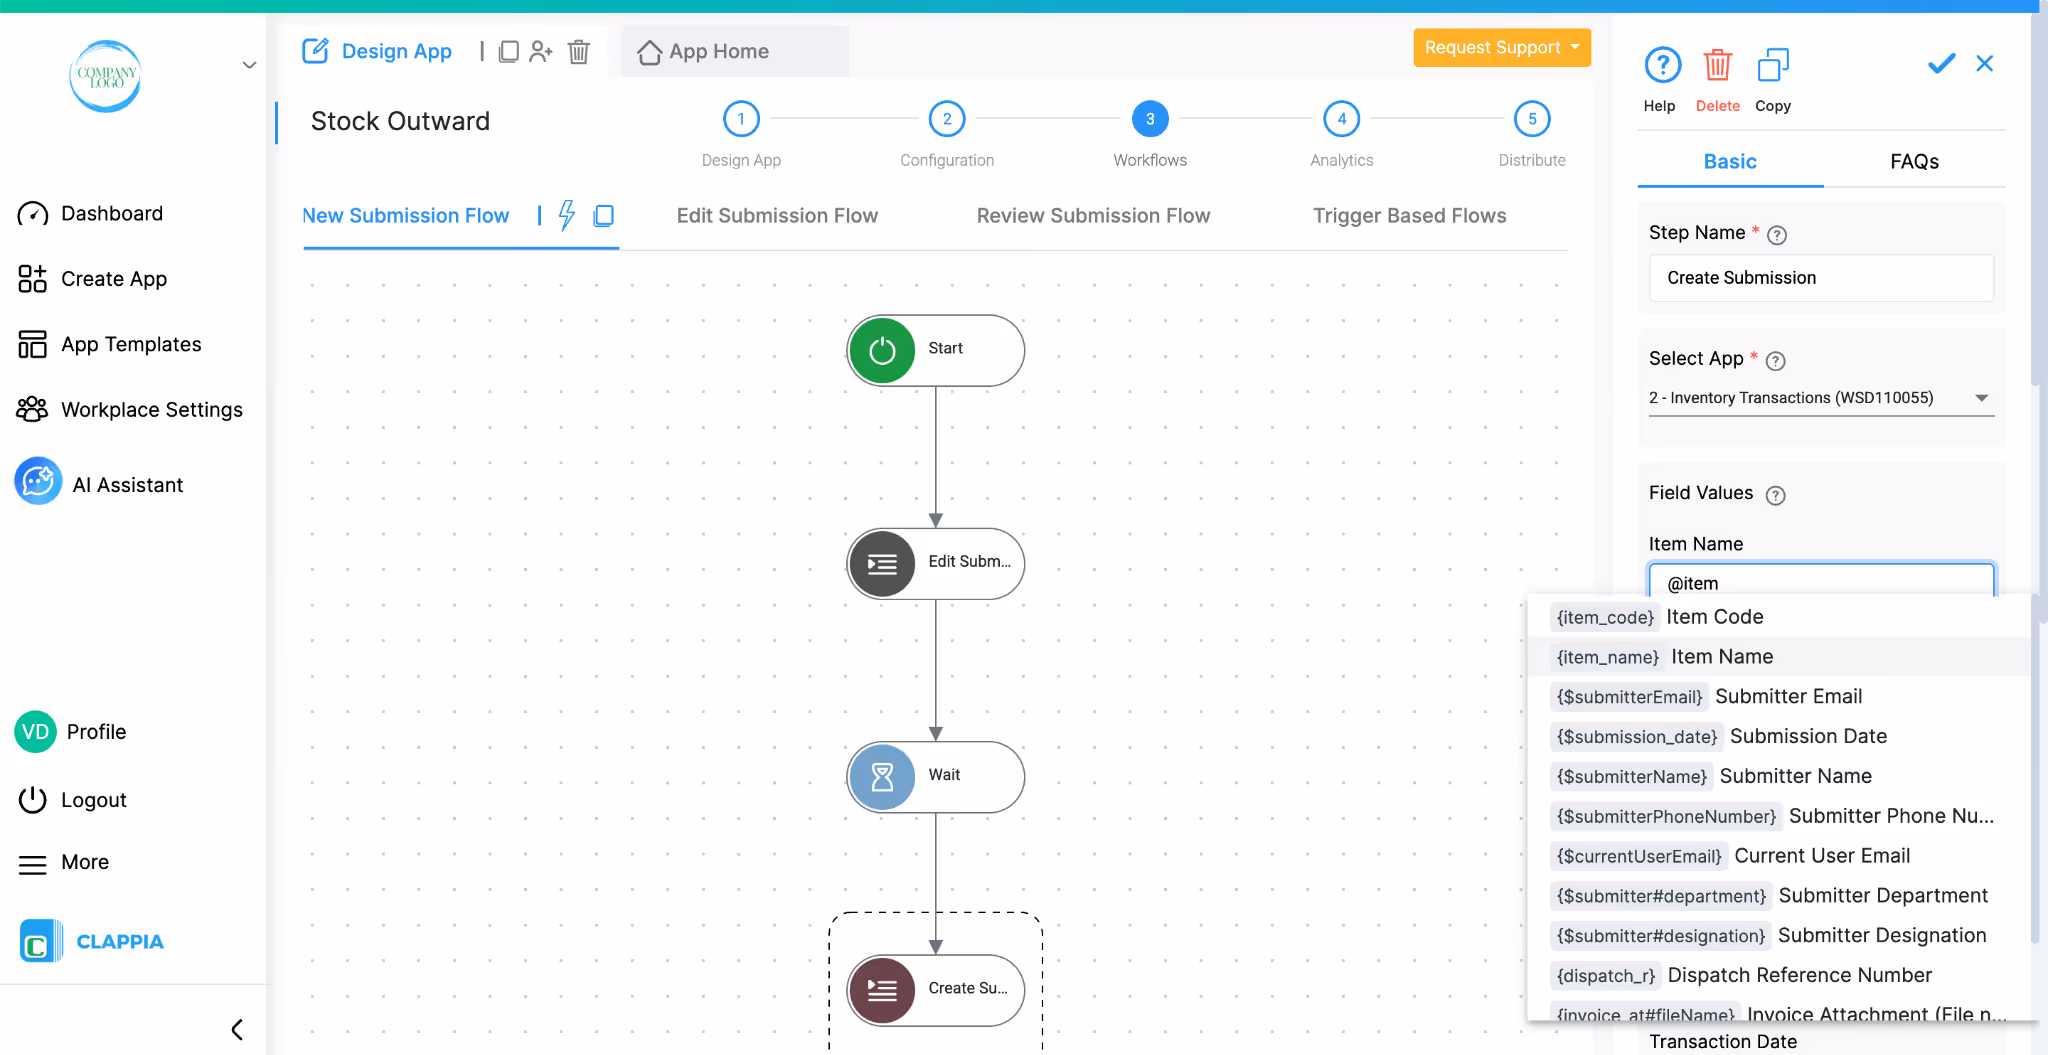
Workflow 2: Create Log Entry in Inventory Transactions
In the same New Submission Flow, add another step after the Edit Submission step. Select Create Submission and set the target app as Inventory Transactions.

Map the fields as follows:
This creates a permanent log record every time stock comes in, capturing what the stock level was before and after the transaction.
Create another app and name it "Stock Outward".
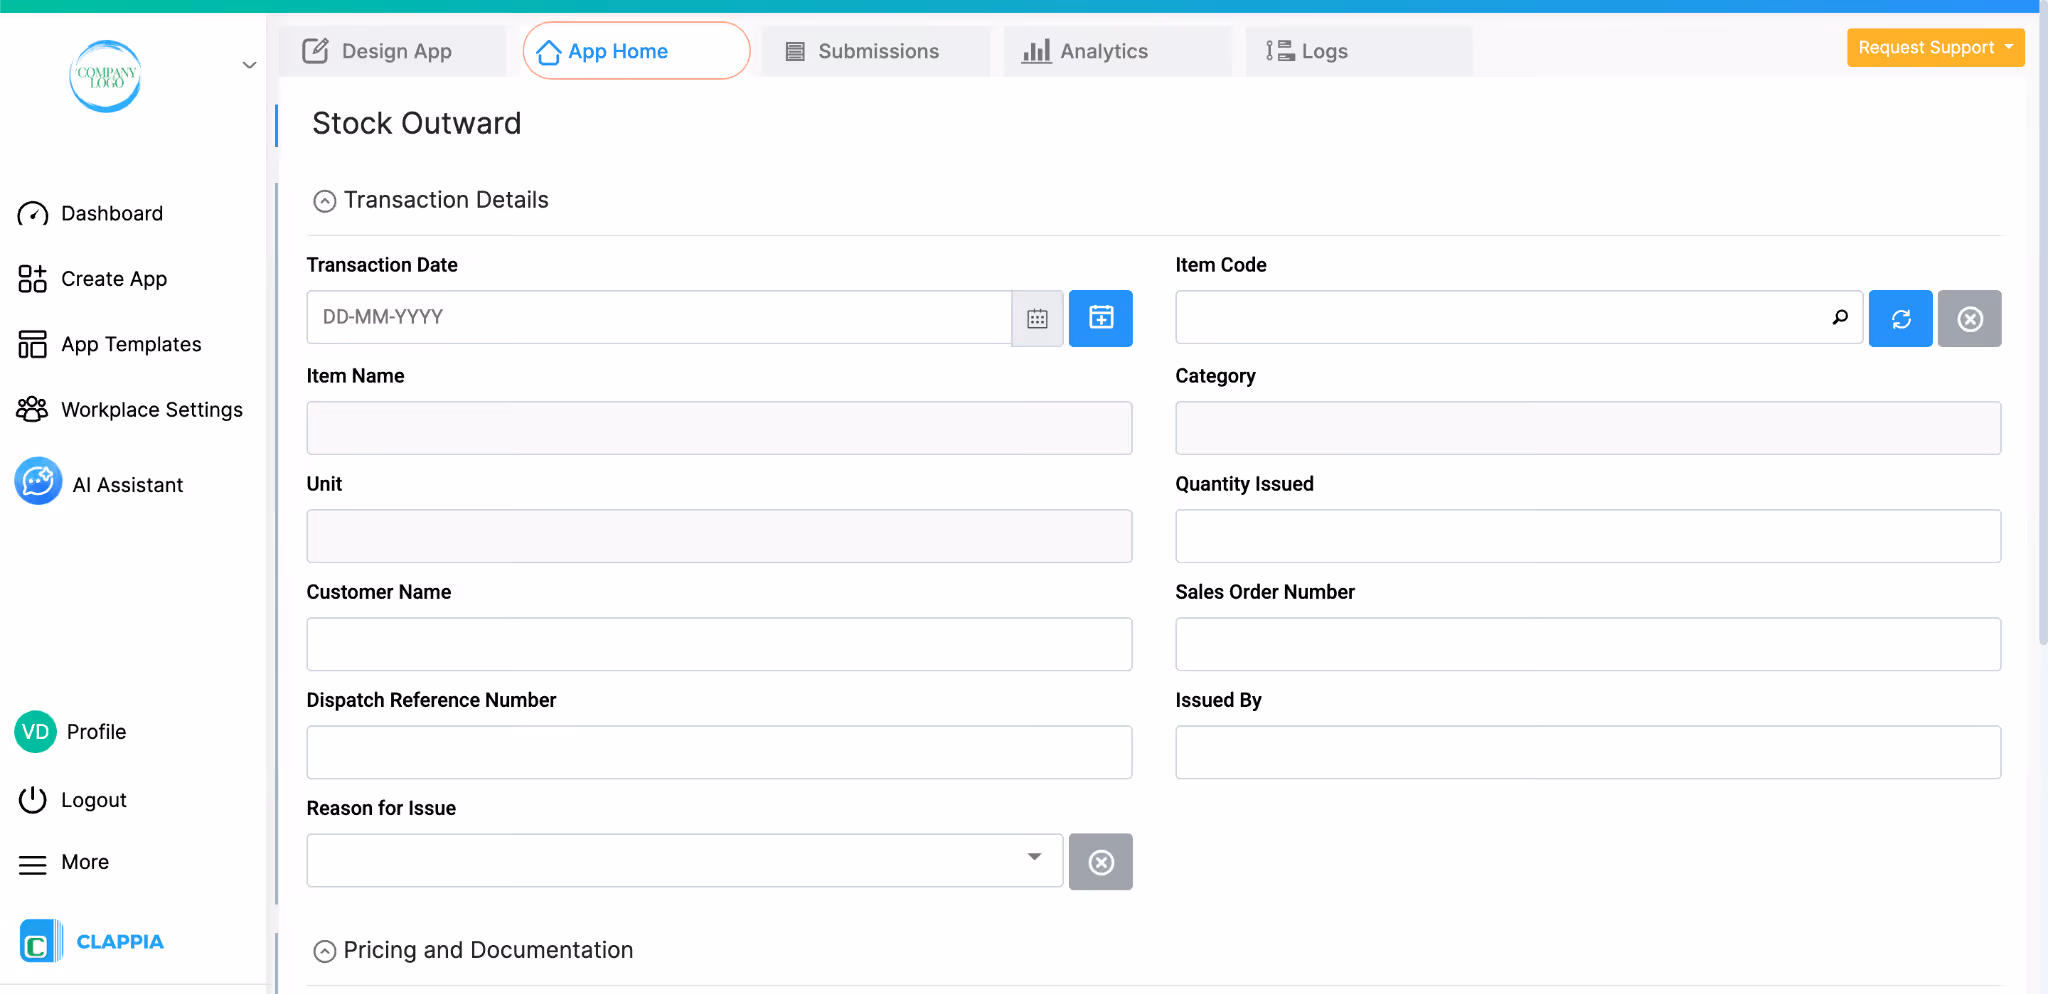
Section 1 - Transaction Details
Click Add Section and name it Transaction Details.

As with the Stock Inward app, the Item Code field uses a Get Data from Other Apps block linked to the Item Master. Set Item Code / SKU as the search column and Item Name, Category, and Unit as pulled columns so they populate automatically on selection.

Section 2 - Pricing and Documentation
Click Add Section and name it Pricing and Documentation.
For Total Sale Value, set the formula as:
Selling Price Per Unit × Quantity Issued
Workflow 1: Reduce Stock in Item Master
Go to Design App > Workflows and open the New Submission Flow.
Add an Edit Submission step targeting the Item Master.
Match Item Code to Item Code / SKU.
Set the field update as:
Current Stock = Current Stock − Quantity Issued
Workflow 2: Create Log Entry in Inventory Transactions
Add a Create Submission step targeting the Inventory Transactions app and map the fields:
Once the four apps are set up, you can extend the system further without changing the core structure.
For additional notifications, you could add an email or mobile push notification workflow in the Stock Outward app to alert a sales or dispatch team when an outward entry is submitted. Similarly, in the Stock Inward app, you could notify a quality control team when a new batch arrives. These can be added as extra steps in the New Submission Flow of each app.
For analytics, each app has its own Analytics tab inside Design App. In the Item Master, you can build a live dashboard with a bar chart showing current stock levels per item, and a data table flagging items where current stock is at or below the minimum stock level. In the Inventory Transactions app, you can track transaction volumes over time, how many inward vs outward entries per day or week, using a line chart. These charts update automatically as new submissions come in and can be shared as a live dashboard with managers.
For user access, go to Workplace Settings > Users to add your team members. Once added, open each app and go to Design App > Distribute to assign access. You can give different people access to different apps, for example, warehouse staff may only need access to Stock Inward and Stock Outward, while managers may also need access to the Item Master and Inventory Transactions. Within each app you can also set field-level permissions to prevent certain users from editing specific fields after submission.
Once everything is set up, the day-to-day operation is straightforward.
An admin or inventory manager creates item records in the Item Master, one record per item with its stock details, cost, category, and minimum stock level. This is the master reference that every other app reads from. If you maintain this data in spreadsheets, then you can always bulk upload all the data in one go to reduce the manual entry.
When stock arrives, a warehouse team member opens the Stock Inward app, either on a browser or on the Clappia mobile app on their Android or iOS device. They enter the transaction date and type or select the item code. The category and unit fill in automatically from the Item Master. They fill in the quantity received, supplier details, purchase cost, and attach any documents. On submission, two things happen automatically: the Current Stock in the Item Master increases by the quantity received, and a new row is written to the Inventory Transactions app logging the full details of the transaction including the stock before and after.
When stock leaves, a team member opens the Stock Outward app, selects the item code, and the item details populate automatically. They enter the quantity issued, customer or department name, pricing details, and any relevant documents. On submission, the Current Stock in the Item Master decreases by the quantity issued, and another log entry is created in the Inventory Transactions app.
At any point, a manager can open the Inventory Transactions app and filter by item code to see a full chronological record of every stock movement for that item — every inward entry, every outward entry, the quantity that changed each time, and what app triggered it. This is the tracker view the system is designed to provide. Instead of clicking through submission histories manually, every change is already written into a single, readable log.
If stock for any item drops to or below the minimum level, the low stock workflow in the Item Master fires automatically and sends an alert email to the inventory manager, so restocking decisions can be made before stock runs out entirely.
On mobile, the Clappia app is available on both the Google Play Store and the Apple App Store. Once your team members are added as users and given access to the relevant apps, they can log in and use the Stock Inward and Stock Outward apps directly from their phones or tablets. The Get Data from Other Apps block works on mobile the same way it does on the web, users tap the item code field, type a few characters, and the matching items appear for selection with the details filling in automatically. Submissions made on mobile trigger all the same workflows as web submissions, so the Item Master and Inventory Transactions app stay up to date regardless of where the entry was made.
This system gives you a live stock count, a complete transaction history, automated low stock alerts, and the flexibility to extend it as your operations grow, all built without writing a single line of code. If you run into any questions while setting it up, you can reach out to the Clappia support team or explore the help articles linked throughout this guide. To get started, log in to your Clappia workspace and create your first app today.
L374, 1st Floor, 5th Main Rd, Sector 6, HSR Layout, Bengaluru, Karnataka 560102, India
3500 S DuPont Hwy, Dover,
Kent 19901, Delaware, USA


3500 S DuPont Hwy, Dover,
Kent 19901, Delaware, USA
L374, 1st Floor, 5th Main Rd, Sector 6, HSR Layout, Bengaluru, Karnataka 560102, India
.svg)
