
Still need help?

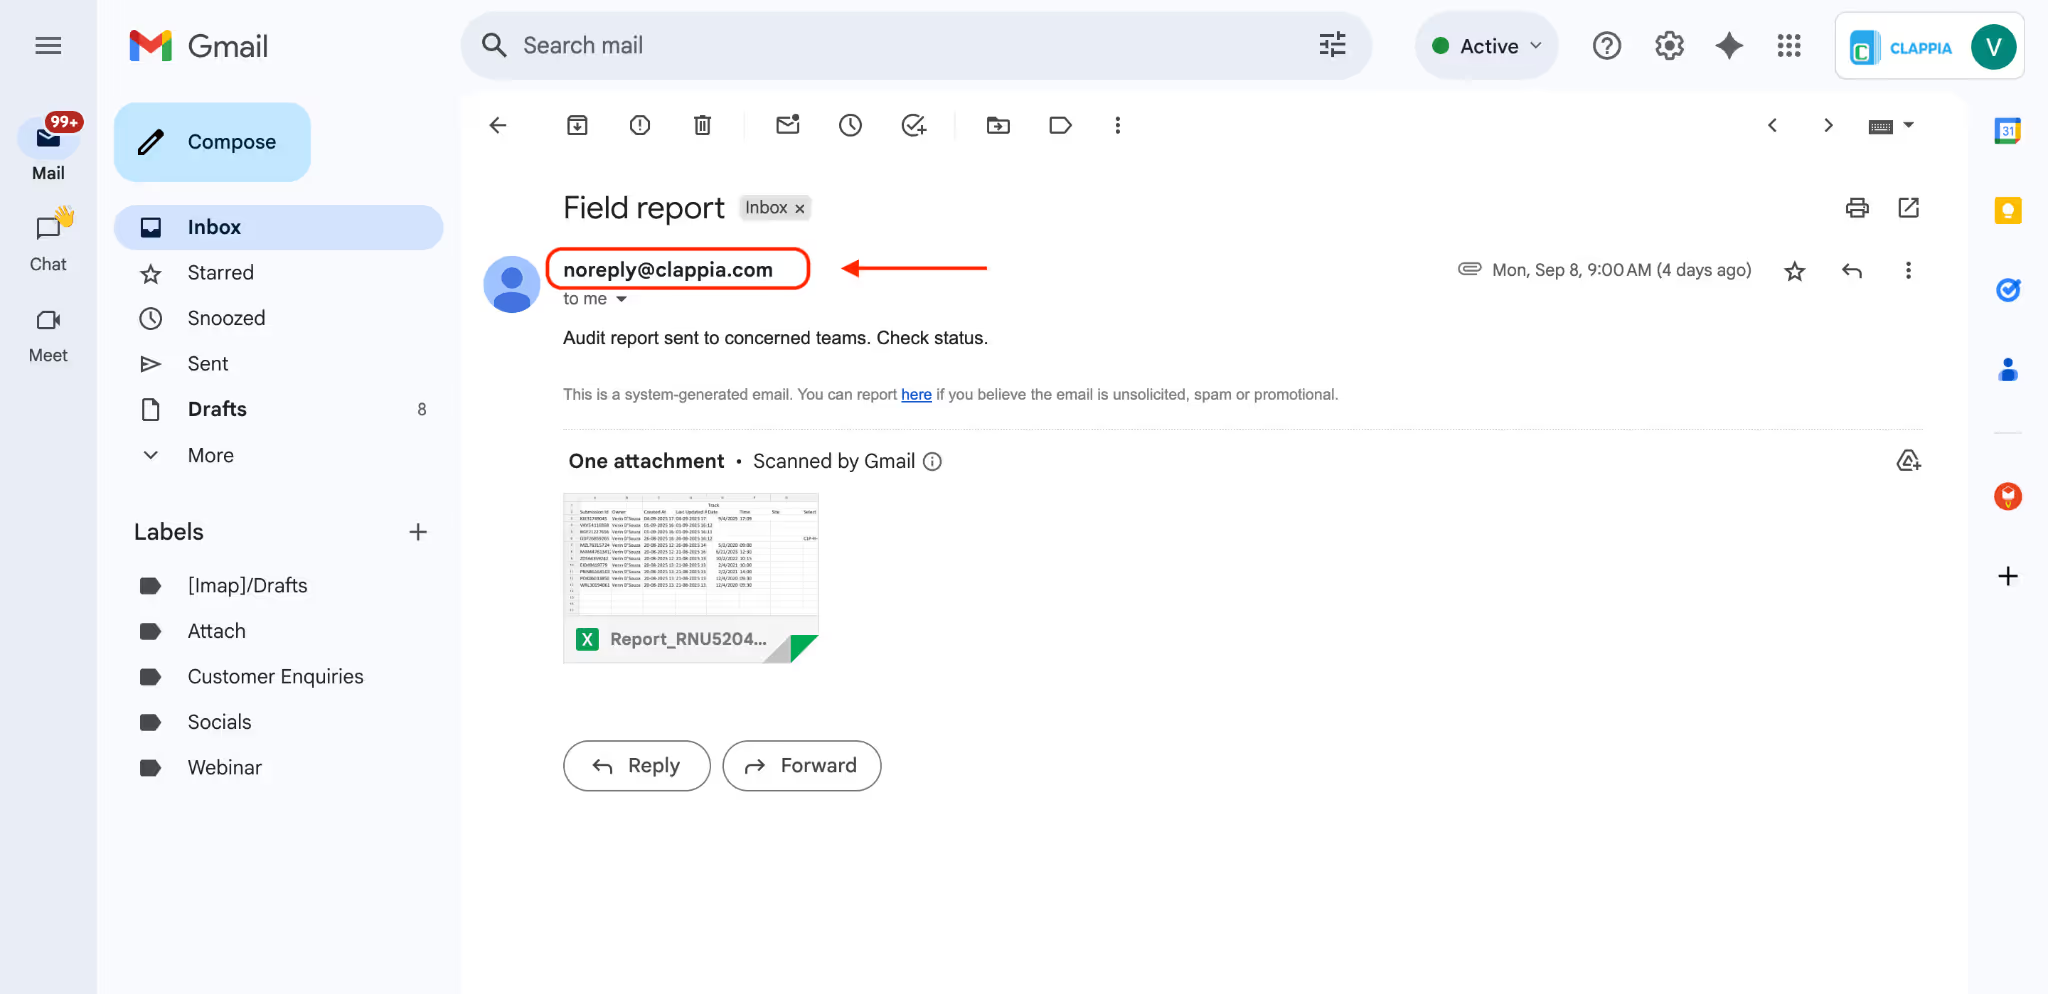
SMTP settings allow you to control how emails triggered from your Clappia workflows are sent. By default, all such emails are sent from noreply@clappia.com using Clappia’s own SMTP server. However, if you want these workflow emails to appear as though they are sent directly from your company’s email account, you can configure your own SMTP settings.
This ensures that automated notifications, approvals, or other workflow-related emails carry your organization’s domain, making them more recognisable and professional for recipients.
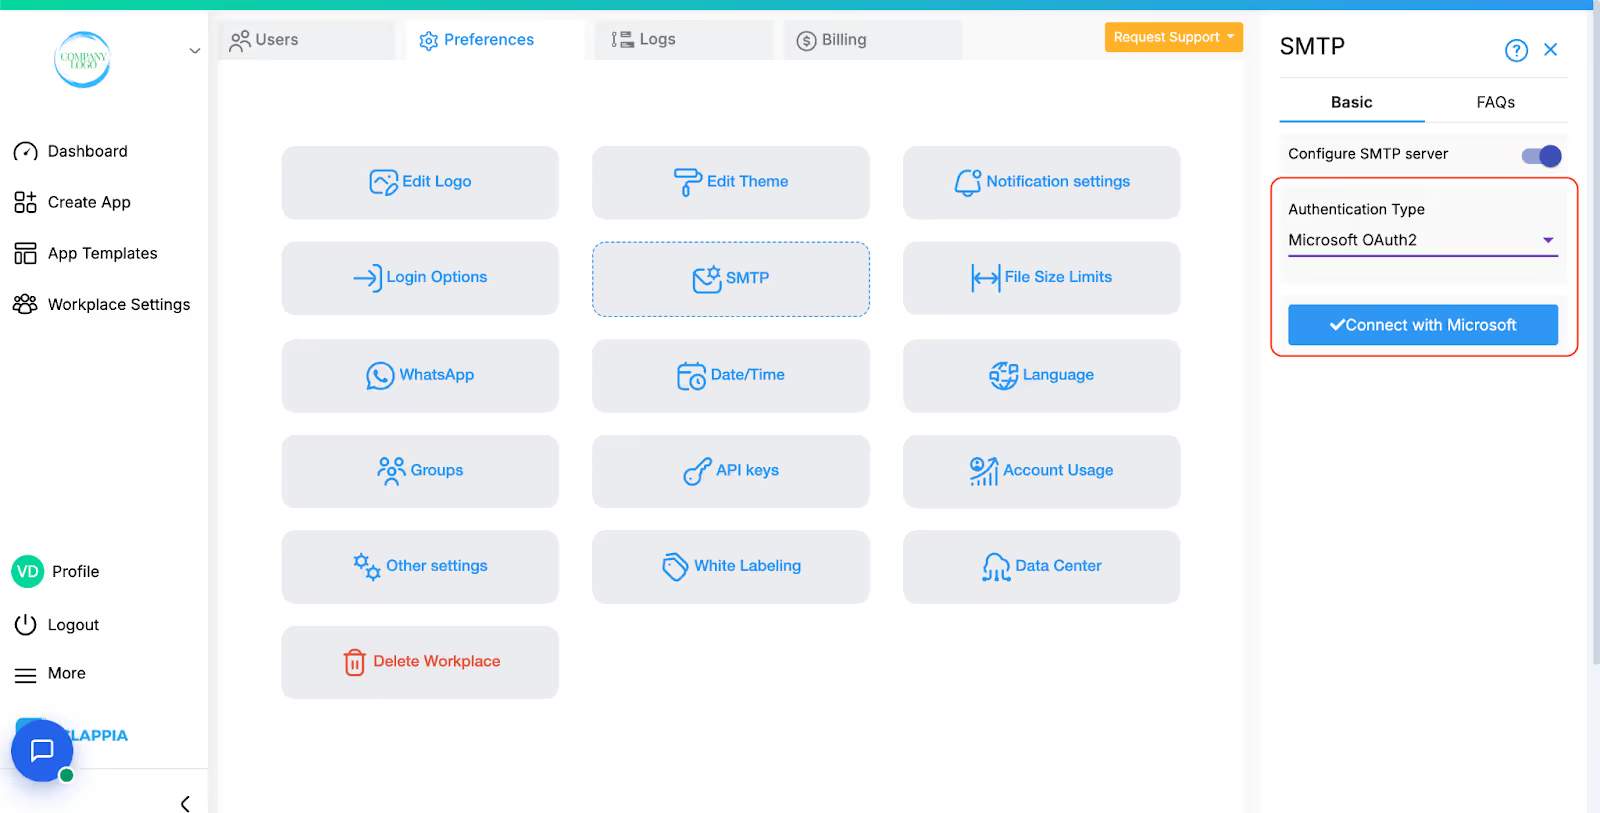
To configure SMTP settings in Clappia, navigate to Workpalce Settings on the left panel of the dashboard. Head over to Preferences tab and select SMTP. On the right panel, enable the option 'Configure SMTP server.

.avif)
Specify the SMTP hostname (e.g. smtp.gmail.com), port (e.g. 465), SMTP username (e.g. name@companyname.com) and password.
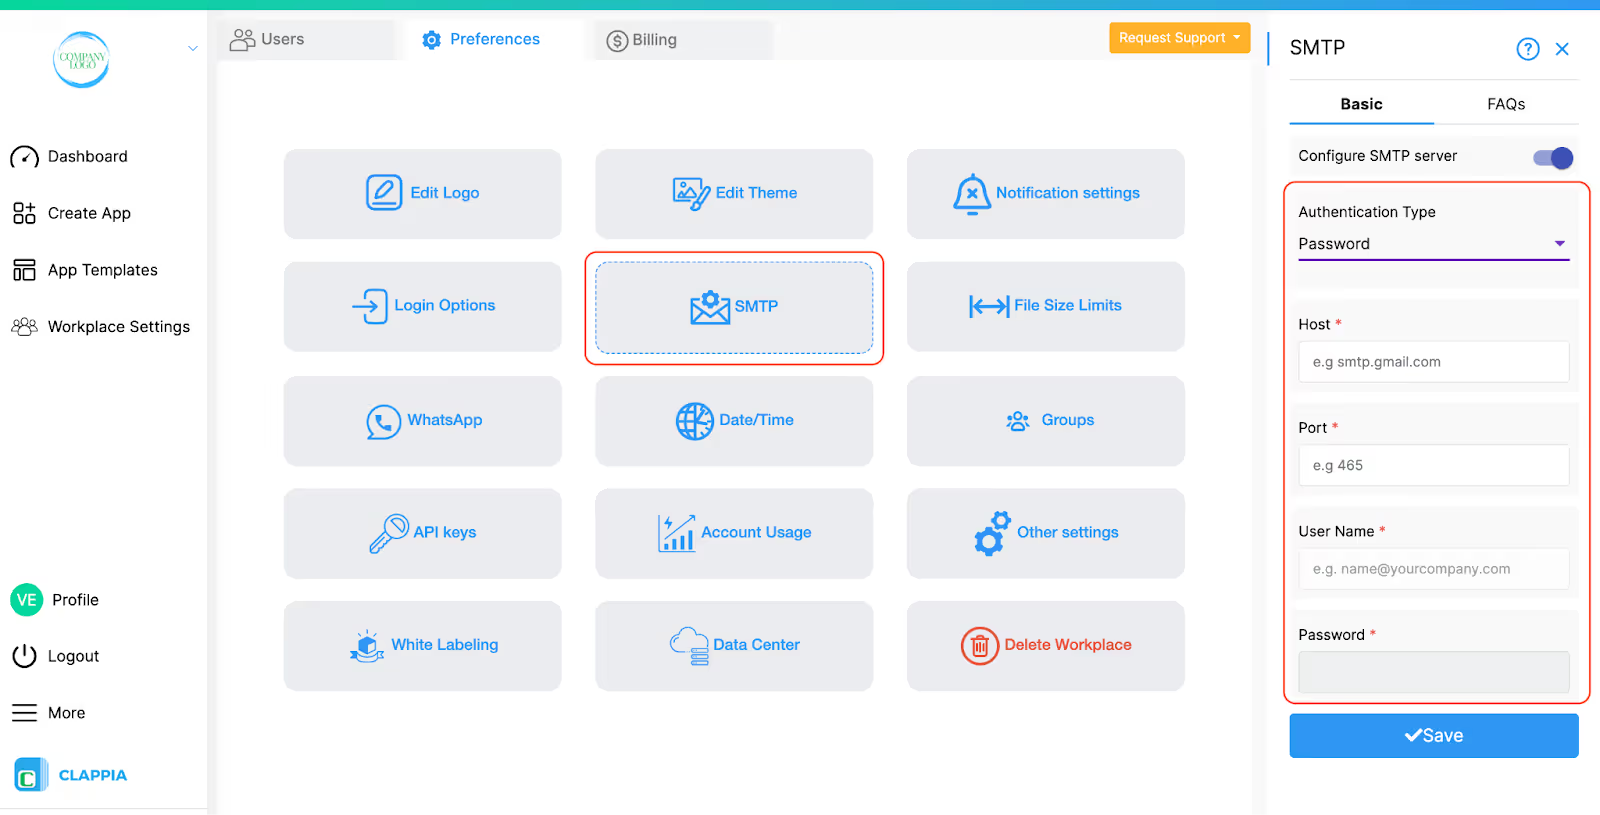
Note: If you are configuring SMTP for a Google account using the Password option, there may be cases where the connection might not work or may stop working in the future, as Google is gradually discouraging such authentications. In such cases, it is recommended to use the Google OAuth2 option for reliable integration. For non-Google accounts, using the Password option should work without issues.
If selected, you will need to connect your Google account.
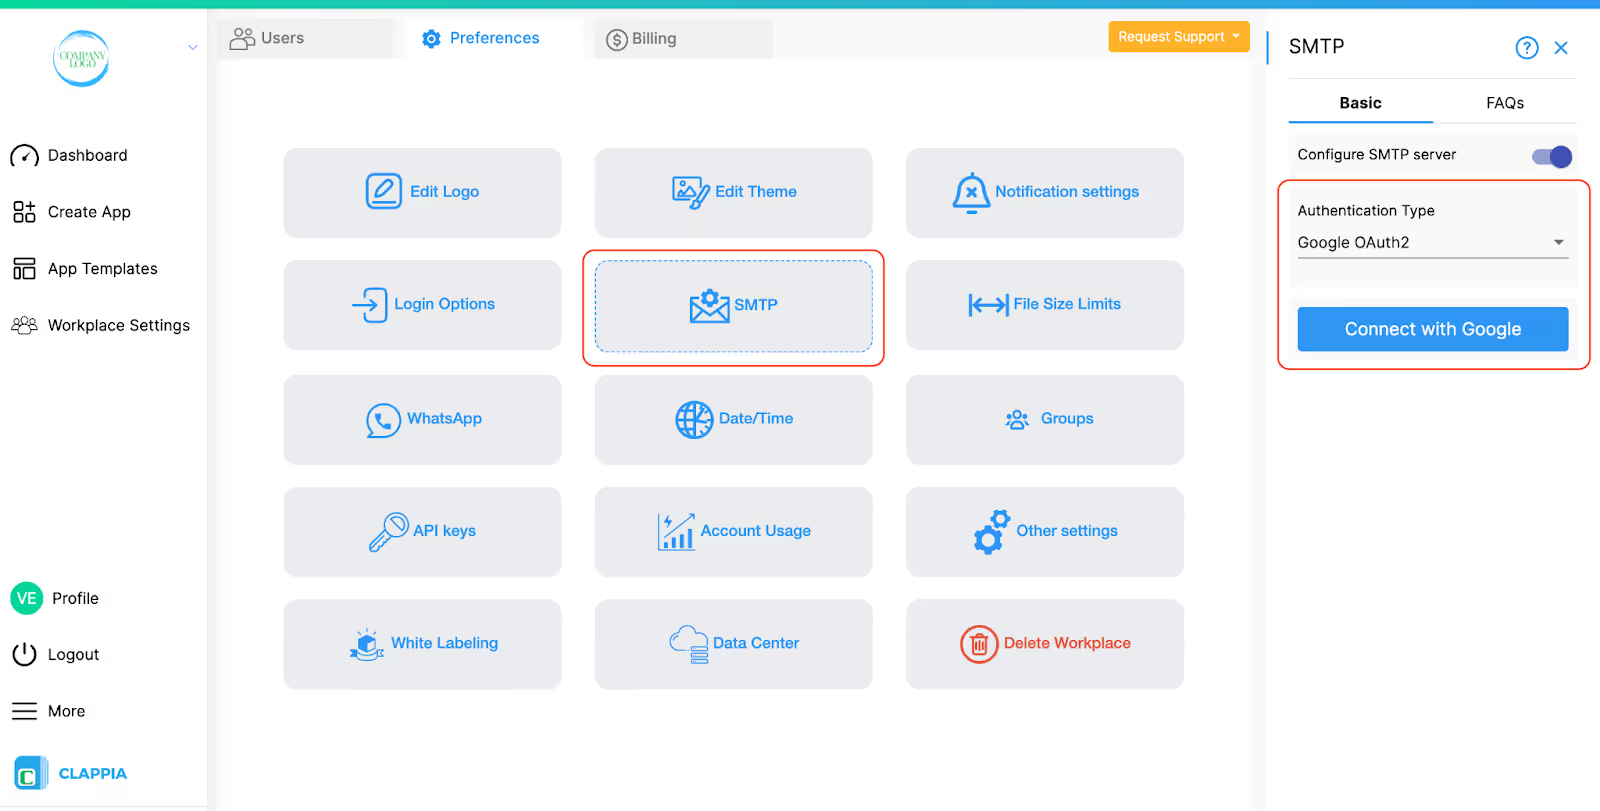
Note: When connecting your Google account, the pop-up window will request permissions. Make sure to select the option ‘Send email on your behalf’. Without this permission, the SMTP setup will not work correctly, and email workflows triggered from your Clappia apps will fail to send emails.
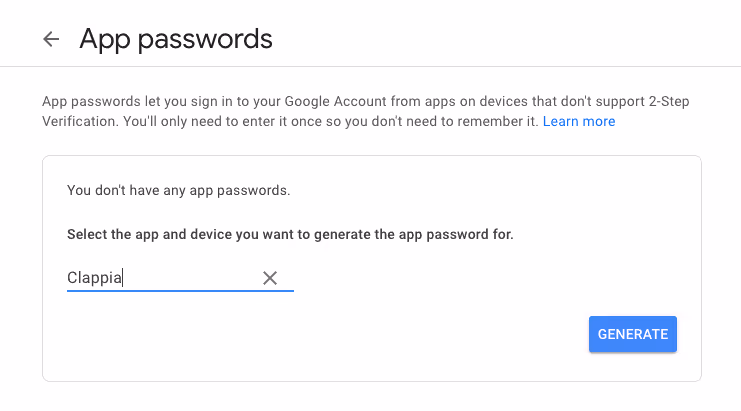
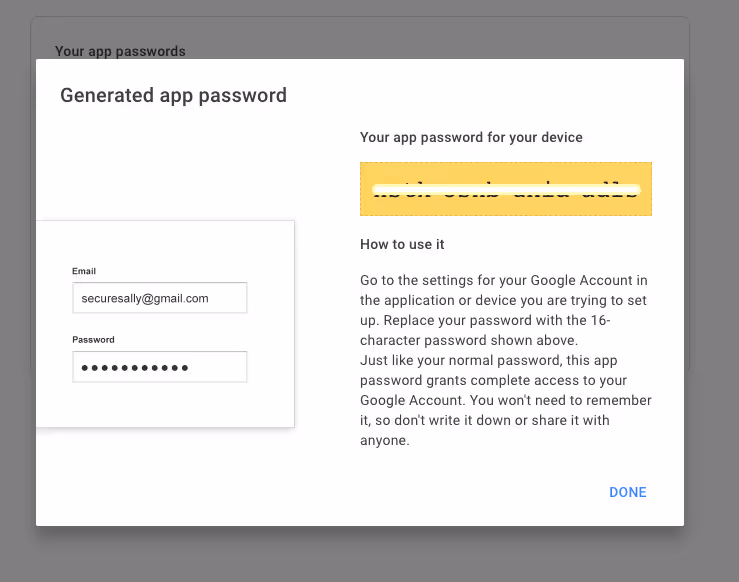
If you are trying to use your Google Account for configuring SMTP Settings, you might be getting errors like Invalid login: 535-5.7.8 Username and Password not accepted. This means that the Google Account doesn't allow using your raw password for sending emails. In this case, you need to generate a Custom App Password for your account. You can follow the steps below for this -

If your Google account has multiple email addresses associated with it (such as alias addresses), a From Email dropdown will appear in the right panel. You can select which email address should be used as the sender for workflow emails.
The email ID you select here will be displayed as the sender when workflow emails (configured using the Send Email node) are delivered to recipients. This ensures that recipients see the correct email identity you want them to reply to.
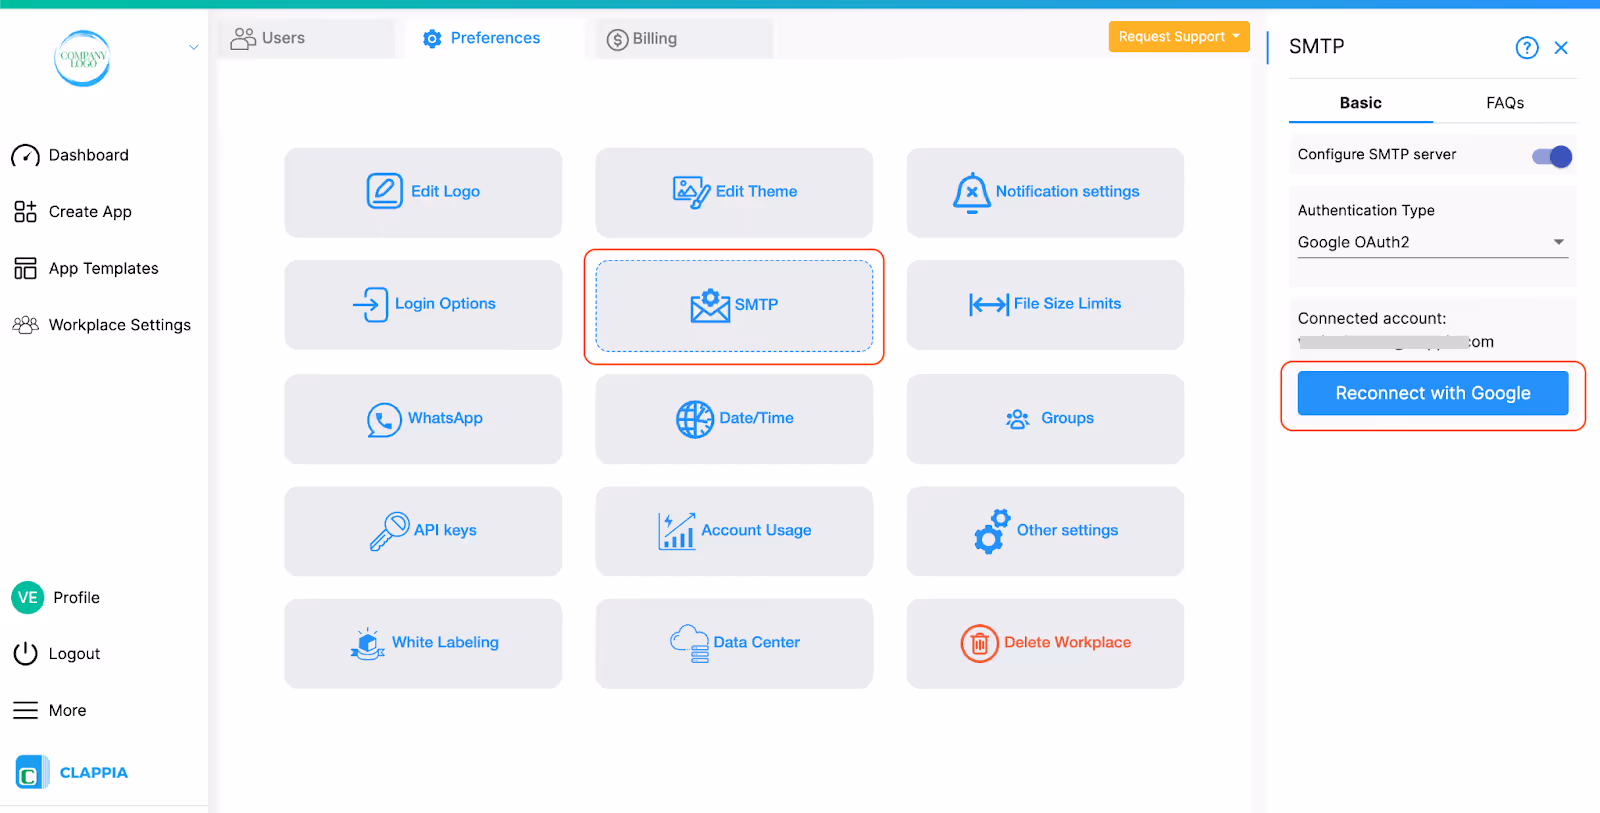
If needed, you can Reconnect with Google at any time by clicking the button shown.
Note: When emails are sent using Google SMTP, the sender name shown to recipients is taken from the Google account that is connected to SMTP. This is the display name configured in the Google account profile, not a name set within Clappia.
If the connected Google account does not have a display name configured, or if the SMTP provider does not pass the display name, recipients may see only the sender’s email address without a name in the “From” field.
To control how the sender name appears in recipient inboxes, ensure that the Google account used for SMTP has the correct display name set. This name will be used consistently for all emails sent through that SMTP configuration.
If selected, you will need to connect your Microsoft account.
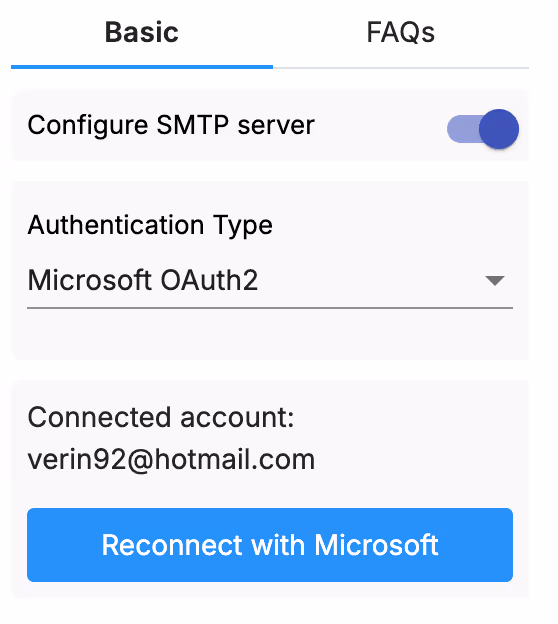
Once connected, all emails triggered from Clappia apps will be sent using the connected Microsoft account’s email address instead of noreply@clappia.com.
When your workplace is configured to use Microsoft SMTP, there is an important size limit to keep in mind. Microsoft does not allow emails to be sent if the total email size exceeds 50 MB.
This total size is calculated by adding up everything included in the email such as the Subject, Email body, Attachments uploaded through the form, and PDFs.
If all of this together crosses the 50 MB limit, the email will not be sent by Microsoft.
In such cases:
This limit is enforced by Microsoft and applies to all emails that Clappia sends through your Microsoft SMTP connection.
L374, 1st Floor, 5th Main Rd, Sector 6, HSR Layout, Bengaluru, Karnataka 560102, India
3500 S DuPont Hwy, Dover,
Kent 19901, Delaware, USA


3500 S DuPont Hwy, Dover,
Kent 19901, Delaware, USA
L374, 1st Floor, 5th Main Rd, Sector 6, HSR Layout, Bengaluru, Karnataka 560102, India
.svg)
