
Still need help?

The Get Data from Microsoft Excel block allows you to connect a Microsoft Excel file stored on OneDrive or SharePoint directly to your Clappia app. Once set up, users filling out the app can search for a record from your Excel sheet and have the corresponding data automatically filled into the form.
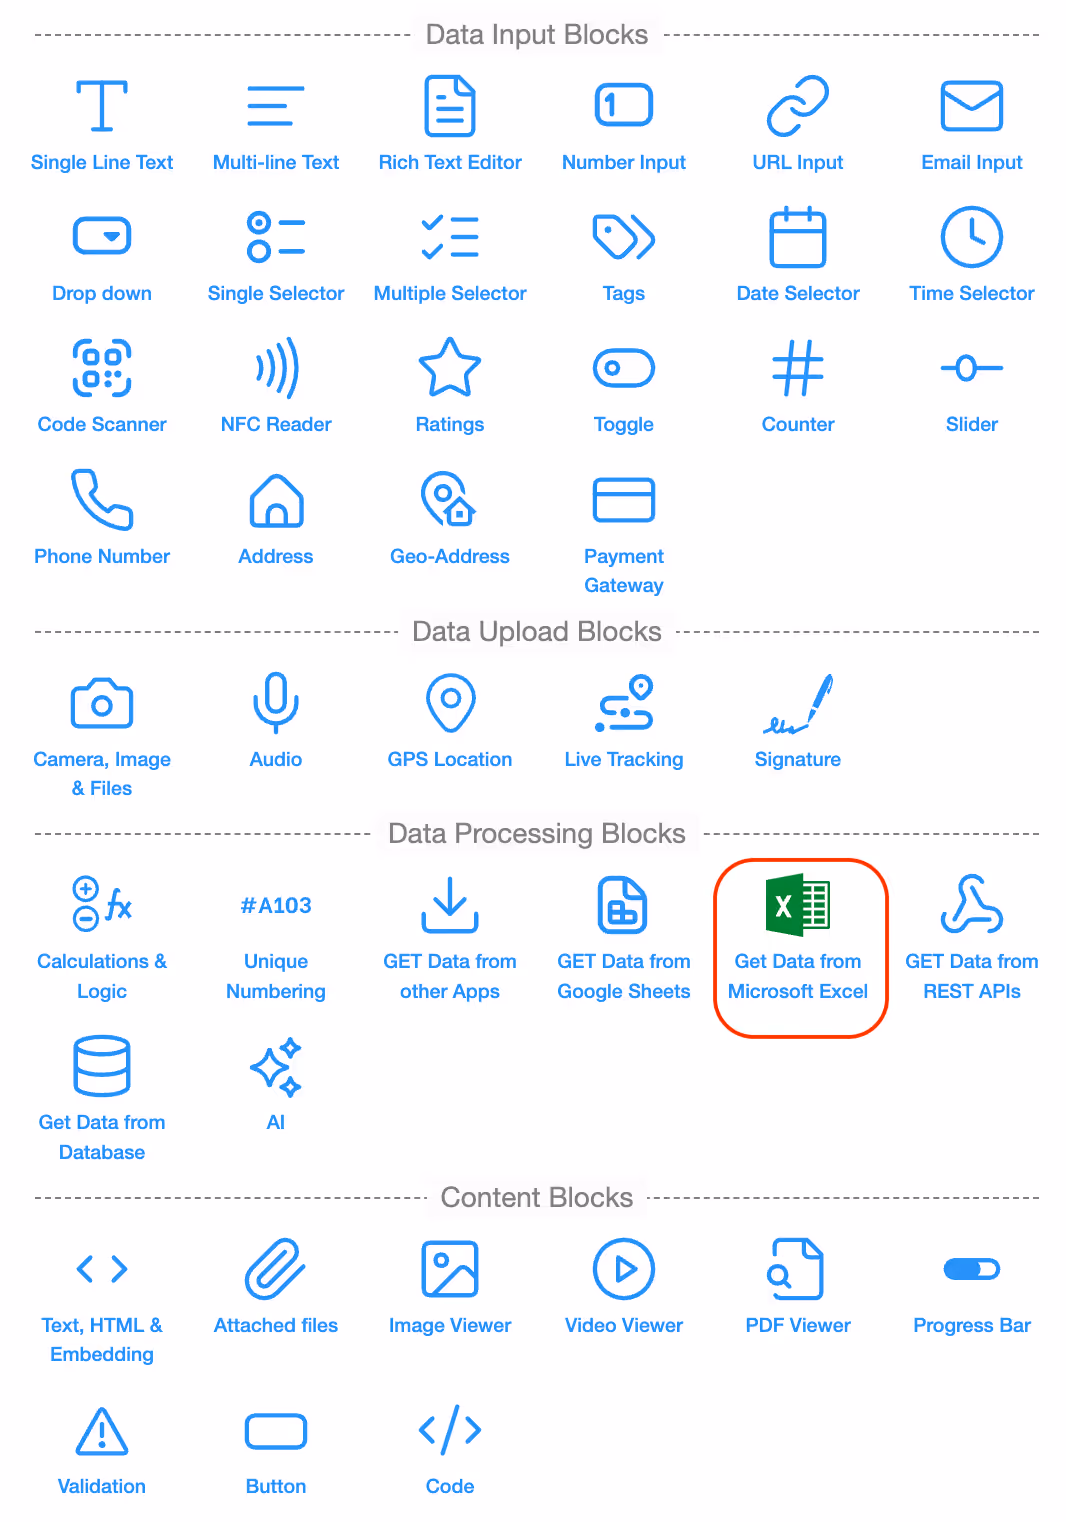
In Design App, click on Add Field and select Get Data from Microsoft Excel. Once added, configure the block on the right panel.
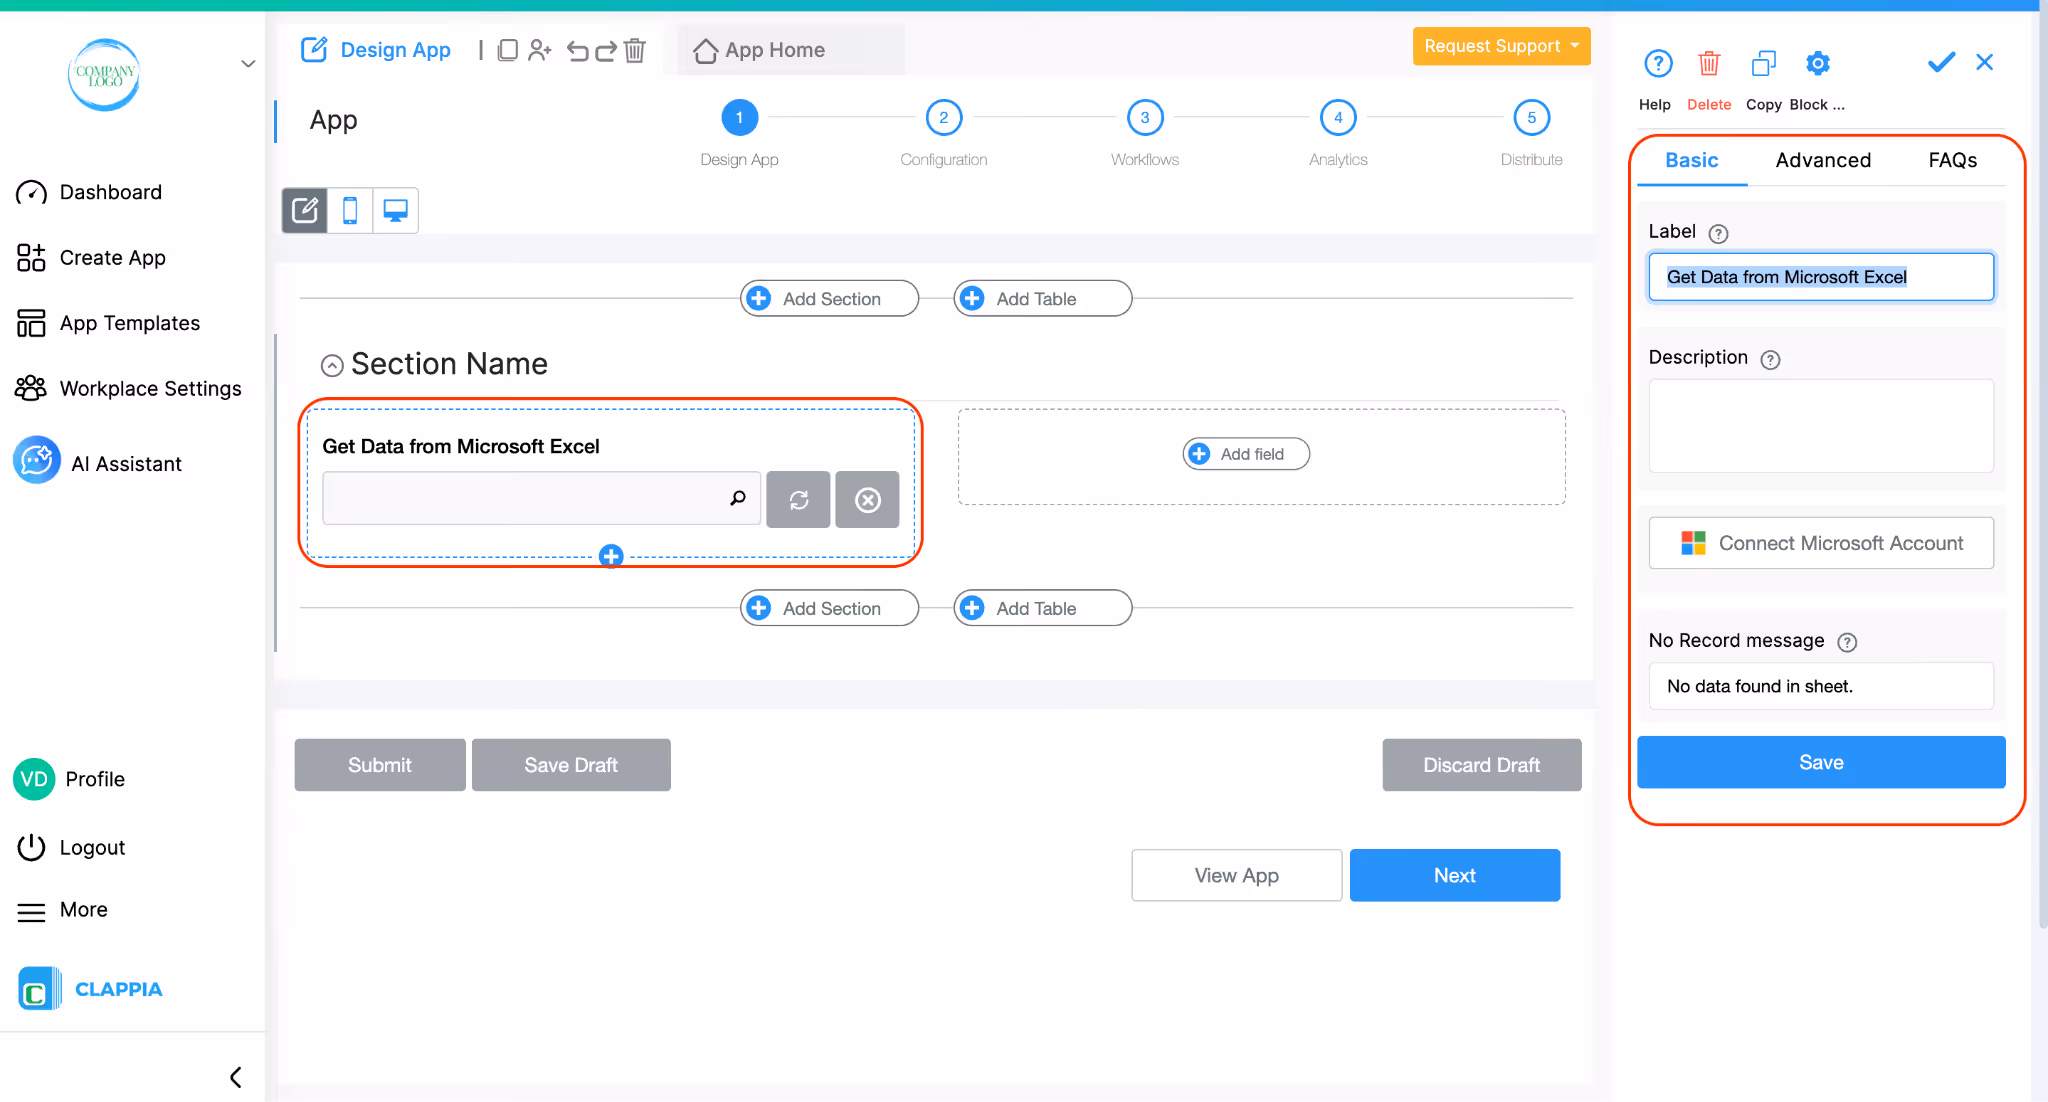
This is the name that will appear on the block in the app. Give it a clear, descriptive name that tells the user what they are selecting, for example, "Select Vendor". You can rename it to anything that fits your use case.
This is used to give a short description for the field., usually as a helpful guide to the user, such as "Search by Vendor ID to load vendor details." The description appears below the field in the app.
The first time you use this block, click on the Connect Microsoft Account button.
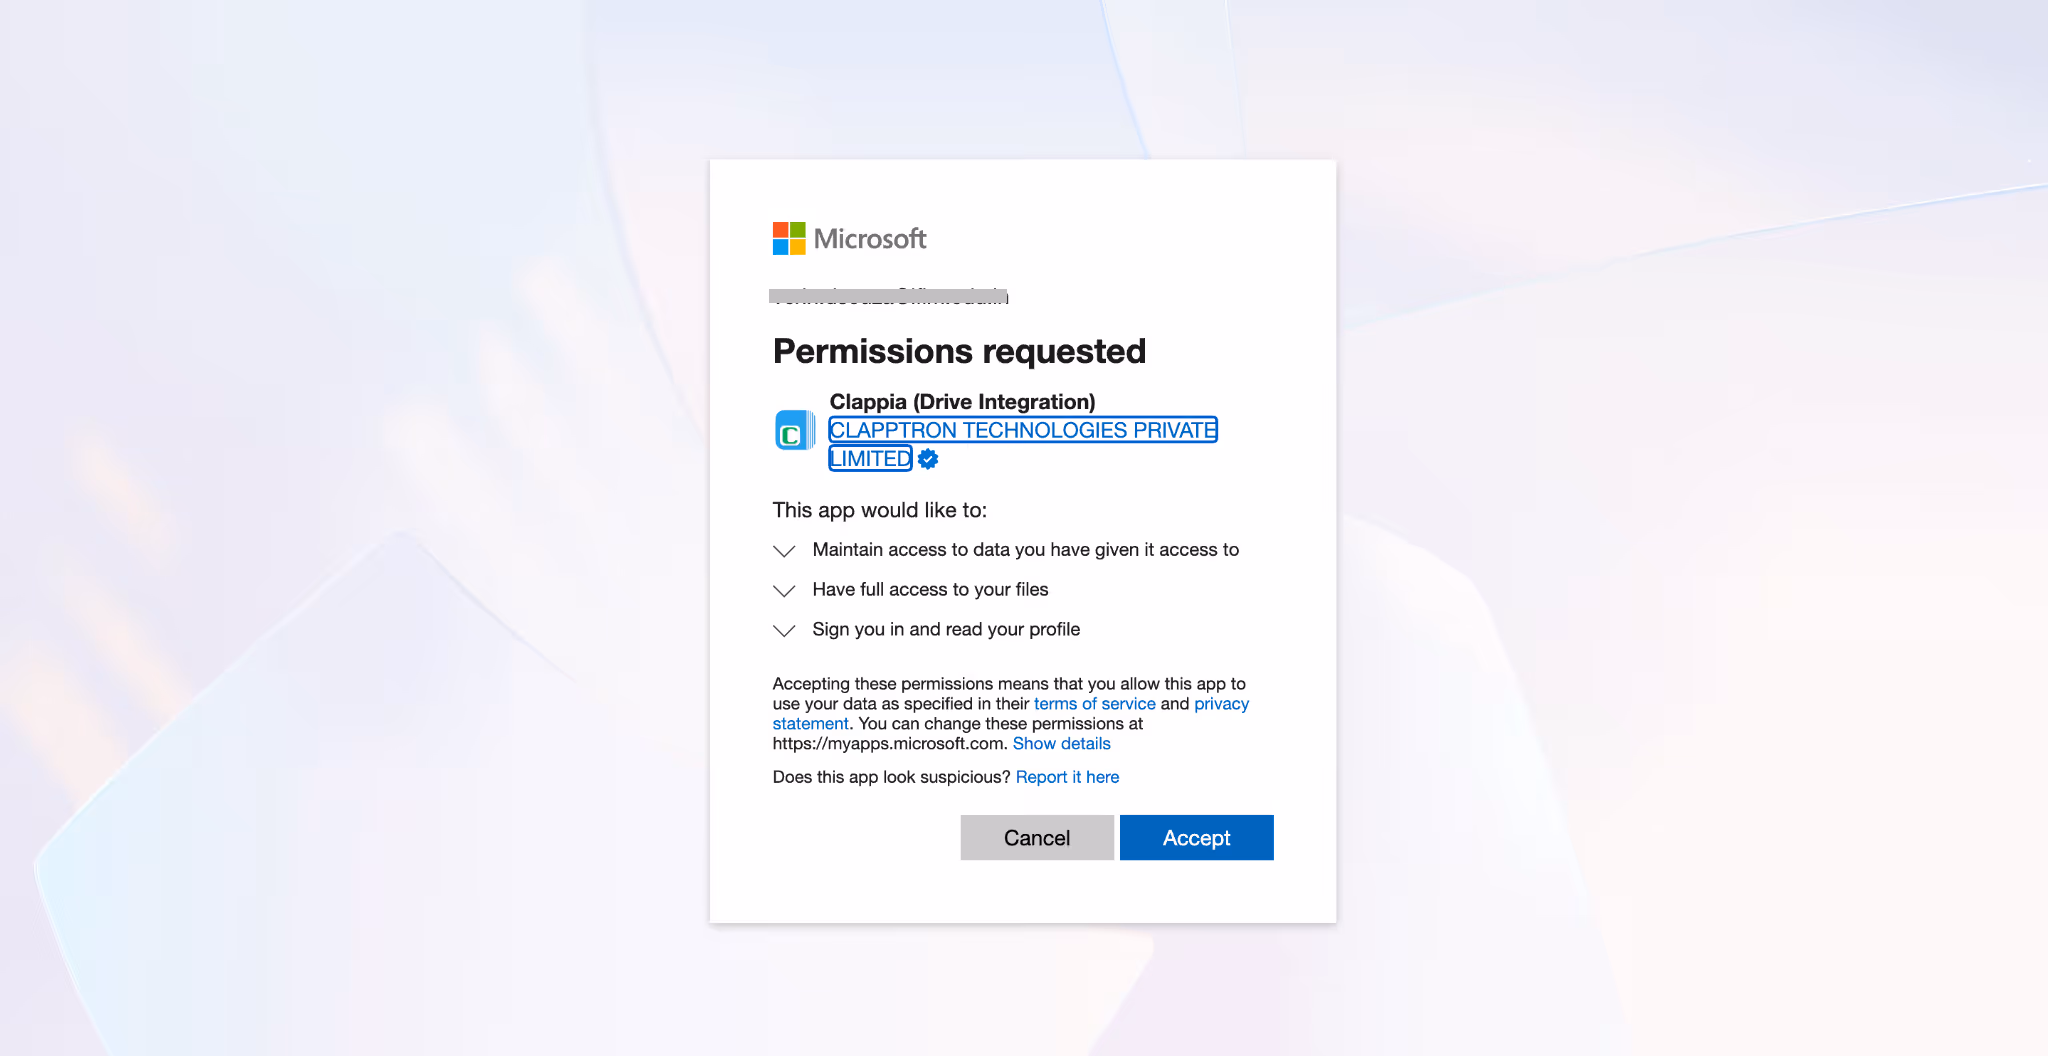
A Microsoft login window will pop up, sign in with the Microsoft account that has access to the Excel file you want to use. After signing in, Microsoft will show you a permissions screen asking Clappia to access your files. Click Accept to grant access.
Once the account is connected, on the right panel, it will appear in the Select Microsoft Account dropdown.
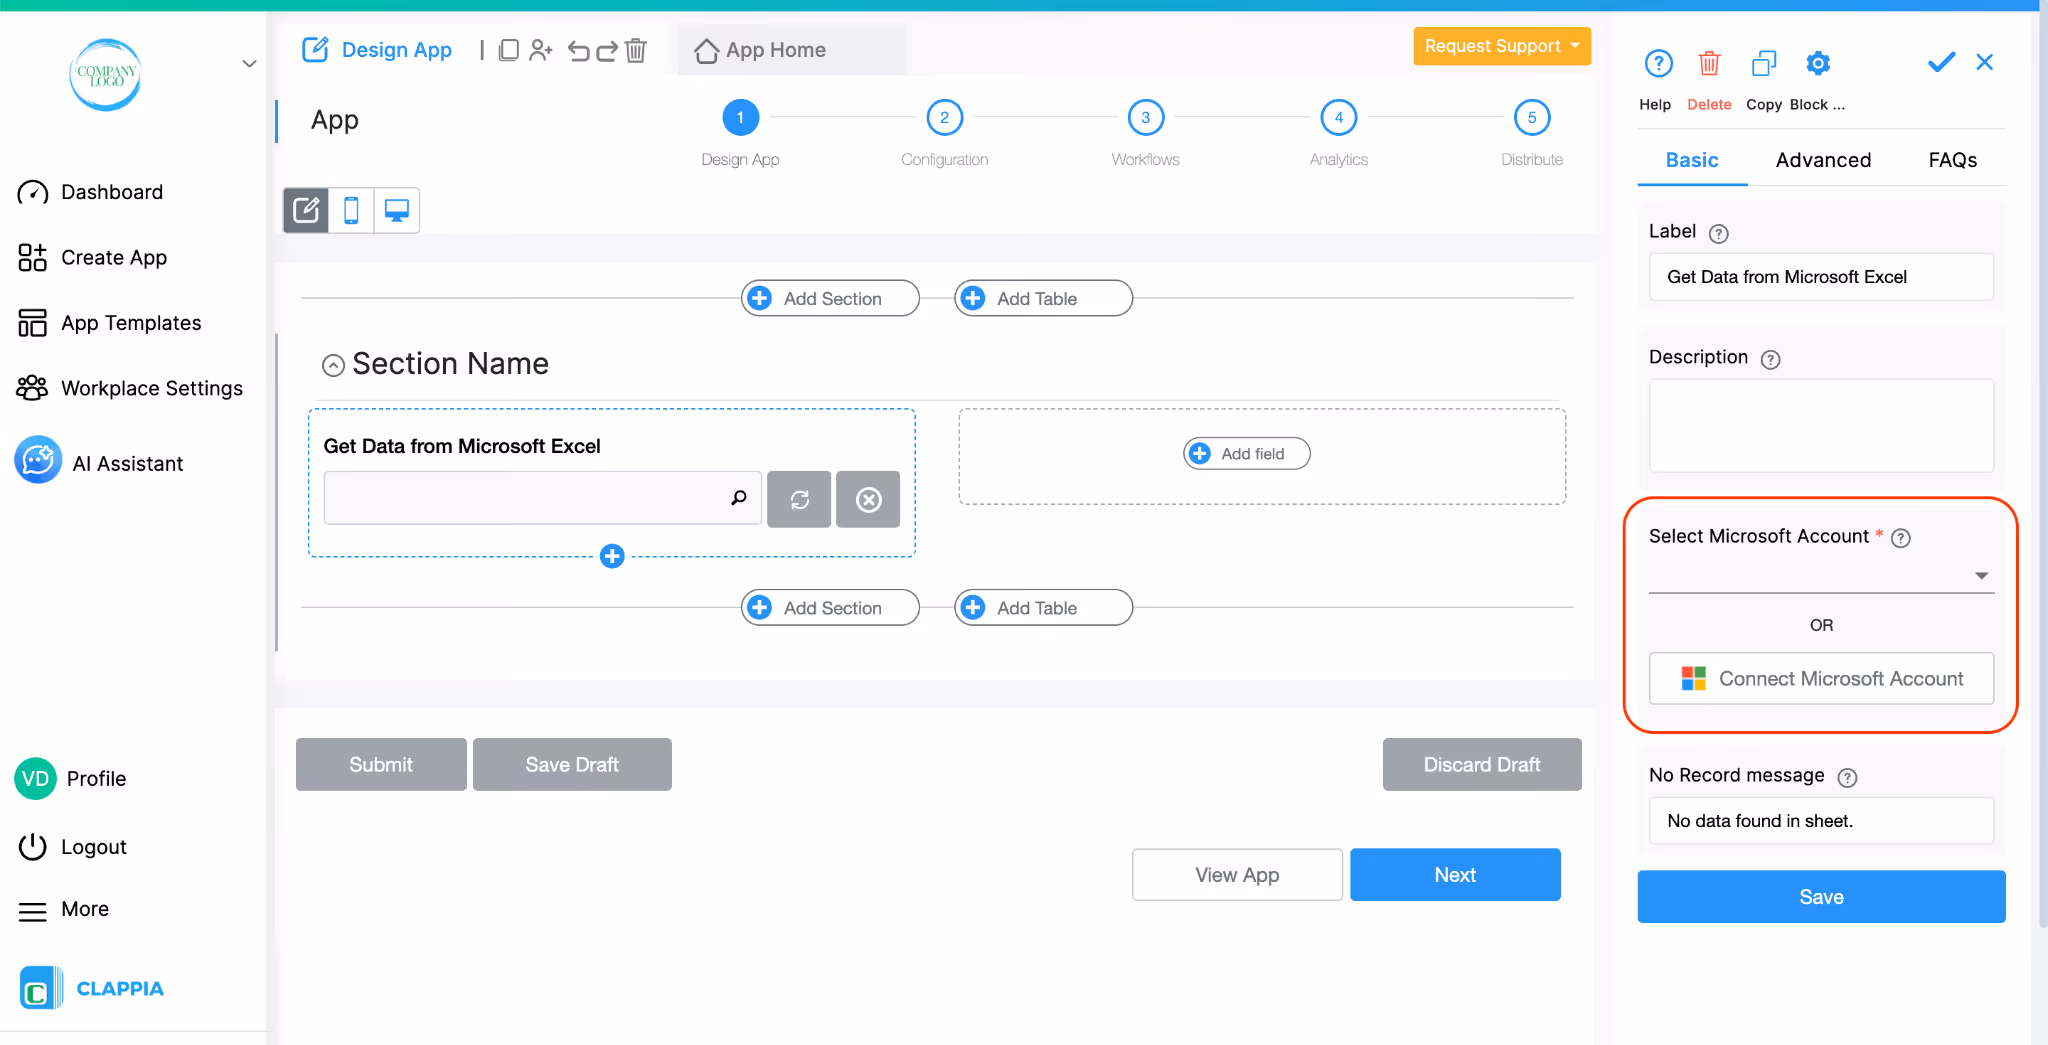
If you already have a Microsoft account connected to Clappia, it will show up here directly and you can simply select it.
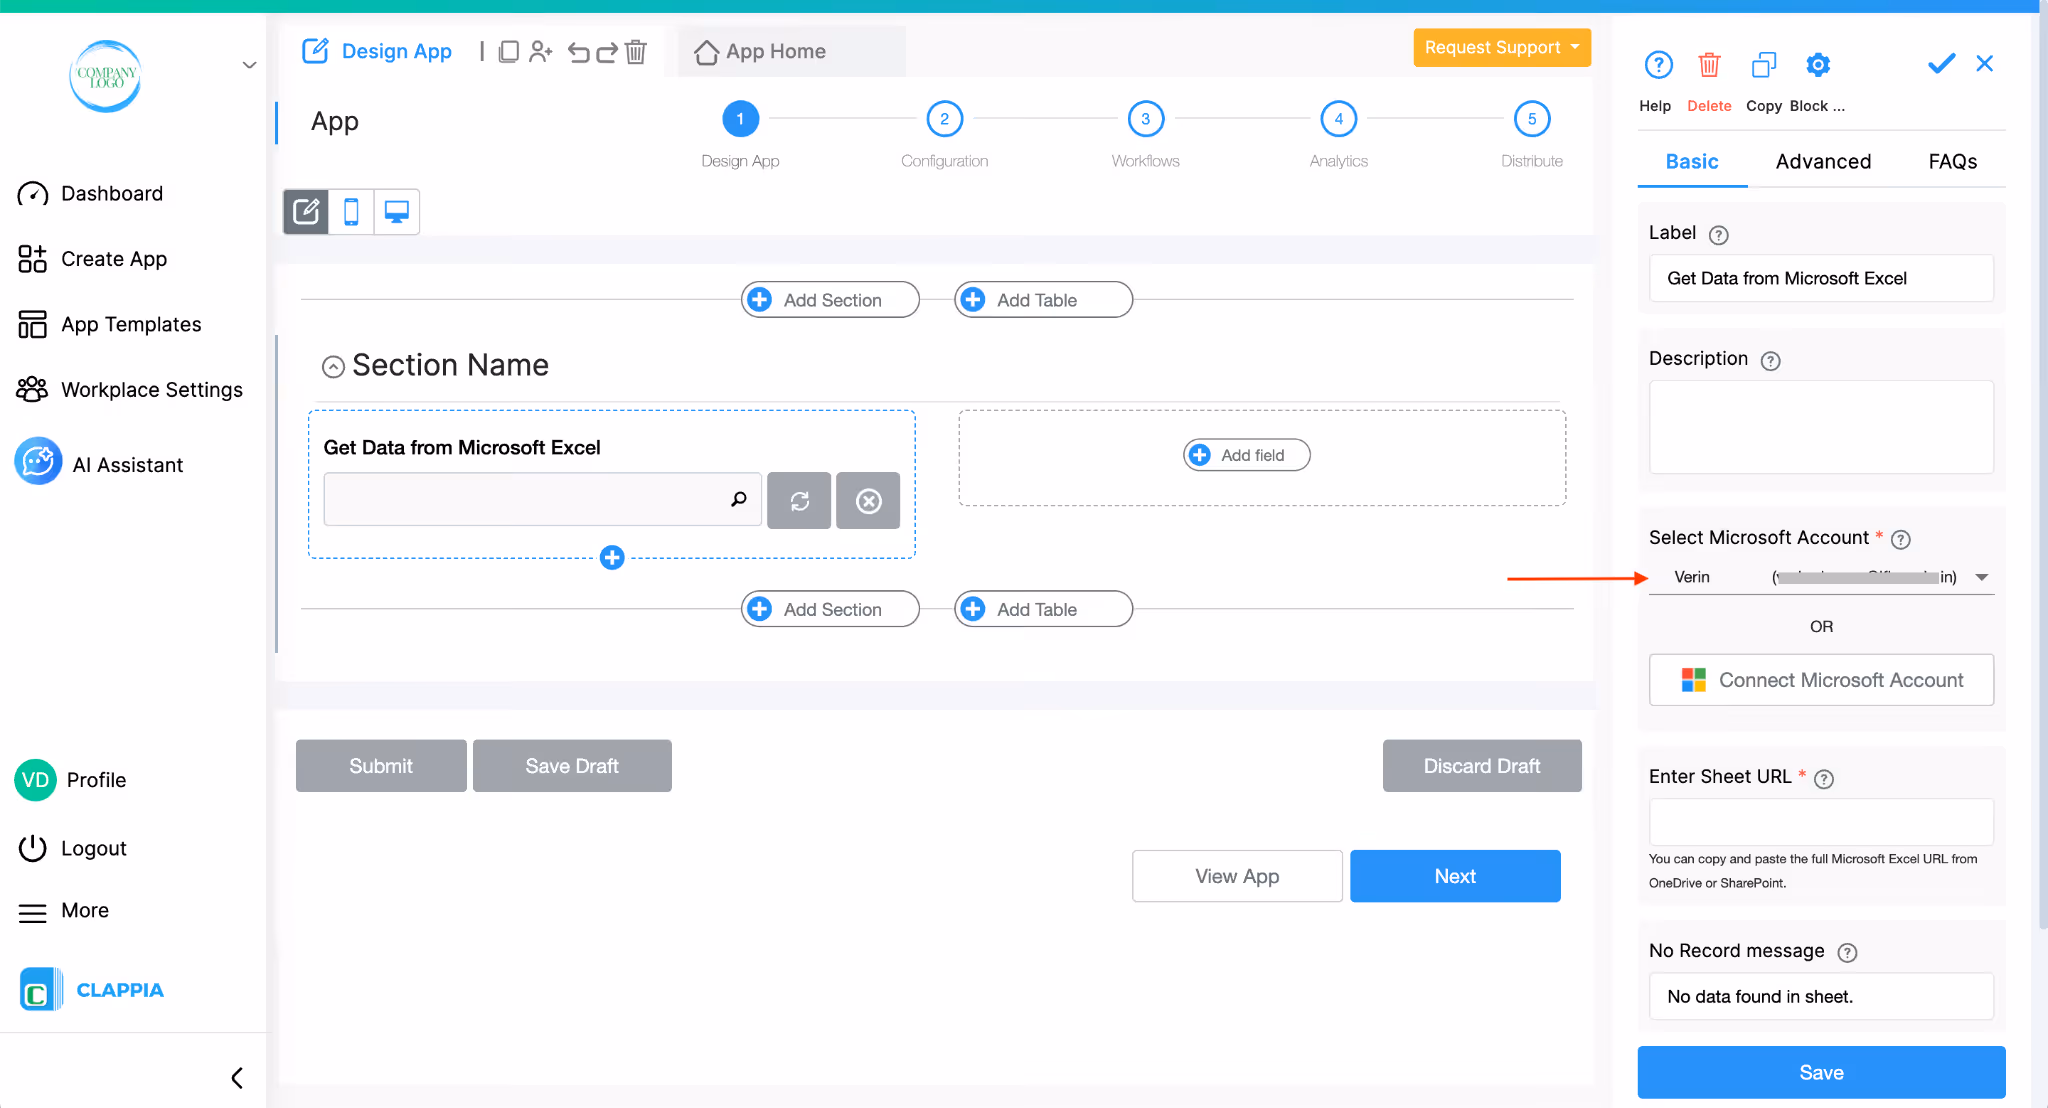
If you need to connect an additional account later, you can always click the Connect Microsoft Account button to add another one.
Only workplace admins can connect Microsoft accounts to Clappia.
Make sure your Excel file is structured correctly before connecting it. The sheet should have a header row as the first row, with column names, for example, Vendor ID, Vendor Name, Category, and so on as shown in the image below.
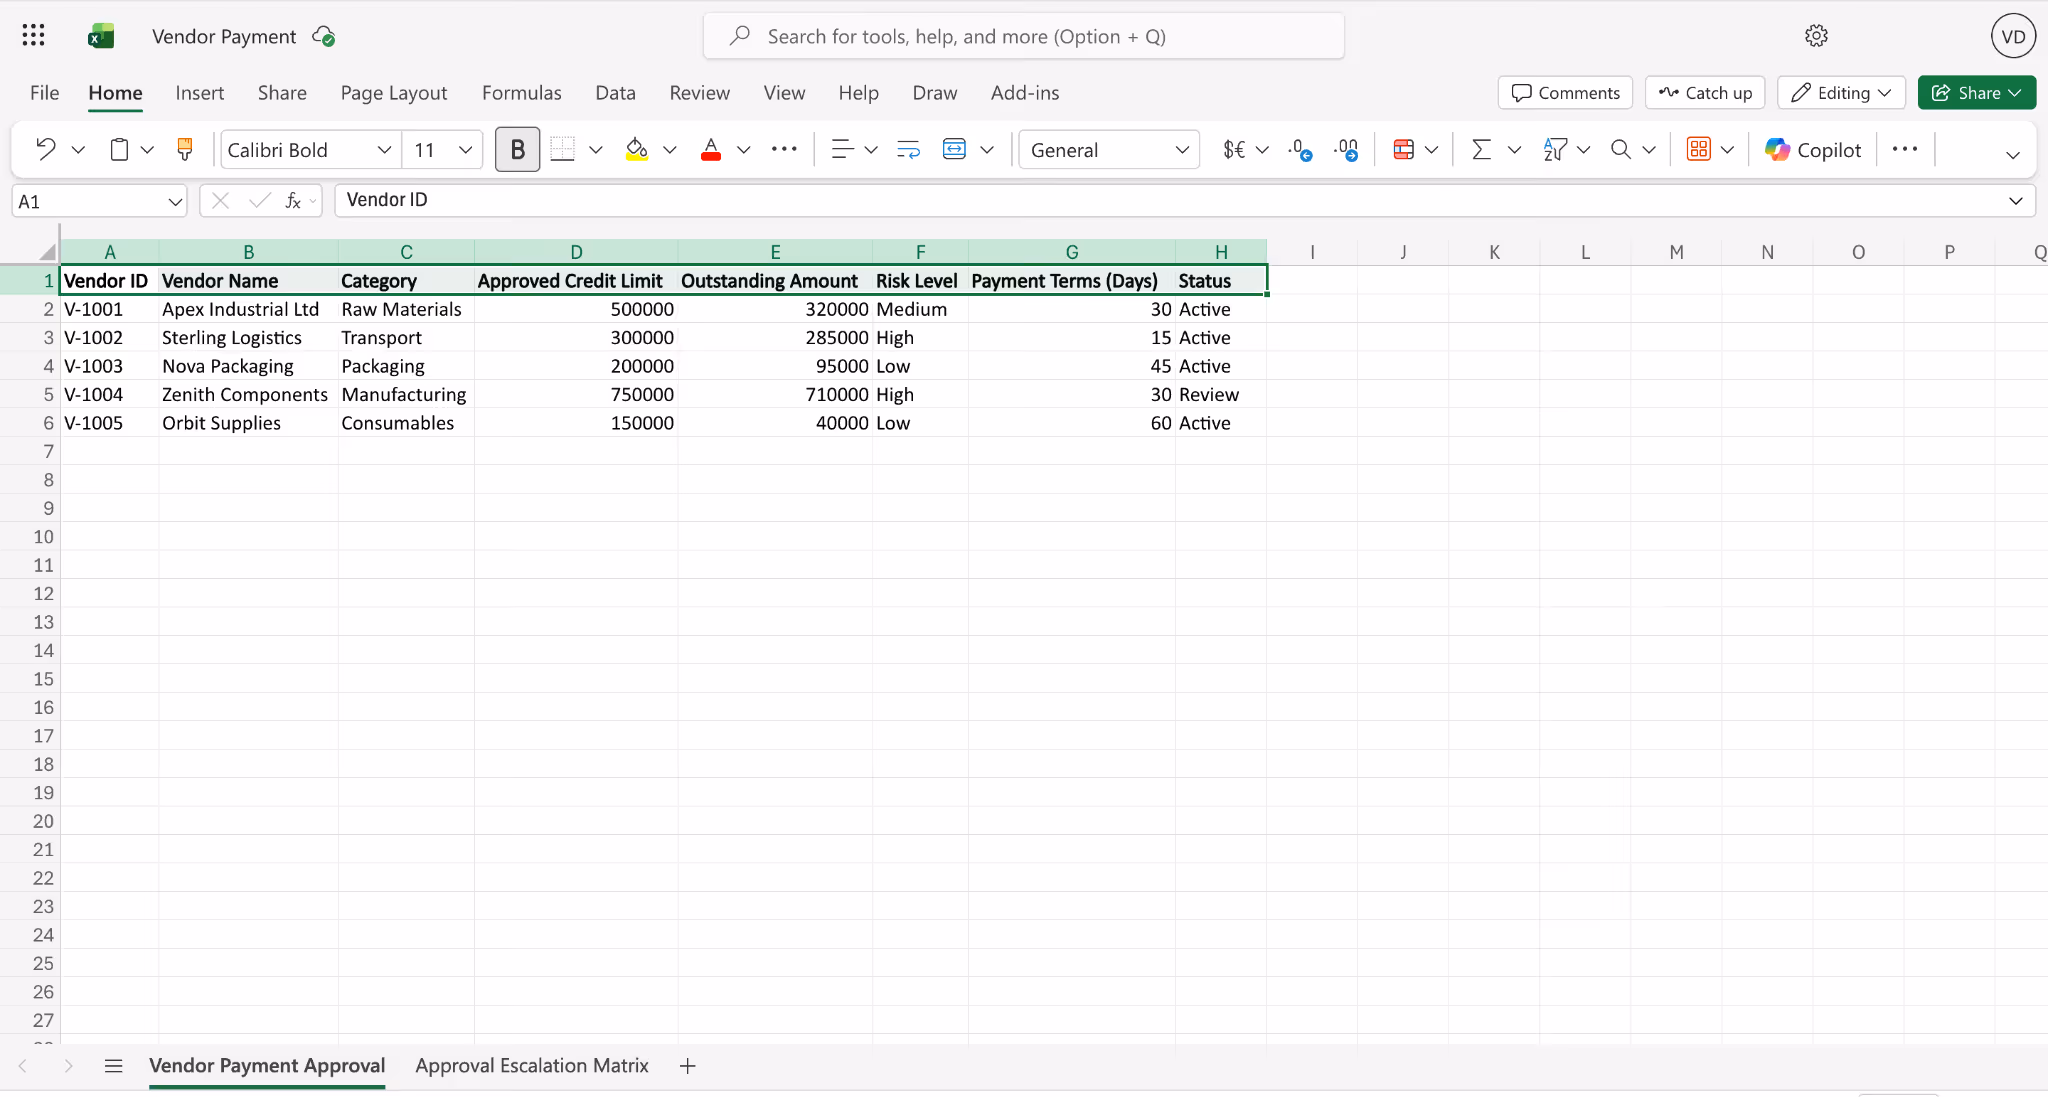
The rows below should contain the actual data. The block reads column names from the header row to allow you to configure it, so this structure is required.
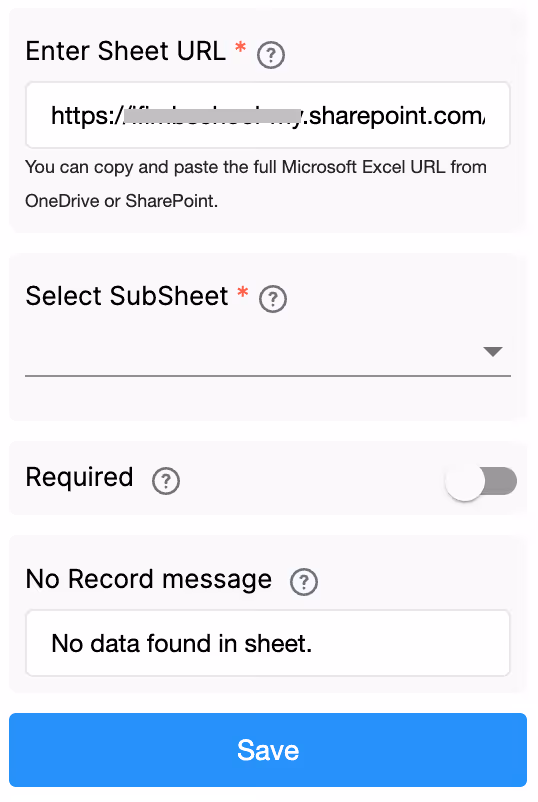
After selecting your Microsoft account, a new field called Enter Sheet URL will appear.
Open your Excel file in OneDrive or SharePoint, copy the URL from your browser's address bar, and paste it here.
Clappia will use this link to connect to your file.
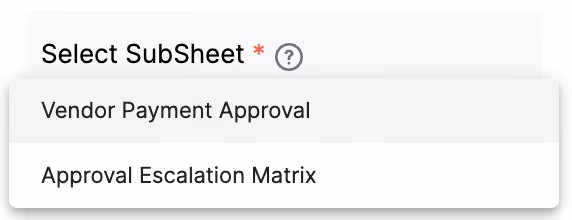
Once the URL is entered, a Select SubSheet dropdown will appear showing all the sheets (tabs) within your Excel file. For example, if your file has two tabs named "Vendor Payment Approval" and "Approval Escalation Matrix", then both will appear here.
Select the one that contains the data you want to use. Only one subsheet can be connected per block.
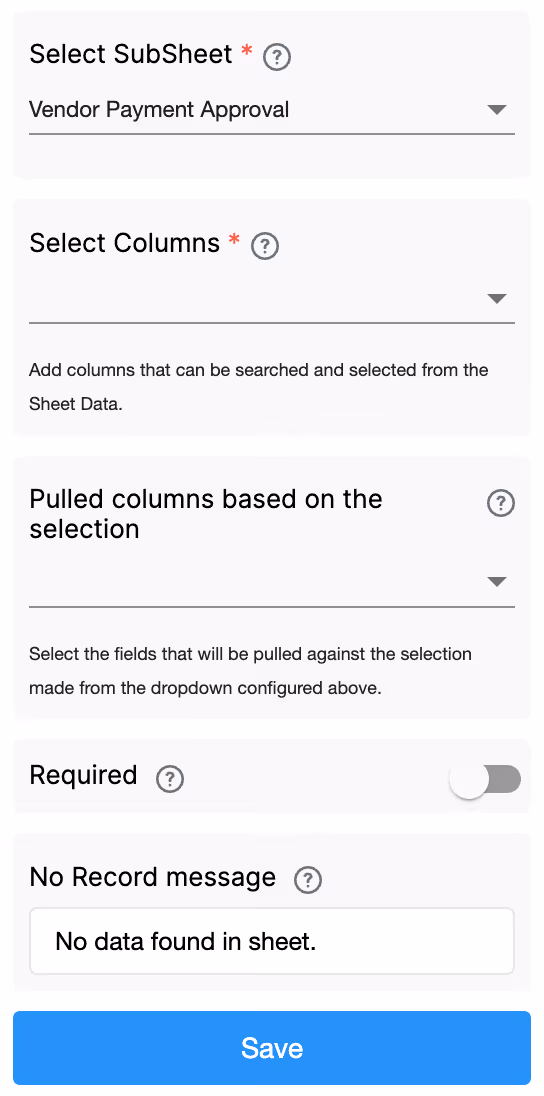
This is where you define what the user will search by. The dropdown will show all the column names from the subsheet you selected.
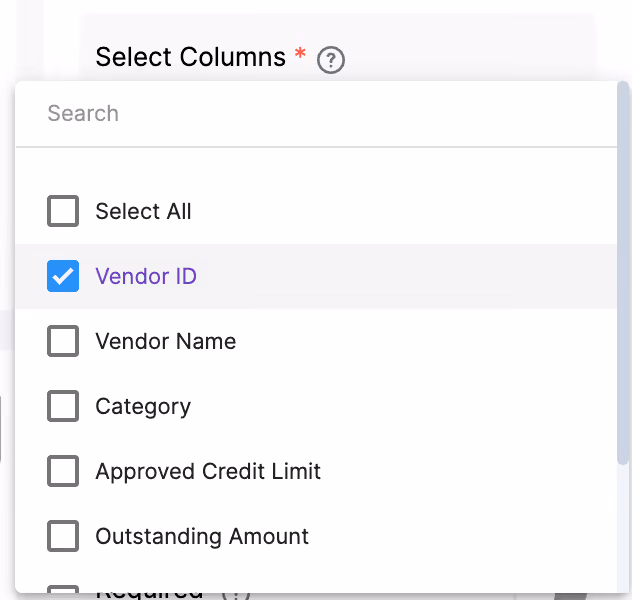
Choose the column or columns that the user should type into or pick from when they are filling out the app. For example, if you want users to look up a vendor by their ID, select the Vendor ID column here. This becomes the search field that the user interacts with in the app.
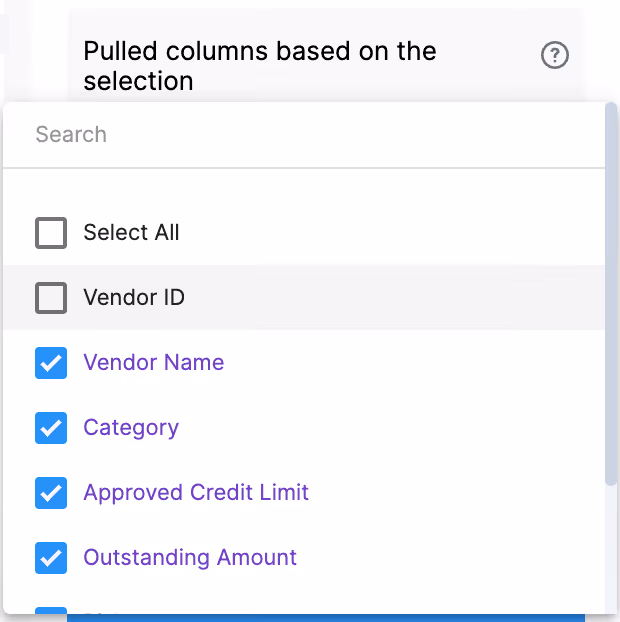
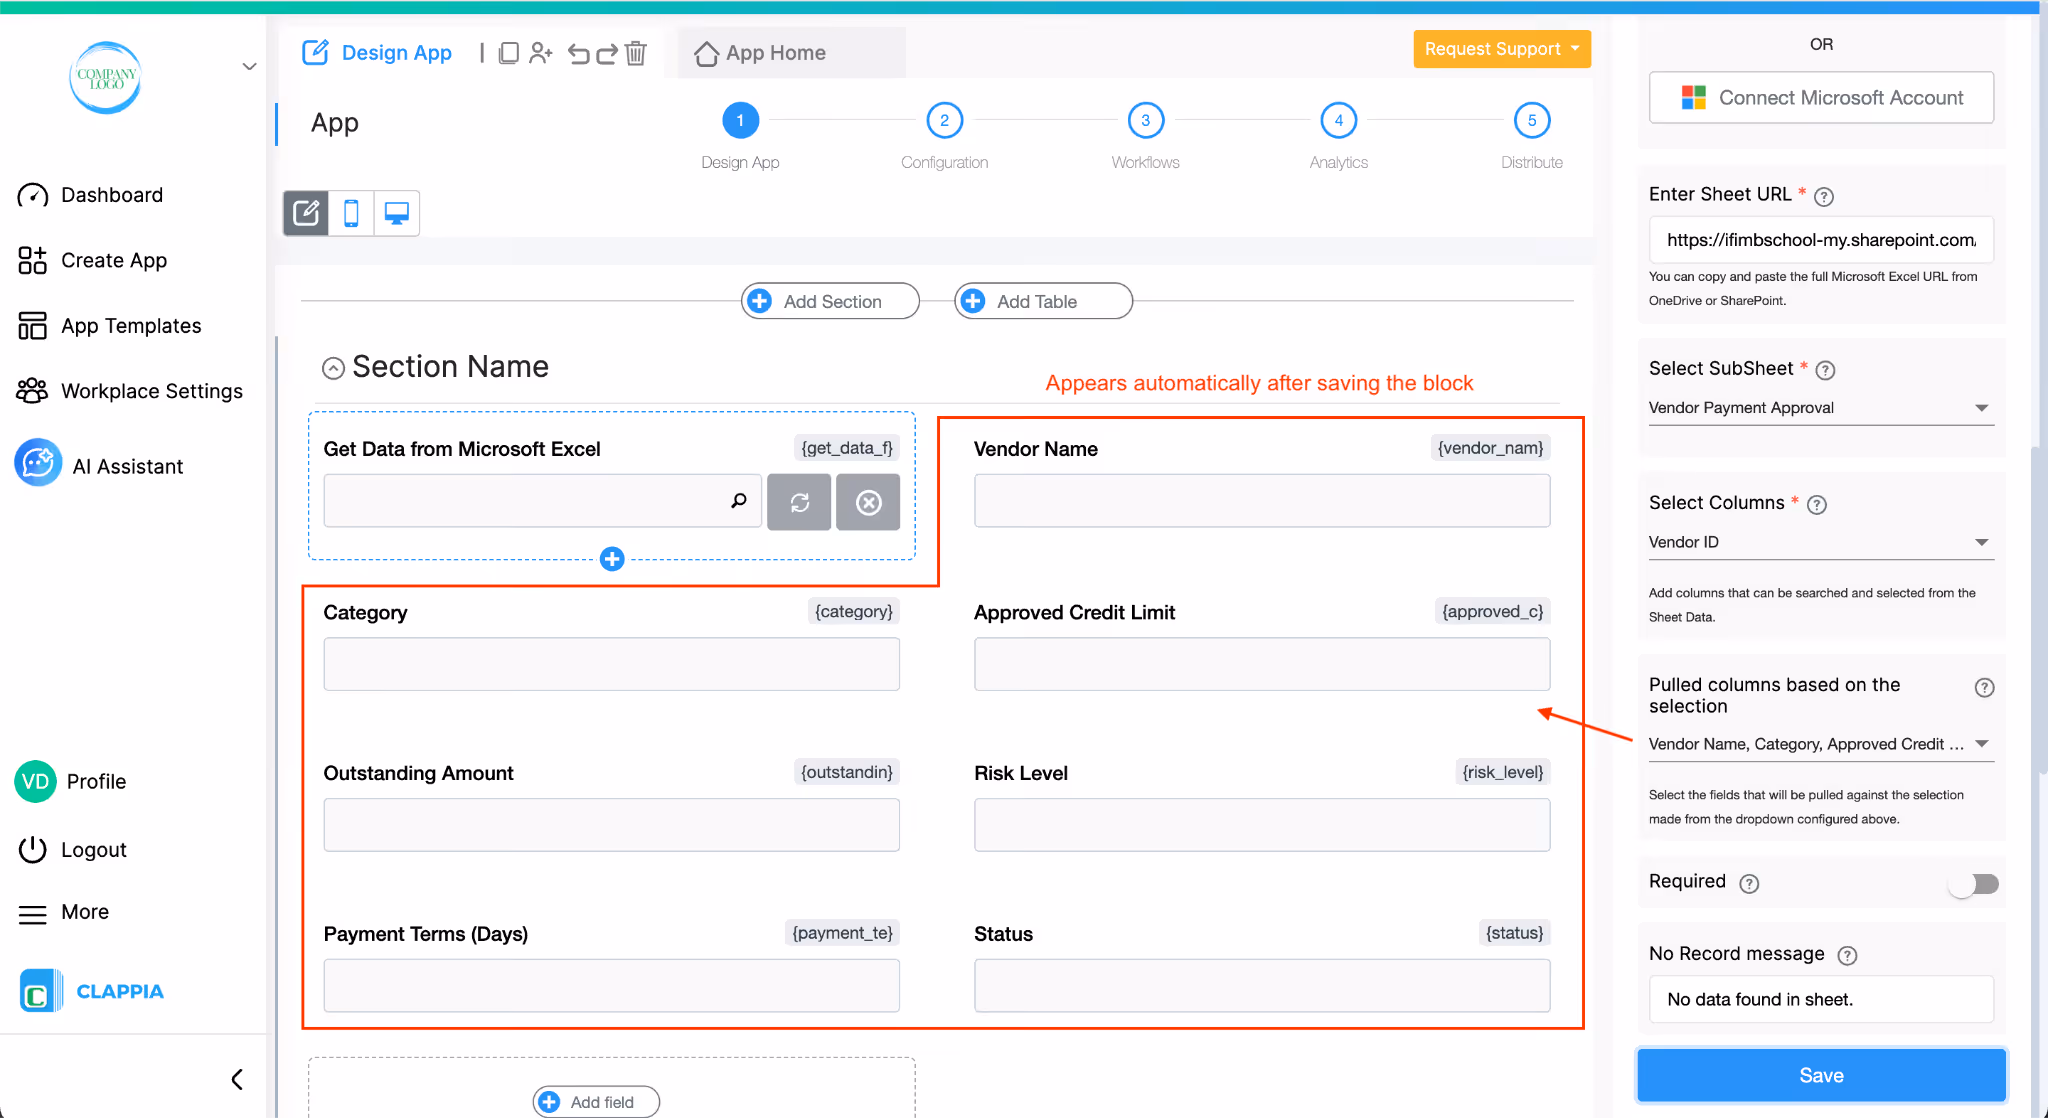
This is where you define which other columns from the sheet should automatically fill in once the user makes a selection. For example, if the user selects a Vendor ID, you may want Vendor Name, Category, Approved Credit Limit, Outstanding Amount, Risk Level, Payment Terms, and Status to all populate automatically. Select all the columns you want to pull in here.
Once you save the block, the pulled columns will automatically appear as separate fields in your app. Each column becomes its own read-only field that gets filled in when the user selects a record.
Enable this toggle if the user must make a selection from this block before they can submit the form. When enabled, the field is marked with a red star in the app and submission will be blocked until the field has a value.
This is the message displayed to the user if their search does not match any record in the sheet. By default it says "No data found in sheet." You can customise this to something more specific if needed, such as "No vendor found with that ID. Please check and try again."
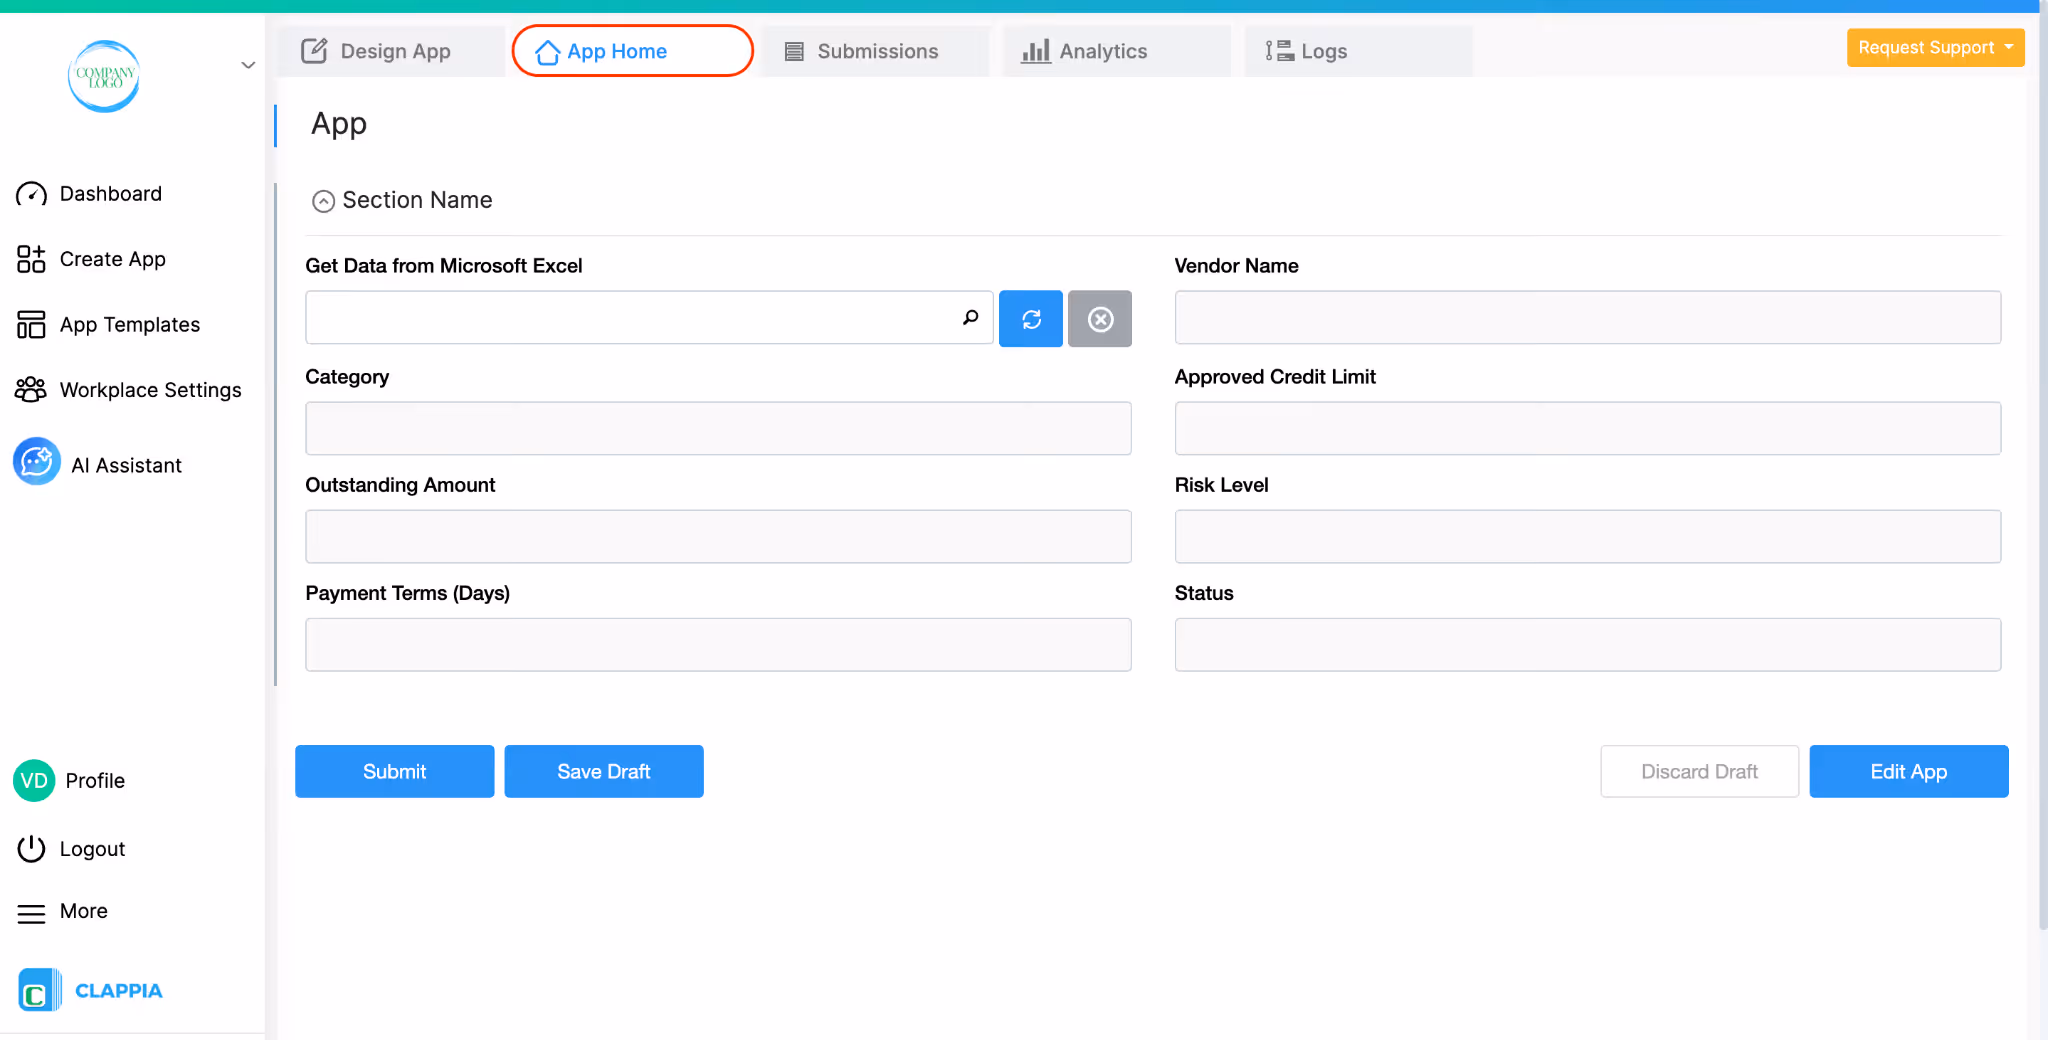
Let's say this is a vendor payment application. When a user opens the app in App Home, they will see the Get Data from Microsoft Excel field.
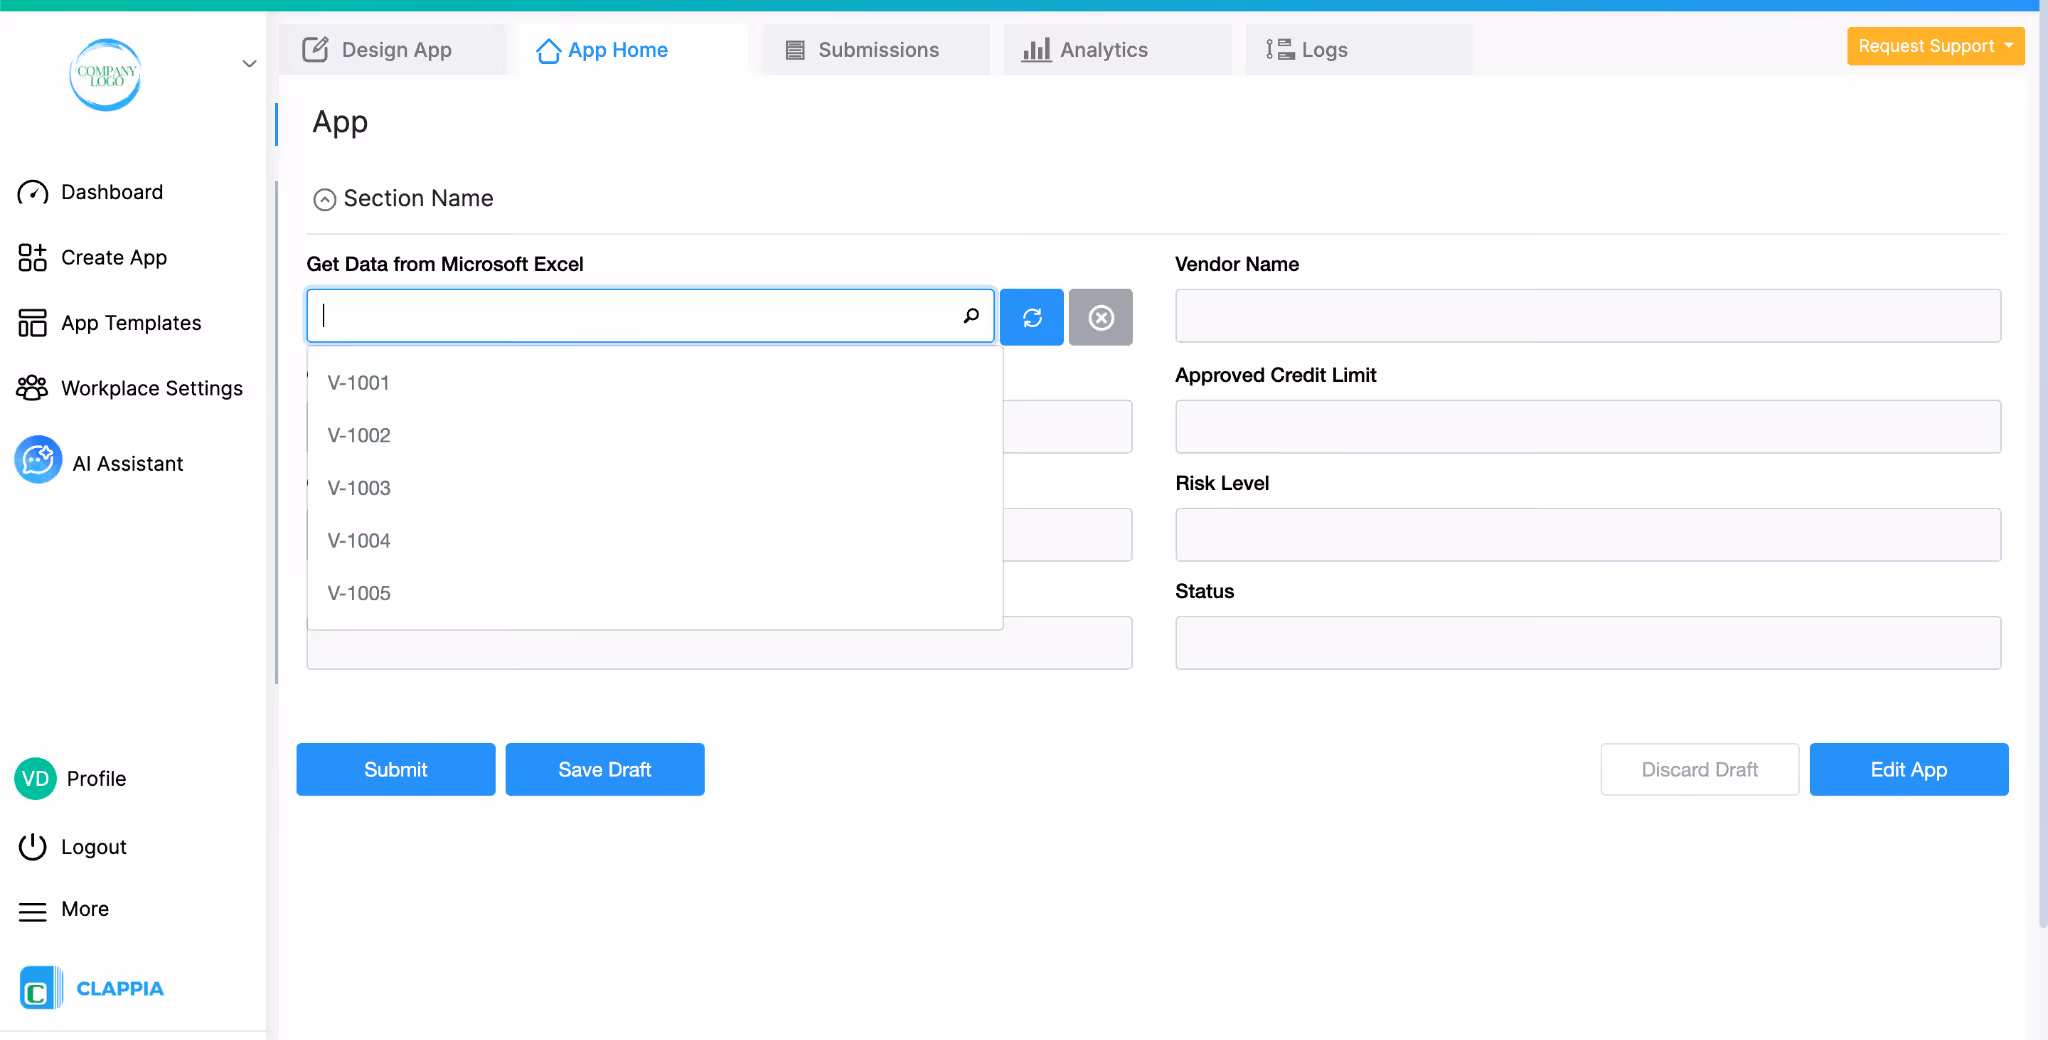
They can click on it and either type in a Vendor ID or select one from the dropdown list that appears which shows all available IDs from the Excel sheet.
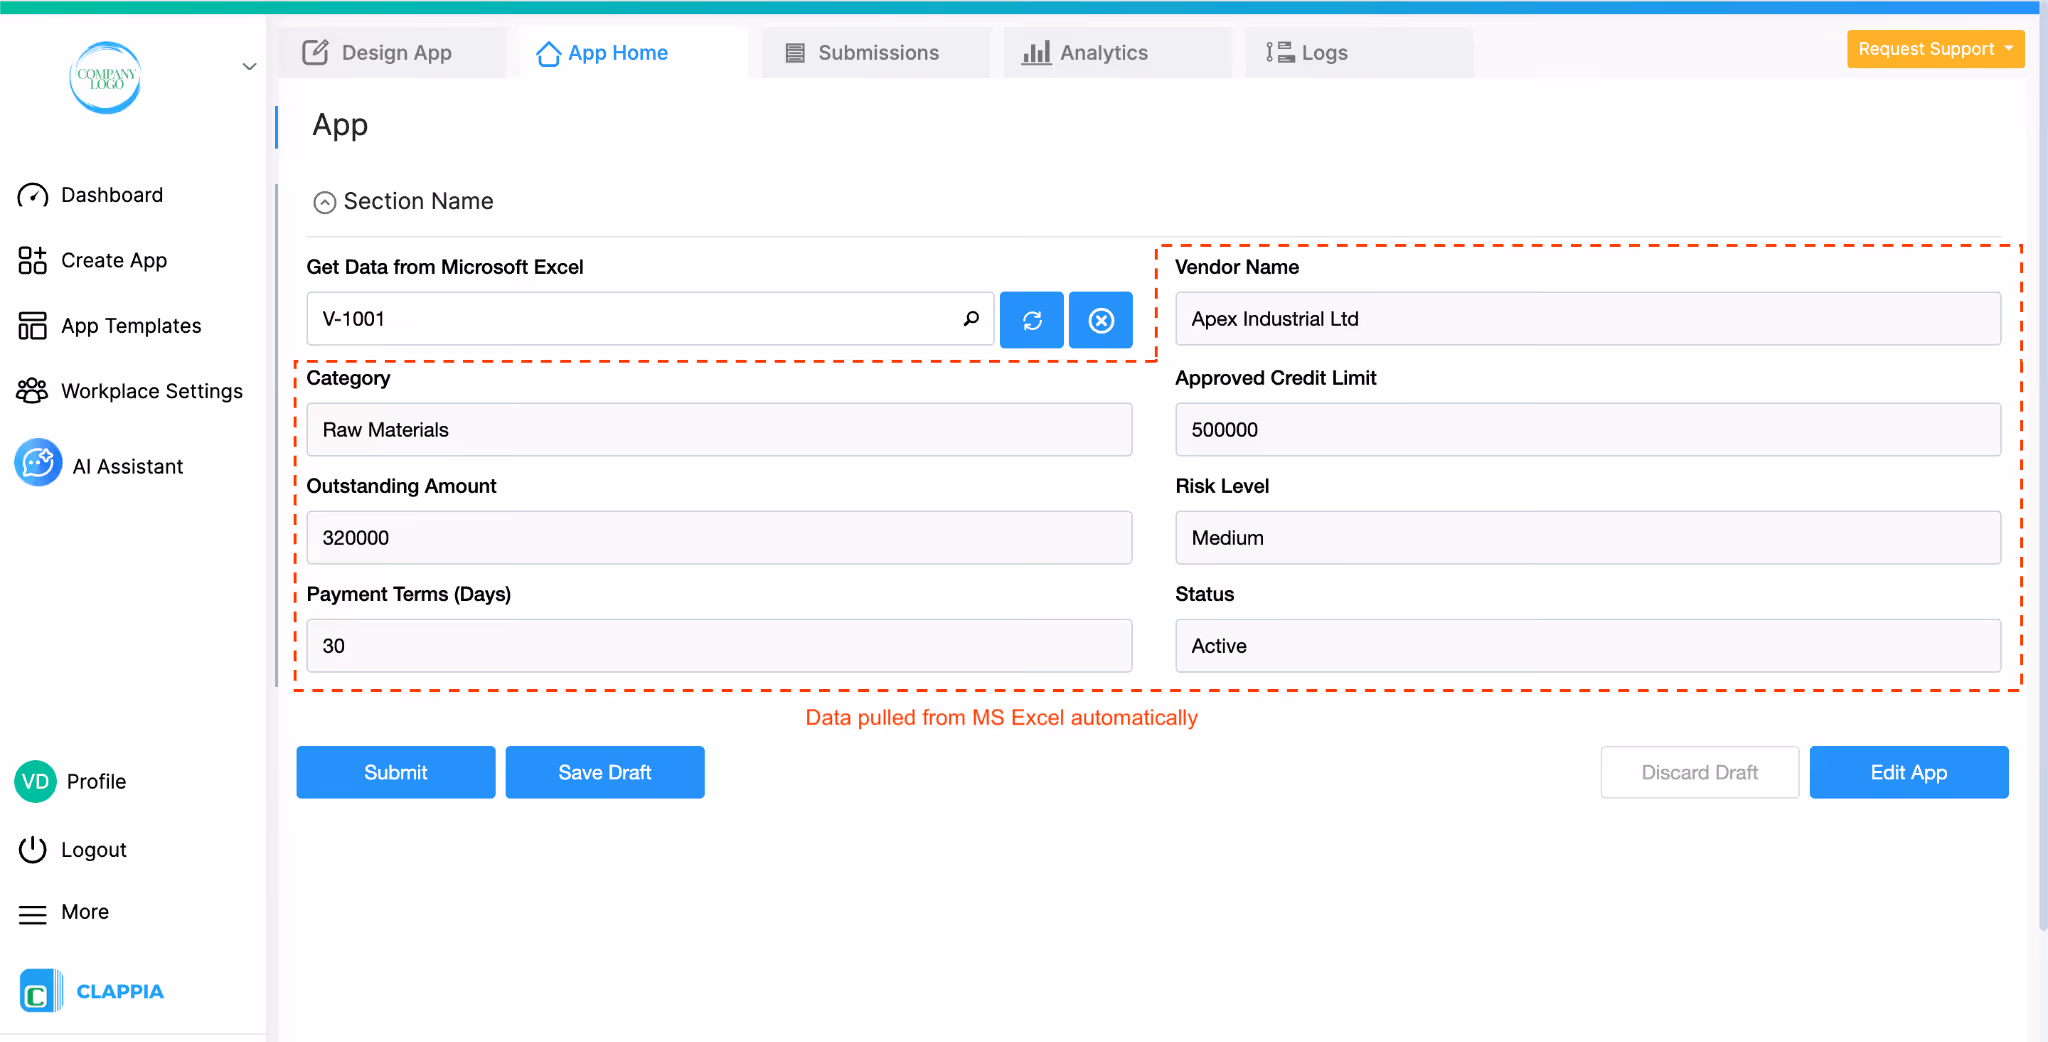
The moment they select a vendor, all the corresponding fields i.e. Vendor Name, Category, Approved Credit Limit, Outstanding Amount, Risk Level, Payment Terms, and Status are instantly filled in with the data pulled from the sheet. The user does not have to type any of this manually. They can then fill in any other fields in the app and submit.
Note: Once a submission is made, any changes you make to the Excel sheet later will not automatically update that submission. If you need to refresh the data on an existing submission, go to the Submissions tab, open the submission, and click the refresh button on the Get Data from Microsoft Excel field.
Values are automatically filled when a user selects a matching record from the Excel sheet.
Even though these fields are filled automatically, it is just displayed to the user. However, you can control whether users can edit these fields or whether they should remain hidden in the app.

By default, the fields that receive data from Excel are not editable by users. This ensures that the values pulled from the Excel sheet remain unchanged in the app.
However, in some cases you may want users to be able to modify these values after they are populated.
To allow this, in Design App > Click on the pulled field that you want users to be able to edit. In the right panel, go to the Advanced tab.
Enable the option Make this field editable.
Once this option is enabled, the field will still be auto-filled when a selection is made, but users will be able to edit the value if needed.
It is important to note that any edits made by users do not update the original Excel sheet.
The changes apply only to that specific Clappia submission.
This is useful when:
In some cases, the data pulled from Excel may be needed for calculations, workflows, or validations, but you may not want users to see those fields in the form.
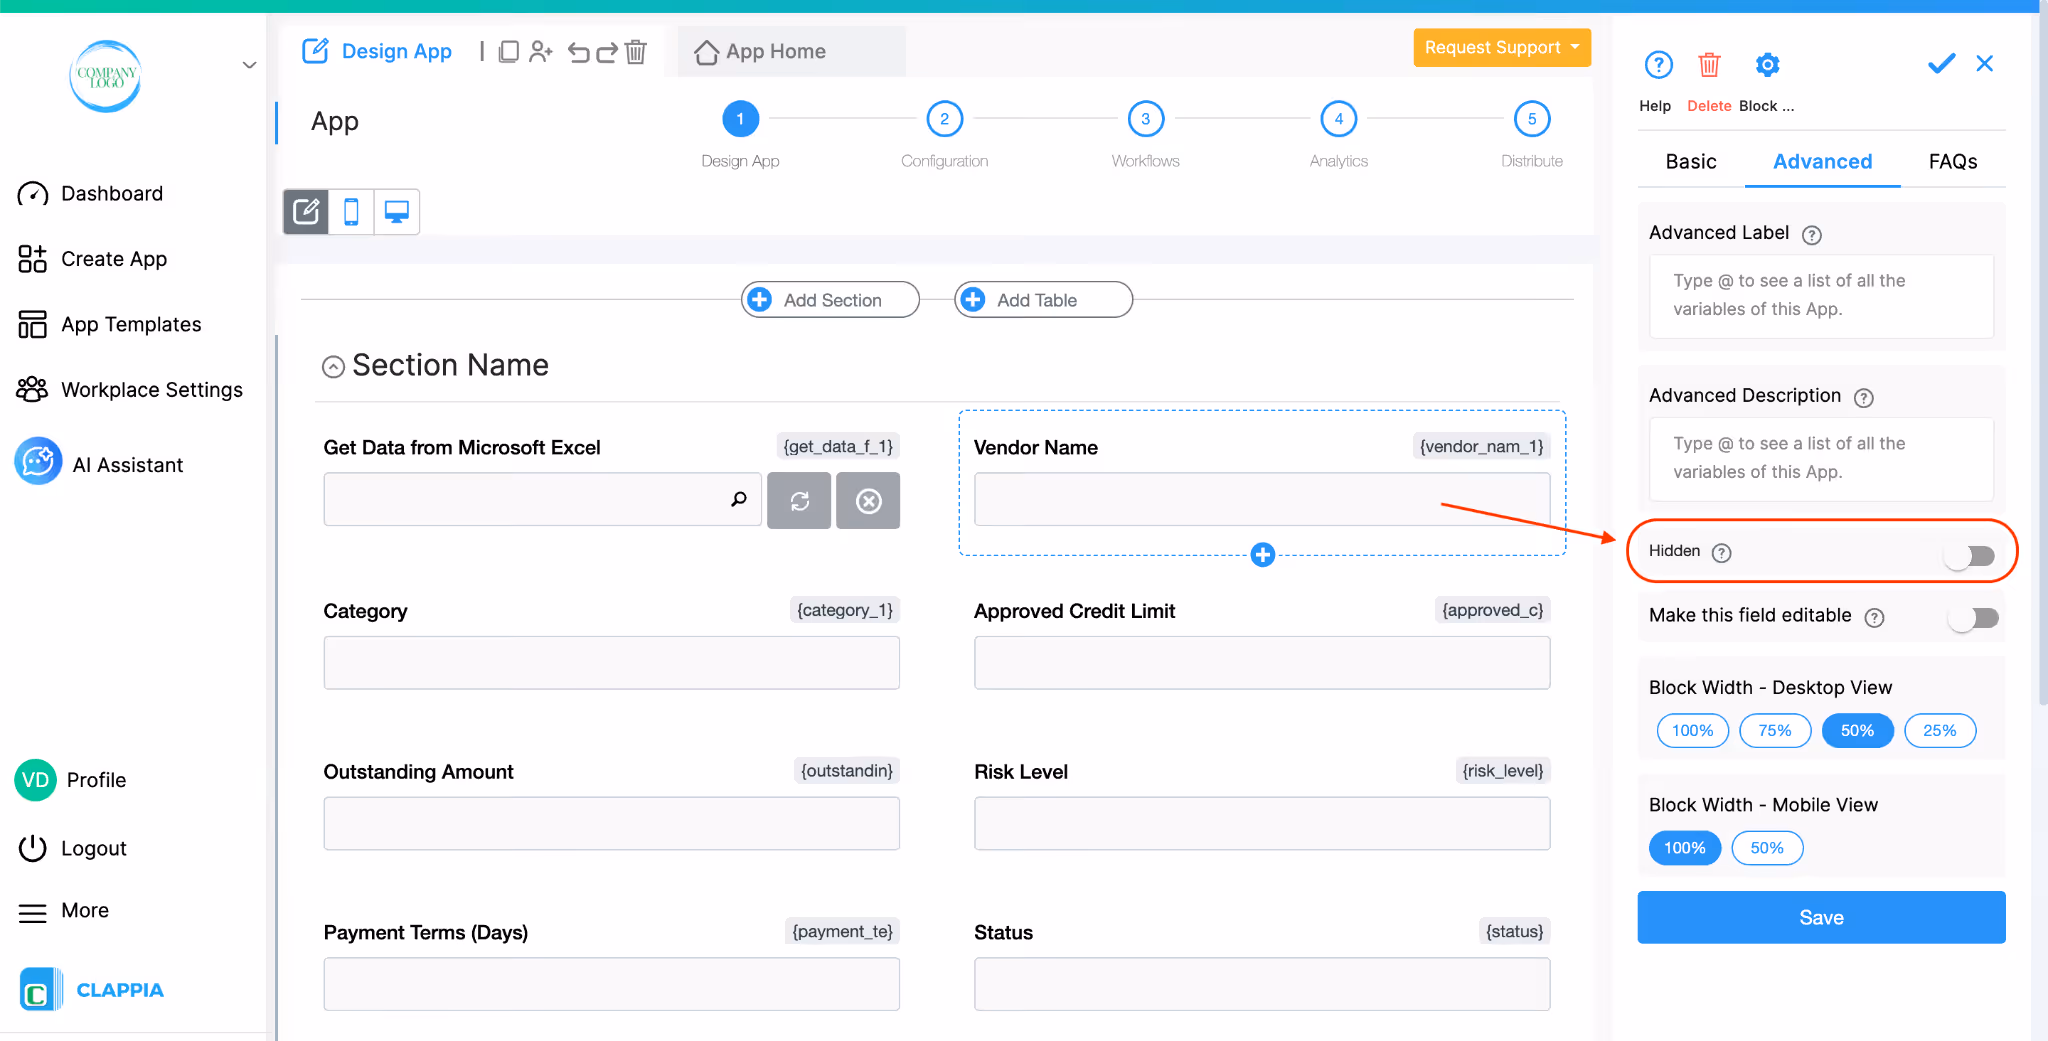
To hide a pulled field, in Design App > Click on the pulled field. In the right panel, enable the Hidden option.
When this option is enabled:
This allows the field to be used in formulas, conditional logic, workflows, or approvals while remaining hidden from the user interface.
Click on the Advanced tab in the right panel to access these options.
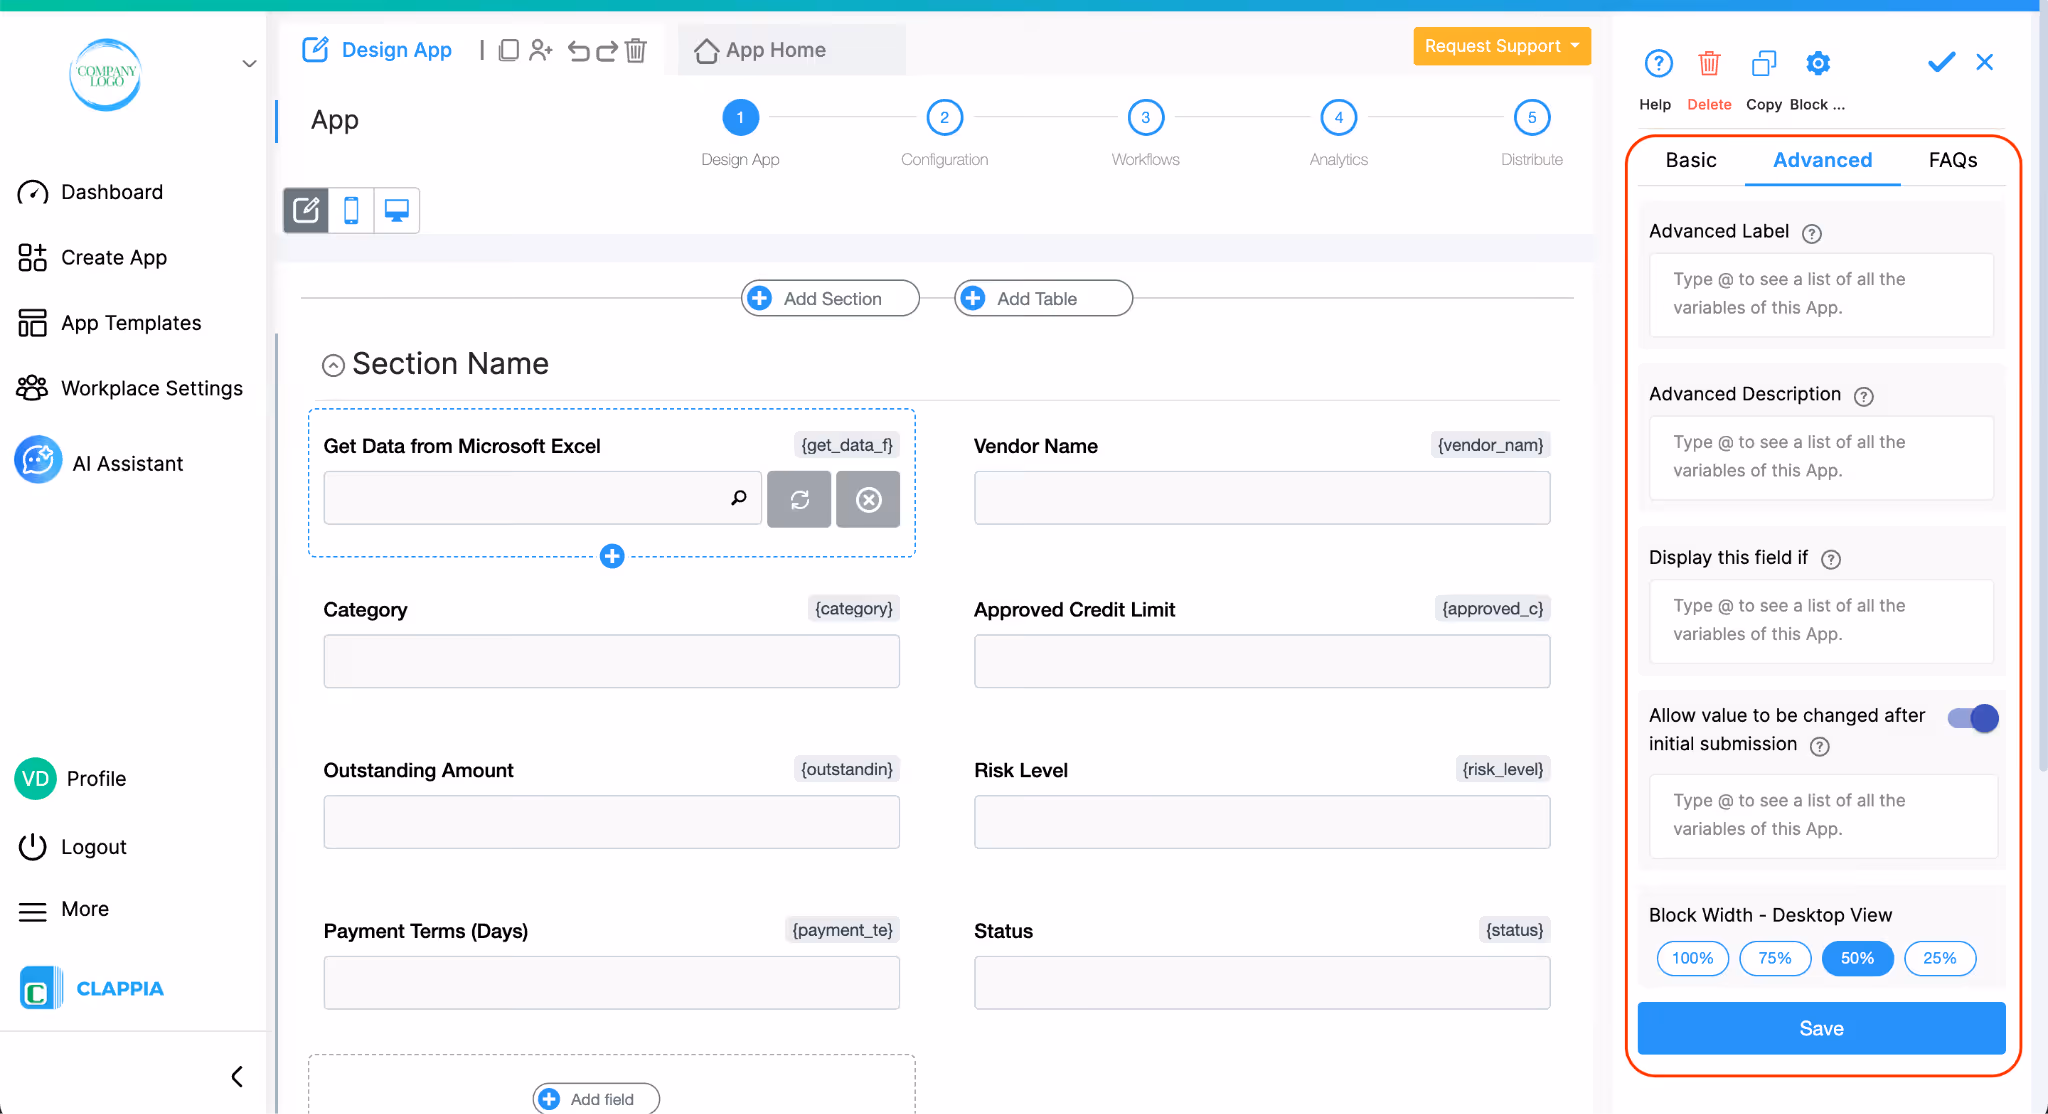
This lets you change the label of the block dynamically based on conditions you set using spreadsheet-like formulas. Instead of always showing the same label, the field can display different text depending on what the user has selected elsewhere in the form.
Type @ to reference other fields in your app and use standard Clappia functions like IF, AND, OR to build your condition.
For example, if your form has a dropdown called "Lookup Type" with options "Vendor Lookup" and "Product Lookup", you could set the label to change accordingly:
IF({lookup_type} = "Vendor Lookup", "Select Vendor", "Select Product")
This is useful when the same block serves different purposes depending on earlier selections in the form.
Works the same way as Advanced Label, but changes the description text instead. This is useful when the instructions for the field need to change depending on context. Using the same example above, you could show "Search by Vendor ID" or "Search by Product Code" depending on what the user picked in the Lookup Type dropdown.
1. Variables do not change
When a field is created, its variable name is derived from the label you set in the Basic tab. That variable name is what you must use in formulas, workflows, and other logic. The visible label or description shown by Advanced Label / Advanced Description does not change the variable name.
2. Submissions tab: table view vs right panel
In the Submissions area, the table view always displays the labels from the Basic tab. When you open an individual submission, the right panel shows the labels and descriptions as they appear in the form (i.e., the Advanced Label and Advanced Description applied for that submission). This keeps the submission list consistent while letting reviewers see the context-aware labels and descriptions when viewing a record.
3. Bulk Edit shows Basic tab labels and descriptions
When you need to Bulk Edit submissions, the spreadsheet you download shows the labels and descriptions from the Basic tab only. Advanced Label and Advanced Description are not applied in Bulk Edit, so keep that in mind when preparing bulk updates.
4. Some fields cannot be used inside Advanced Label/Description formulas
Certain block types do not expose a variable that can be referenced in Advanced Label or Advanced Description. If a block does not expose a variable, you cannot use it inside the formula.
Geo Address
GPS Location
PaymentGateway
Audio
Live Tracking
Signature
Code Scanner
NFC Reader
Get Data from RestApi
Get Data from Other Apps
Get Data from Google Sheets
Get Data from Database
AI Block
Text, HTML & Embedding
Attached Files
Image Viewer
Video Viewer
PFD Viewer
Code block
Progress Bar
Action Button
Use this option to show or hide the block based on a condition. For example, you may only want the Excel lookup to appear if the user has selected a specific option in another field. You can define the condition using standard Clappia formulas and field variables.
Type @ to select a field and build the logic.
This option appears once you set a condition in Display This Field If. When enabled, the value already selected in the block will be preserved even if the field becomes hidden due to the condition being unmet. This is useful when you want the data to stay in the submission even if the field temporarily disappears from the form.
By default, once a submission is made, the data pulled from Excel is locked. Enable this toggle if you want to allow users or admins to change the selection and re-pull data when editing a submission. This is helpful in cases where the form may need to be updated with a different record from the sheet after the initial submission.
This controls how wide the block appears on a desktop screen. You can set it to 100%, 75%, 50%, or 25% of the form width, depending on how you want the layout to look.
L374, 1st Floor, 5th Main Rd, Sector 6, HSR Layout, Bengaluru, Karnataka 560102, India
3500 S DuPont Hwy, Dover,
Kent 19901, Delaware, USA


3500 S DuPont Hwy, Dover,
Kent 19901, Delaware, USA
L374, 1st Floor, 5th Main Rd, Sector 6, HSR Layout, Bengaluru, Karnataka 560102, India
.svg)
