

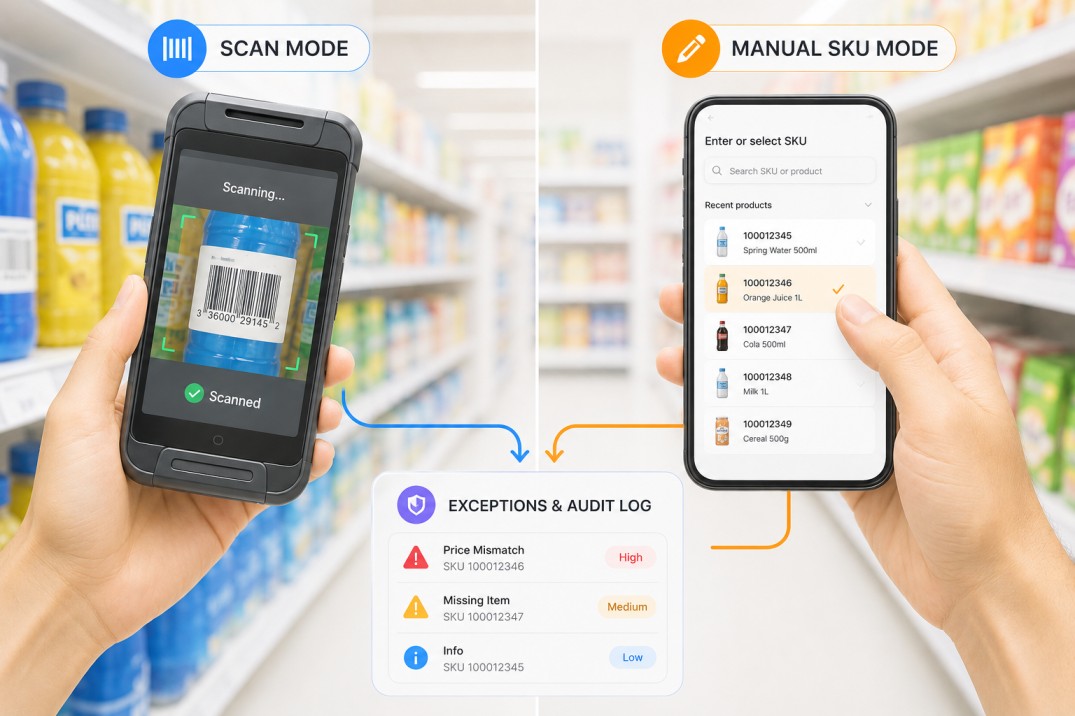
Any team that conducts physical stock audits across multiple locations will eventually face the same practical question: should auditors scan barcodes or select products manually? The answer is rarely one or the other. In a single audit session, a field auditor might scan fifty products without issue, encounter three with damaged labels, and find two more that appear in the store but are not in the barcode master at all. A rigid choice of one method forces workarounds on every exception.
Building an audit app that supports both capture modes in a single form eliminates this problem. The auditor selects the method that suits the product in front of them, the app routes them through the appropriate fields, and both paths produce an identical structured record in the exception log. From a reporting standpoint, it does not matter which mode was used; the data is consistent either way.
This article compares scan and manual SKU capture as they are implemented in a Clappia-built store audit app. It covers the full user path for each mode, the specific situations where each performs better, the exception detection logic that applies to both, and how the automated exception log receives identical data regardless of which mode the auditor used. If you are designing an audit app or evaluating how to configure capture modes for your team, this comparison gives you the specifics needed to make that decision confidently.
The audit form presents both modes through a single Radio Button block labelled Capture Mode with two options: Scan SKU and Manual Entry. Display Conditions on each section mean only the selected mode's fields are visible. The other section is hidden entirely, not greyed out, which keeps the form uncluttered and removes any ambiguity about which fields the auditor should be filling in.
Switching between modes is possible mid-session by changing the radio selection. In practice, most audit sessions are predominantly one mode or the other, with the occasional switch when a specific product cannot be handled by the primary method. The form accommodates this without requiring a new submission or a separate form.
Scan mode is designed for speed. The premise is that the auditor points the phone camera at a barcode, the app resolves the scan to a product record, and the auditor's only manual inputs are the physical price and quantity they observe on the shelf. Everything else fills in automatically.
The scan field uses Clappia's Barcode Scanner block. When the auditor scans a product's EAN barcode, the block reads the code and triggers a lookup against the Product Master. Four fields auto-fill from the matched record:
These four fields are read-only. The auditor cannot edit them. Their purpose is confirmation: the auditor sees the product name and master price and can verify they are looking at the right item before entering their observations.
After the scan resolves, the auditor enters two values:
That is the entire data entry requirement for a clean scan. Two numbers, and the submission is ready for this product line. For a well-maintained store with good barcode labels, this makes scan mode significantly faster than manual entry: a trained auditor can cover a shelf section in minutes.
Scan mode checks for one type of exception: a price mismatch between what the master says and what the auditor observes. If the auditor's Physical MRP does not equal the Master MRP that was auto-filled from the scan, a warning label appears and an additional field becomes visible: New MRP. This field captures the shelf price the auditor is actually seeing. Filling it in is what triggers the exception log entry when the form is saved.
Scan mode does not check for quantity discrepancies against a master value. This is a deliberate distinction: scan mode does not have access to a store-level stock master during the lookup, so it cannot compare the auditor's count against an expected quantity. If quantity comparison is important for a particular audit, manual entry mode should be used for those product lines.
Manual entry is the more capable mode in terms of data comparison, at the cost of slightly more interaction per product. Instead of a barcode scan, the auditor searches for and selects the product by its material code. The app then runs two separate lookups: one against the product master for description and price, and one against a store-level stock reference for the expected quantity and location-specific price.
The auditor uses a Get Data from App block configured as a searchable dropdown. They type part of the material code or description, select the correct product, and three fields auto-fill from the Product Master:
There is also an auto-generated EAN Code field produced by a Formula block in the form. This formula calculates a valid EAN from the material code by applying your organisation's GS1 company prefix and computing the check digit. It uses the Material Code field as its input variable. The formula looks like this in Clappia:
Formula field: EAN Code (Auto)
Uses: {Material Code} as the input variable
Output: a calculated EAN value that the auditor sees displayed alongside the manually entered or looked-up EAN for cross-reference
This auto-generated EAN is particularly useful when a product's barcode is damaged or missing, because the auditor can confirm the expected EAN without needing to scan it.
This is the capability that distinguishes manual entry from scan mode. After the product is selected, a second Get Data from App block performs a store-specific lookup using two keys simultaneously: the Location ID of the store being audited (auto-filled from the store identification section at the top of the form) and the Material Code selected by the auditor. Together, these identify the exact record in the store-level stock reference for this product at this location. The lookup returns:
The Location ID field used as one of the two lookup keys is set as visible only to designated support users in Clappia's Display Conditions. Regular auditors do not see it in the form, but the lookup uses it behind the scenes for all users. This keeps the auditor's view clean while the system still accesses the necessary reference data.
After both lookups complete, the auditor enters:
Manual entry mode checks for two types of exceptions, not one:
Both checks happen in real time as the auditor enters values. They see the warning the moment a discrepancy is detected, before they move to the next product. This immediate feedback is one of the key advantages of manual entry mode: the auditor knows about a quantity discrepancy on the spot and can recount before submitting, rather than discovering it after the fact in a report.
| Aspect | Scan SKU | Manual Entry |
|---|---|---|
| Product identification | EAN barcode scanned via camera; resolves to product record instantly | Material code searched and selected from a dropdown lookup |
| Auto-filled fields | Material Code, EAN Code, Master MRP, Product Name | SKU Description, EAN Code, Master MRP, plus auto-generated EAN via formula |
| Auditor inputs | Physical MRP and Physical Quantity only | Total Quantity and Physical MRP |
| Exception: price mismatch | Detected; New MRP field appears when Physical MRP does not equal Master MRP | Detected; New MRP field appears when Physical MRP does not equal Master MRP (Store) |
| Exception: quantity mismatch | Not checked; no store-level quantity master available in scan mode | Detected; warning appears when Total Quantity does not equal Master Quantity |
| Store-level stock comparison | Not available | Available via two-key lookup using Location ID and Material Code |
| Auto-generated EAN | Not applicable; EAN comes from the scanned barcode | Calculated by formula from Material Code for cross-reference |
| Speed per product | Faster for products with readable barcodes; minimal manual input | Slower; requires typing or selecting material code and entering two values |
| Works without barcode | No; requires a scannable EAN | Yes; material code can be searched without a physical barcode |
| Exception log output | Identical fields: date, time, store name, location ID, material code, product description, EAN, observed MRP, quantity, remarks | Identical fields: same as scan mode |
The right choice depends on what the audit needs to accomplish and what physical conditions the auditor is working in. Here is a practical decision guide:
The audit app does not force a choice for the entire session. An auditor can scan most products on a shelf, switch to manual entry for a product with a damaged label, and switch back. The mode radio button is always accessible, and the Display Conditions respond immediately.
The practical approach for most audit teams is to default to scan mode for shelf products and have manual entry available as the fallback. Auditors who know they are doing a full stock reconciliation, where quantity comparison matters, often default to manual entry for the entire session to ensure consistent data across all captured products.
Despite their differences in data collection, both modes produce exactly the same output when an exception is recorded. This is by design: the exception log serves as the reporting layer, and it needs to be consistent regardless of how each entry was captured.
When either mode's New MRP field is filled, the On Save workflow fires. It sets the submission status to New MRP Not in Master and creates a new submission in the Exception Log app. The field mappings are identical for both modes:
| Exception Log Field | Source from Scan Mode | Source from Manual Entry Mode |
|---|---|---|
| Date | Auto-captured at time of submission | Auto-captured at time of submission |
| Time | Auto-captured at time of submission | Auto-captured at time of submission |
| Store Name | From store identification section | From store identification section |
| Location ID | From store identification section | From store identification section |
| Material Code | Auto-filled from barcode scan lookup | Selected by auditor from material code dropdown |
| Product Description | Product Name (auto-filled from scan) | SKU Description (auto-filled from material lookup) |
| EAN Code | EAN Code (auto-filled from scan) | EAN Code (auto) calculated by formula from material code |
| Observed MRP | Physical MRP entered by auditor | Physical MRP entered by auditor |
| Total Quantity | Physical Quantity entered by auditor | Total Quantity entered by auditor |
| Remarks | From verification section | From verification section |
The result is a flat, structured exception log where every row looks the same regardless of whether a barcode was scanned or a material code was selected. The field names, data types, and structure are consistent across all entries, which means filtering, grouping, and analysing the exception data does not require any conditional logic or mode-specific handling.
The value of supporting both capture modes is not just operational flexibility for the auditor. It is data consistency for the analyst. When both paths produce identical output, the exception log can be treated as a single reliable source without having to account for how each entry was created.
Regardless of which capture mode was used, every audit submission passes through the same verification step before it can be saved. This final section of the form contains two elements:
Placing the Submit button only in this verification section serves a practical purpose: the auditor cannot save the form while still mid-capture in the product entry fields. They must reach the verification step before submission is possible, creating a natural checkpoint between capture and commit.
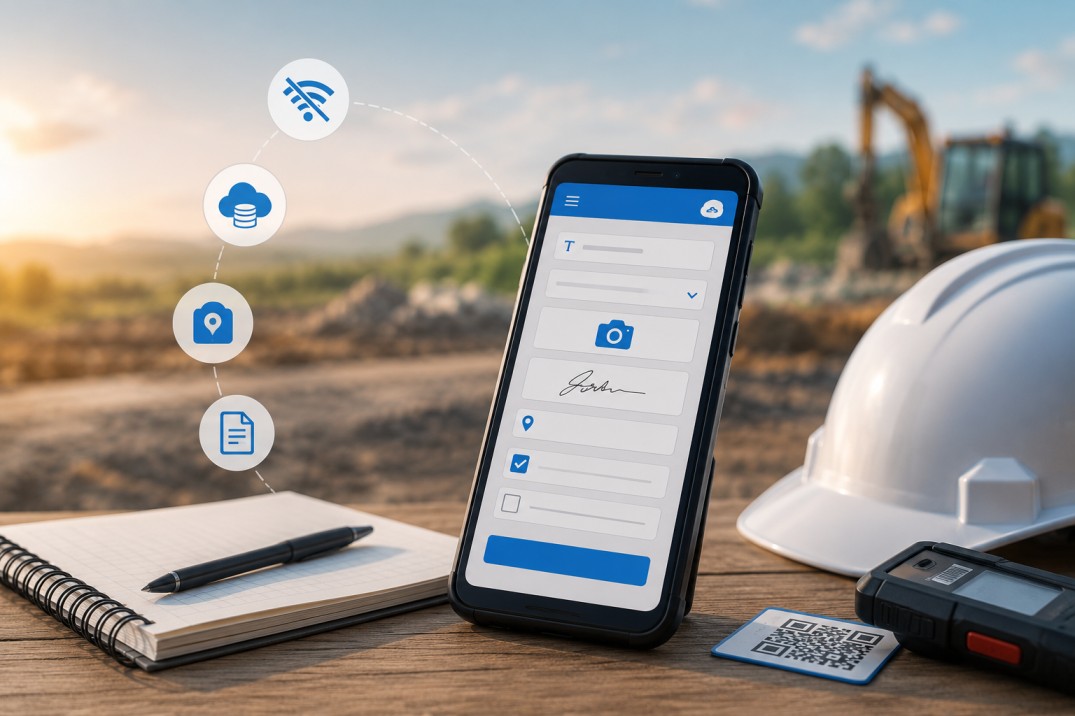
Both scan and manual entry modes work in offline mode on the Clappia mobile app (available for Android and iOS). The barcode scanner operates using the device camera without a network connection. Manual entry lookups work offline if the reference data, specifically the Product Master and Store Stock Reference, has been cached on the device before the session. Auditors should open the Clappia app on Wi-Fi before entering the store to sync the latest master data.
Submissions queue locally if saved offline and sync to the server once connectivity is restored. The exception log workflow fires after sync, so exception records appear in the log with a slight delay if the form was saved offline.
For user permissions, field auditors are typically given Submit Only access to the audit app. They can fill in and save forms and view their own submissions, but they do not see other auditors' records or access the reference apps. The Location ID field, which is used by the manual entry stock lookup, can be set to visible only for support or admin users via Display Conditions, keeping it hidden from regular auditors while still active in the lookup logic.
To set up the dual-mode capability in Clappia, the key configuration steps are:
Because both modes write to the same Exception Log with identical field names, all analytics and reporting built on that log apply uniformly. Clappia's Analytics feature can build live dashboards on the exception data with no mode-specific filtering required. Useful views include:
The fact that both modes feed the same destination with the same structure is what makes this analytics layer possible without additional configuration. The exception log is mode-agnostic by design, which means every report built on it is valid regardless of how the underlying data was captured.
Scan SKU mode is fast, simple, and well-suited to price checks across large product ranges with good barcode coverage. Manual entry mode is more thorough, supports quantity comparison against a store-level stock master, and handles situations where barcodes are unavailable. Neither mode is universally superior; the right choice depends on the audit type, the physical environment, and what exceptions need to be detected.
The practical advantage of building both into a single Clappia app is that the decision does not have to be made at the app design stage. Auditors make it in the moment, product by product, and the form accommodates both without requiring separate submissions or separate reporting flows. The exception log receives the same structured data either way, and any analytics built on it remain valid regardless of which mode produced each entry.
If you are building a retail store audit app in Clappia and want both capture modes configured correctly from the start, the setup steps in this article cover everything needed: from the Radio Button block and Display Conditions through to the dual-mode exception logging workflow. Get started at clappia.com.
L374, 1st Floor, 5th Main Rd, Sector 6, HSR Layout, Bengaluru, Karnataka 560102, India
3500 S DuPont Hwy, Dover,
Kent 19901, Delaware, USA


.svg)




3500 S DuPont Hwy, Dover,
Kent 19901, Delaware, USA
L374, 1st Floor, 5th Main Rd, Sector 6, HSR Layout, Bengaluru, Karnataka 560102, India

.avif)




.jpg)