
Still need help?

In some business processes, you may have a scenario where a user needs to complete something within a fixed duration after clicking a button, for example, starting a timed task where they have a limited amount of time to finish or where an action should automatically happen after a delay.
In such cases you can use the Timer option inside the Action Button block in Clappia. The timer lets Clappia wait for a defined duration or a specific date/time after the button is clicked, and then trigger a configured outcome.
In this guide, you will see how to set this up step by step.
Let’s say you have an internal quality check or inspection app.
This ensures that inspections are time-bound and cannot remain open indefinitely.
Sign in to Clappia and open your app.
Go to ‘Design App’.
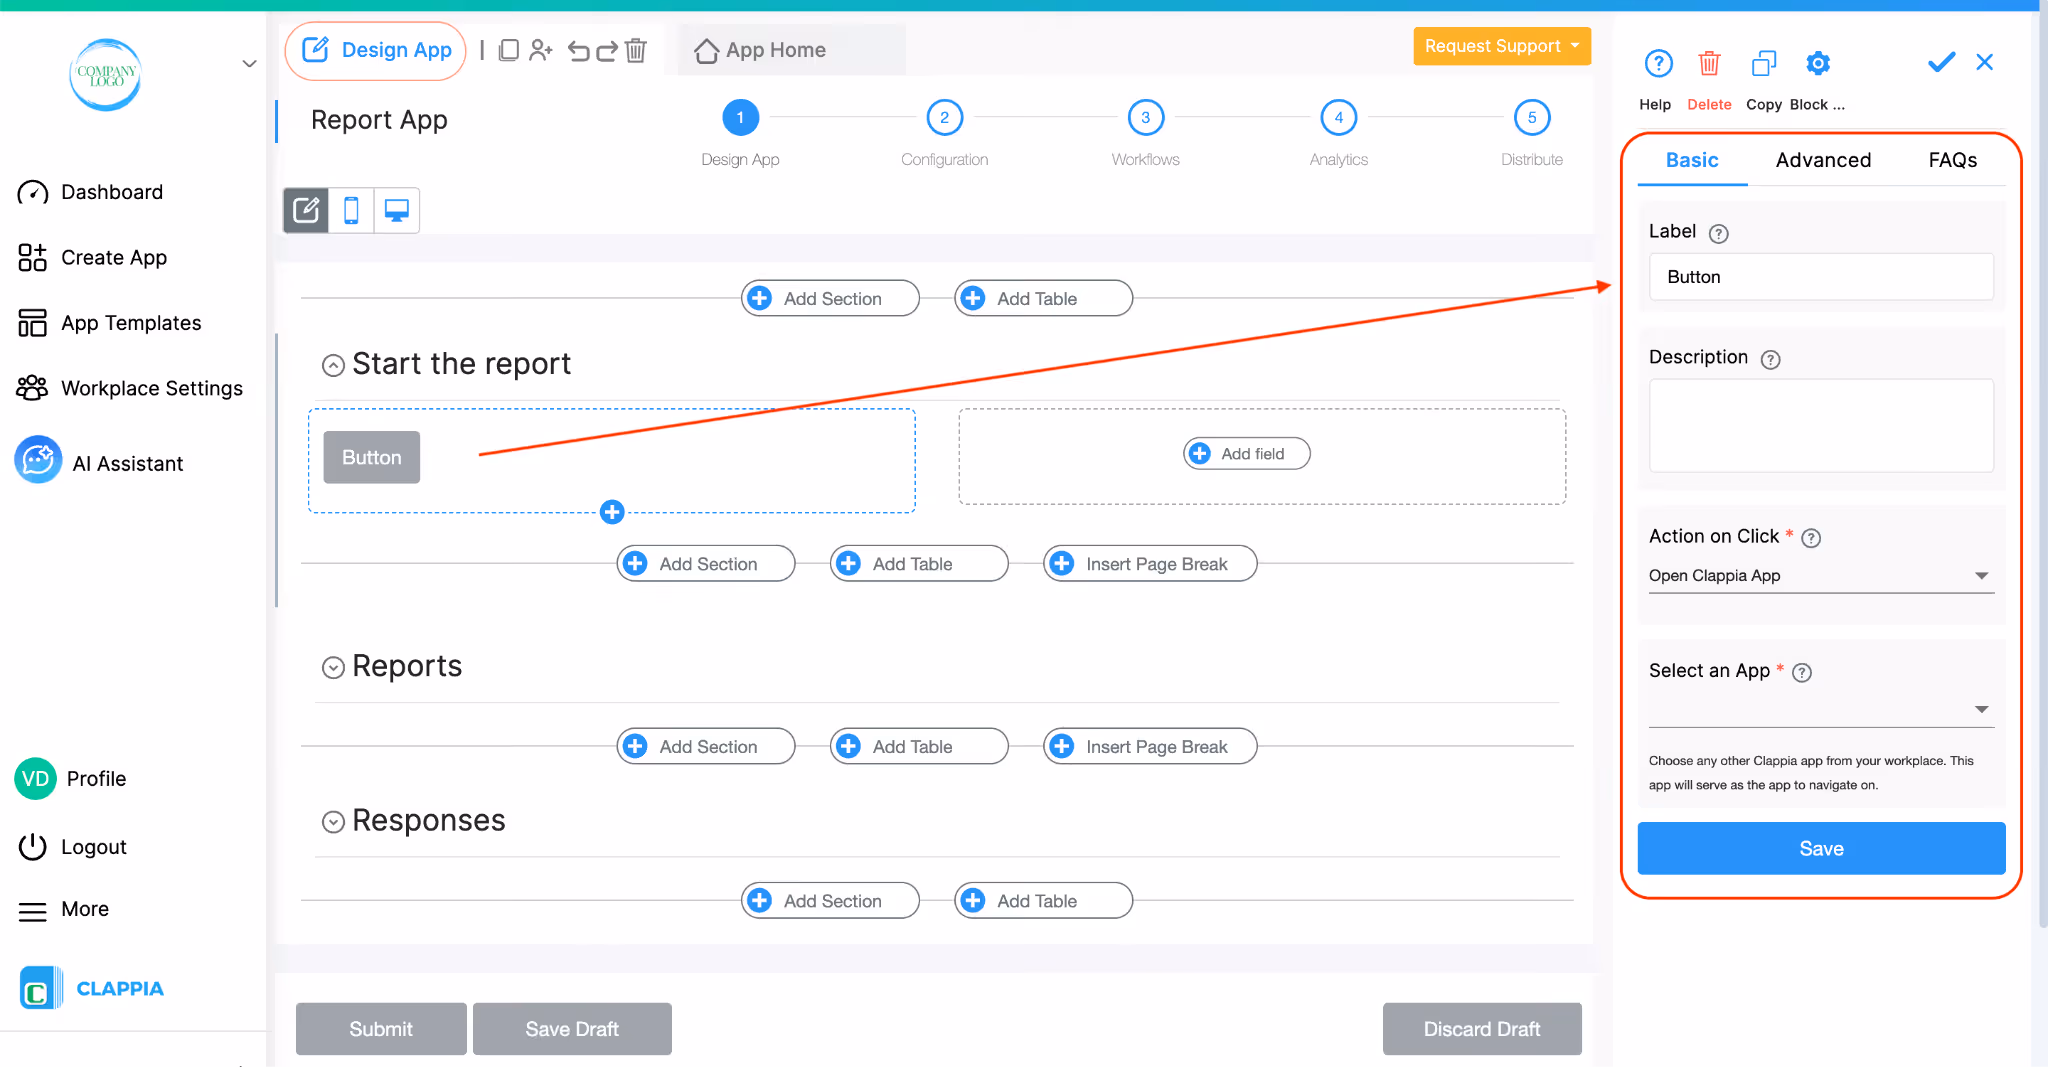
Add an ‘Action Button’ block to the form. On the right panel, first give it a name, let’s say “Start Inspection”.
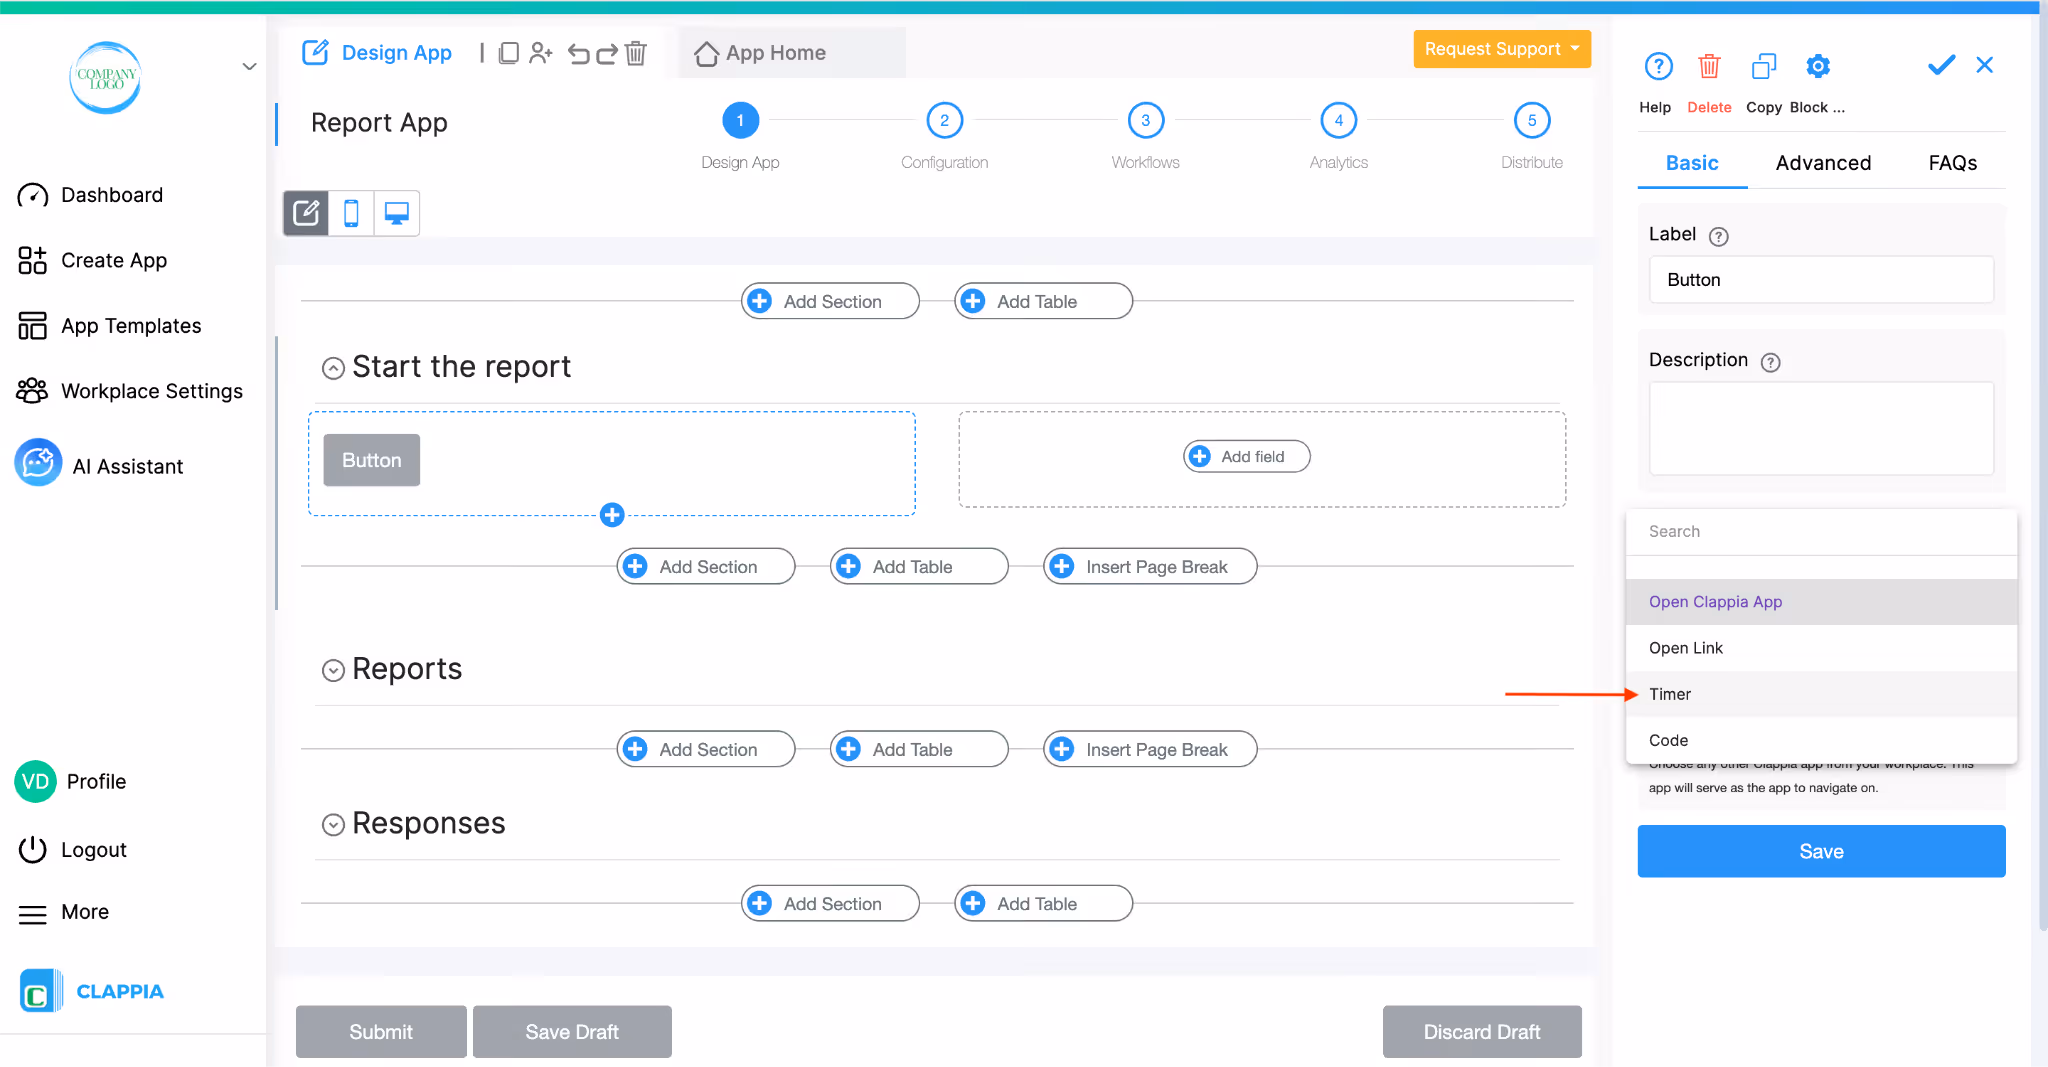
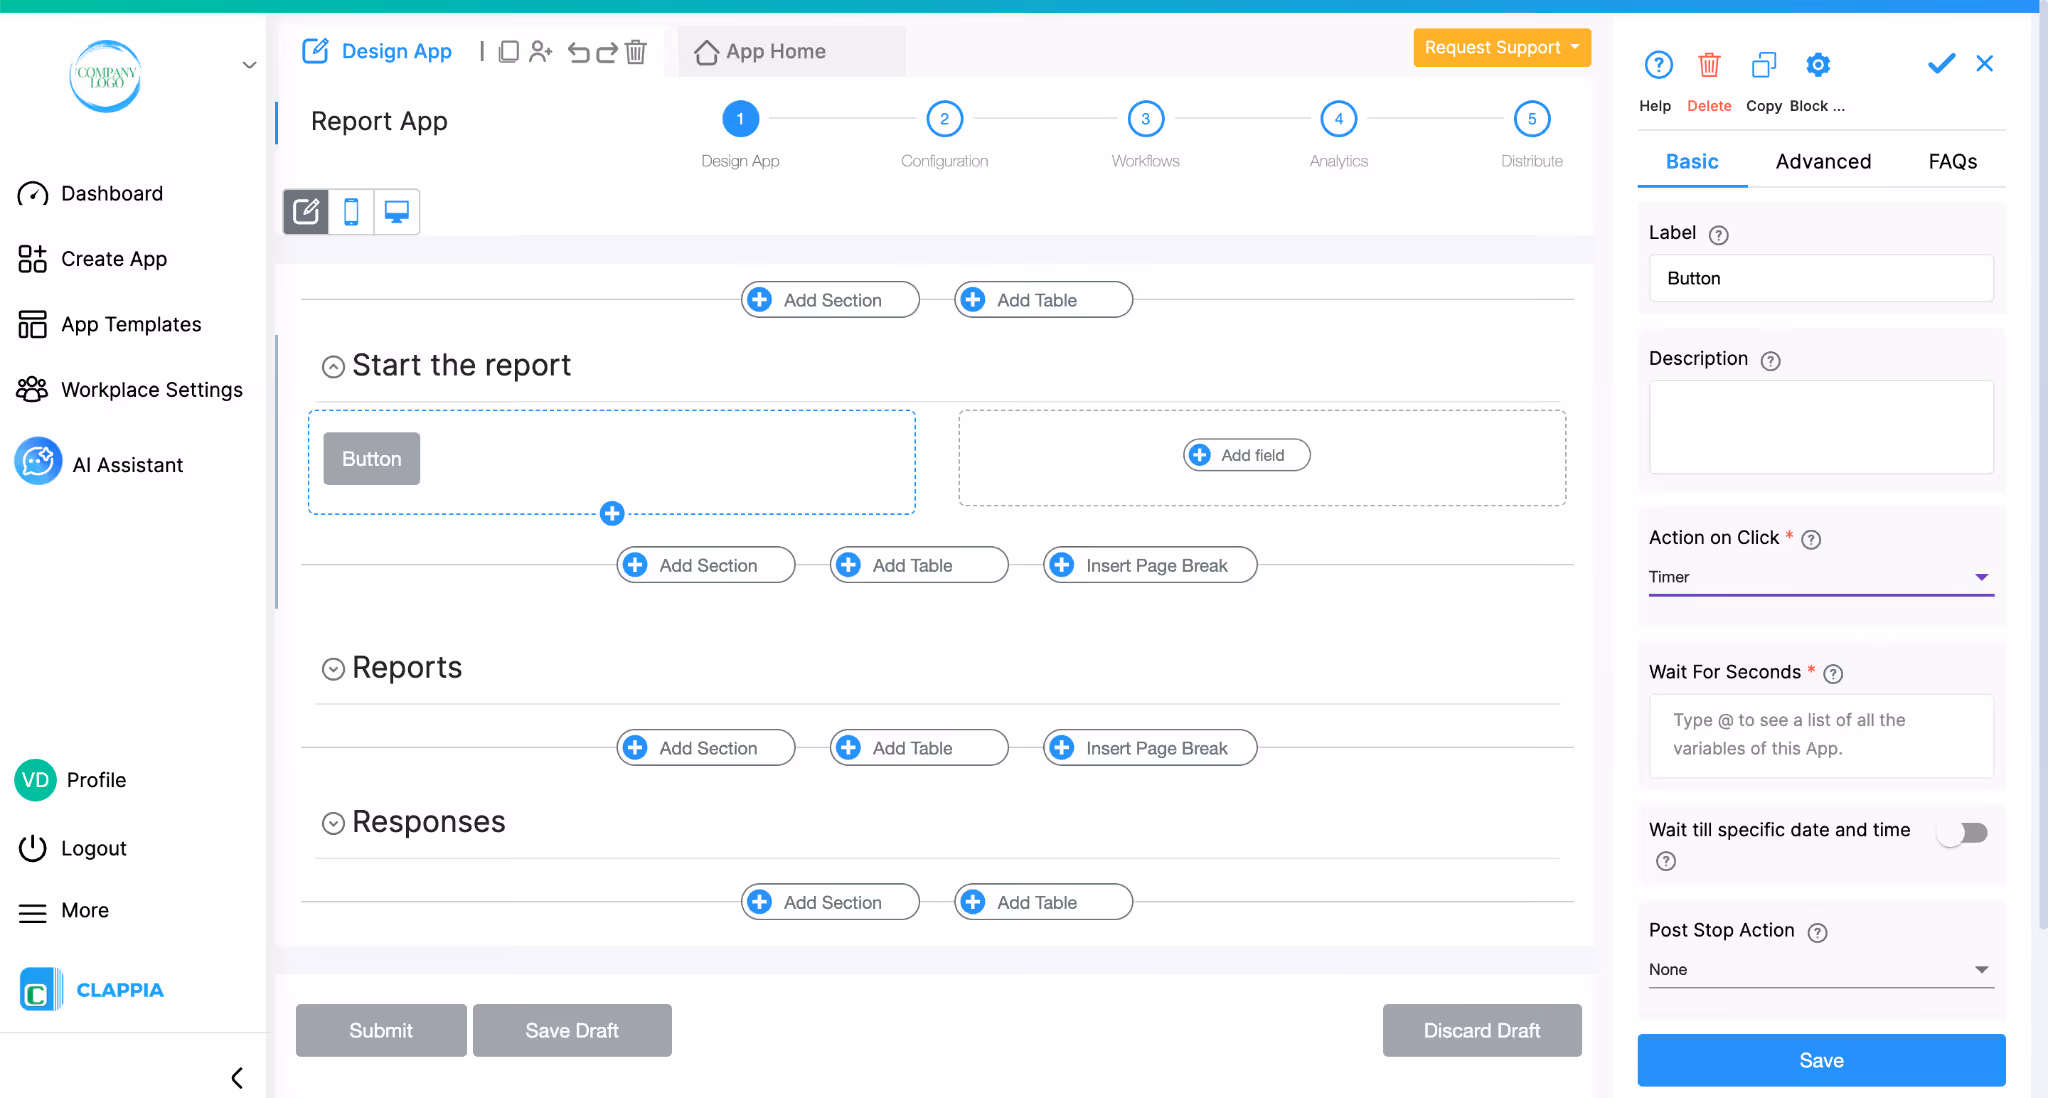
Then under ‘Action on Click’, select Timer.
Once Timer is selected, the timer-related configuration options become available.
Since in this example, the inspection needs to last for 30 minutes, you can use the option Wait For Seconds and enter the duration for which the inspection should remain active in seconds.
So for a 30-minute inspection, enter 1800.
This value represents how long the system should wait after the button is clicked.
You can enter the value directly, or type @ if you want to pull the duration dynamically from another field in the app.
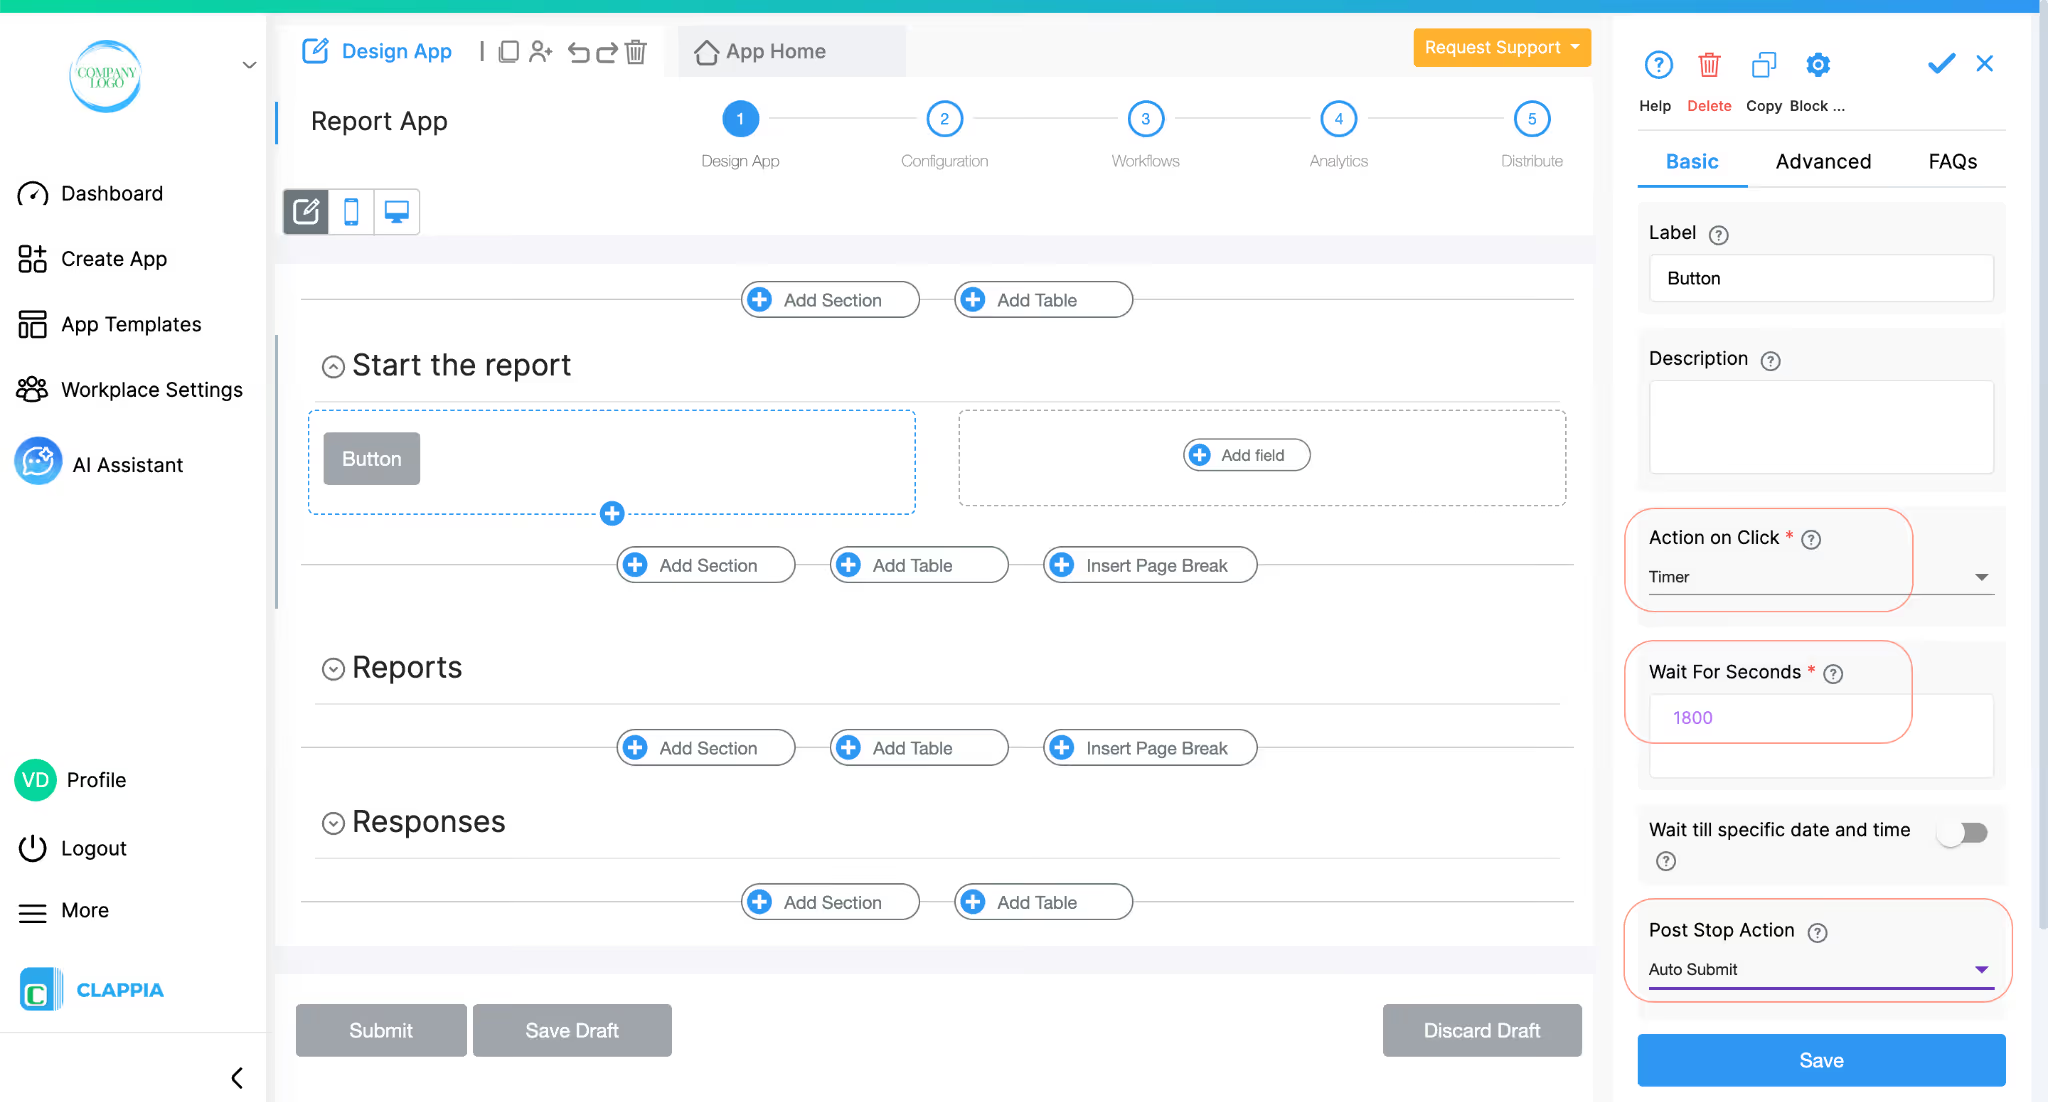
Under Post Stop Action, select Auto Submit.
This means that once the timer completes:
Save the Action Button configuration after this.
When the user clicks the Start Inspection button, the timer starts running in the background.
The user can continue filling in inspection details and interacting with the form during the next 30 minutes.
Once the 30 minutes are over, the timer stops and the Post Stop Action is triggered. Since Auto Submit is selected, the form is submitted automatically at that point.
The user cannot extend the inspection duration or prevent submission once the timer ends.
In this setup, only Wait For Seconds is used.
The Wait till specific date and time option can be used when the action needs to stop at a fixed date and time instead of running for a duration. For example, when a form must close at a predefined deadline for all users.
This type of timer-based setup is commonly used in scenarios such as:
L374, 1st Floor, 5th Main Rd, Sector 6, HSR Layout, Bengaluru, Karnataka 560102, India
3500 S DuPont Hwy, Dover,
Kent 19901, Delaware, USA


3500 S DuPont Hwy, Dover,
Kent 19901, Delaware, USA
L374, 1st Floor, 5th Main Rd, Sector 6, HSR Layout, Bengaluru, Karnataka 560102, India
.svg)
