
Still need help?

This article explains the features of the Single Line Text block and how it can be used to design your app.

1. Short Answers
2. Numbers
3. Emails
4. Phone Numbers5. URL
Click on the block and configure it by editing on the right panel.
.webp)
.png)
The label is the name of the block that the end user sees in the app.
Example: Company Name is written as the label and is saved.
The description is the additional information provided to the end user which will be displayed below the input area.
Example: Enter the company name as in legal docs is written as the label and is saved.
This is how the Single line text block with the label and the description will look to the end user.

This is the default value that you want to add so that the end user will see the pre-filled data and doesn’t need to input any data in the single line text block.
Enable this option if you want the user to compulsorily input the data. If enabled, the end user can submit if and only if the data is entered in this field.
.png)
Enable this option to show the advanced options to configure the single line text block.
Use this if you want to show or hide a field under certain conditions. It accepts the standard Clappia Formulae, similar to conditional sections.
Example: For a Yes or No question, you can show the remarks field when the answer is No.
.png)
This option is enabled by default. End users can edit the value entered in this field after creating a submission. Disable it if you do not want the end users to edit the submitted value.
Example: A new submission has been created in the Customer Visit app. You do not want the customer's name and other details to be edited by anyone after the submission has been created.
You can also write a formula here to conditionally allow editing of the data in the block after submission.
Example: In the customer visit app, the customer email field should be editable if and only if the status of the submission is not equal to Confirmed or if the user is an admin.
.png)
Select the proper validation for the single line text block to receive specific input from the end user.

Example: A single line text block is used and labeled as Quantity. You want the end user to enter the quantity of not less than 5 kgs in one go.

Custom validation condition
Type ‘@’ and select the quantity block and enter the condition as {quantity}>5.
Custom error message
Error! Please enter more than 5 kgs.
Here is how the final app will look if the user enters a value less than 5 in the "Quantity" field.

The Dynamic Value option allows you to set a value for the field dynamically. If both Default value and Dynamic Value are configured, the Dynamic Value will take priority and will be shown as the default input in the app which can be changed by the user later.

When configuring, you can:
@ and selecting the required fieldFor example, lets say there is an app that has a field for vendor id and a single line text called Invoice number.

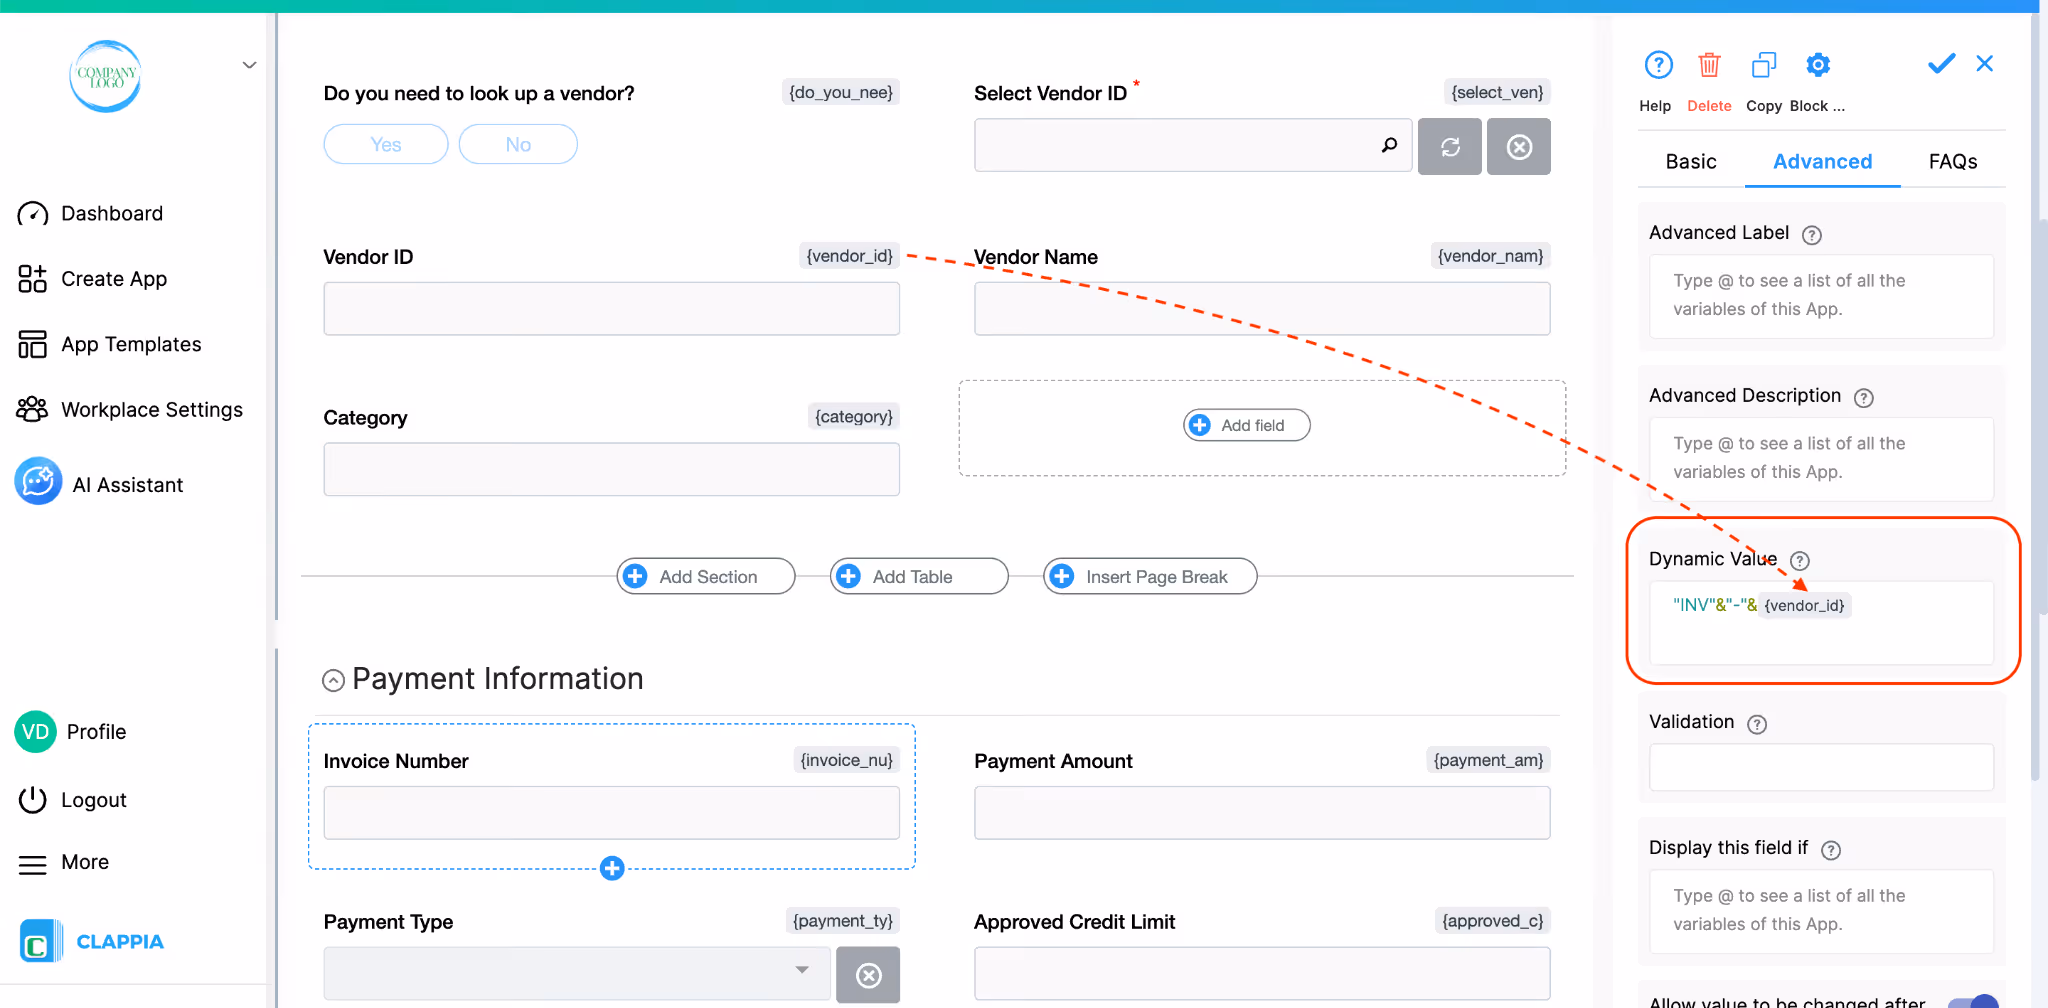
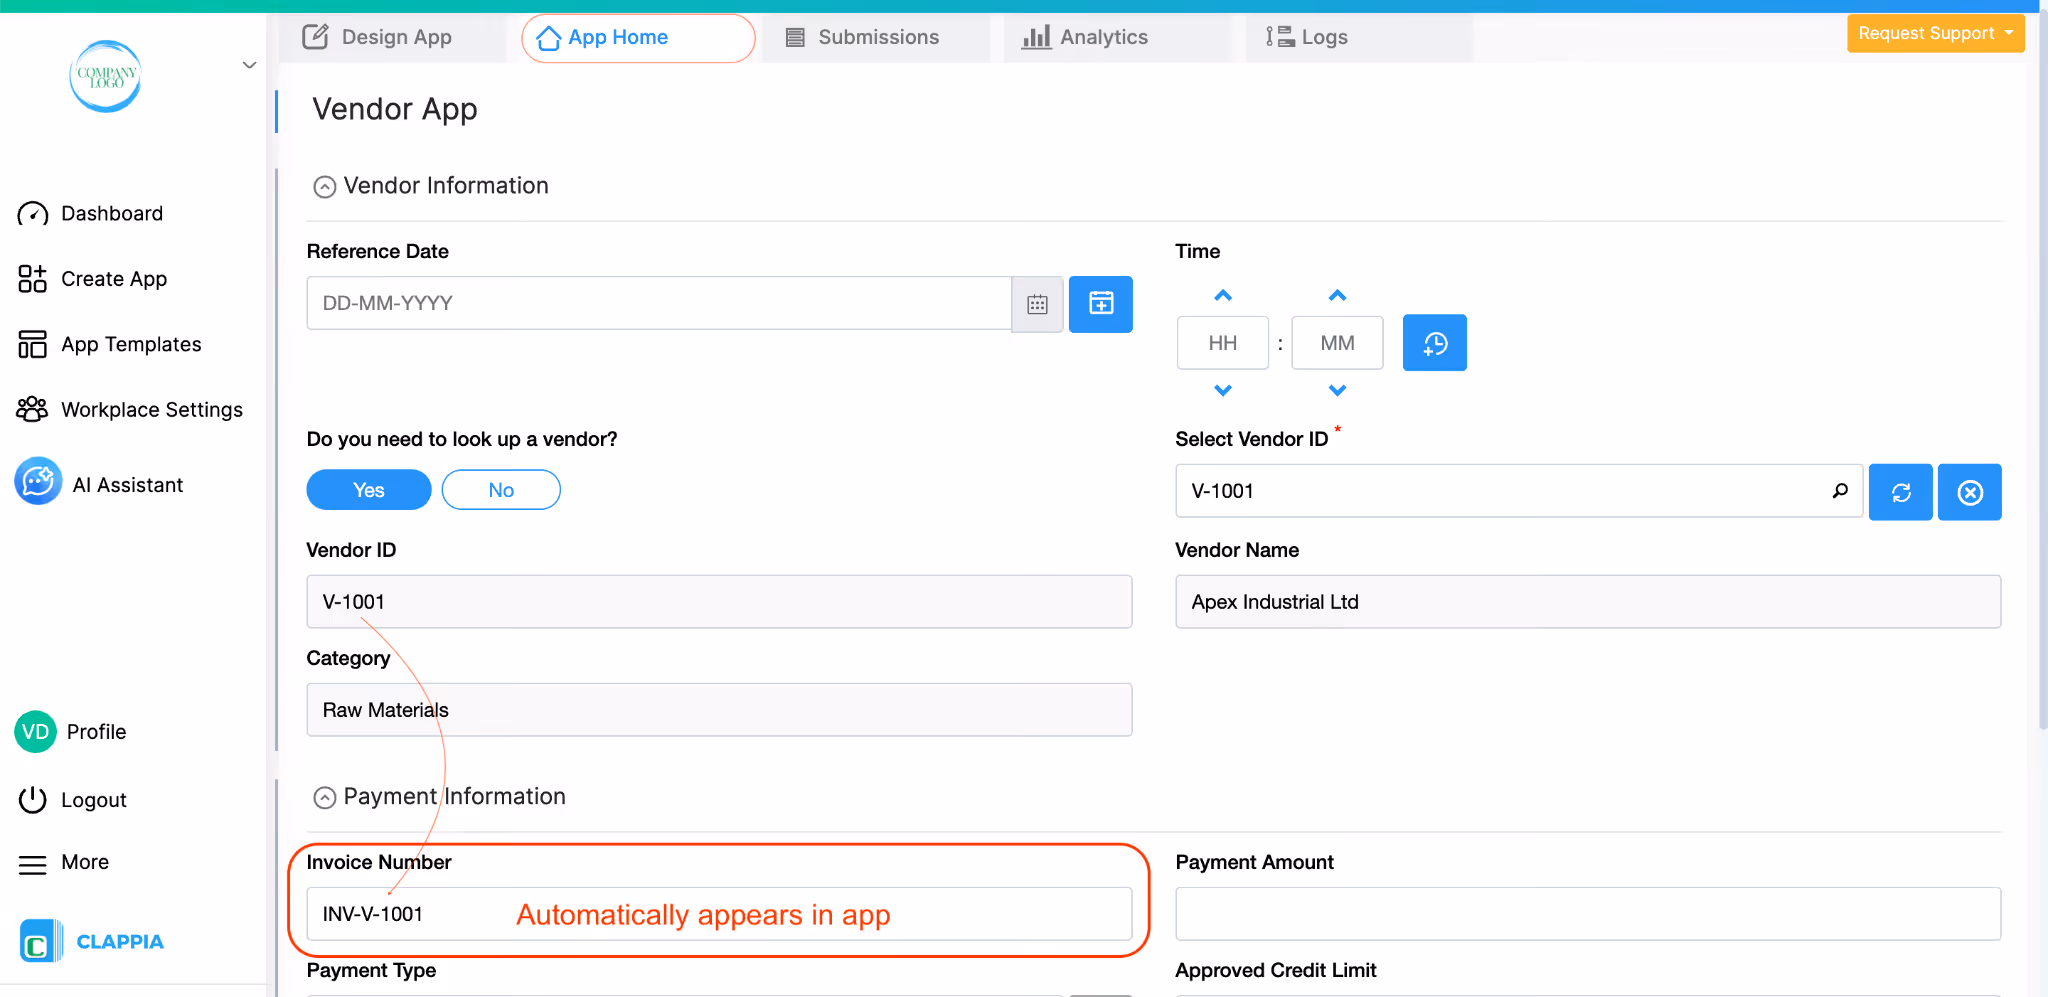
If you set a formula for the Dynamic value like:"INV-" & "-" & {vendor_id}
and a Default value is also set.
As shown, the value of the Vendor ID field is used to display the vendor id from the field in the app. When the app is opened, the Single Line Text field will automatically show this generated value instead of the Default value.
This is useful when you want to auto-fill fields based on other inputs or generate values dynamically without requiring manual entry.
currentUserName or submitterName. This is only applicable for users who log in to Clappia. When logged-in users open the app, their name will automatically show up in that block.L374, 1st Floor, 5th Main Rd, Sector 6, HSR Layout, Bengaluru, Karnataka 560102, India
3500 S DuPont Hwy, Dover,
Kent 19901, Delaware, USA


3500 S DuPont Hwy, Dover,
Kent 19901, Delaware, USA
L374, 1st Floor, 5th Main Rd, Sector 6, HSR Layout, Bengaluru, Karnataka 560102, India
.svg)
