
Still need help?

Multi-Factor Authentication (MFA) adds an additional verification step when users sign in to a Clappia workplace. Along with their usual login method (email ID or phone number), users are required to complete a second verification step before they can access the workplace.
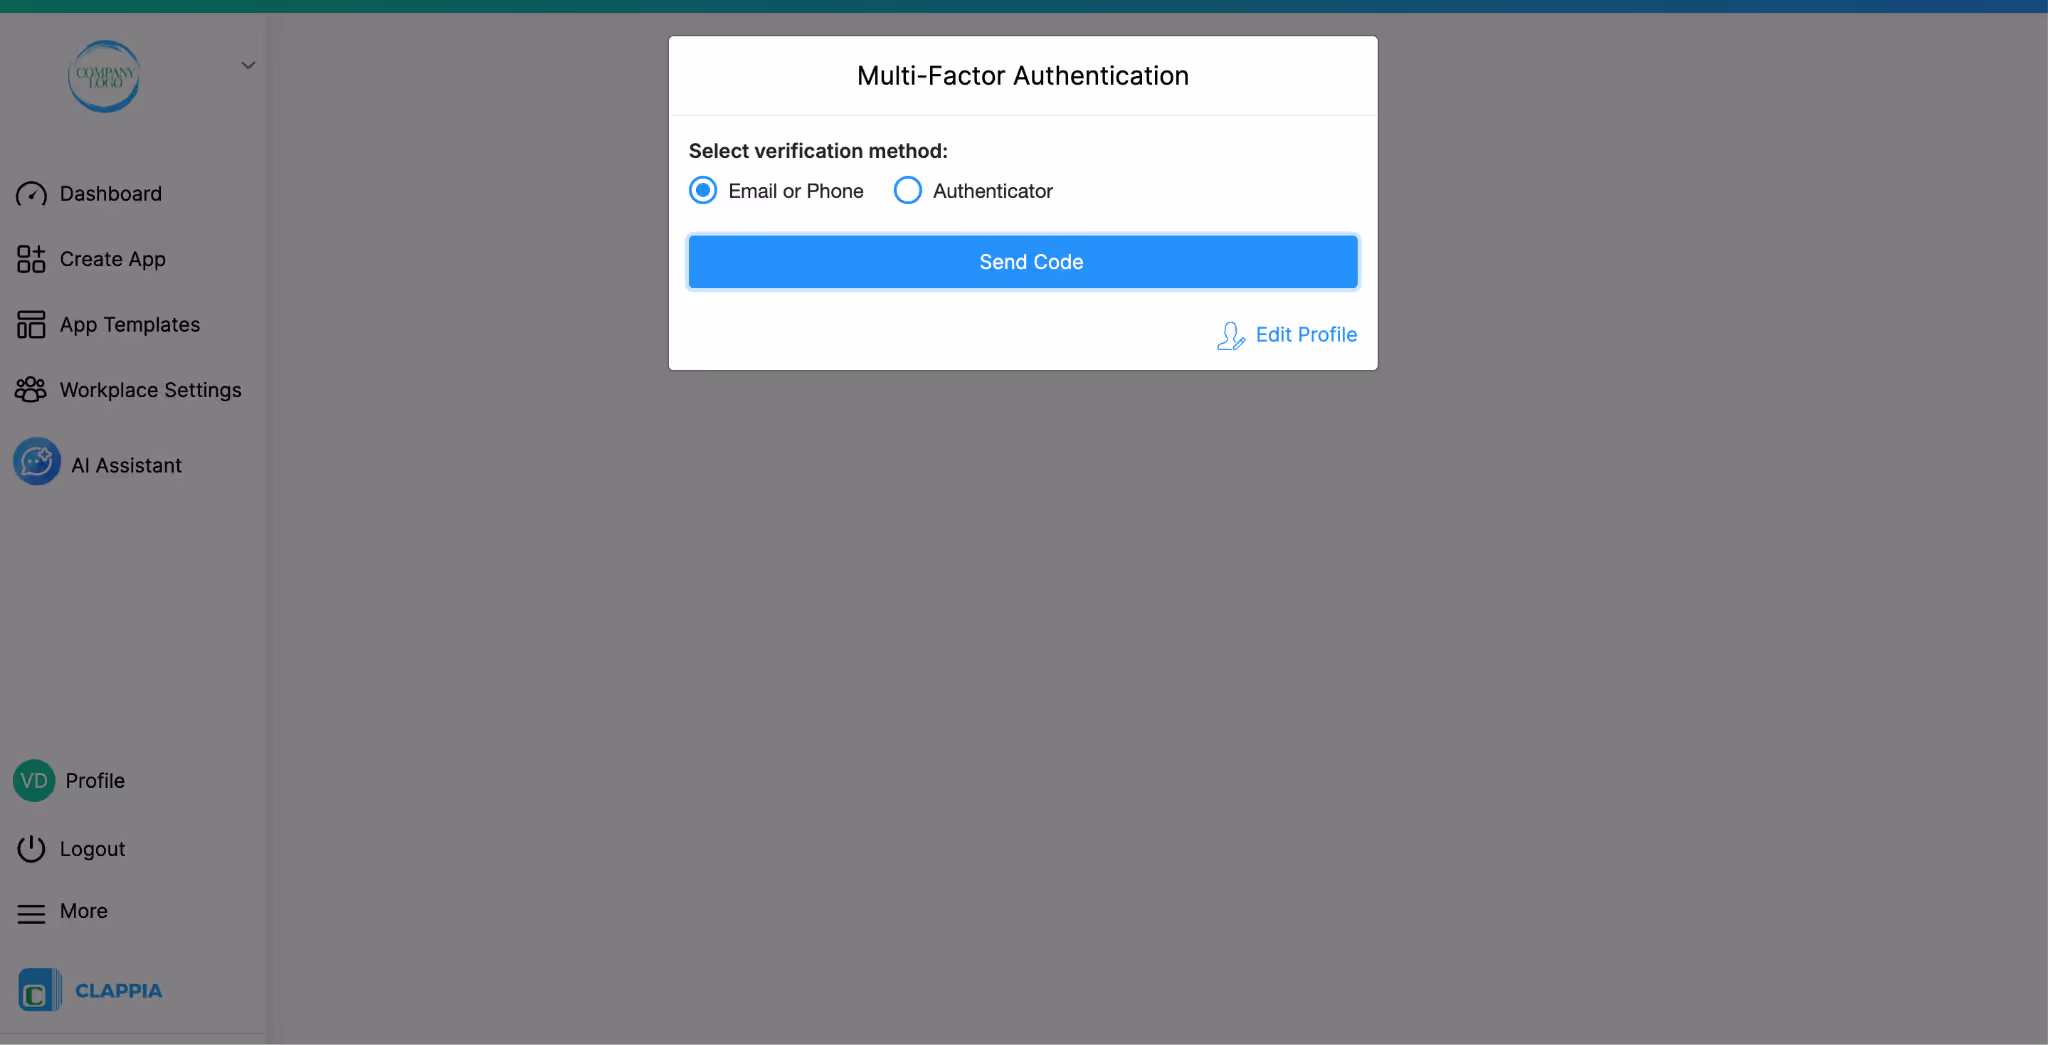
This second factor can be verified using Email, Phone, or an Authenticator app, depending on how the workplace admin has configured the login options.
Passwords alone are often not enough to protect access to workplace data. MFA adds an extra layer of security by ensuring that even if a user’s password is compromised, access is granted only after a second verification step is completed.
Since the second factor is tied to the user’s email, phone number, or authenticator app, it significantly reduces the risk of unauthorised access and helps keep workplace data secure.
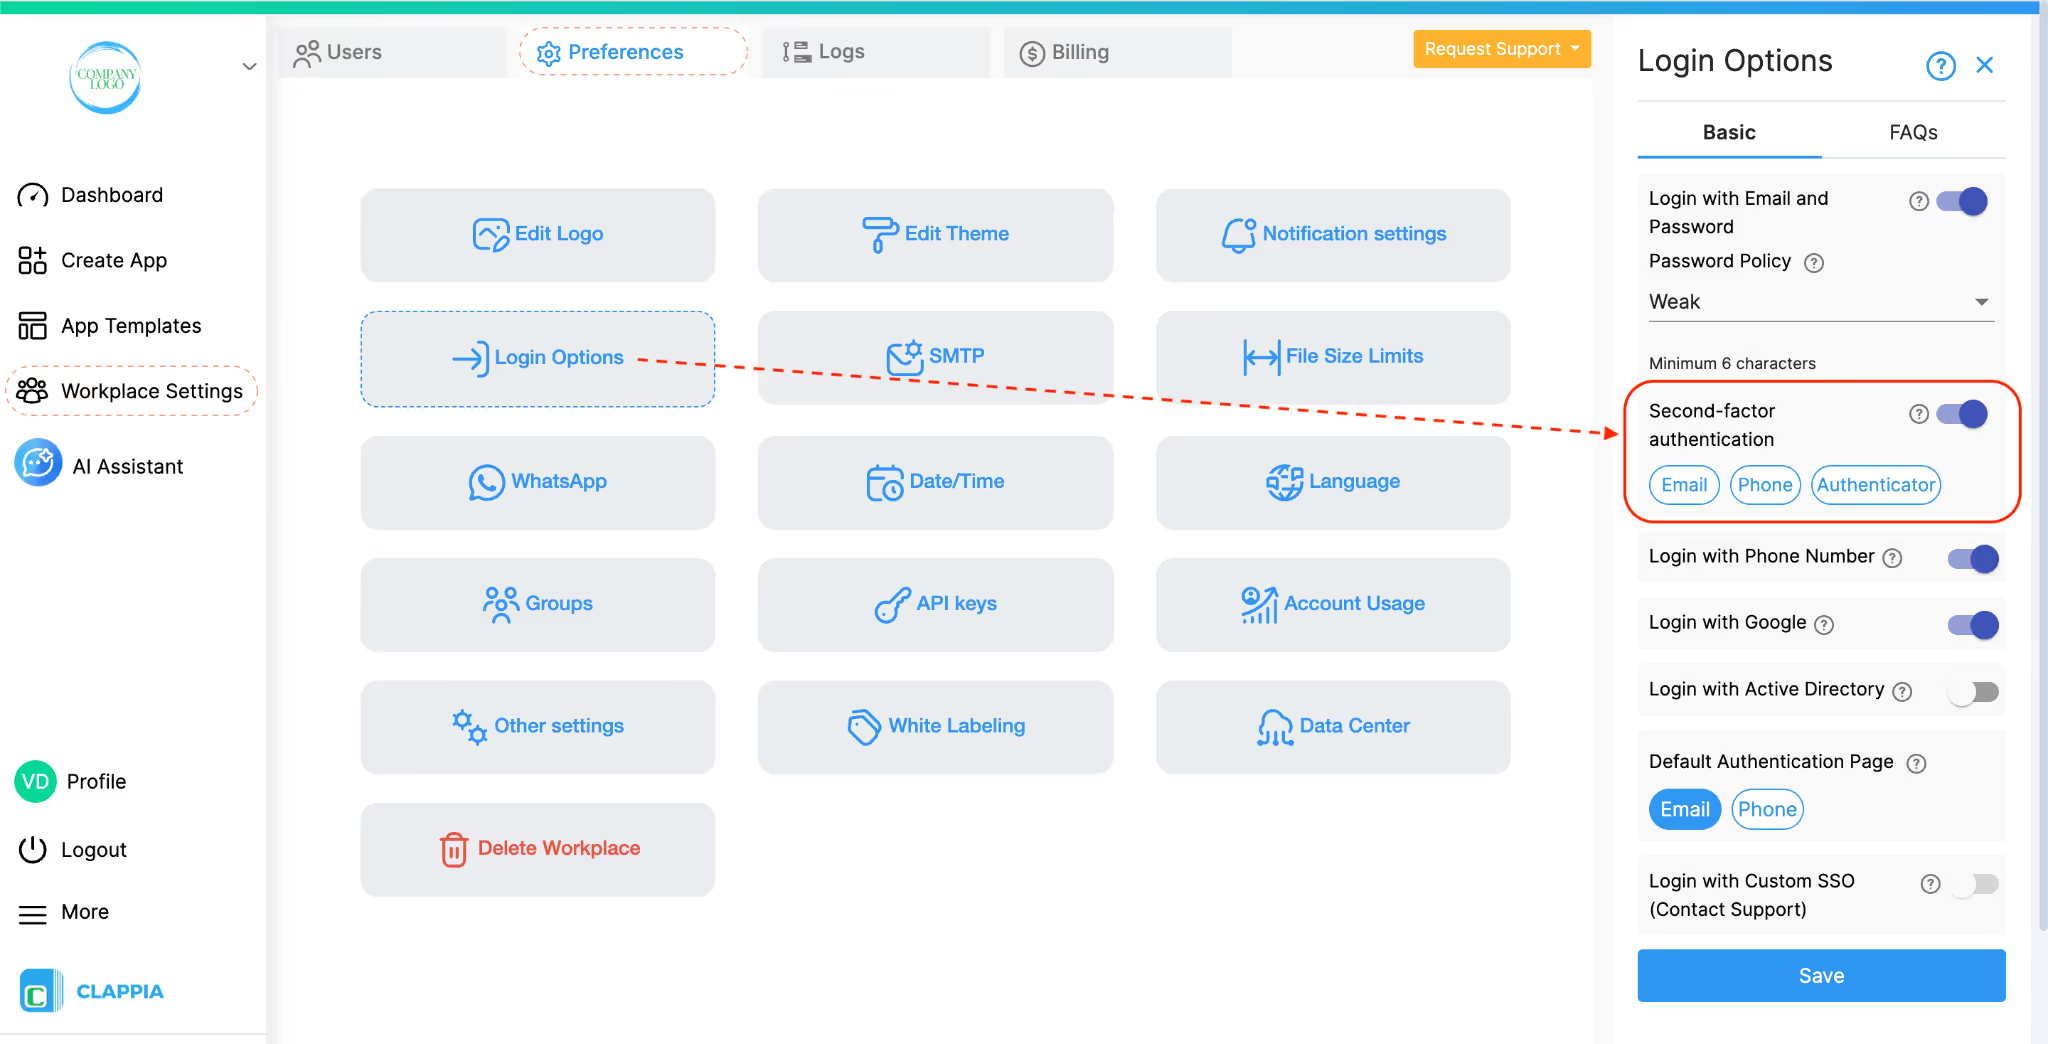
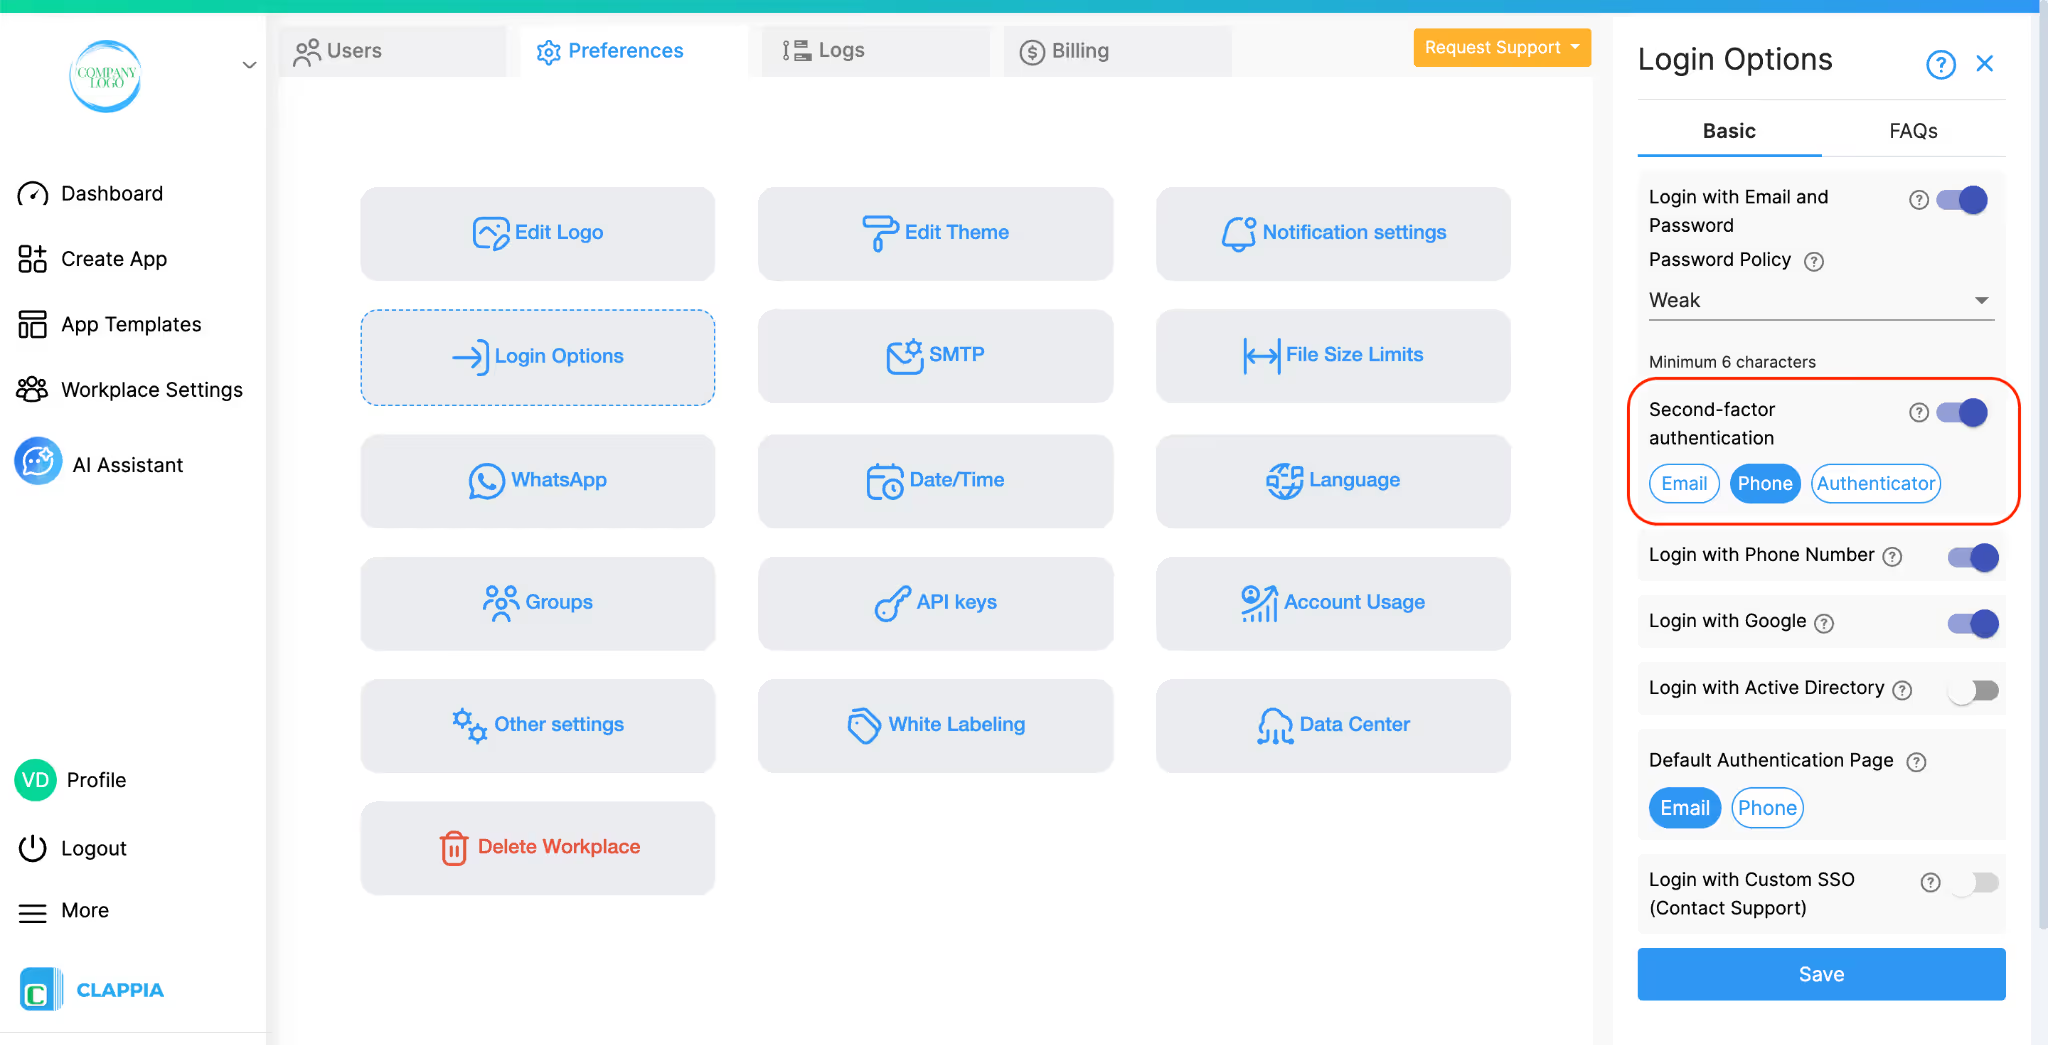
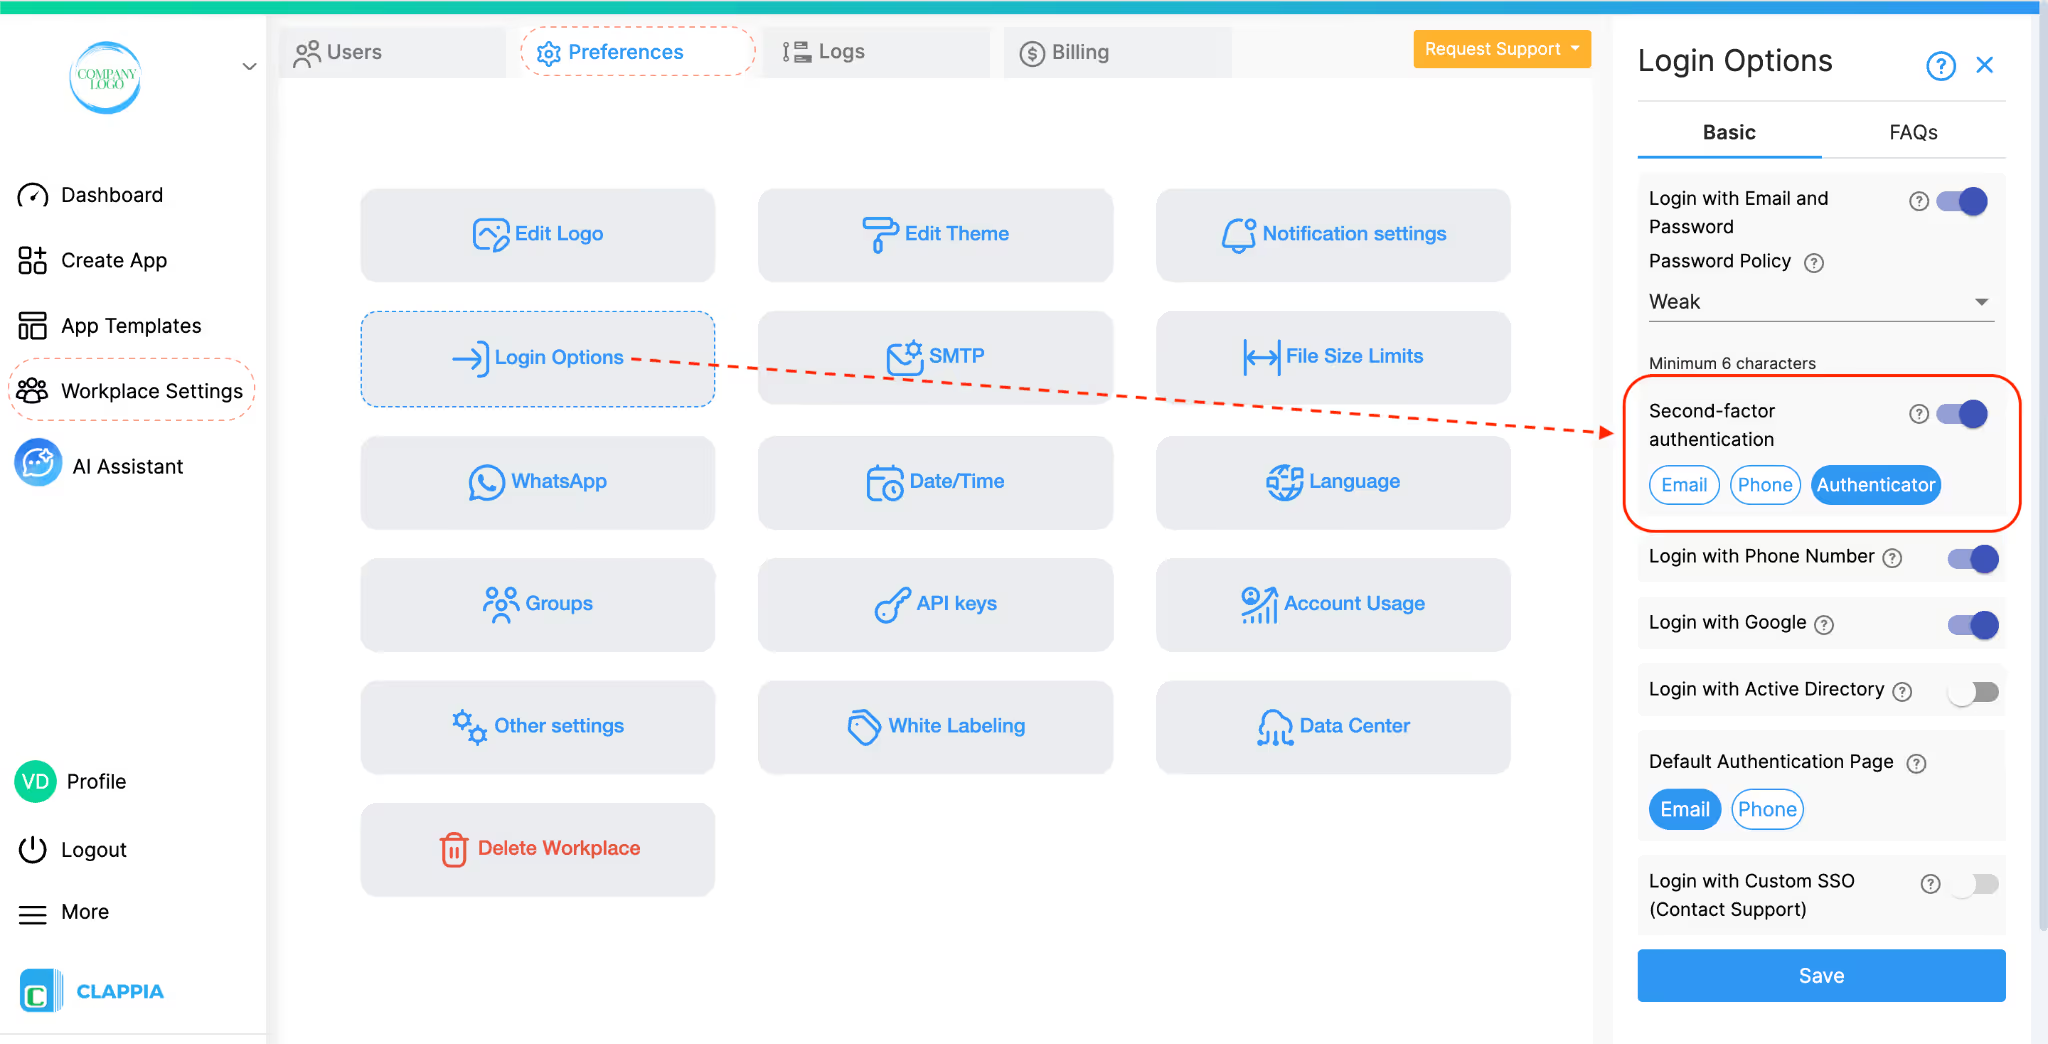
To enable MFA for a workplace, admins need to configure it from Workplace Settings.
Once saved, MFA becomes active for the workplace and will apply to users of the workplace during sign-in.
Admins can choose one or more verification methods as the second factor. The selected options determine what users see during login.
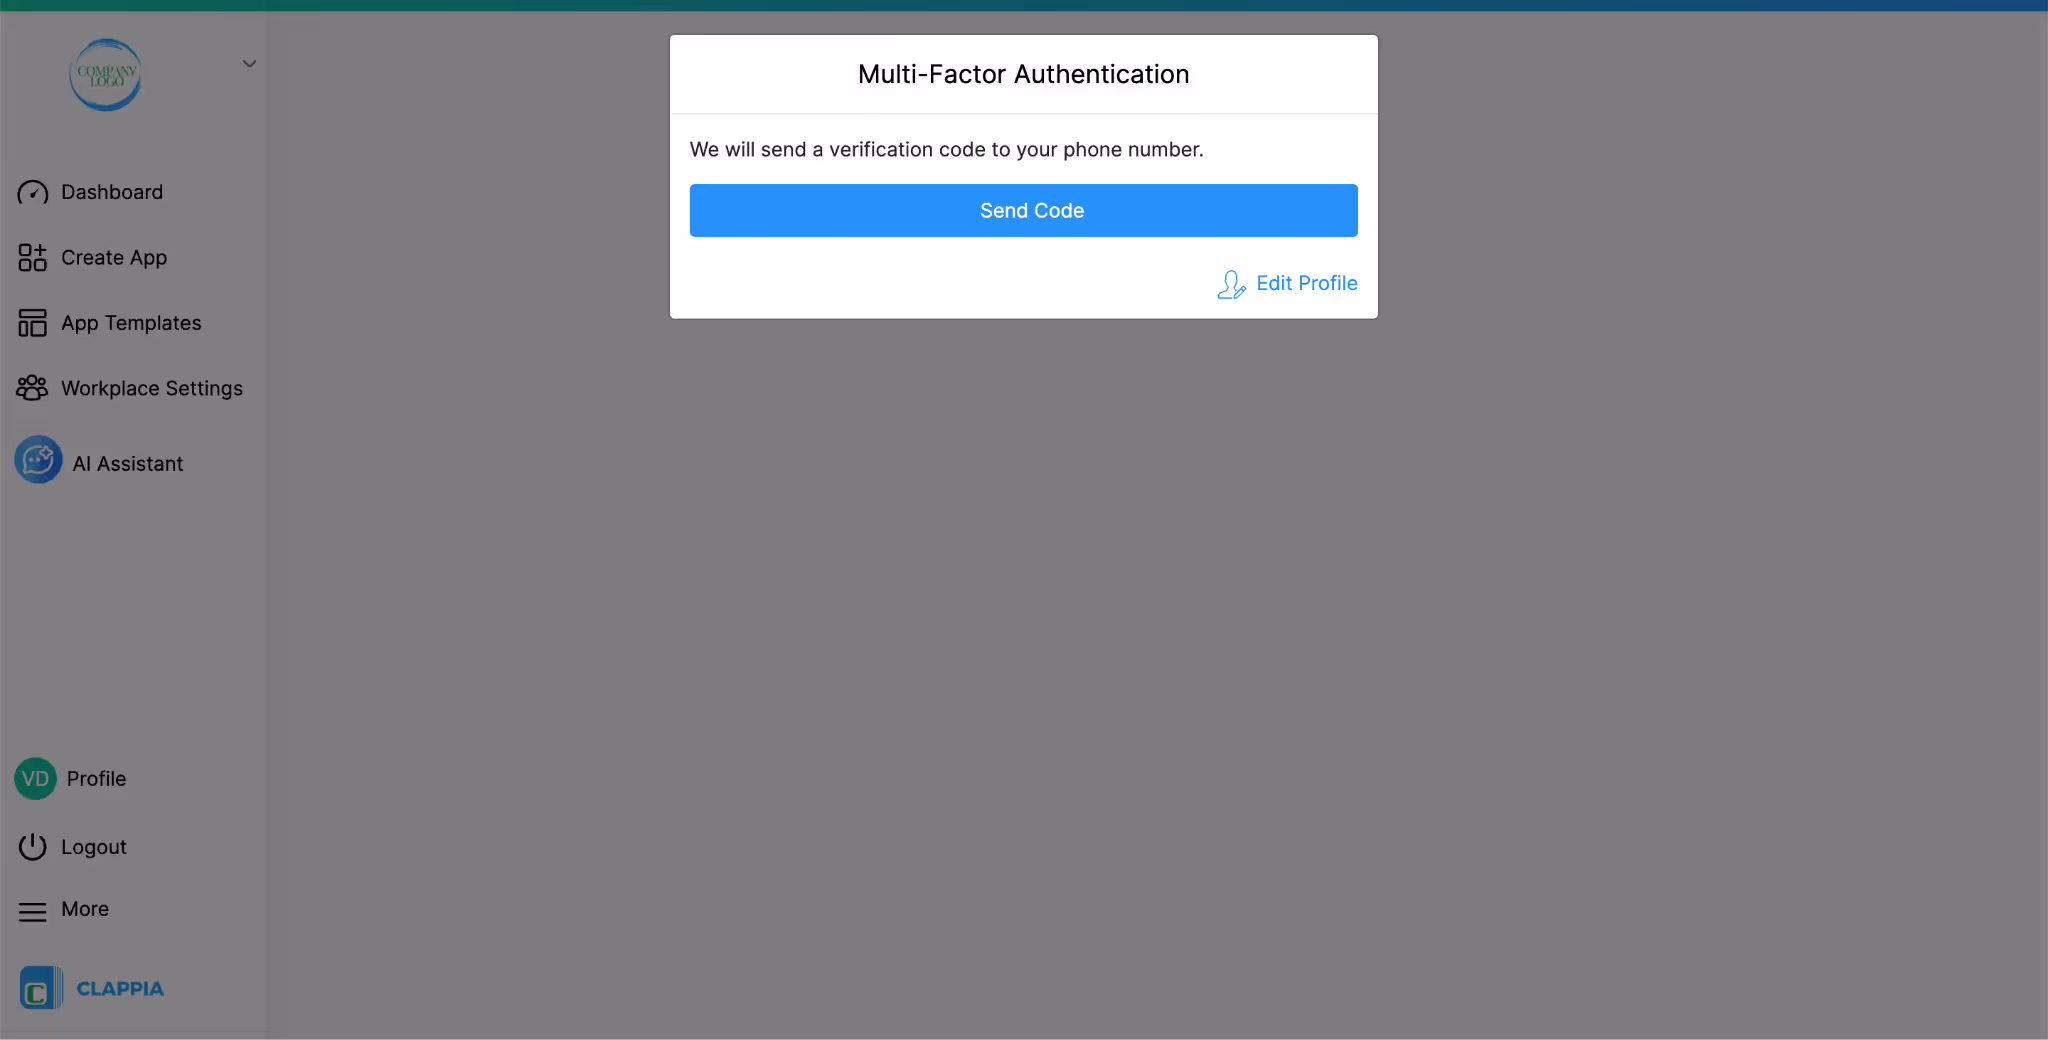
For example, let’s say ‘Phone’ is selected as the second factor.
This allows flexibility while still enforcing an additional security step.
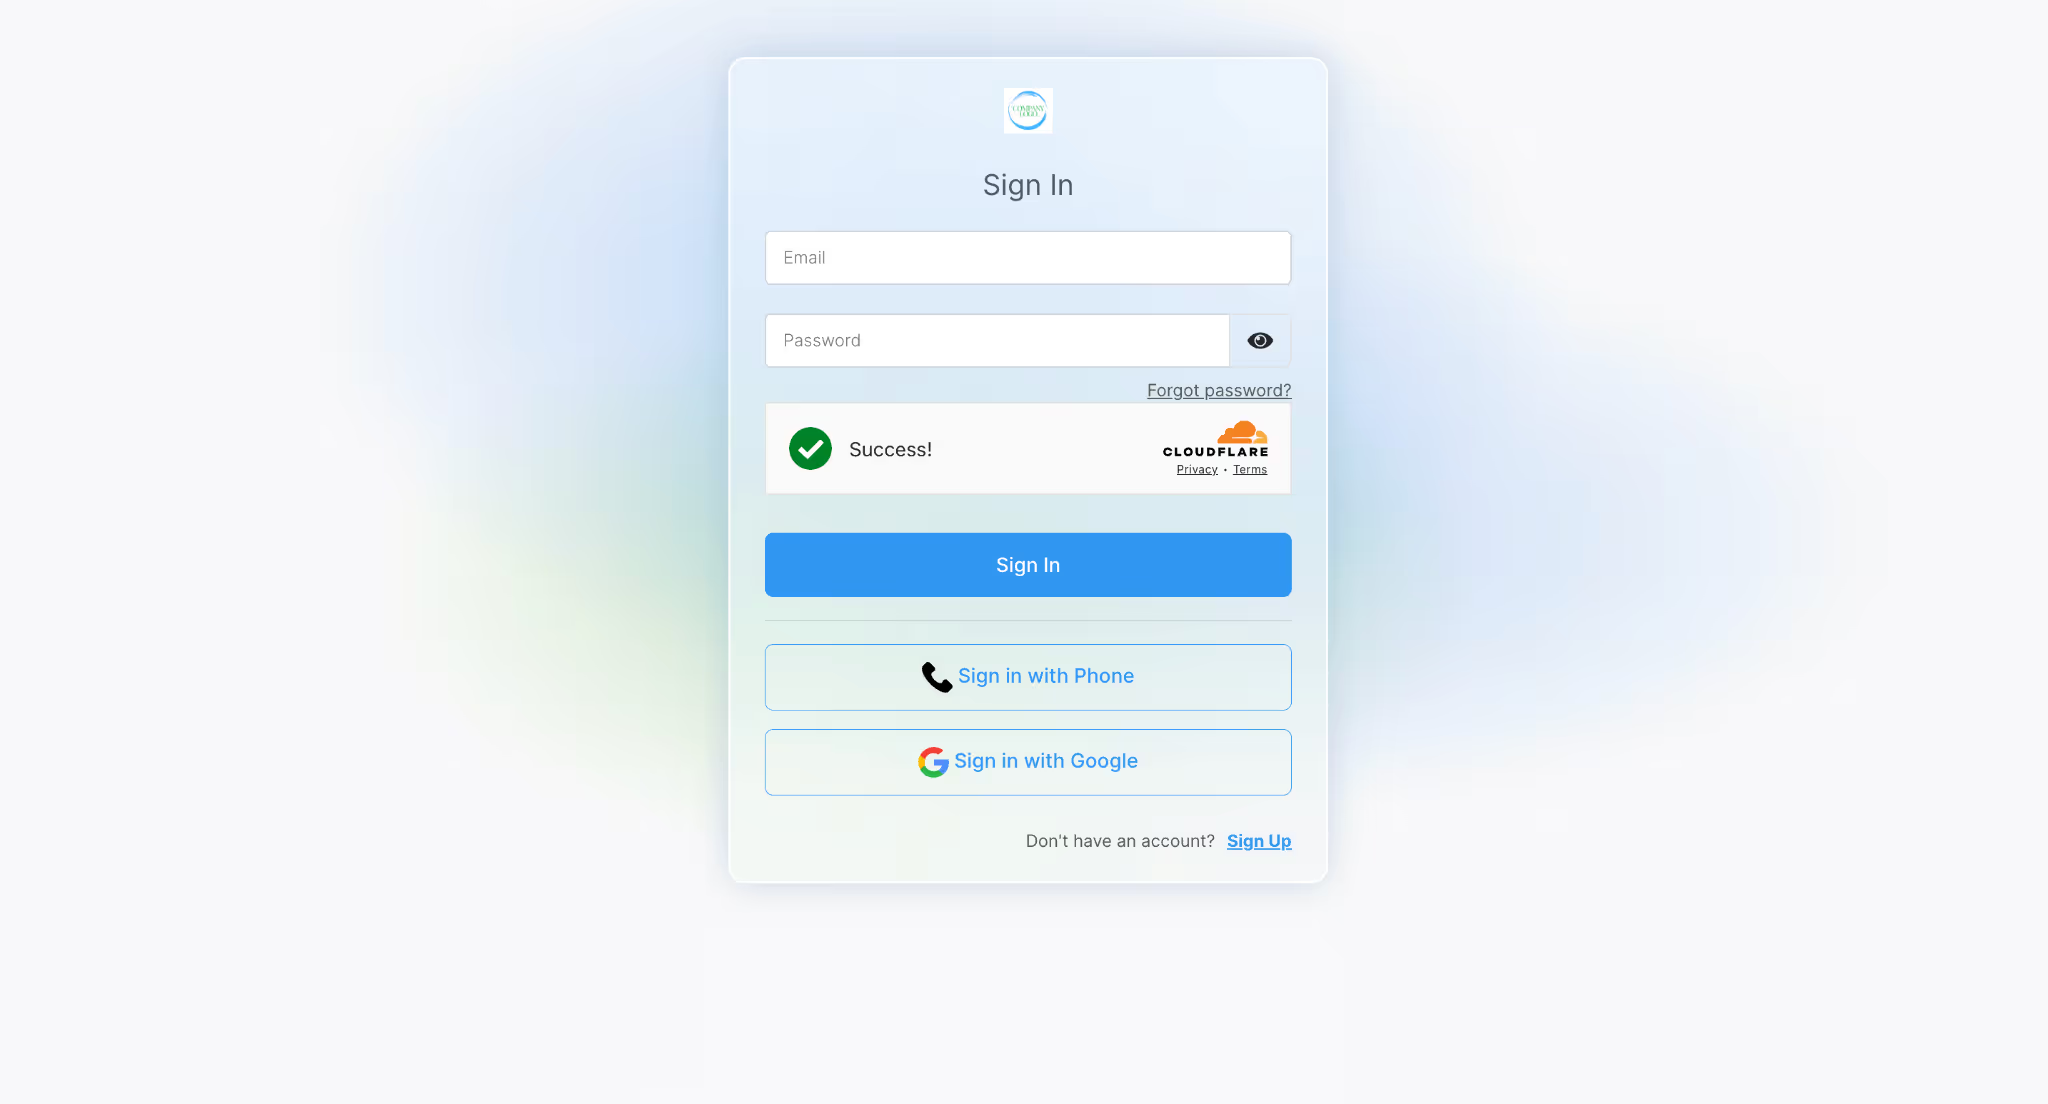
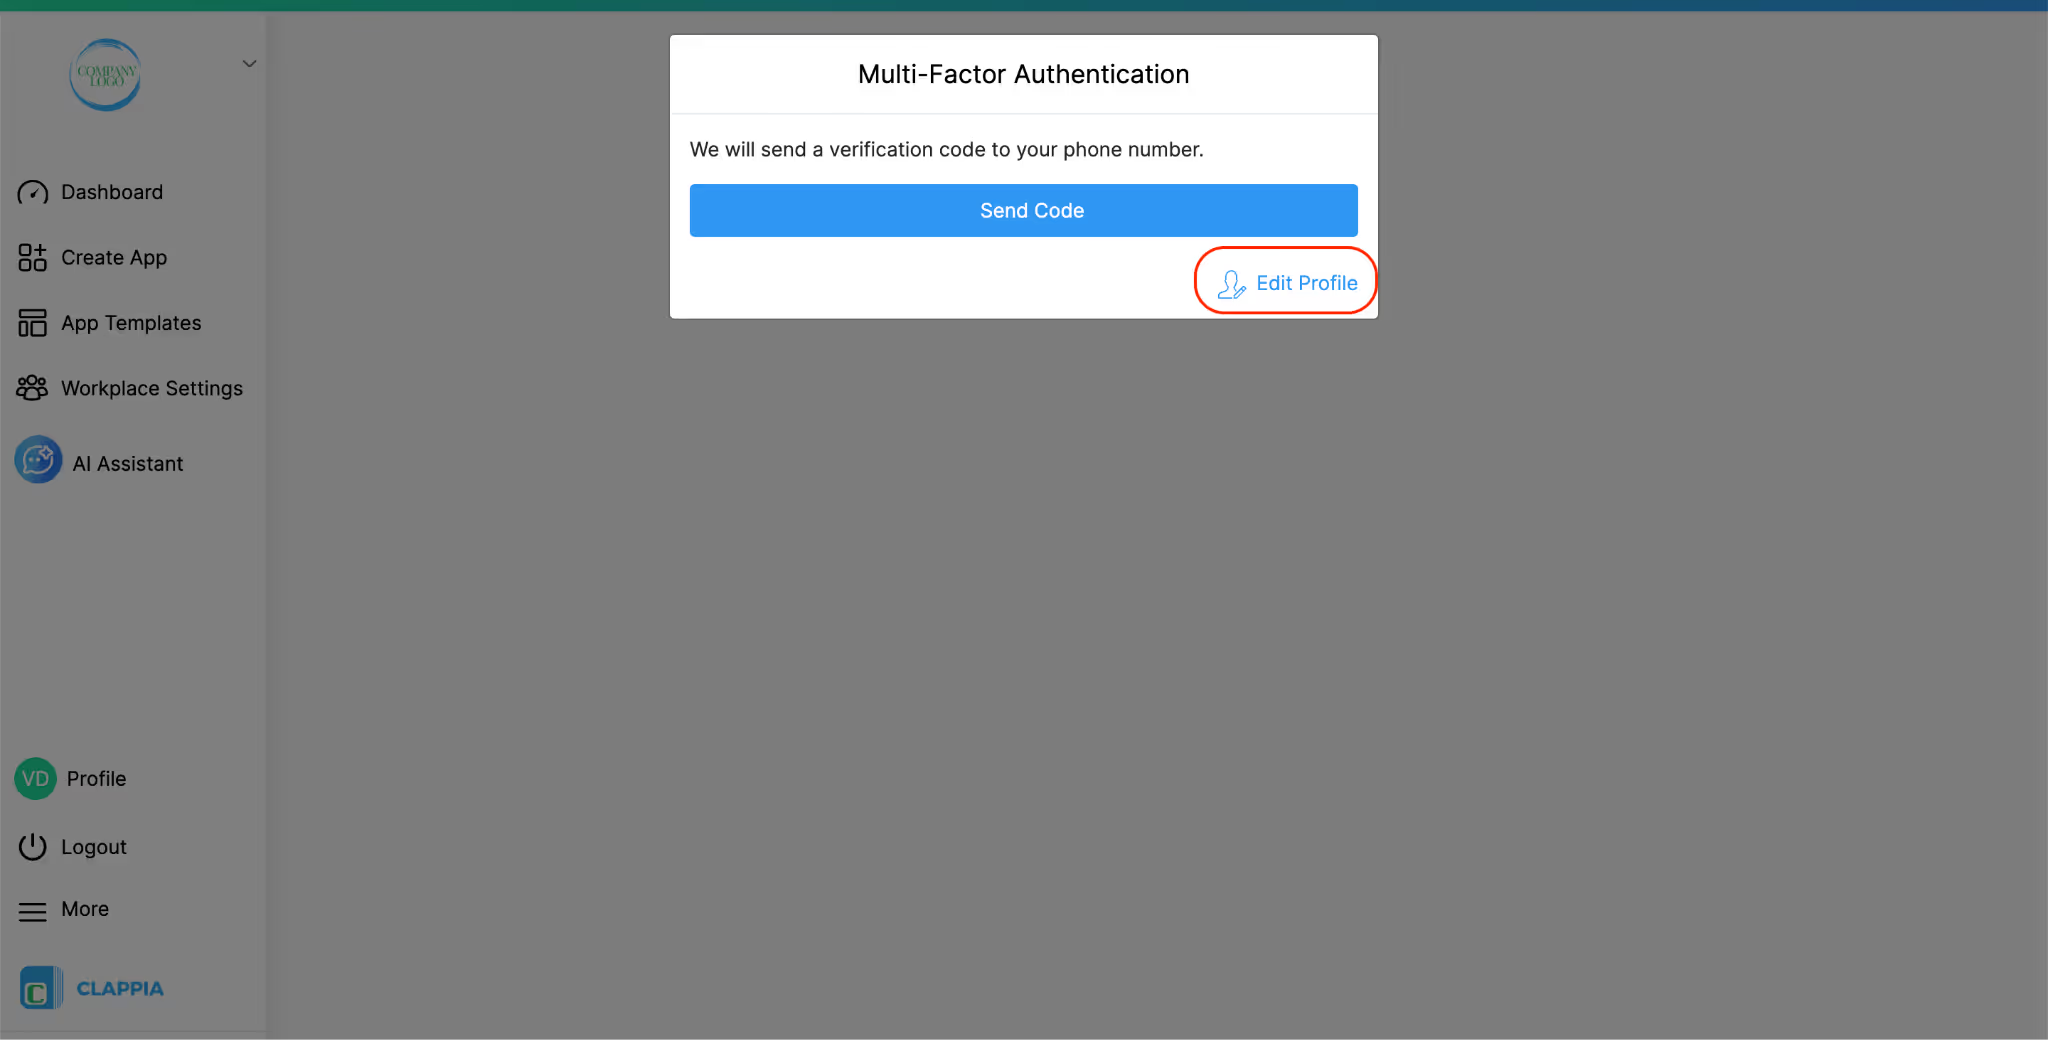
After MFA is enabled at the workplace level, users will be prompted for second-factor authentication when they try to sign in using their email ID or phone number.
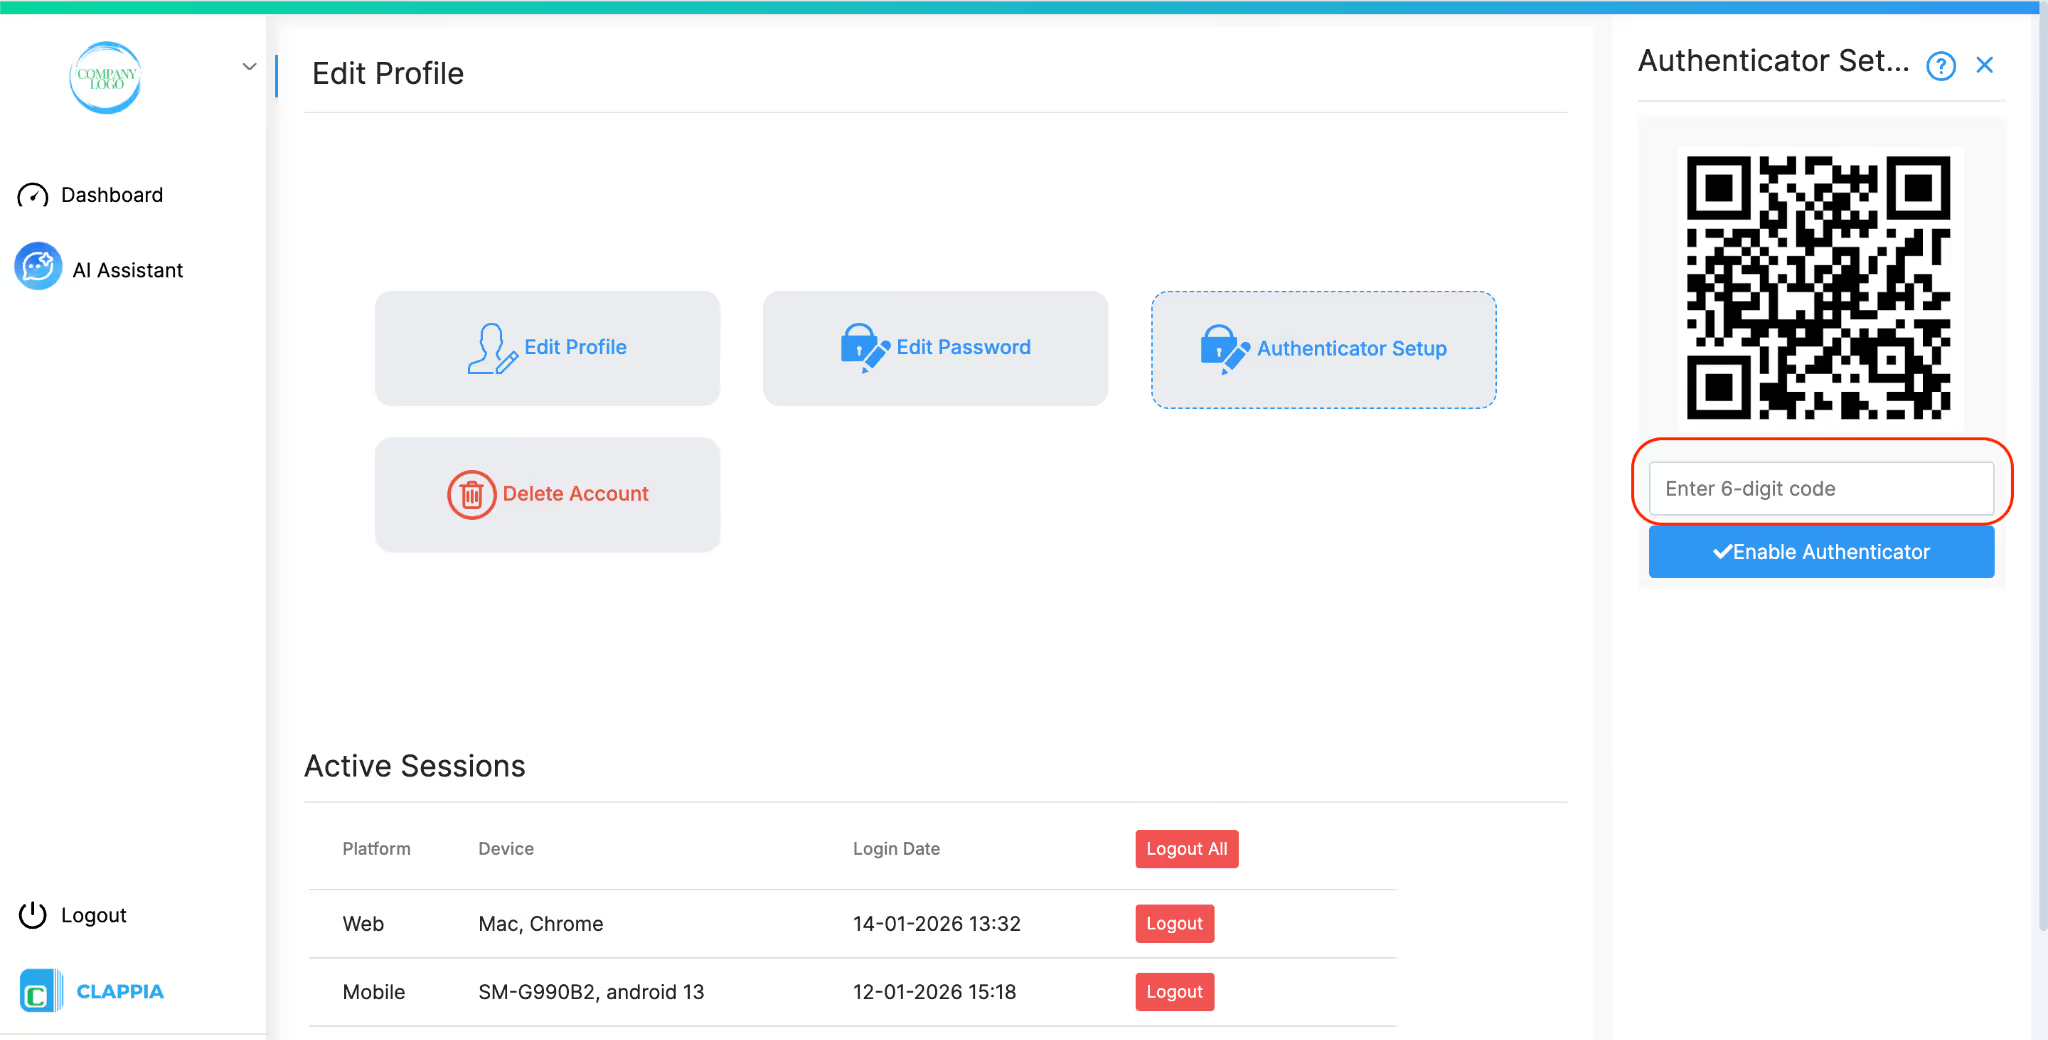
If Authenticator is enabled as a second-factor option and the user has not previously configured an authenticator, they can complete the setup from their profile.
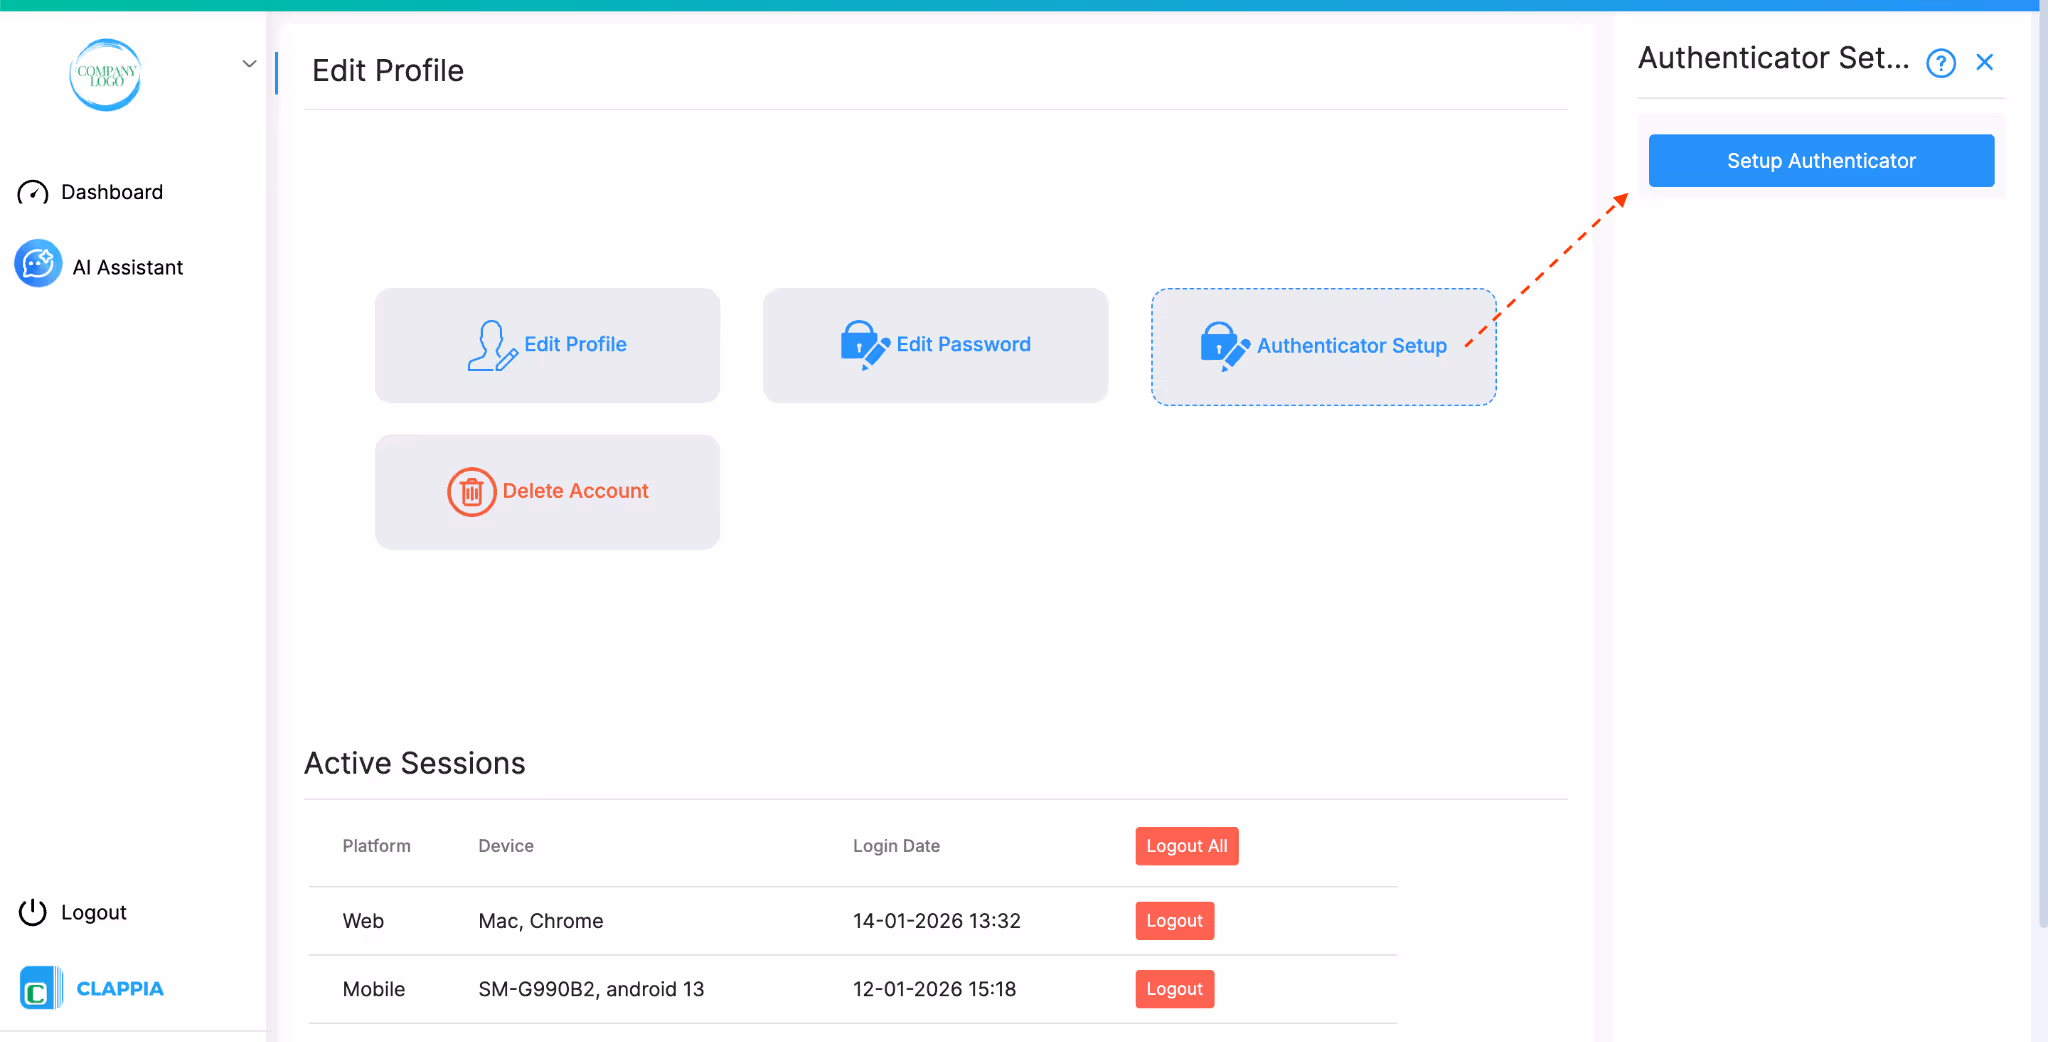
Once setup is initiated, a QR code is generated.
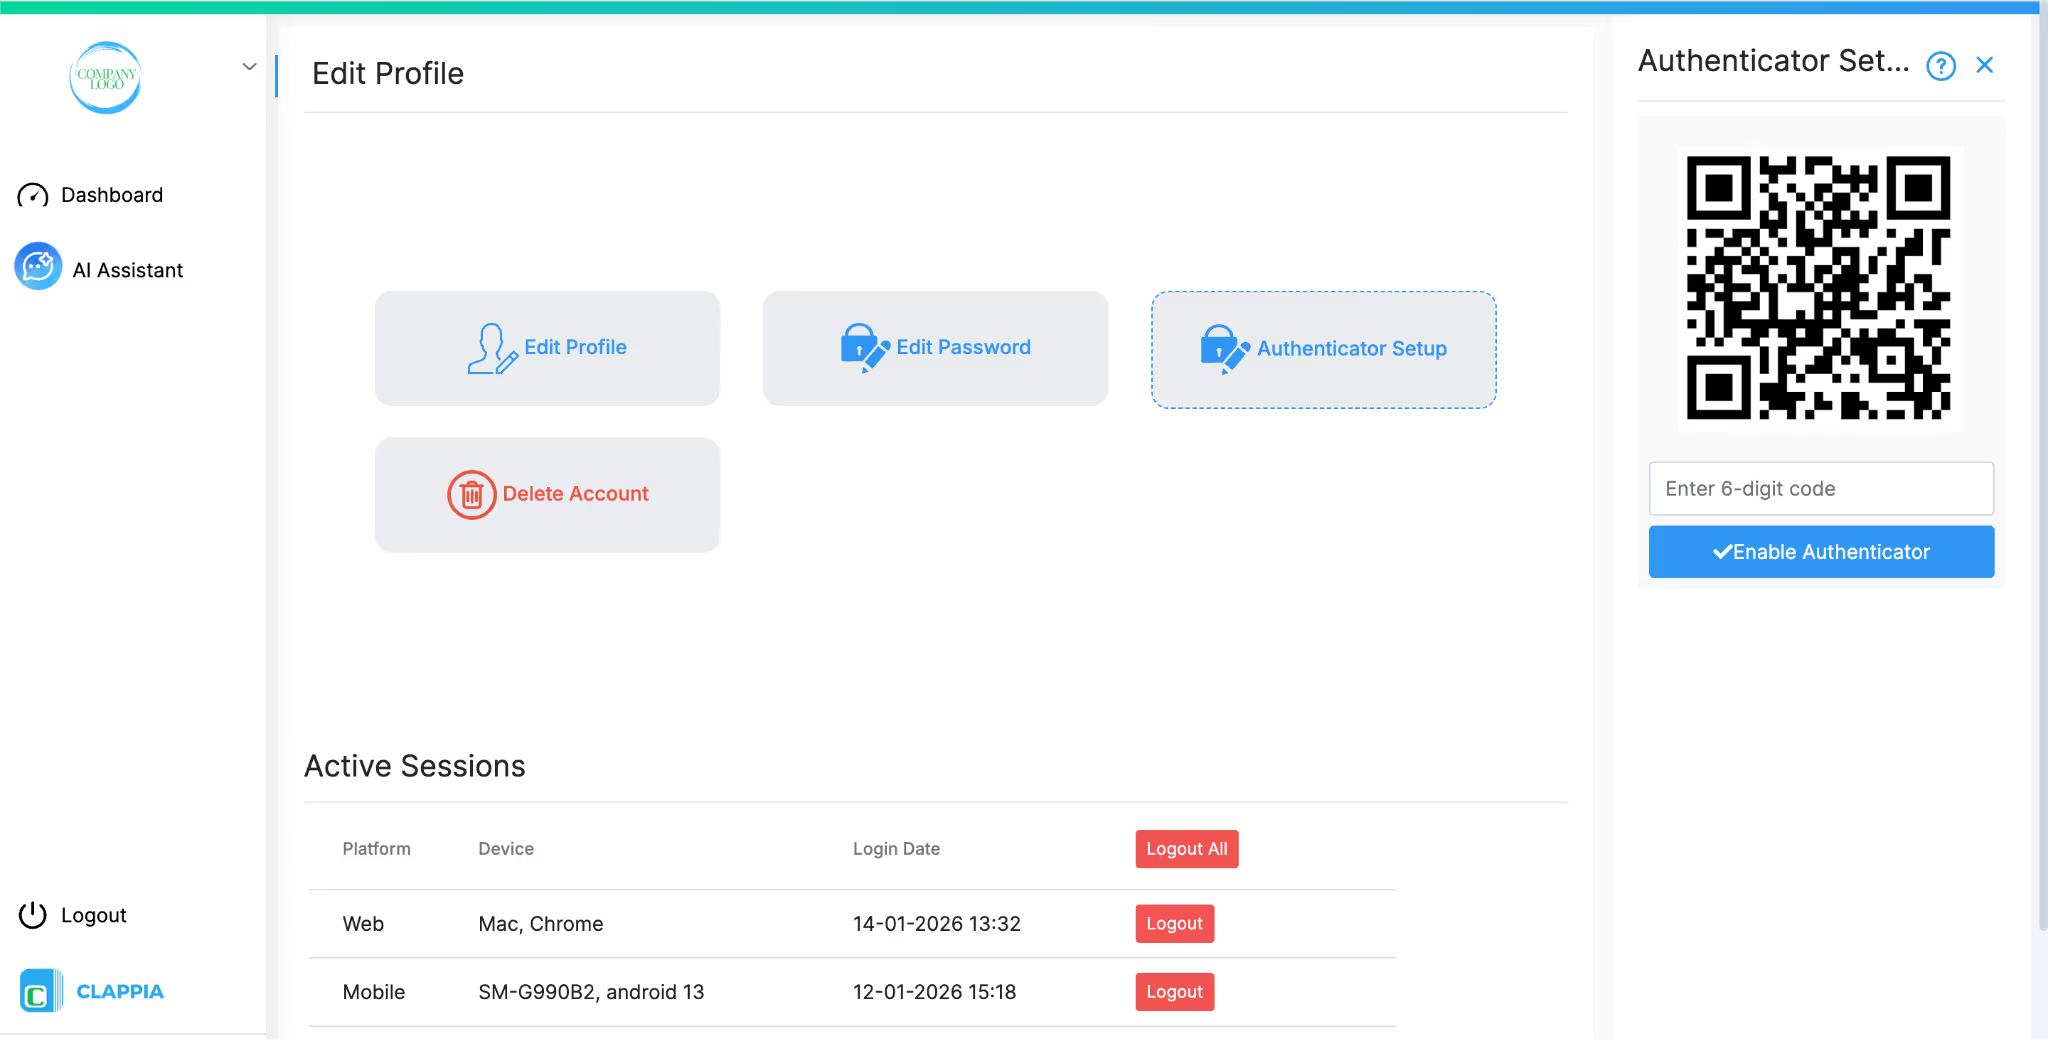
After this, the authenticator app starts generating 6-digit codes for the account.
After setup is complete, every time the user logs in to the workplace, and opens the authenticator for the second factor login:
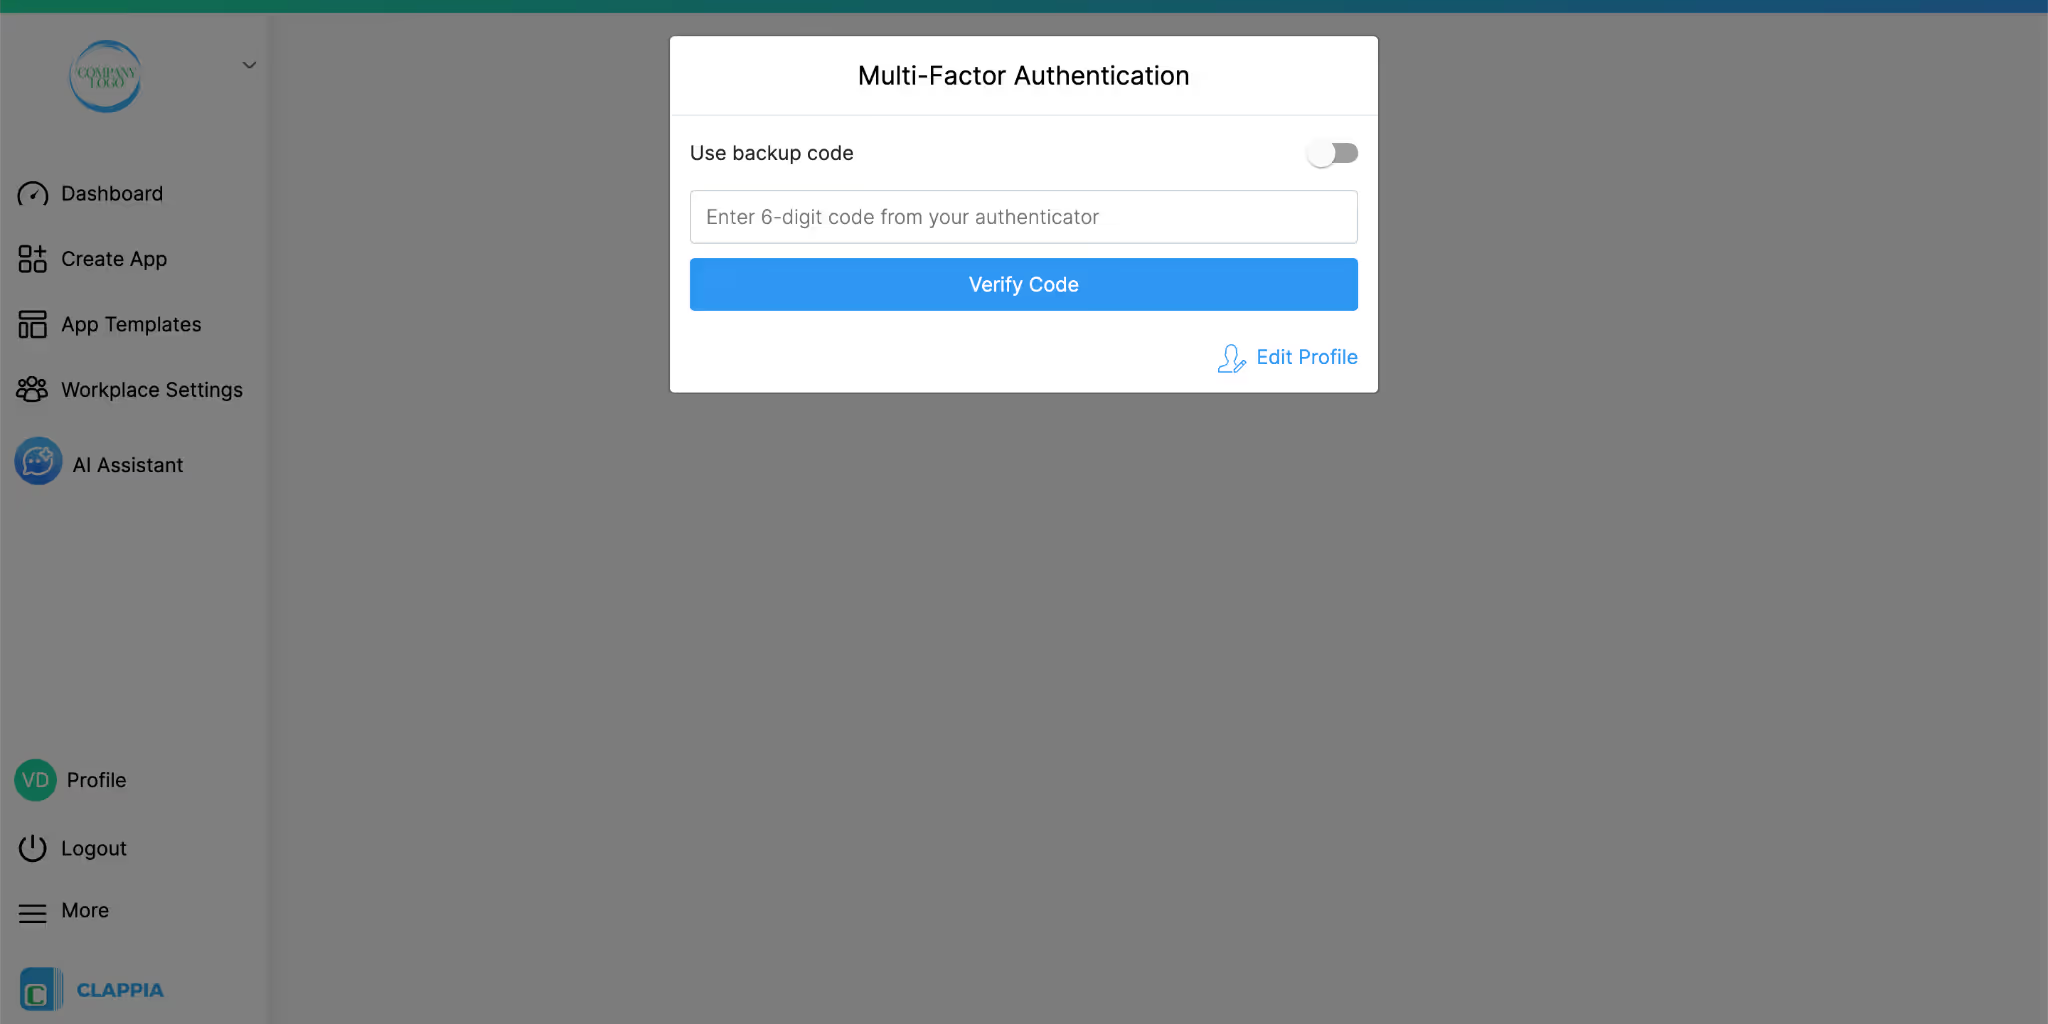
On the MFA verification screen, users also have the option to enter a code manually. Enable the option ‘Use backup code’. This is meant for backup or static codes.
Backup codes are useful when:
Entering a valid backup code allows the user to complete authentication and sign in.
After setting up the authenticator app, users can generate backup codes from their profile.
To do this, go back to Edit Profile and open the Authenticator Setup section where the QR code was scanned earlier. Under this section, there is an option to enter the 6-digit code from the authenticator app.
Once a valid code from the authenticator is entered, the system generates a set of backup codes. These codes can be saved and kept securely by the user.
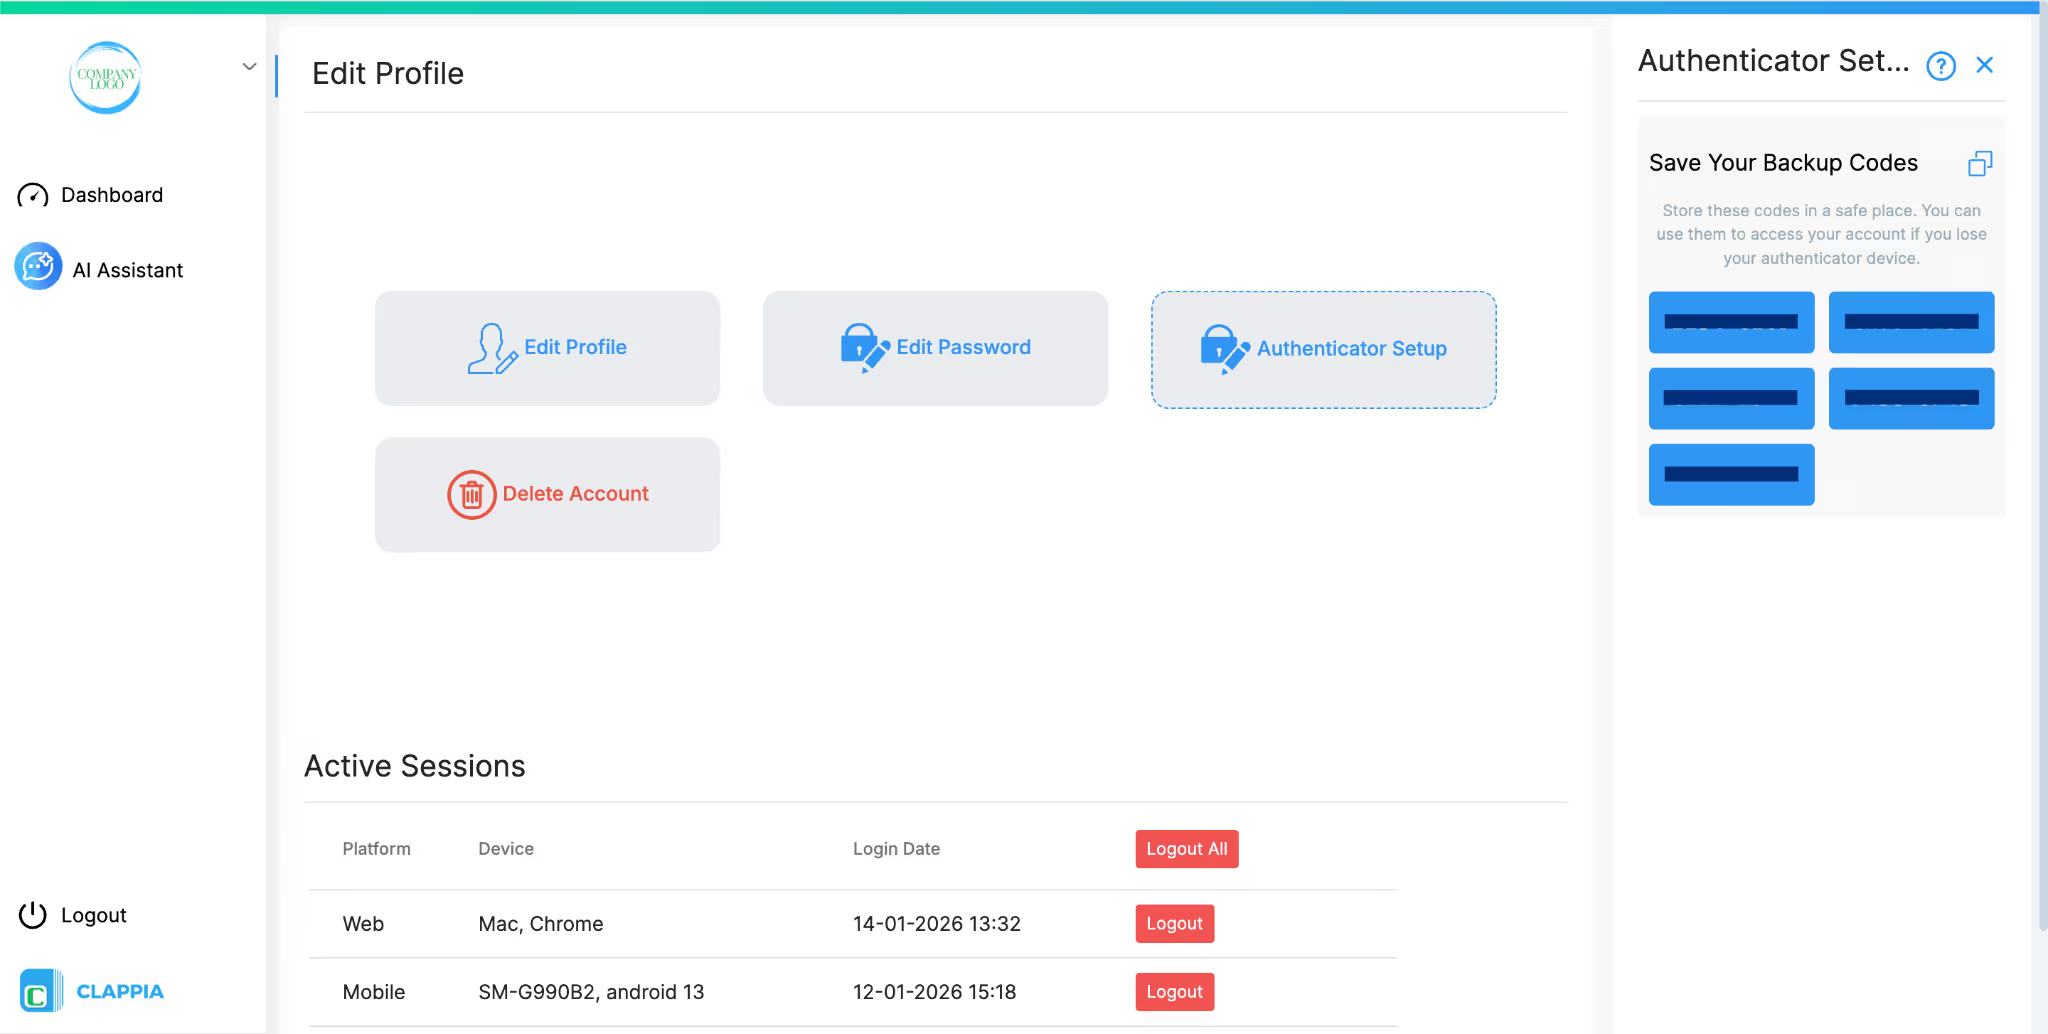
Backup codes act as static second-factor codes and can be used to sign in if the user is unable to access their authenticator app for any reason. Each backup code can be used to complete MFA verification when prompted during login.
Note: It is recommended that users generate and save their backup codes at the time of setting up the authenticator. This ensures that backup codes are readily available if the authenticator app is not accessible later, and helps avoid being locked out of the account.
Let's say an admin enables Email, Phone, and Authenticator together:
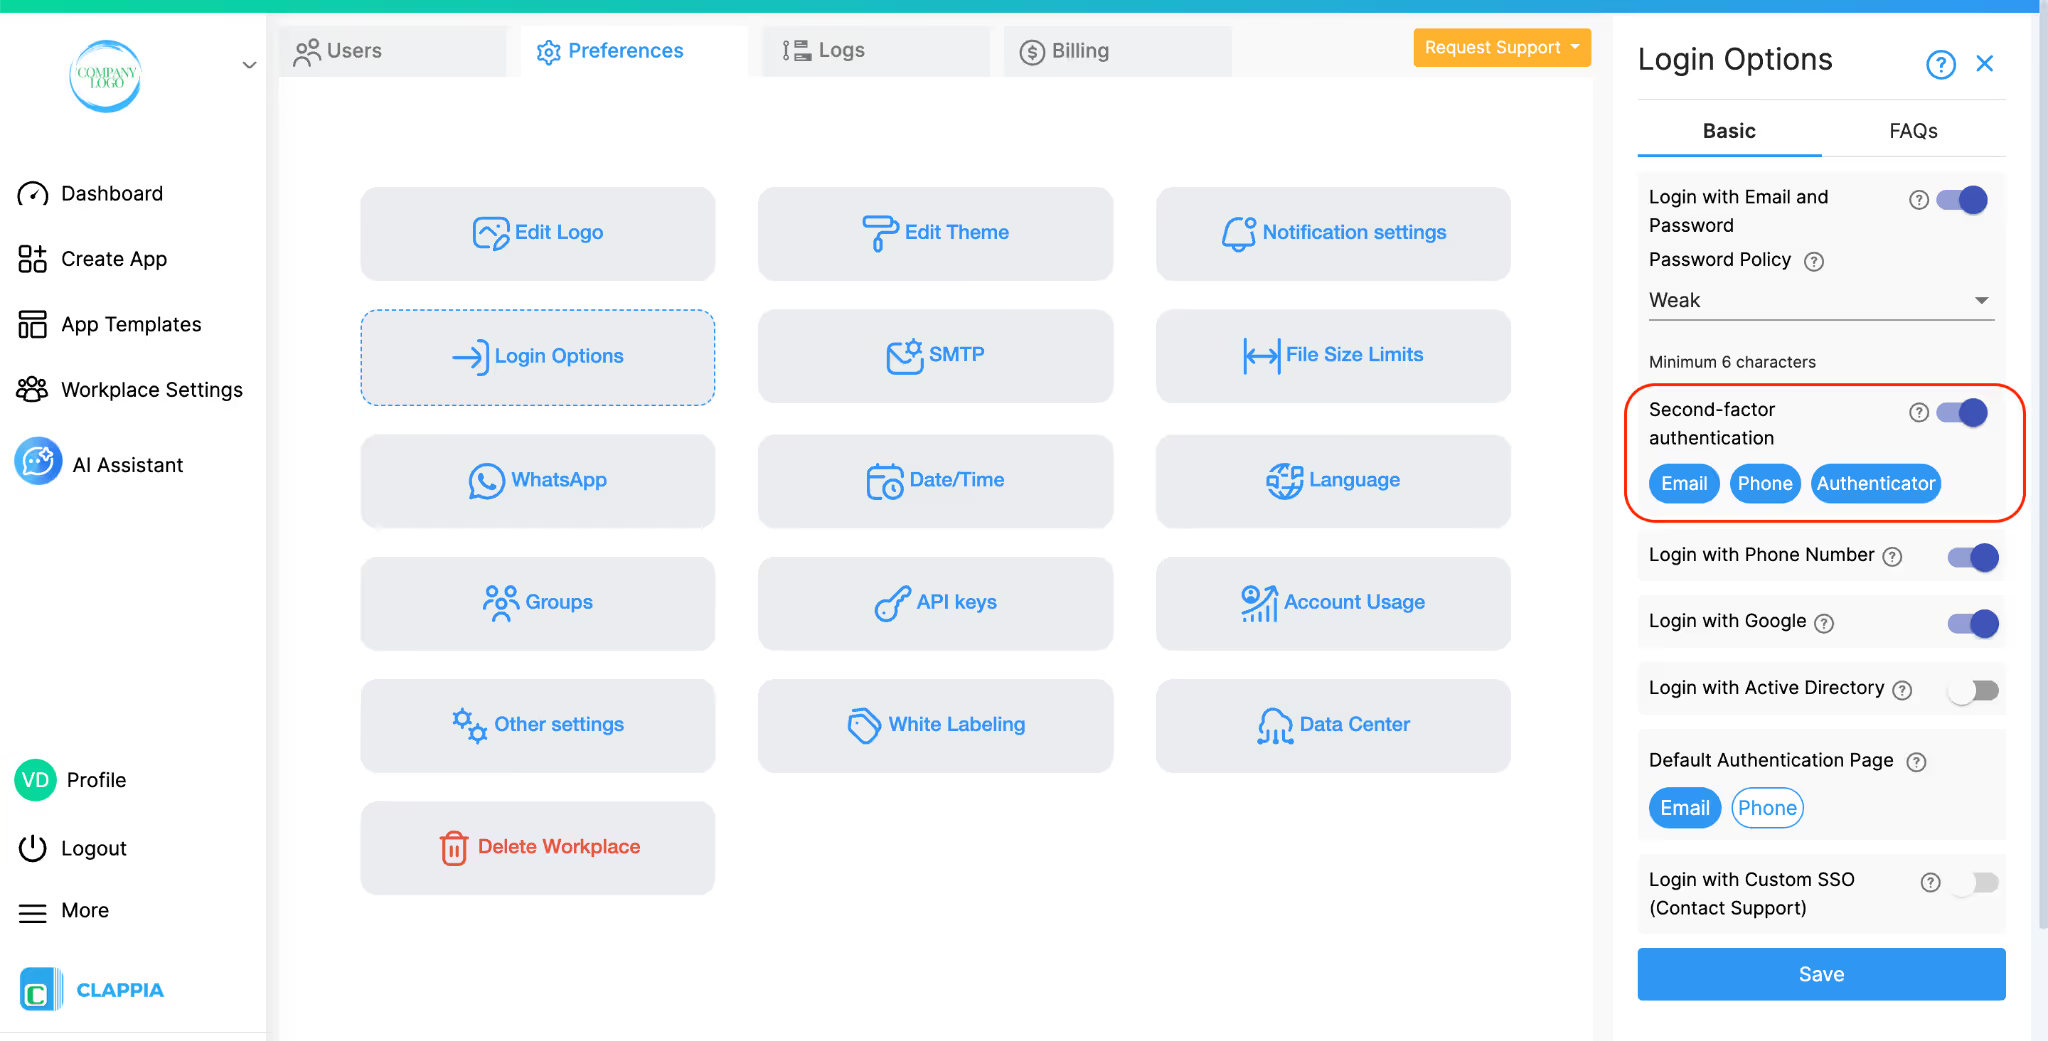
This allows users to complete MFA using any of the enabled methods, while still enforcing second-factor verification on every login.
L374, 1st Floor, 5th Main Rd, Sector 6, HSR Layout, Bengaluru, Karnataka 560102, India
3500 S DuPont Hwy, Dover,
Kent 19901, Delaware, USA


3500 S DuPont Hwy, Dover,
Kent 19901, Delaware, USA
L374, 1st Floor, 5th Main Rd, Sector 6, HSR Layout, Bengaluru, Karnataka 560102, India
.svg)
