

Still need help?

This article explains the Text, HTML, and Embedding block that can be added to design an app.

Click on the block and start editing on the panel that appears on the right side.

This is what appears as the label for the content added in this block.
This is the editor area where you can write and edit any text, insert an image, link, table, or a page break in the box and it will appear as a read-only text to the end-users.

- Type any plain text in the box and stylize the text to Rich Text with respect to font size, font colour, background colour, bold, italicize, underlining, alignment, ordered grouping, indentation and many more formatting options along with the source code generator of the text.
- You can also insert images. Click on the Image icon a dialogue box will appear asking you to upload the image.
- After selecting the image, the parameters of the image are automatically fetched from the original image. The relation between the width and height is locked by default. You can click on the lock icon to remove the relations nd resize your image.
- You can also insert a table and type your text and insert any media in the cells of the table.

- the above text and image has automatically generated the code in HTML format in the backend. You can click on the source code button and the HTML opens up.

You can format any text inside the editor of the HTML Block using conditional formatting. This allows you to change how specific text appears, or hide it completely, based on conditions using field variables and formulas.
This is useful when you want certain information to stand out (for example, highlight urgent cases), or to hide details that are not relevant for a particular submission.
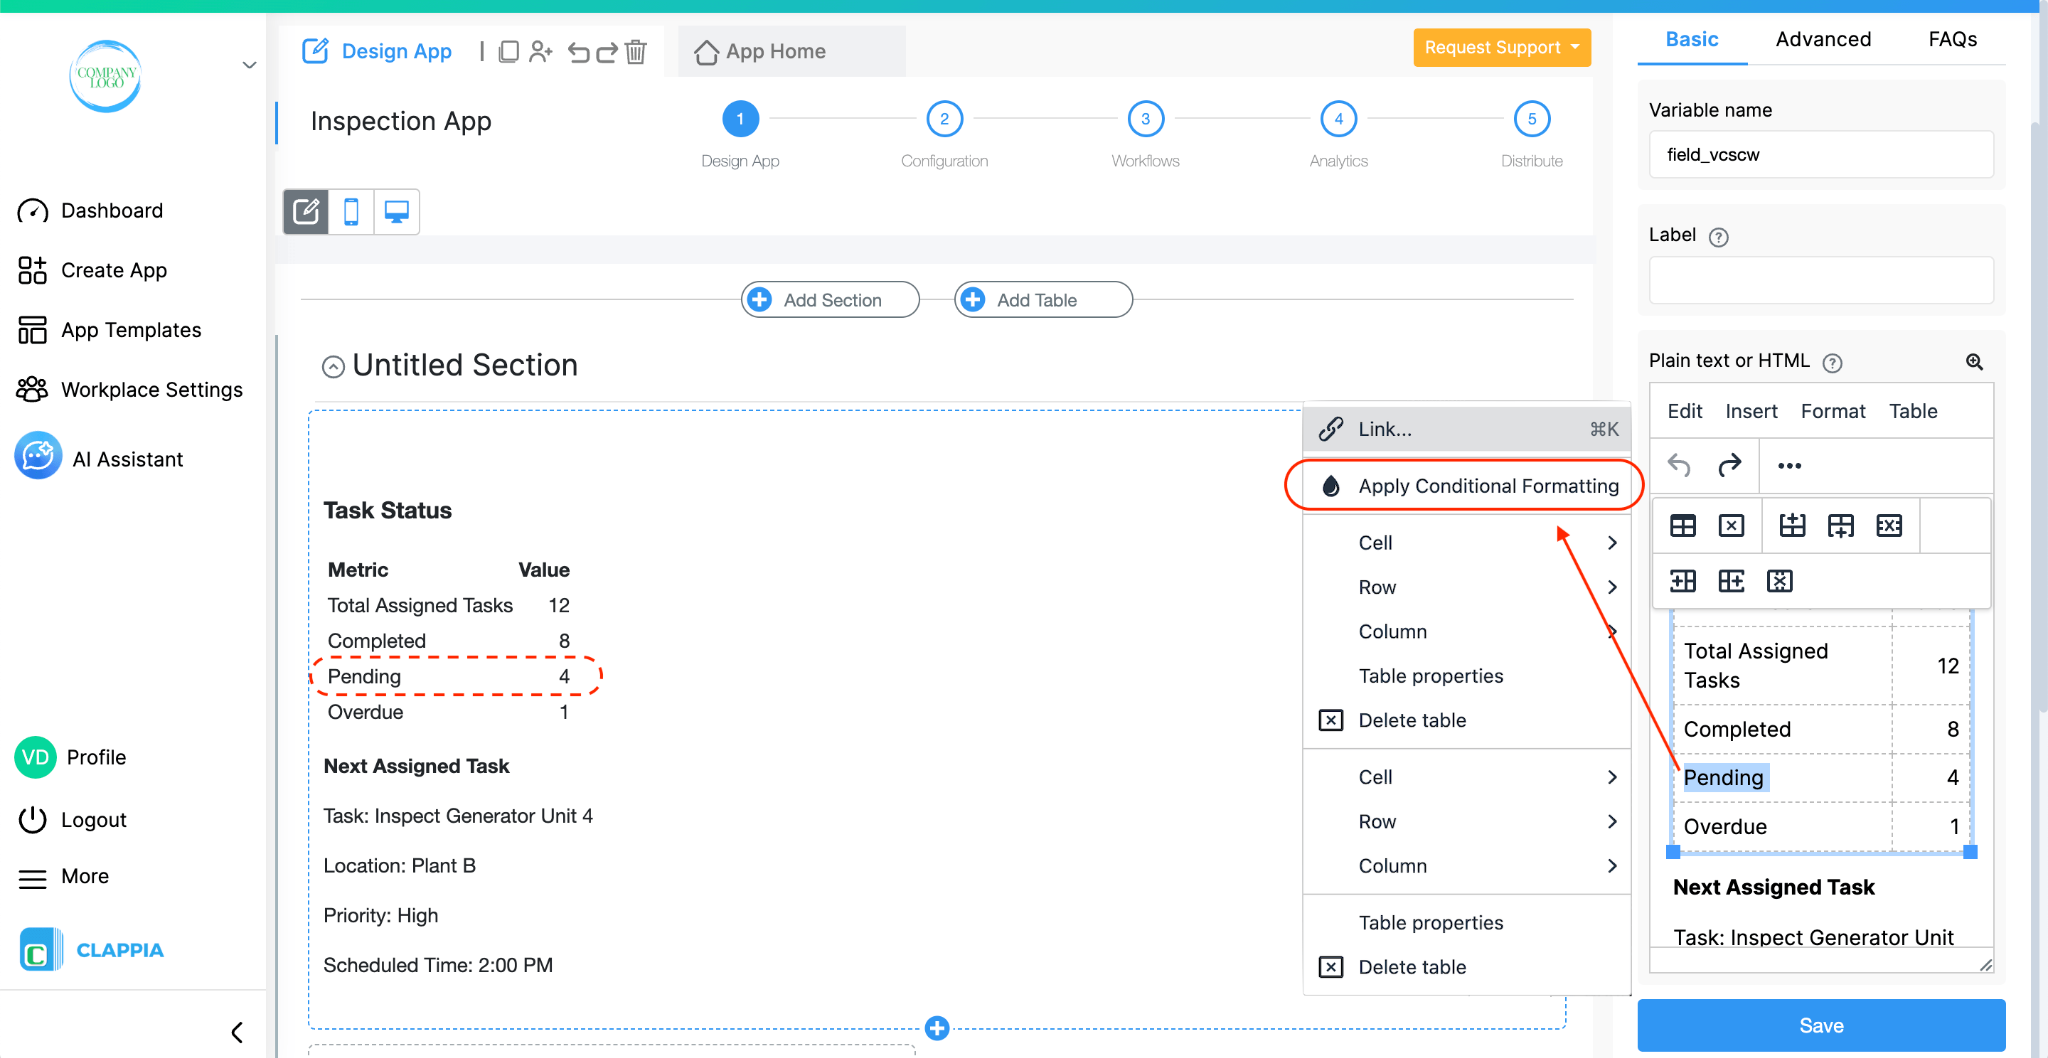
Highlight the text in the editor that you want to format and right-click on the highlighted text. Choose Apply Conditional Formatting from the menu.
In the below image, you can see the highlighted text belongs inside a table. To highlight texts that are in the same row but different coloumns, conditional formatting needs to be applied separately. The below example, "Pending" and "4" will be formatted separately.
Inside the Conditional Formatting panel, you can:
{status}="Pending", you can type @ to select the fields from your app.
You can add multiple properties by clicking on Add Another Property for the same condition or add multiple conditions.
In the example below, the text appears with a different text colour when the status value is "Open":
{status} = "Open"
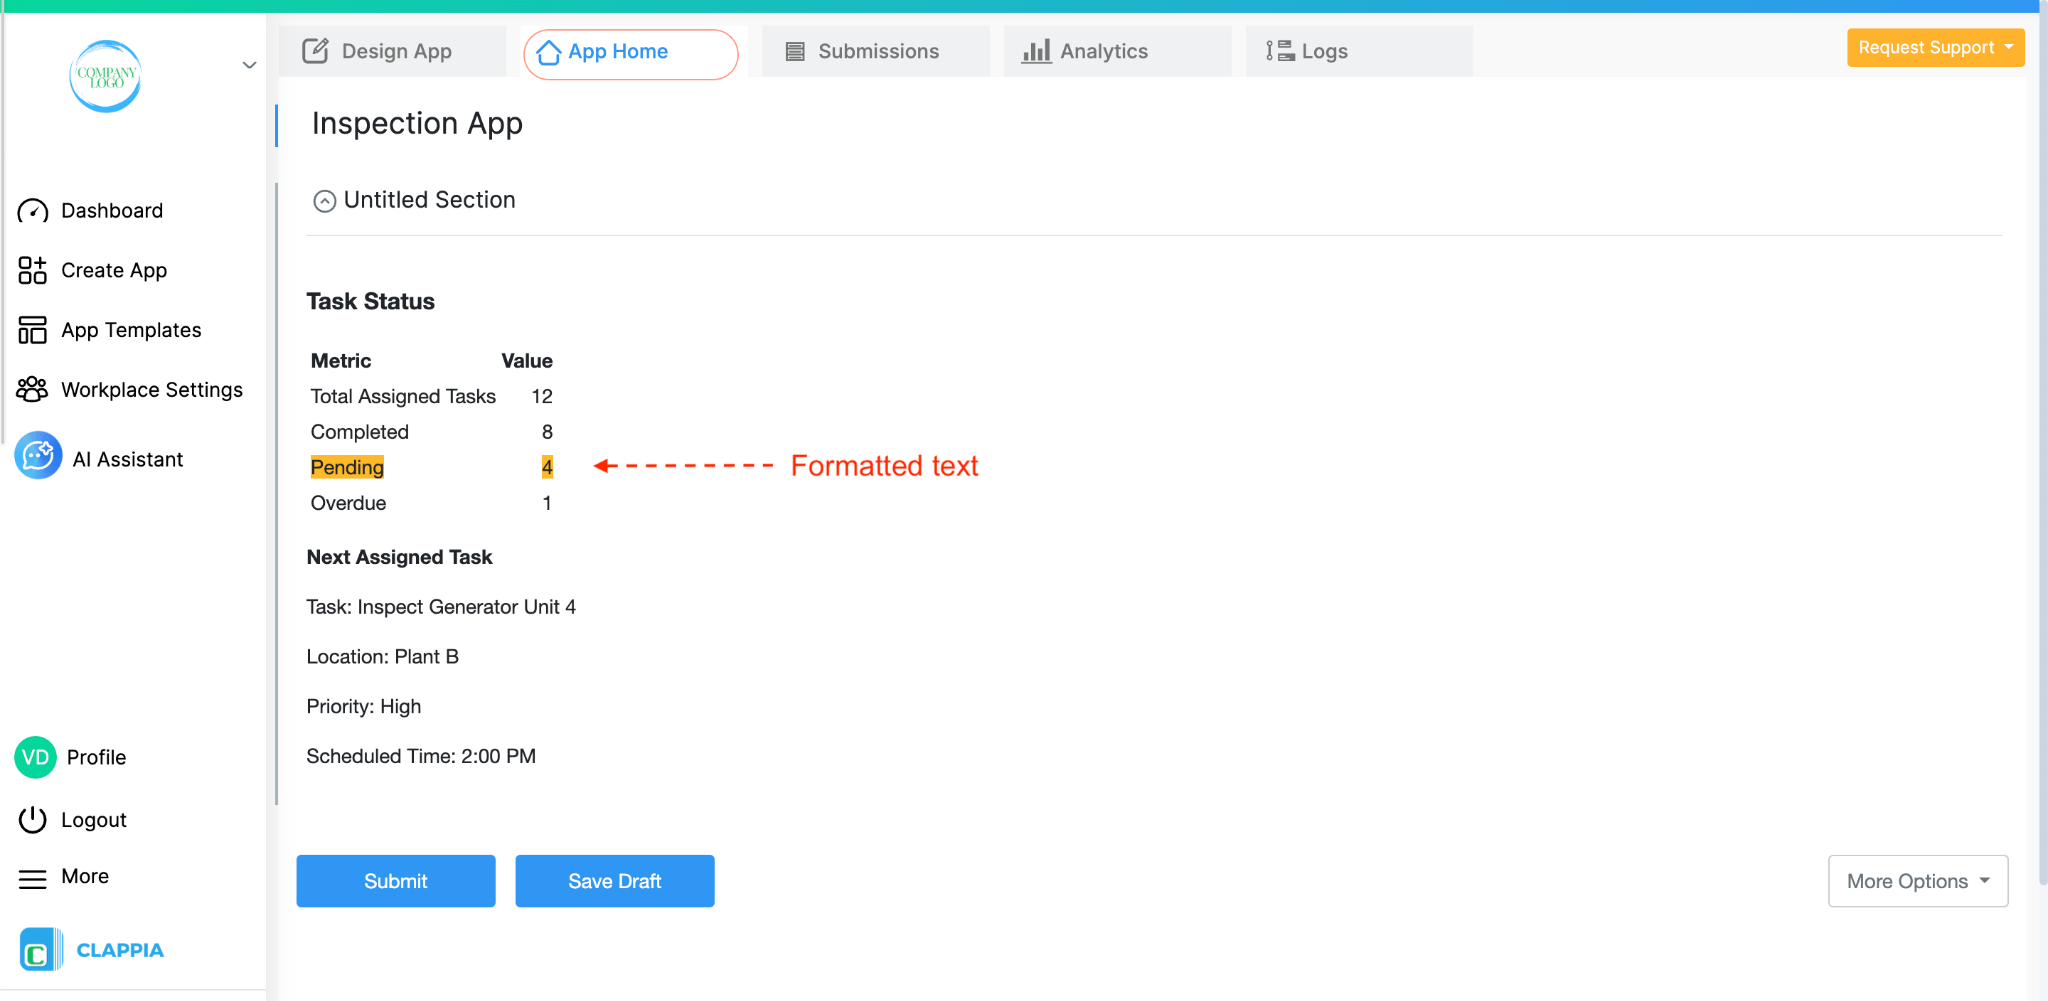
Similarly, you can hide an entire line of text if it should not appear.
To edit a conditionally formatted text, highlight the text > right click > select 'Update Conditional Formatting'.
To remove the conditional formatting, right click the text and select the option 'Remove Conditional Formatting'.
If you know the basics of HTML, you can add rich text or anything that HTML supports by writing HTML in the input box.
If you don't know how to write HTML, we recommend using this awesome service https://wordtohtml.net/ that lets you write anything like a word file and converts it into HTML. Copy the converted HTML and paste it here.
You can also embed your URL in this block.
- Click on the source code <> icon and an input box opens up.

- Write your code or embed your URL and click on save.

- You can see the HTML is converted accordingly to plain text in the editor and displayed accordingly in the app.


Popular ones -
Others -


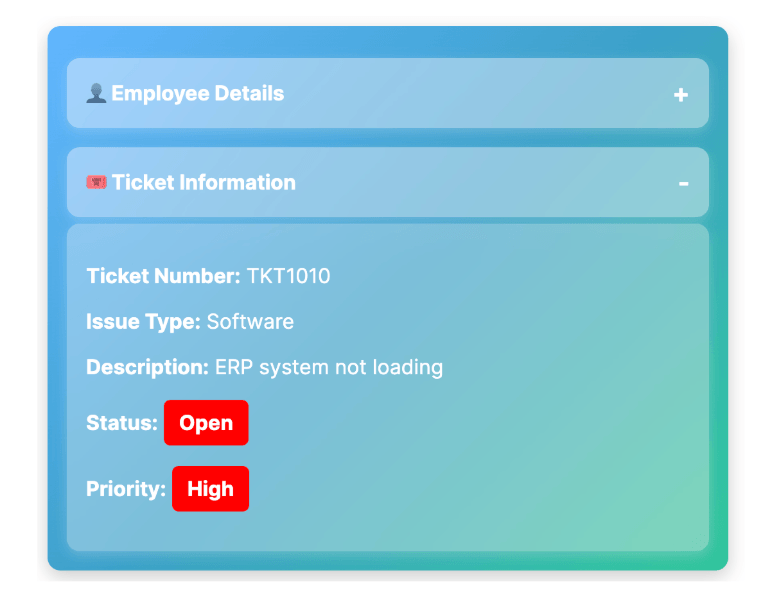
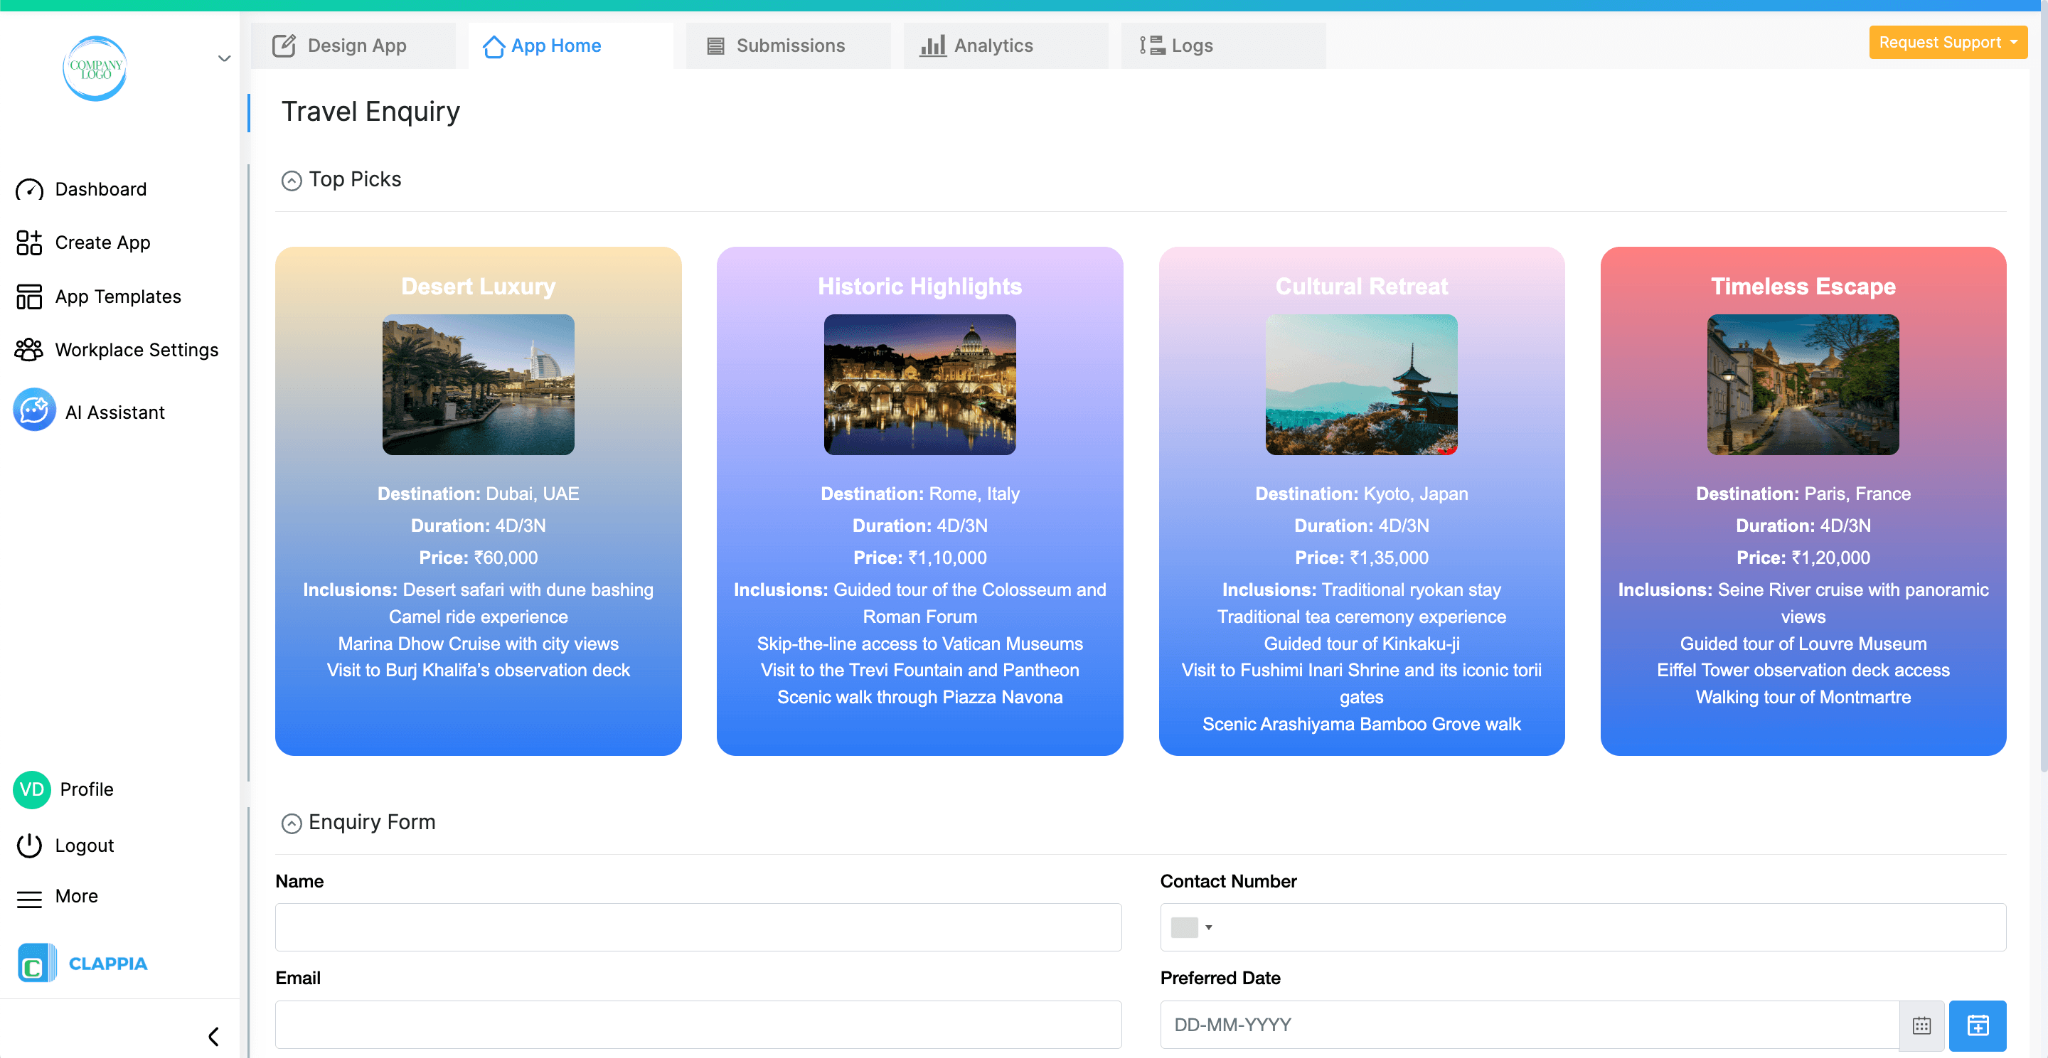
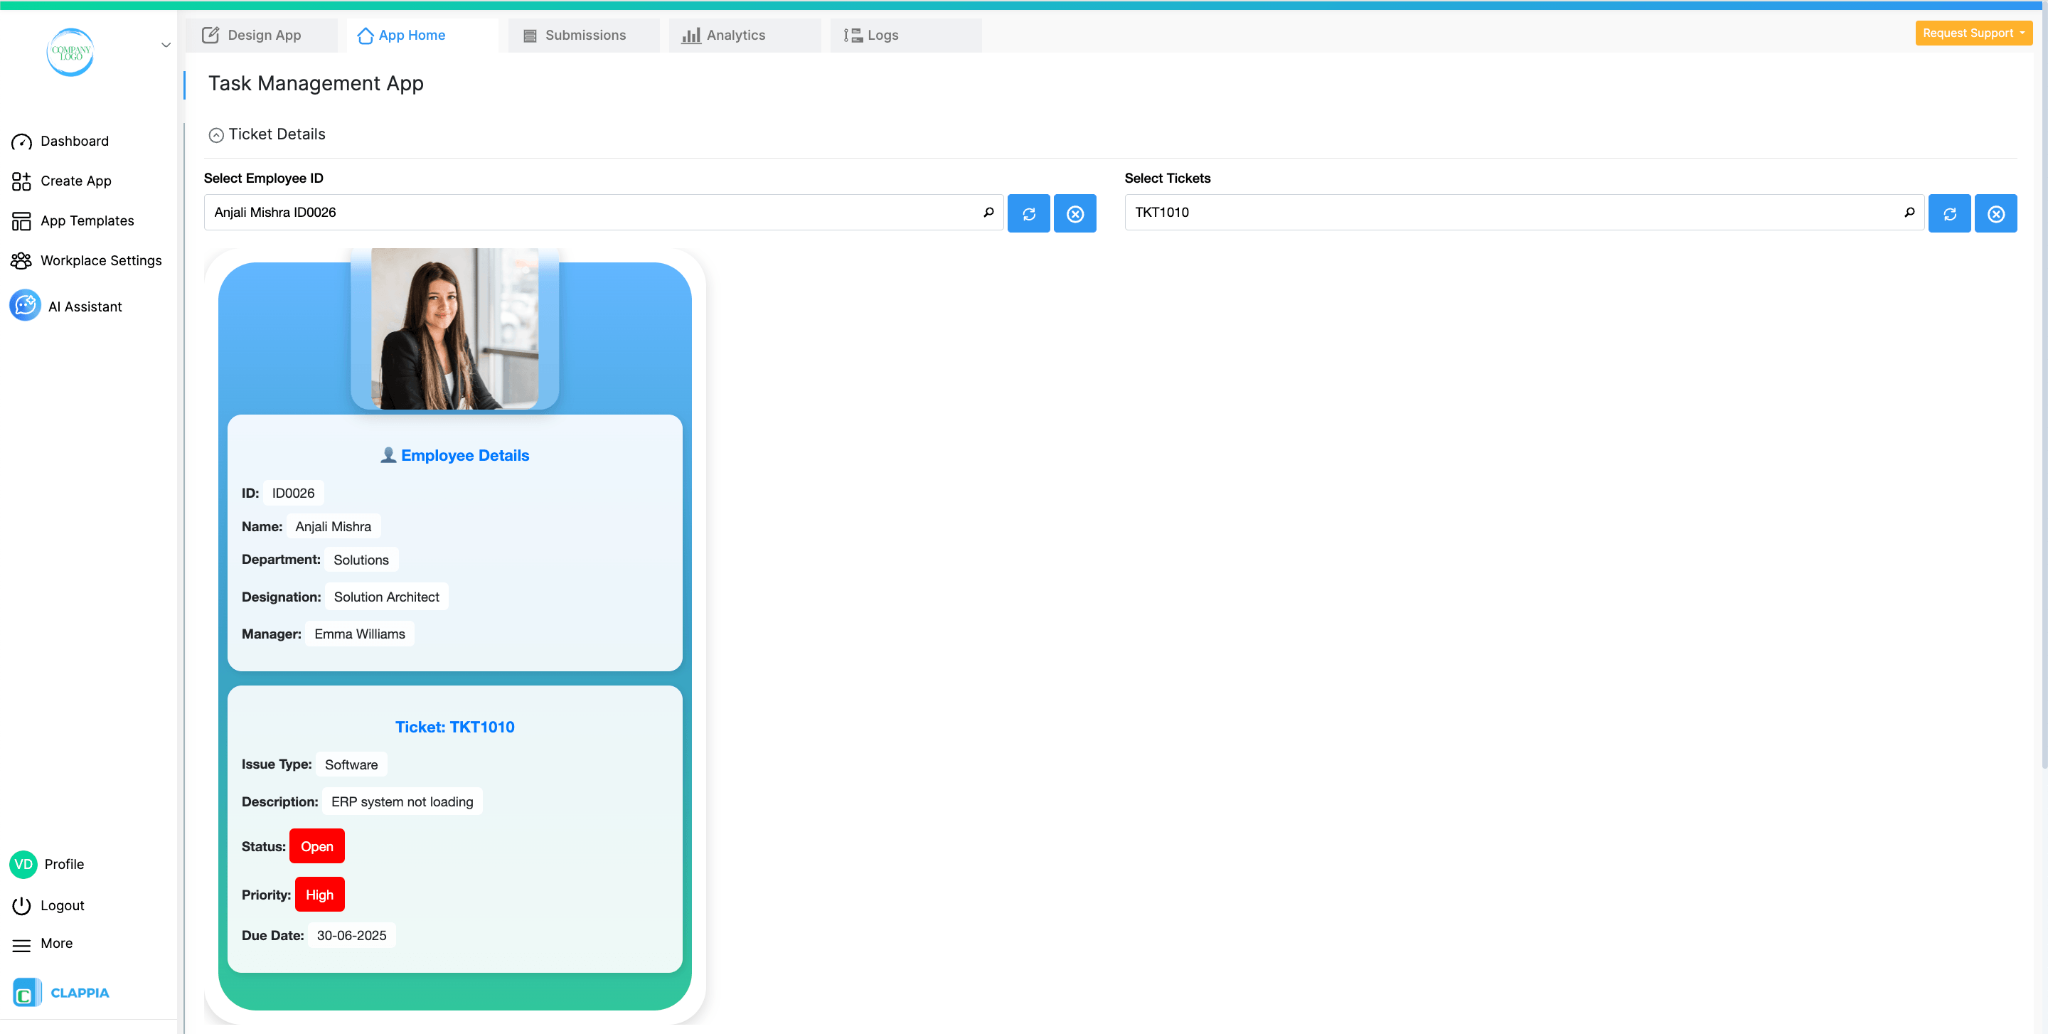
The Text, HTML & Embedding block is much more than a way to display text or instructions. By combining HTML with values from your app, you can completely customise how information is presented to users. Create dashboard-style layouts, colourful KPI cards, profile cards, summaries, navigation tiles, approval screens, or visually rich forms that don't look like traditional forms. You can also display values from Formula Blocks, Code Blocks, or other fields in custom layouts, making it easier for users to view and understand important information at a glance.
Examples of custom interfaces built using the Text, HTML & Embedding block are shown below.
Yes. This block supports rich text, but for display purposes. In addition to the built-in formatting options, you can use HTML code to embed and display rich content in your app.
You can use online HTML converters or AI tools to generate the required code if needed.
If you want users to enter formatted text (such as notes with bold text, italics, or links), use the Rich Text Editor field instead. The Text, HTML & Embedding block is meant only for displaying content, not collecting input.
In the editor box click on the 3 dots and click on the source code button. Here you will have to paste the code for the charts. To get the code, from the app in which charts are configured, click on App Home > Analytics tab. Click on the three dots at the top right corner of the chart and select Get embed code.
<iframe width=\"200\" height=\"100\" src=\"https://www.youtube.com/embed/JbH7Ip8tewA\" title=\"Adding Texts and Embedding Media with HTML ● Clappia App Building ● No-Code Low-Code Platform\" frameborder=\"0\" allow=\"accelerometer; autoplay; clipboard-write; encrypted-media; gyroscope; picture-in-picture; web-share\" allowfullscreen></iframe>
L374, 1st Floor, 5th Main Rd, Sector 6, HSR Layout, Bengaluru, Karnataka 560102, India
3500 S DuPont Hwy, Dover,
Kent 19901, Delaware, USA


.svg)




3500 S DuPont Hwy, Dover,
Kent 19901, Delaware, USA
L374, 1st Floor, 5th Main Rd, Sector 6, HSR Layout, Bengaluru, Karnataka 560102, India