
Still need help?

By default, when you use the Email node in Clappia, emails are sent as separate messages. This is fine in many cases, but when you’re dealing with back-and-forth communication like email queries or support conversations, it quickly becomes hard to track context.
You can set up email threads with Clappia so that replies are sent in the same email thread instead of sending a new email every time.
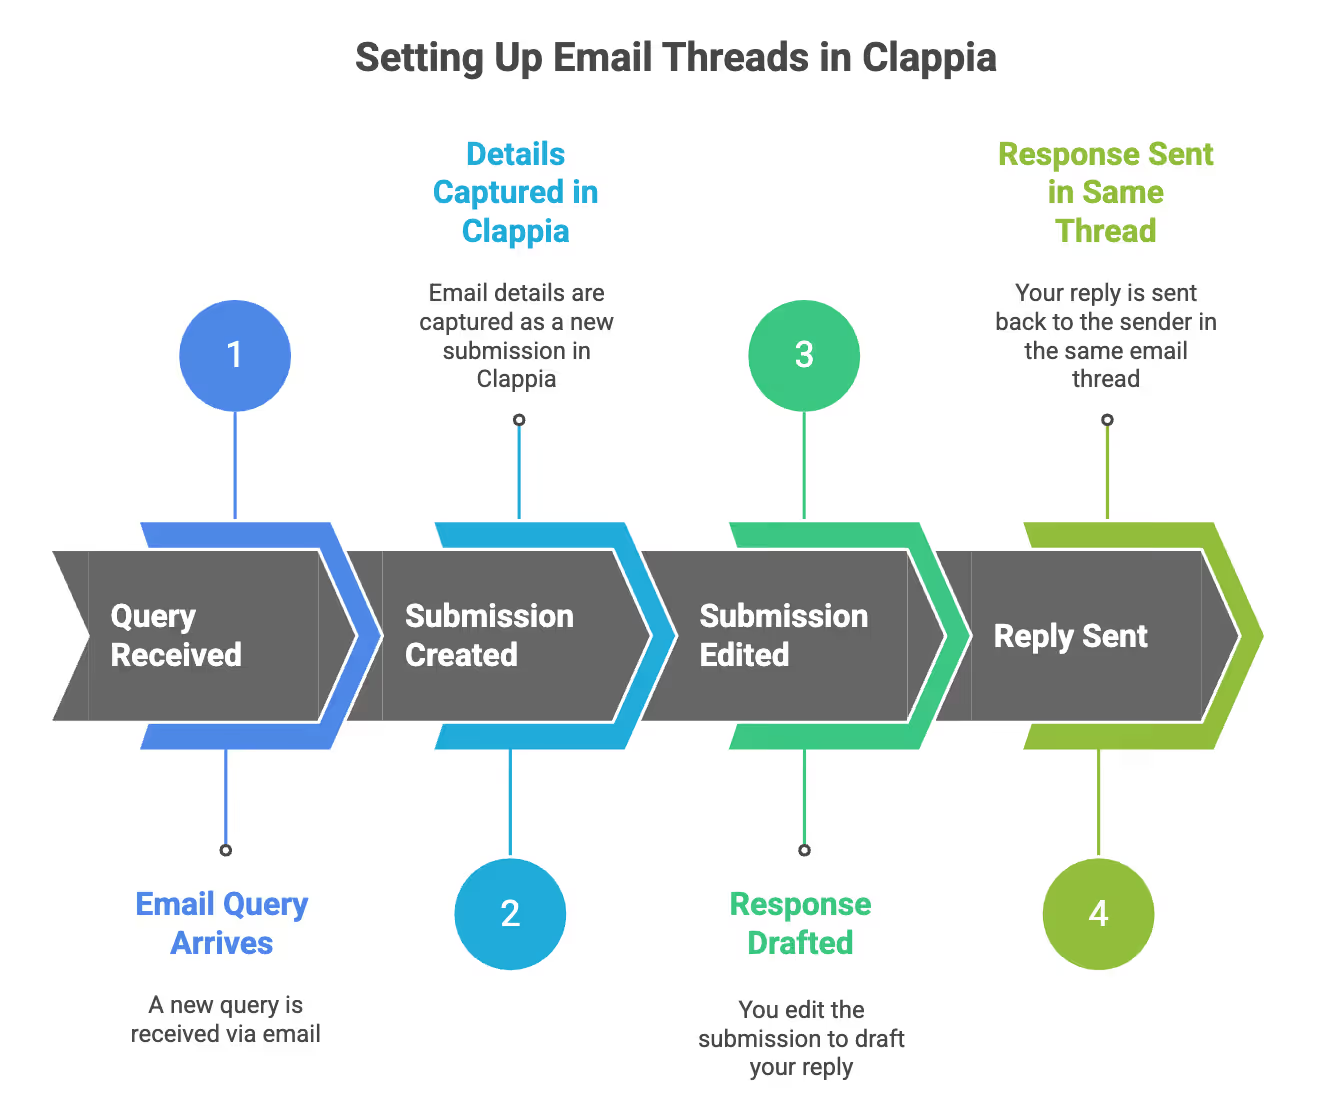
In this guide, we’ll walk through a simple and practical setup where:
This setup specifically covers scenarios where replies are sent after editing an existing submission.
Sign in to Clappia and create a new app, or use an existing one.
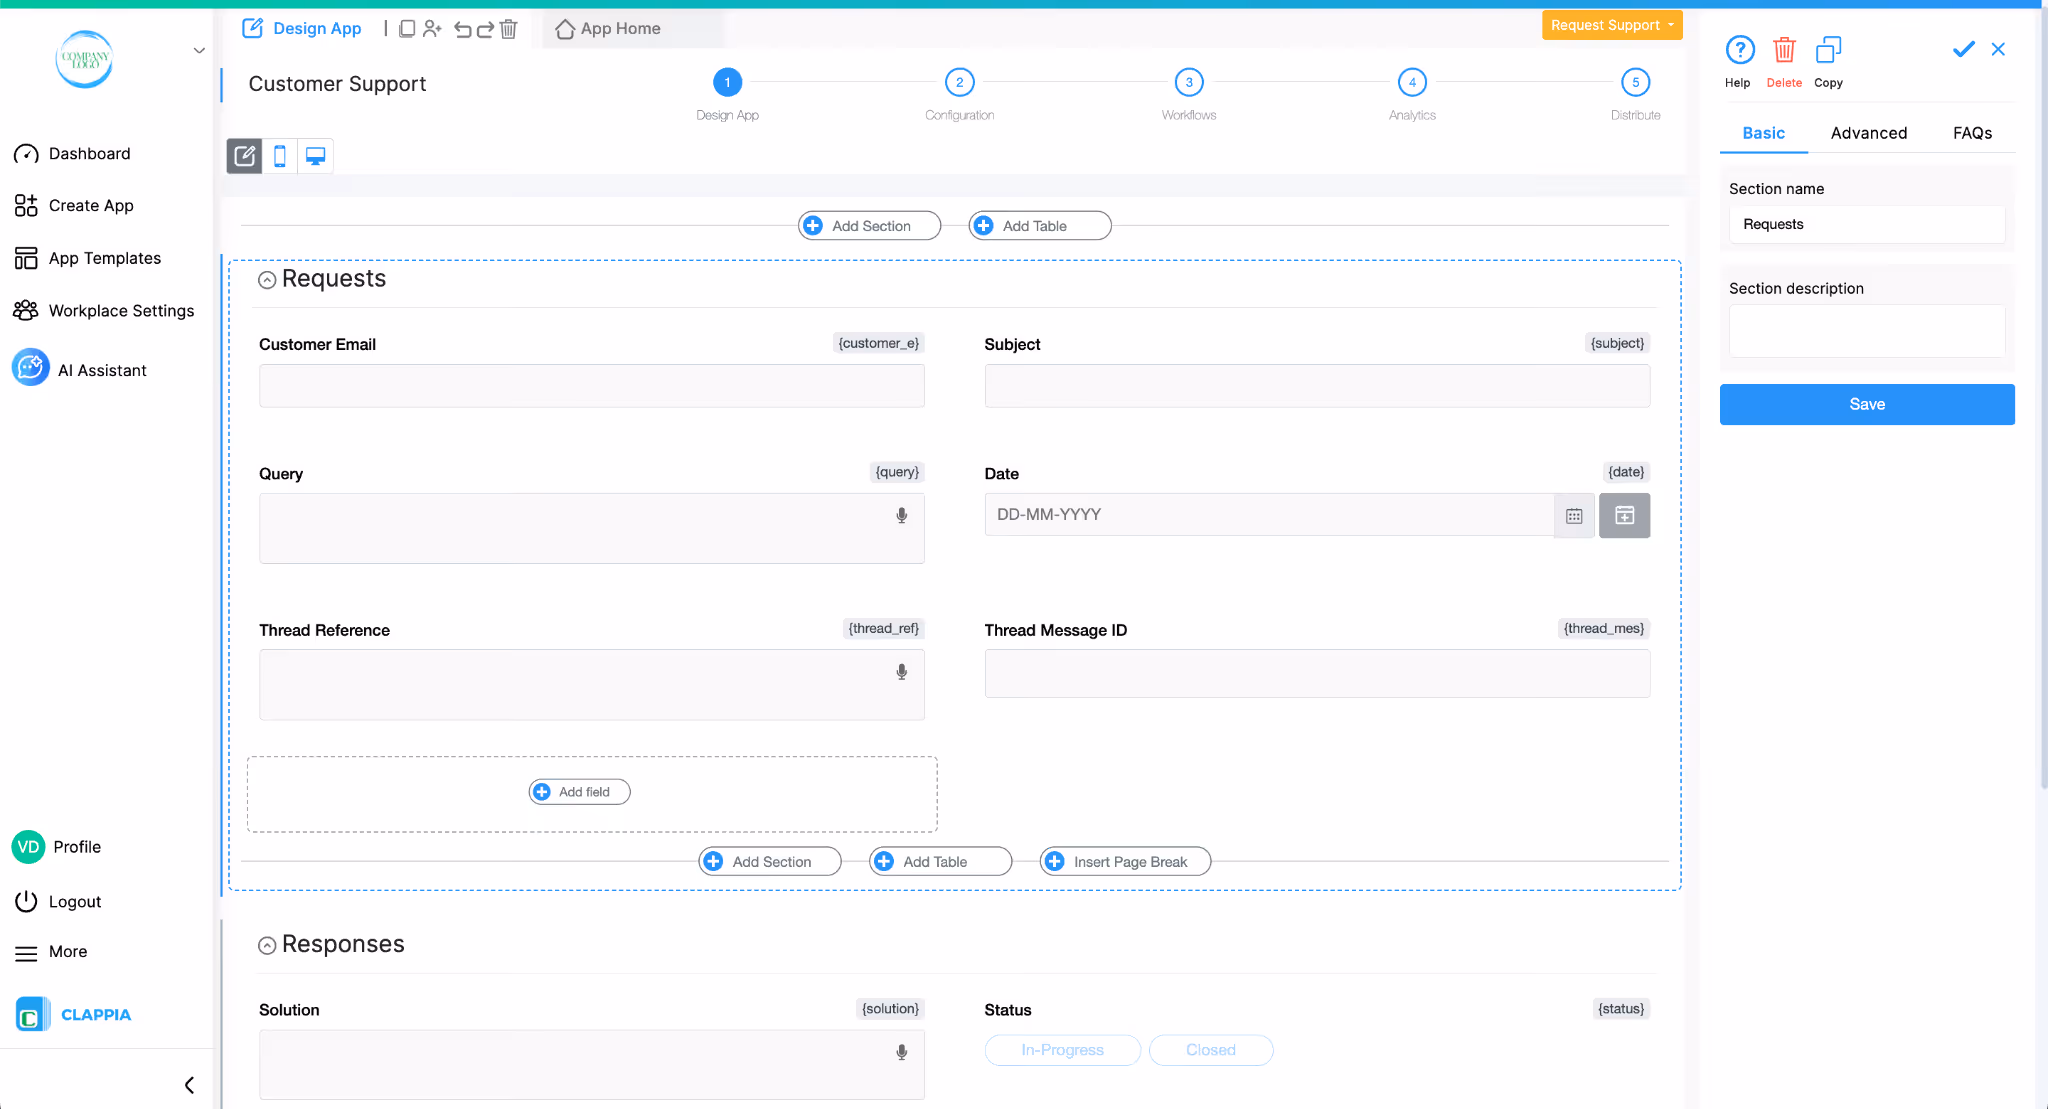
Make sure your app contains fields to store email-related information, such as:
These fields will be used to capture incoming email details accordingly.
You must also add a field to store the Message ID of the email. This Message ID is generated by the email system and is required to maintain the email thread.
You can use a Single-line text field for this.
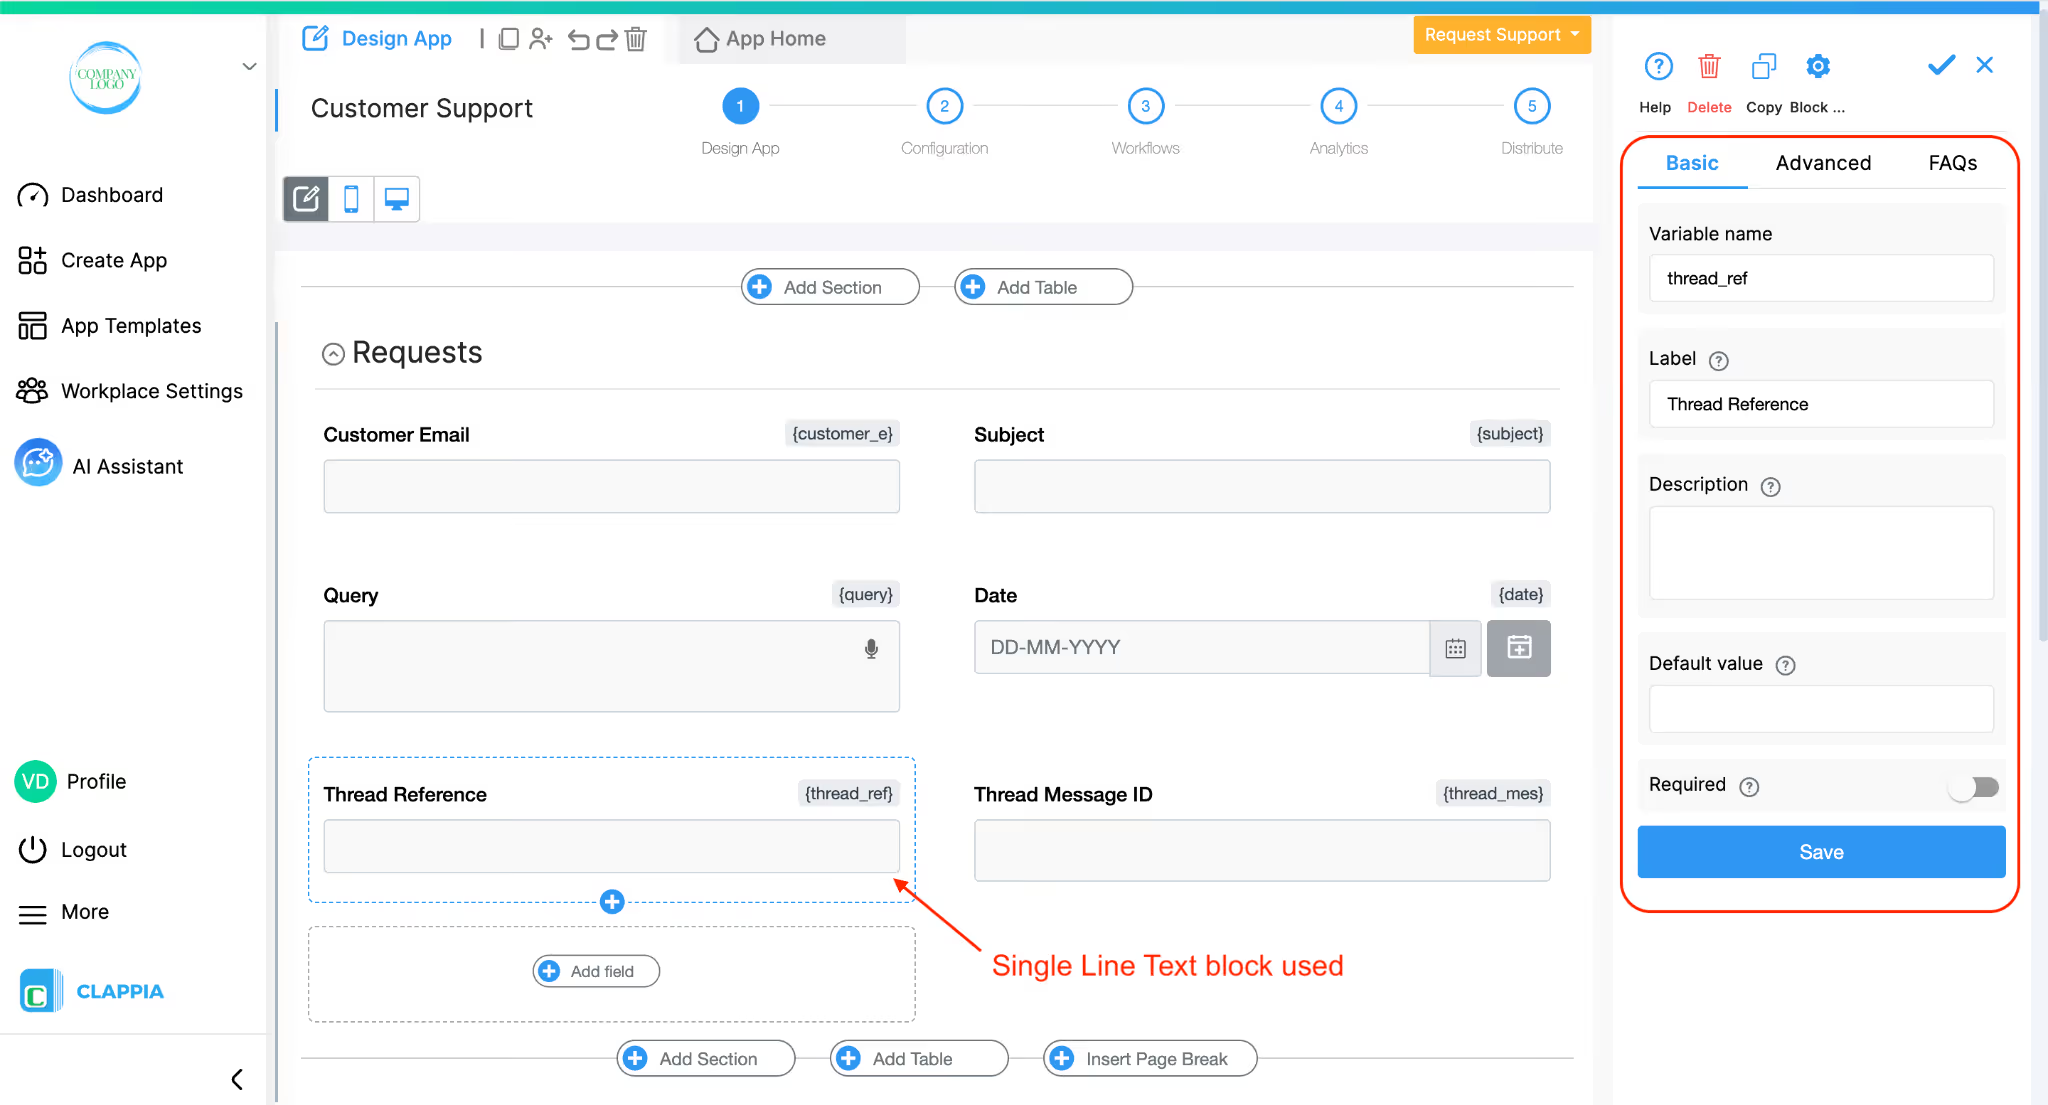
For this setup example, we’ll call the Single -line text field as Thread Reference.
This field will store the Message ID of the incoming email.
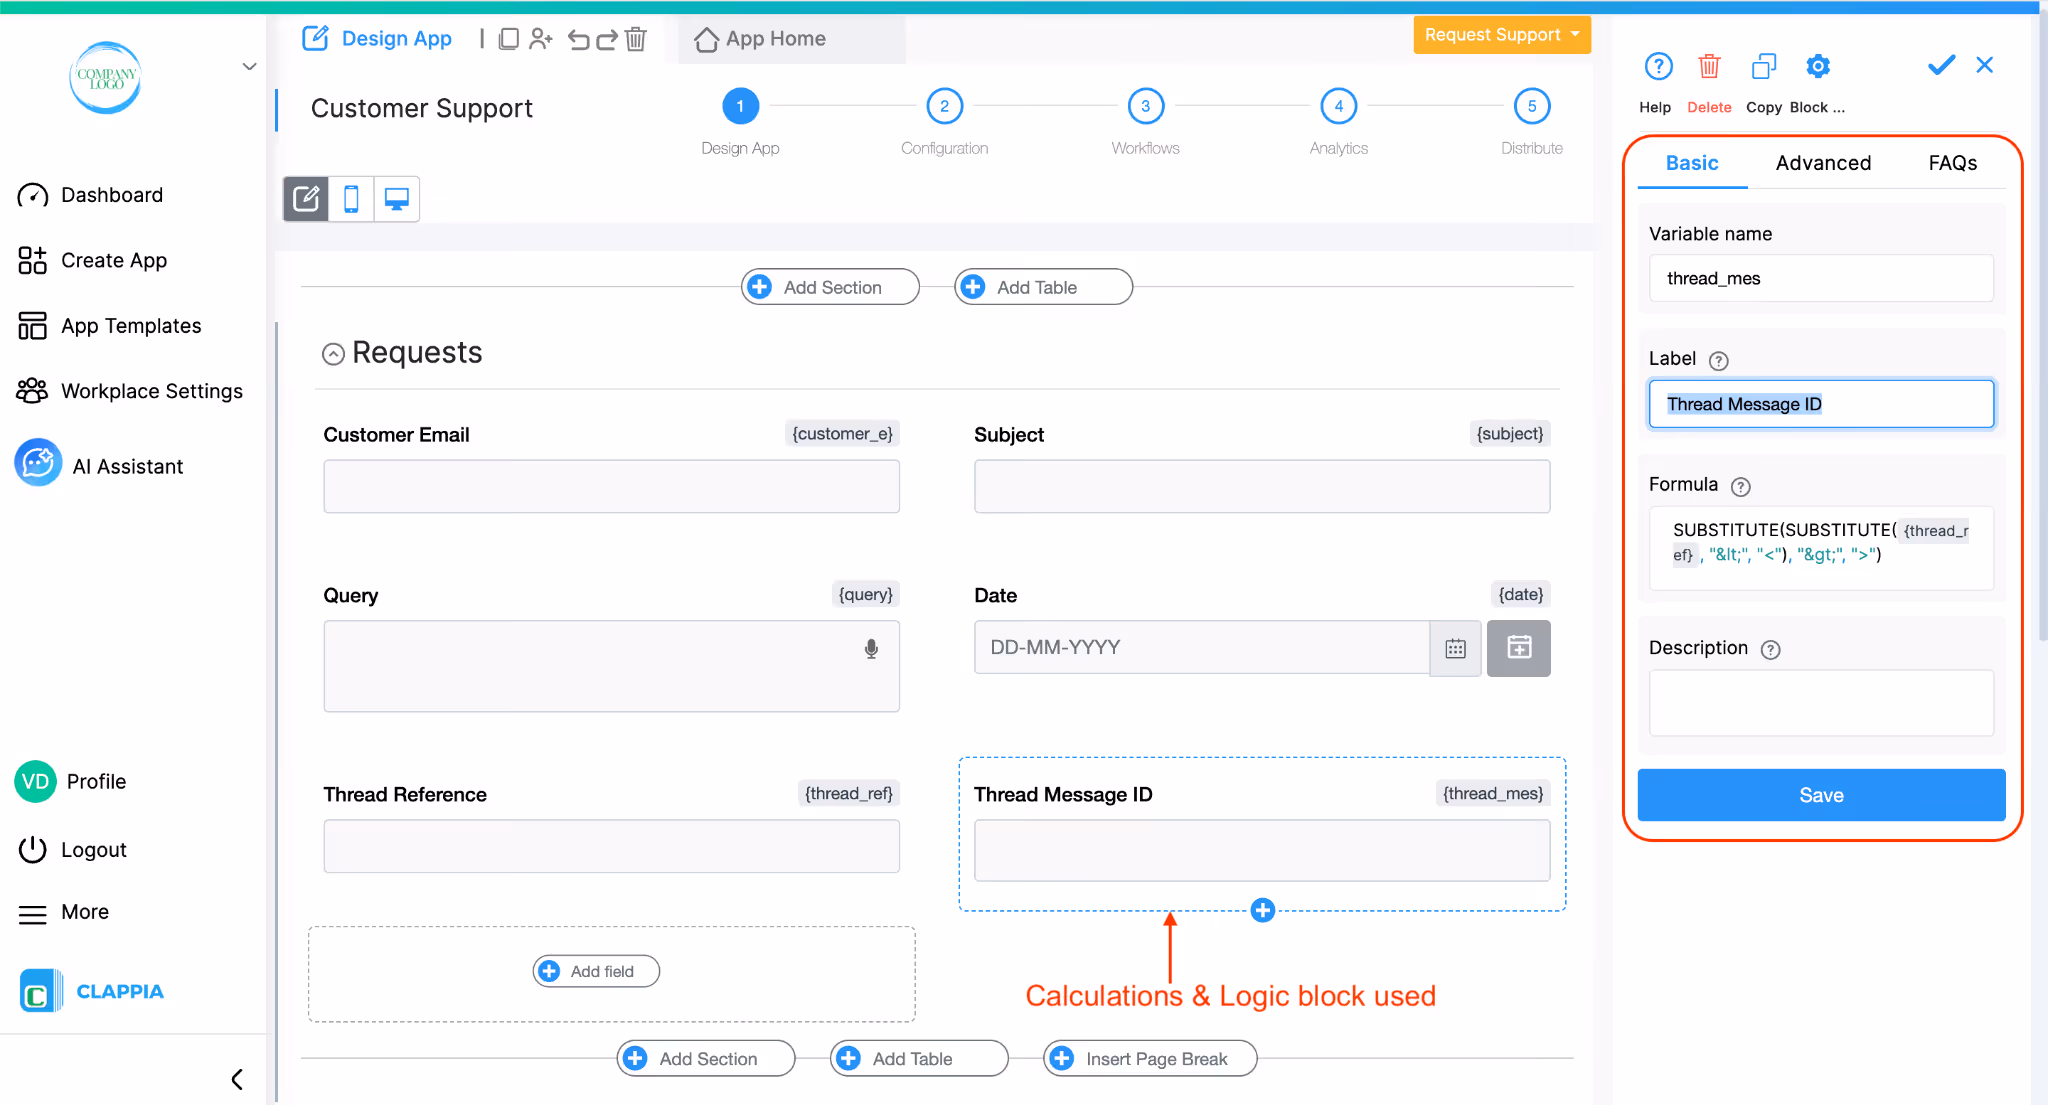
In addition to the Thread Reference (Message ID) field, you will need to add a Calculations & Logic block to clean up the value before using it in the Email node.
This calculation is used to replace encoded characters (< and >) with their actual values (< and >), which is required for proper email threading.
On the right panel of the Calculation & Logic block, use the following formula:
This assumes:
Let’s call this Calculation & Logic field as Thread Message ID and will later be reused when sending replies.Let’s call this field Thread Message ID. It will be reused later when sending replies.
To receive email details into Clappia, you need to use the Trigger Email node.
Open the app you want to use (can be the same or different app) and go to Design App > Workflows.
Under Trigger Based Flows, click ‘Start’ and select the Email node (this is the Trigger email node).
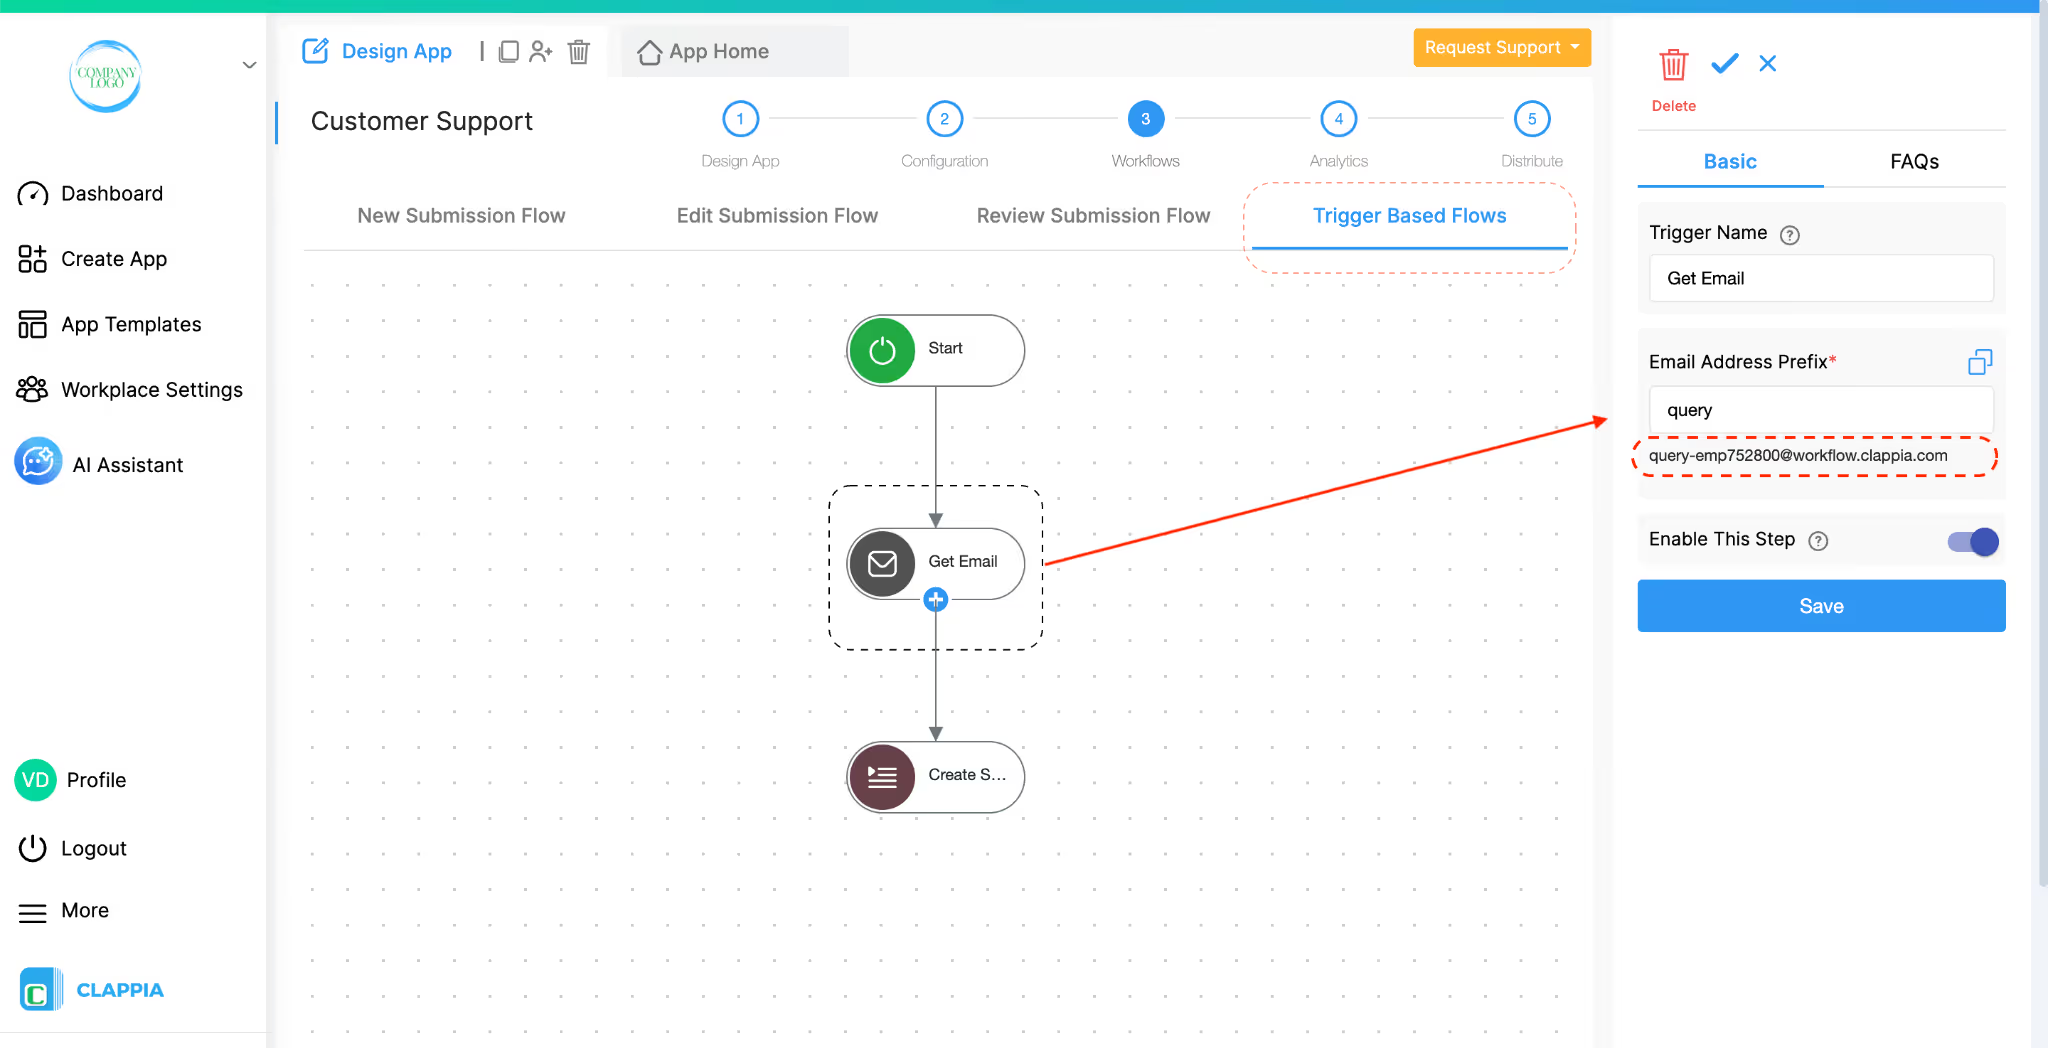
On the right panel:
Once you save this node, Clappia generates an email address.
Important:
Any email whose details you want to capture in this app must be sent to this generated email address. Emails sent elsewhere will not trigger this workflow. Therefore, you will need to share this generated email with others.
Below the Trigger Email node, add a Create Submission node. This node is responsible for creating a new submission in your app for every incoming email.
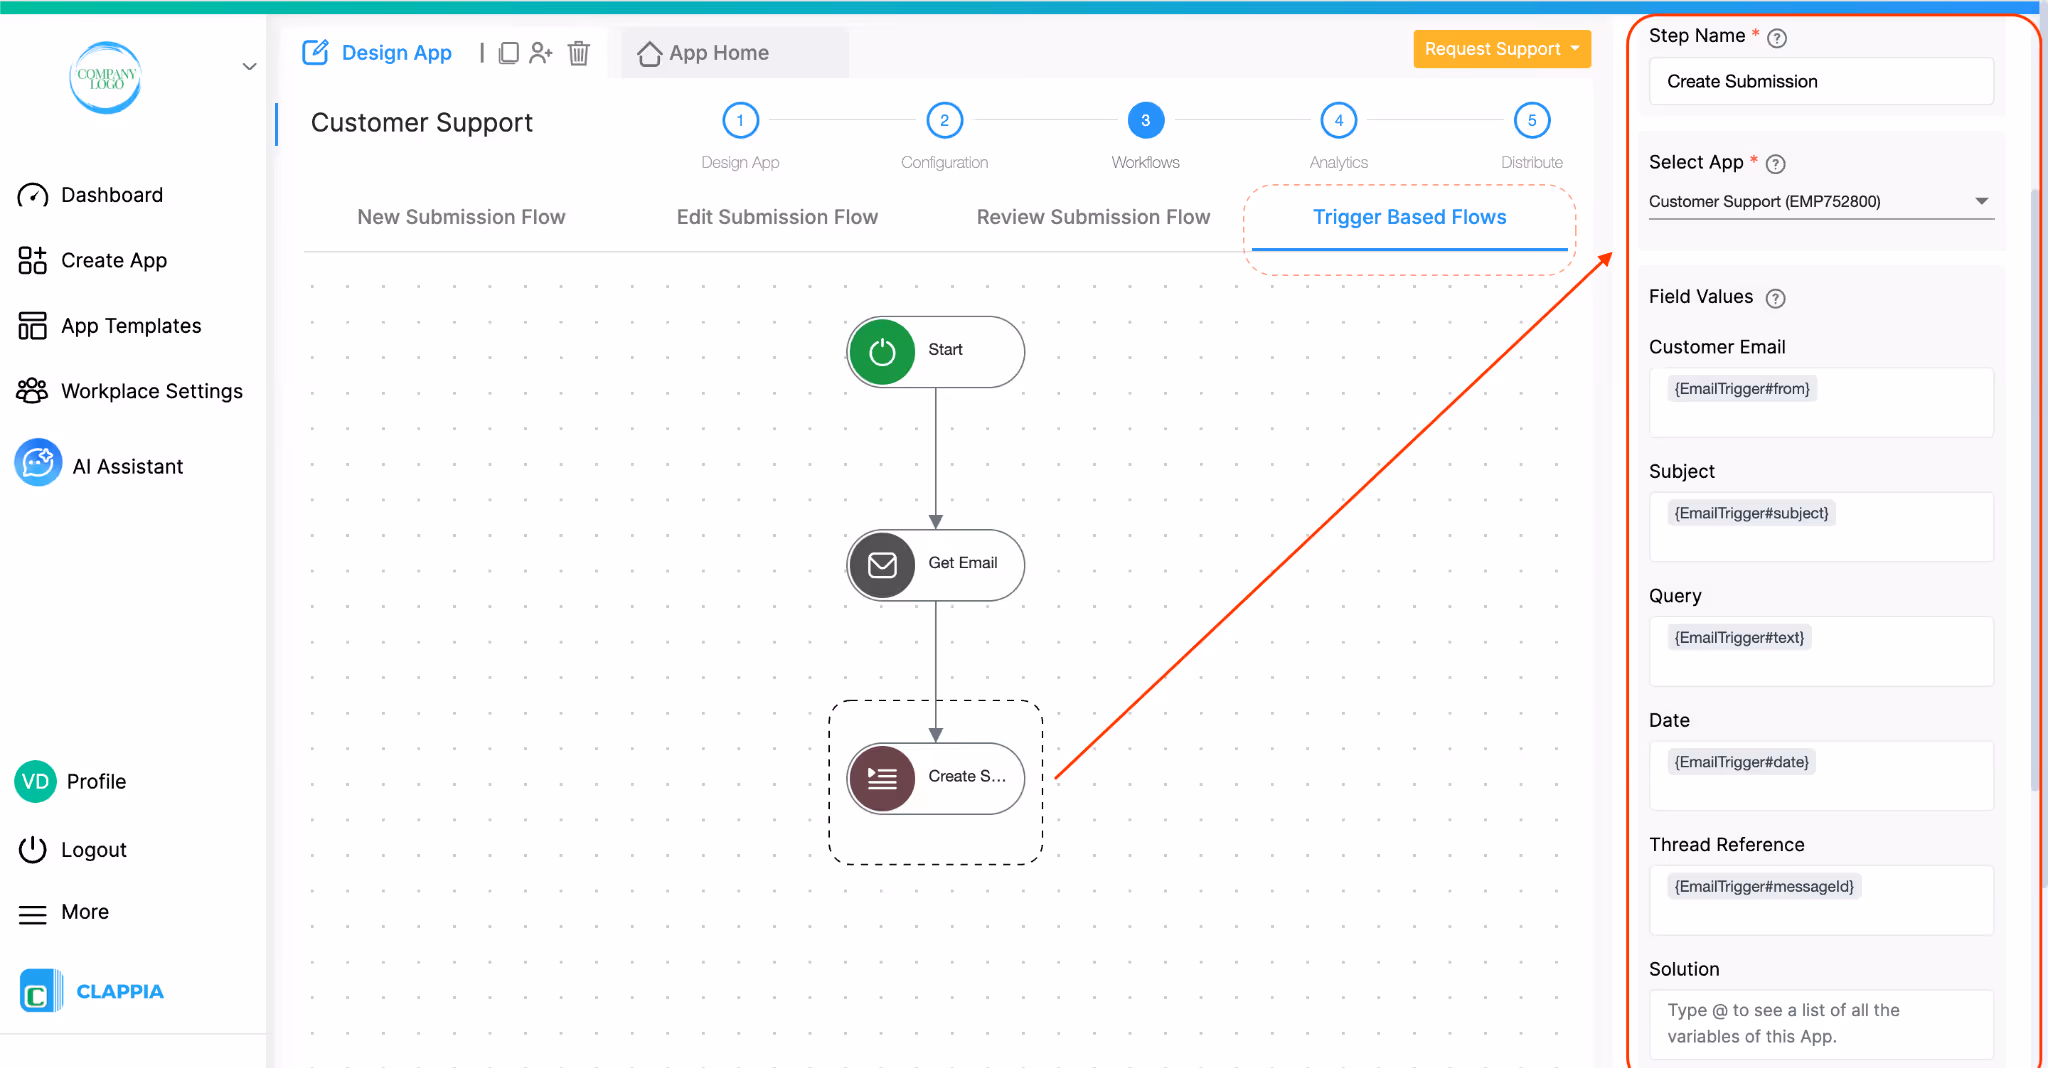
On the right panel:
Under Field Values, you’ll see all the fields from that app.
Here, you need to map email properties to the corresponding fields.
For example:
You do not need to map every field or every available email property, only the ones you need.
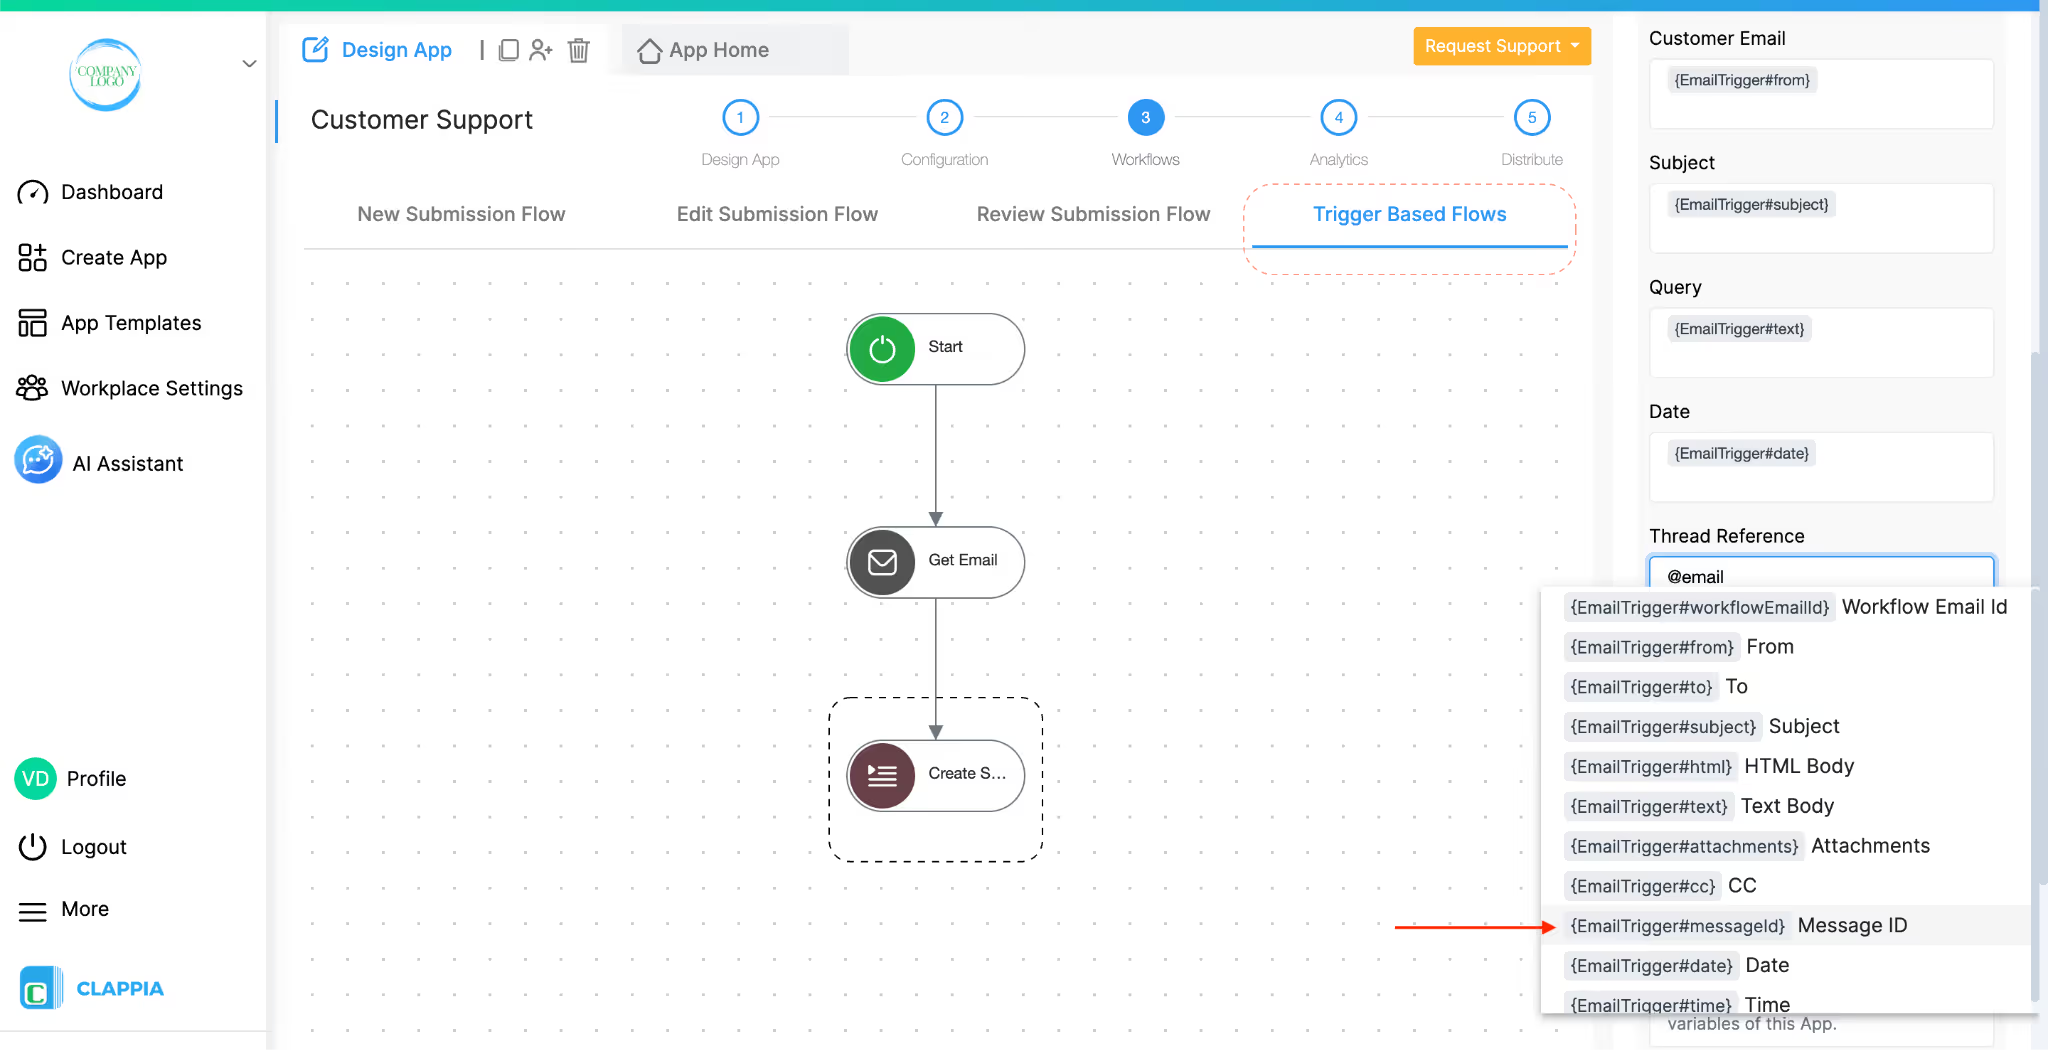
However, you must map the Thread Reference field.
For this field:
This ensures the Message ID of the incoming email is stored in the submission and can be reused later to maintain the thread.
At this point, incoming emails are successfully captured as submissions in your app.
Now that email details are stored in the app, the next step is to send replies that continue the same email thread.
Open the app that contains the email related fields and go to Design App > Workflows.
Under Edit Submission Flow, add an Email node.
This placement is important because this setup assumes that:
As an alternative, you could place the Email node under New Submission Flow with a wait time before it runs. Which option you choose depends on your process, but the threading logic remains the same.
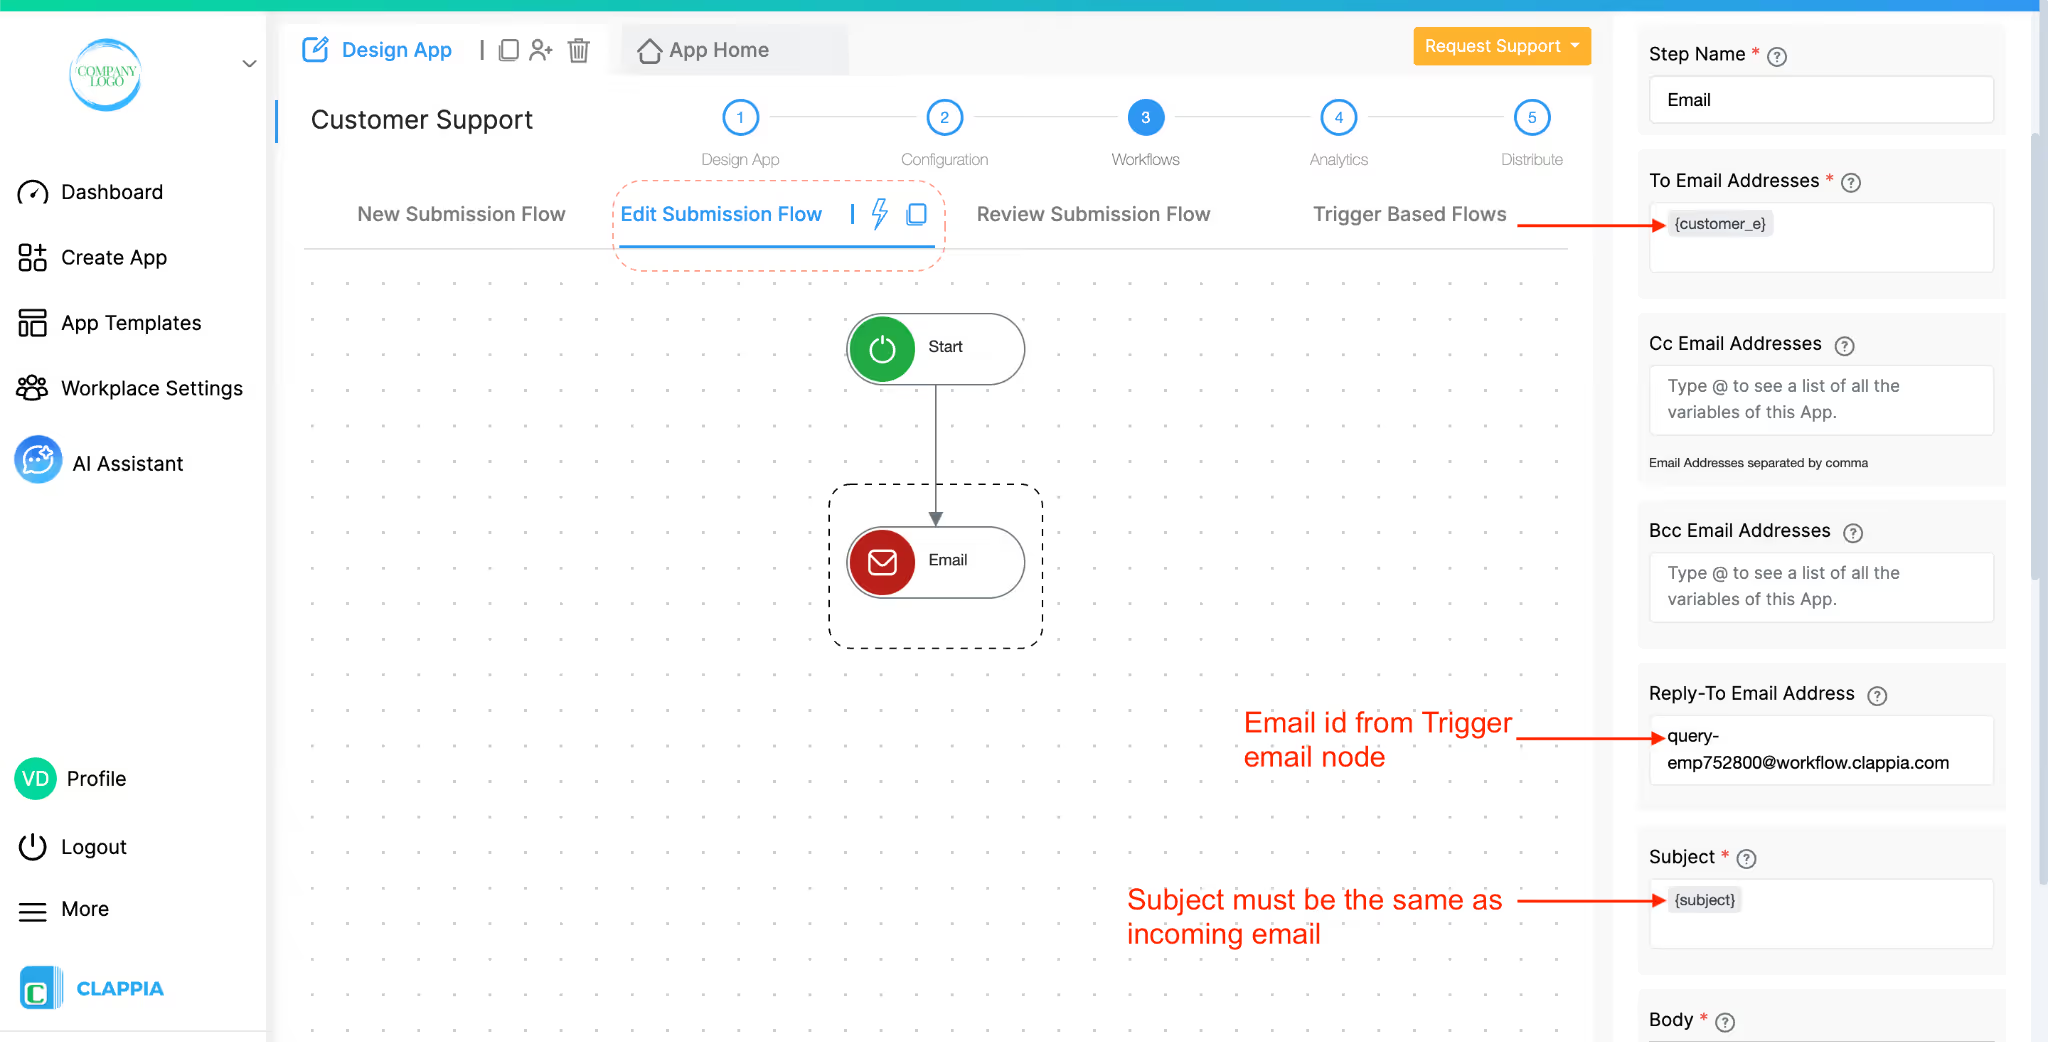
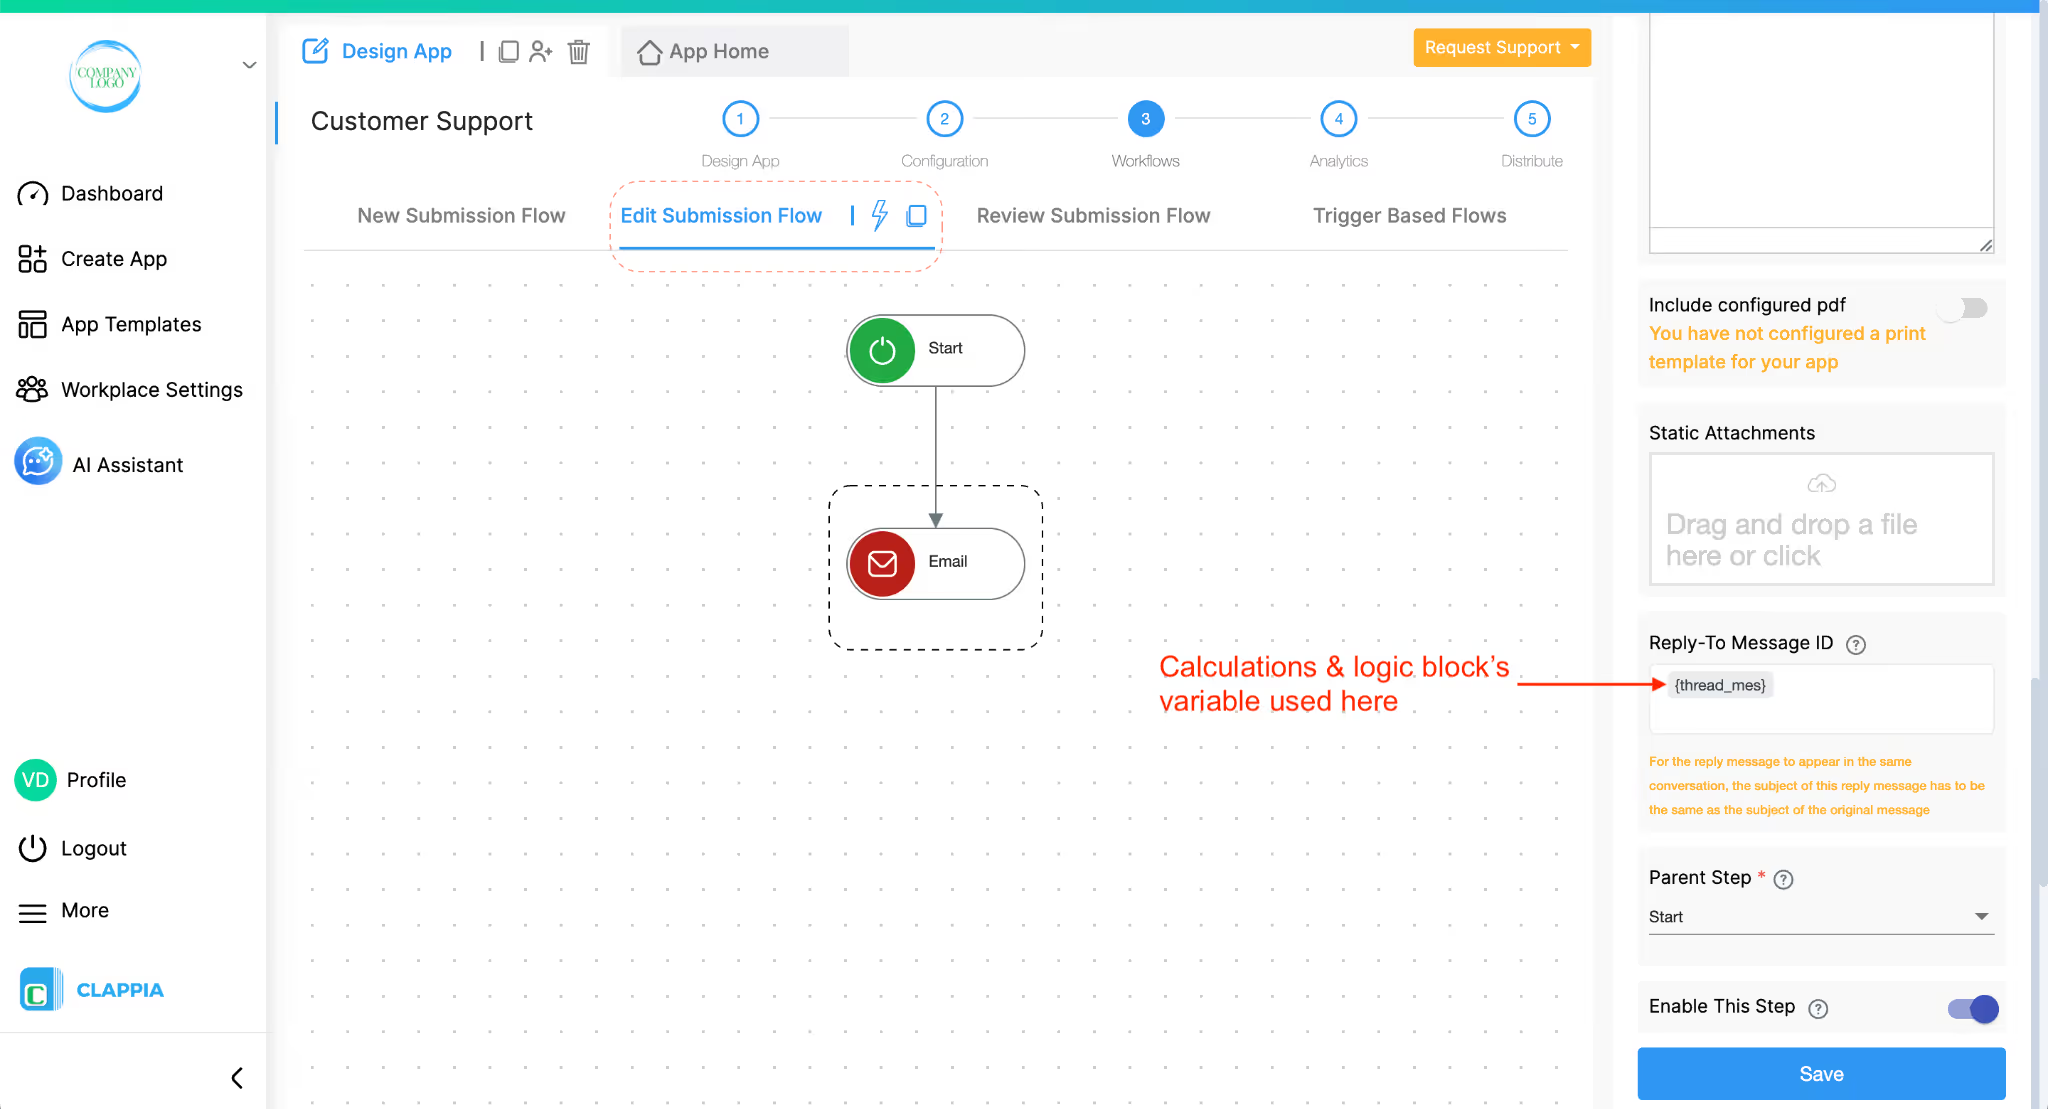
Configure the Email node as follows:
Save the Email node.
Now, whenever an email is sent to the email address configured in the Trigger Email node:
When you edit that submission:
If the recipient replies again, that reply is sent back to the Trigger Email address and can be captured into Clappia, allowing the conversation to continue without breaking the thread.
This way, you maintain full email context while keeping inboxes clean and conversations easy to follow.
L374, 1st Floor, 5th Main Rd, Sector 6, HSR Layout, Bengaluru, Karnataka 560102, India
3500 S DuPont Hwy, Dover,
Kent 19901, Delaware, USA


3500 S DuPont Hwy, Dover,
Kent 19901, Delaware, USA
L374, 1st Floor, 5th Main Rd, Sector 6, HSR Layout, Bengaluru, Karnataka 560102, India
.svg)
