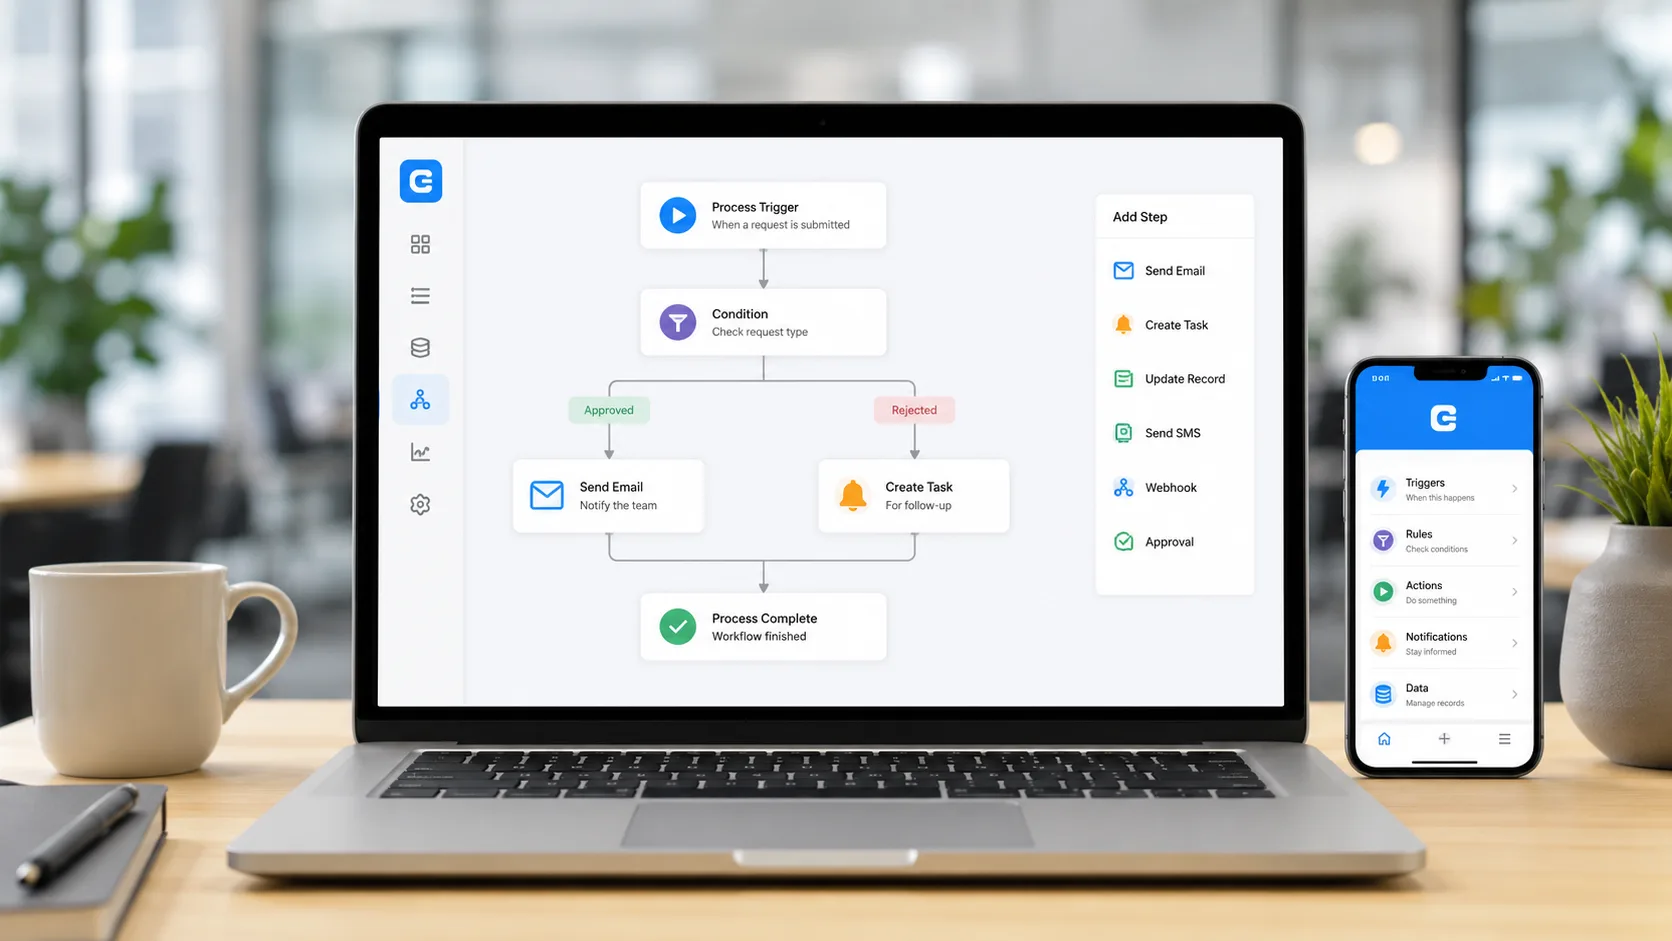
Workflow automation is software that runs the steps of a repeatable business process automatically - when a trigger fires, it applies your rules and carries out the actions without manual handoffs. In a no-code platform like Clappia, that means a submitted form kicks off a chain of workflow nodes - checking conditions, routing approvals, sending notifications, even running AI - all built visually. This guide explains what workflow automation is, how it works in Clappia, the nodes you'll actually use, and how to build your first workflow.
A workflow is the sequence of steps that gets a job done - a request is made, someone reviews it, a decision is recorded, and the result is filed. Workflow automation hands those steps to software so they run consistently and instantly. Every automated workflow has the same shape: a trigger (something happens), logic (rules decide what to do), and actions (the work is carried out).
The difference between platforms is what happens in the middle. In Clappia, the logic and actions are workflow nodes you drop onto a canvas - no code, no waiting on IT. A business user can automate a real process the same afternoon they design the form.
The clearest way to understand it is to follow one submission through the engine. When a form is submitted, the workflow runs the nodes you placed, in order - each doing one job before handing off to the next:
The key thing to know about Clappia is the condition (IF) node: it checks a single condition, so a yes/no decision is built with two IF nodes - one for the approved path and one for the rejected path - each starting its own branch of actions.
You don't need a taxonomy of automation buzzwords - you need the handful of nodes that do real work. Here are the ones most workflows are built from:
| Clappia workflow node | What it does | Example |
|---|---|---|
| Condition (IF) | Branches the flow on a condition (one condition per node) | Route expenses over $5,000 down a different path |
| Approval | Sends the record for multi-level sign-off with reminders | Manager then finance head approve a purchase |
| Email / notification | Sends automated email, SMS, WhatsApp or push alerts | Email the requester when a claim is approved |
| AI Workflow node | Runs AI tasks - generate content, analyze an image, extract data (OpenAI, Claude, Gemini and more) | Read a submitted invoice image and pull out the total |
| Code node | Runs custom JavaScript for advanced logic and API calls | Calculate a tiered discount, then format the output |
| REST API | Fetches or updates data in external systems | Push an approved order to your ERP |
| Database | Fetches data dynamically from external databases | Look up a vendor's credit terms mid-workflow |
| Repeat | Loops an action over a list of items | Send a reminder to every pending approver |
Two nodes are worth calling out. The AI Workflow node brings AI directly into a process - it can read a submitted invoice image, summarize a description, or classify a request, then pass that result to the next node. And the Code node runs custom JavaScript for the rare cases where you need advanced calculations or a bespoke API call. Together with the REST API and Database nodes, they let a no-code workflow reach well beyond simple forms. You can see the full set in the workflows help center.
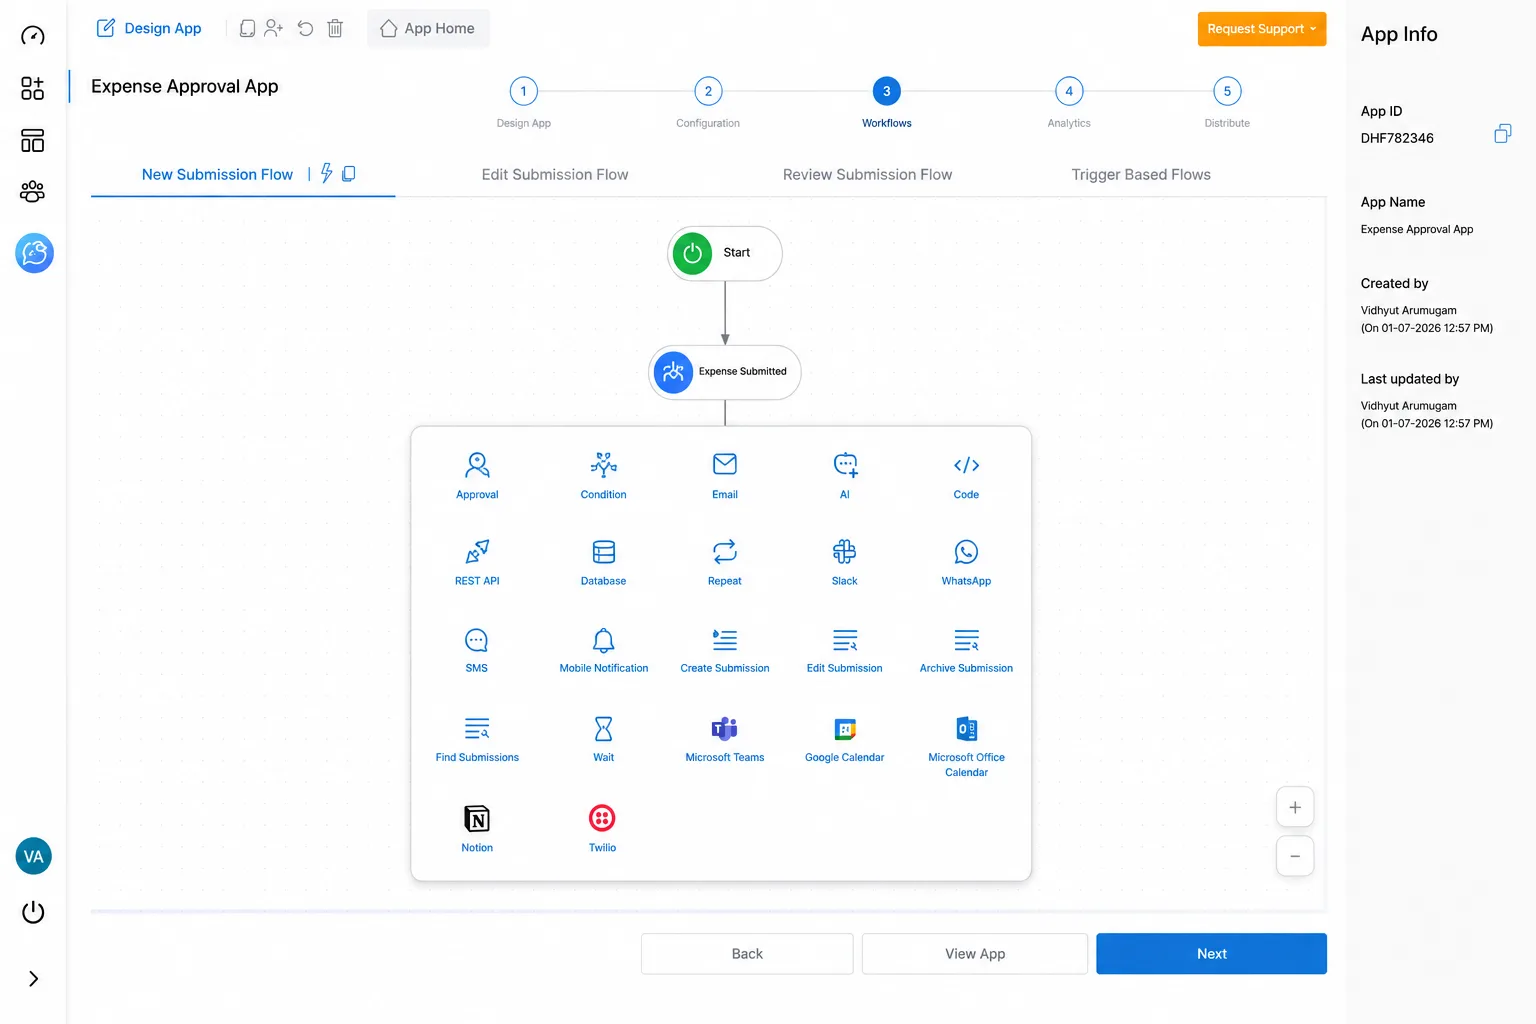
You build a workflow the same way you build the form - visually. On the Workflows tab you add a node, and a picker opens with every option: Approval, Condition, Email, AI, Code, REST API, Database, Repeat, and integrations like Slack, WhatsApp, and Google Calendar. A typical build is four steps:
Build an approval workflow visually - a trigger, two IF nodes, an approval, and an email - and run it as a web and mobile app the same day.
Get started freeThe automations that actually stick almost never start big. In the rollouts we've seen work, teams automate one painful approval first - a single form, two IF nodes, one approval, one email - prove the cycle-time win, then add AI, integrations, and dashboards. Start with the workflow people complain about most, not the most complex one.
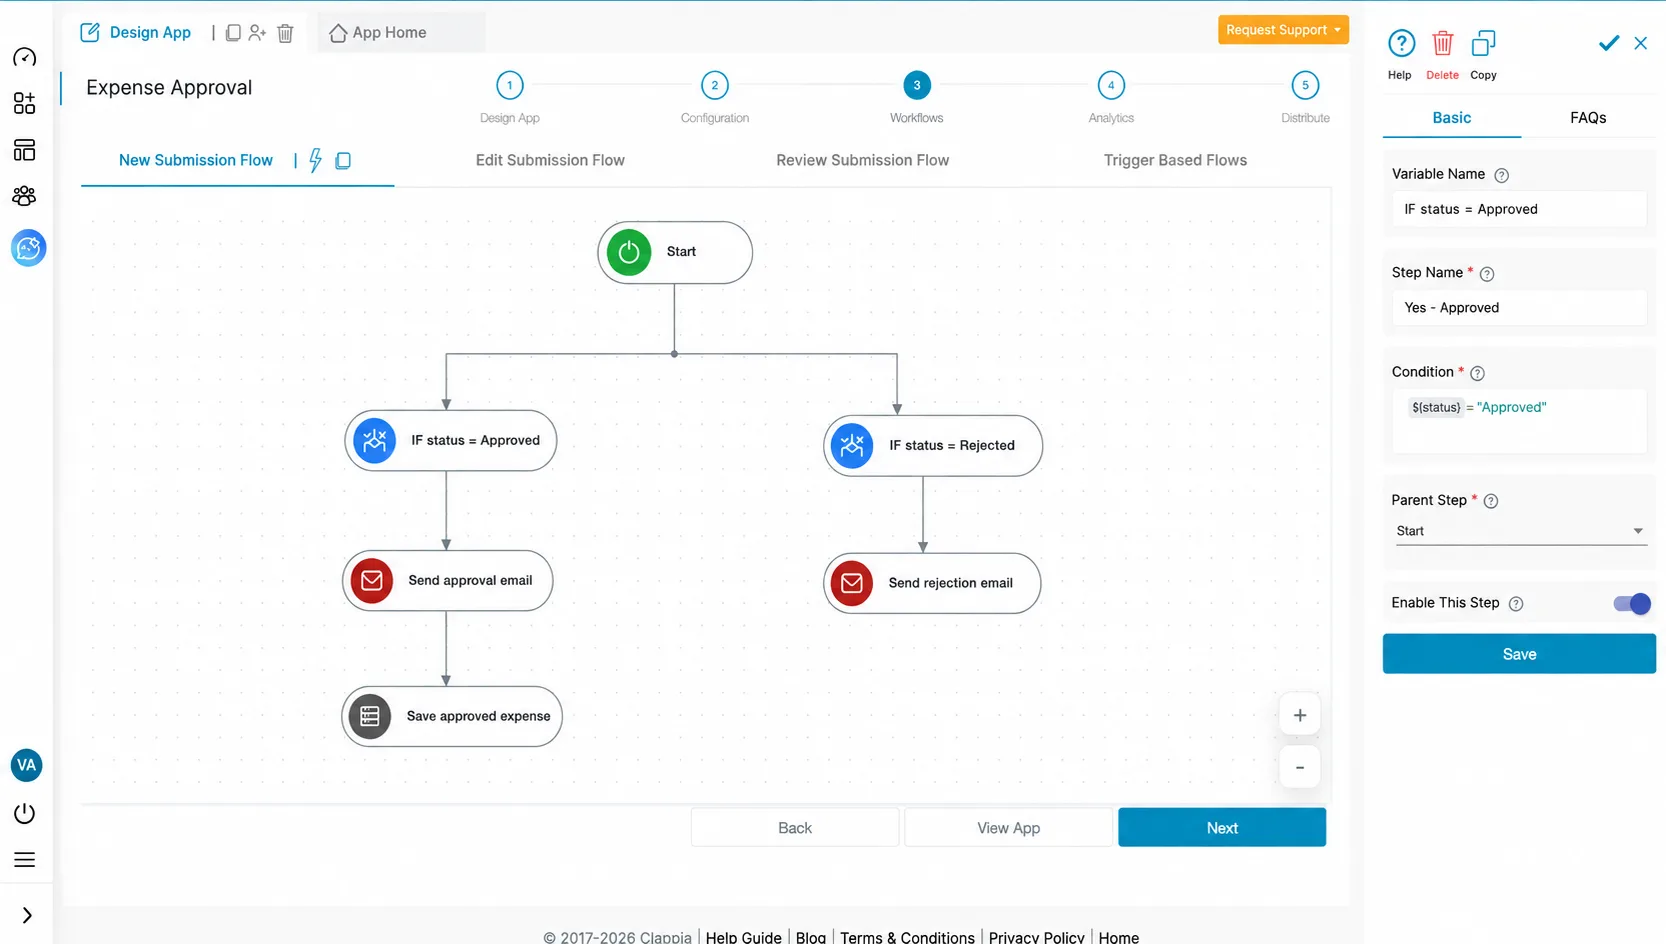
Here is the same expense-approval workflow after it's built. A Start node branches into two IF nodes - "IF status = Approved" leads to a Send-approval-email node and then a Database node that saves the record; "IF status = Rejected" leads to a Send-rejection-email node. Every run is logged, so you always know where a request is. It's the trigger → logic → actions shape made concrete, entirely without code. For a real-world version, see Clappia's approval workflows and invoice processing with approvals.
Because every Clappia app is generated for web and mobile together, the people doing the work can submit forms, capture photos and GPS, and approve requests from their phones - online or offline - so the workflow meets field teams where the work happens. Explore the full feature set to see every field and node available.
The fastest way to understand workflow automation is to walk through two real ones, node by node.
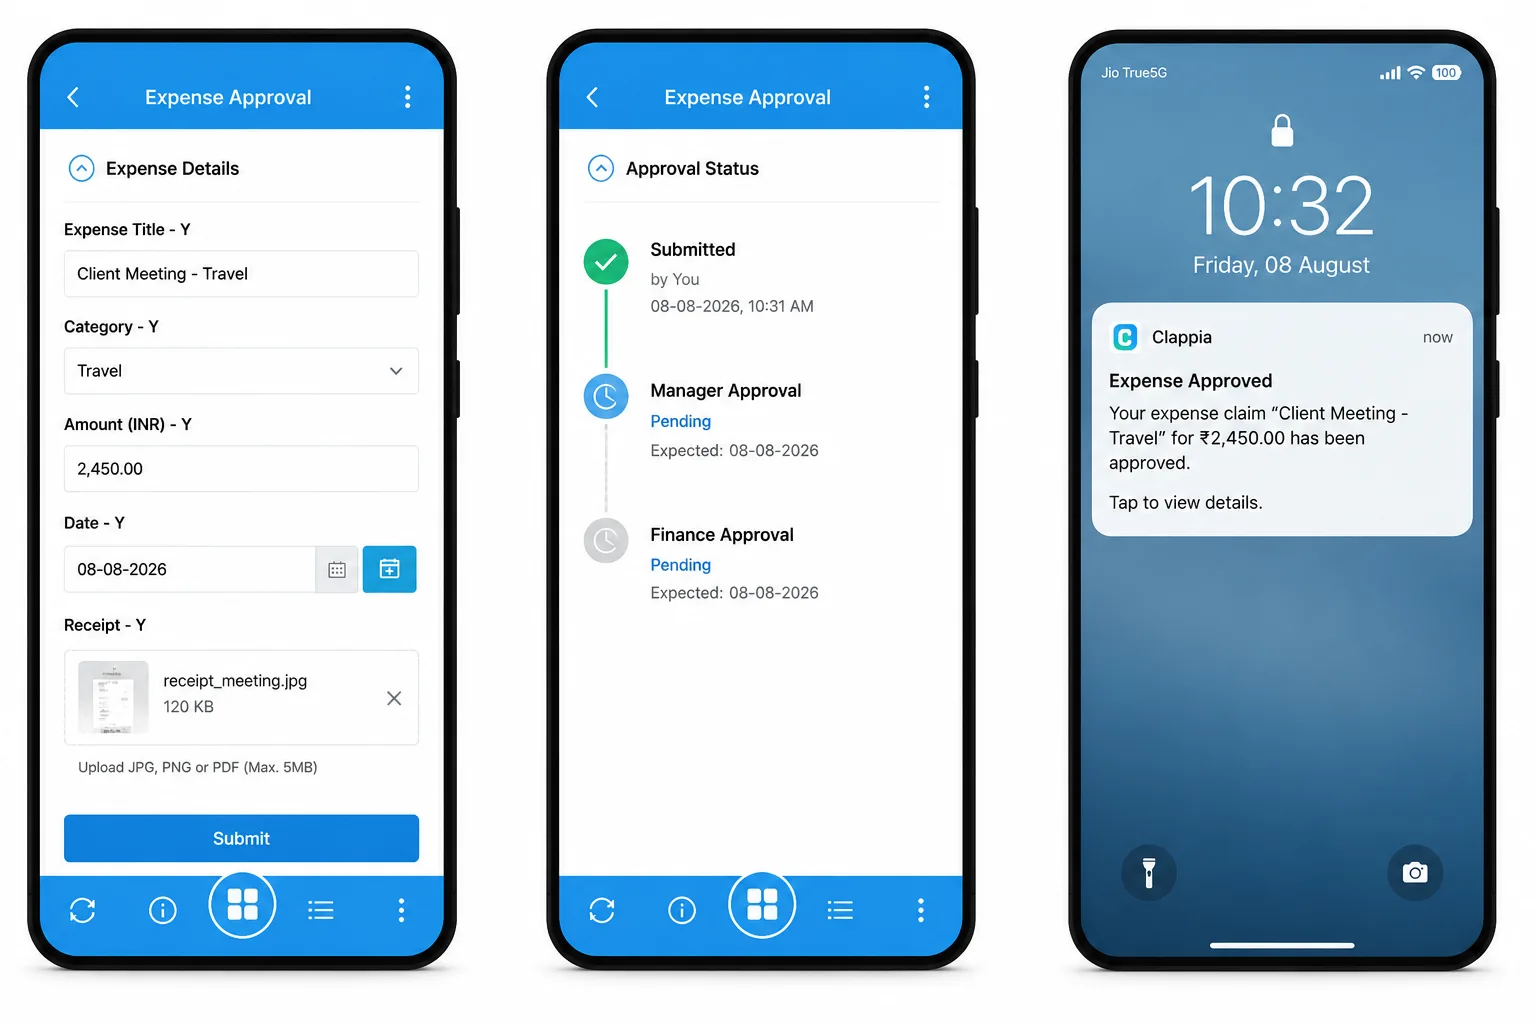
An employee submits an expense claim - that submission is the trigger. Two IF nodes split the path: "IF amount is over $5,000" routes to a two-level Approval node (manager, then finance head), while "IF amount is $5,000 or under" auto-approves. Either way, an Email node tells the employee the outcome and a Database node records the approved expense. What used to be a chain of emails now settles in minutes, with a complete audit trail.
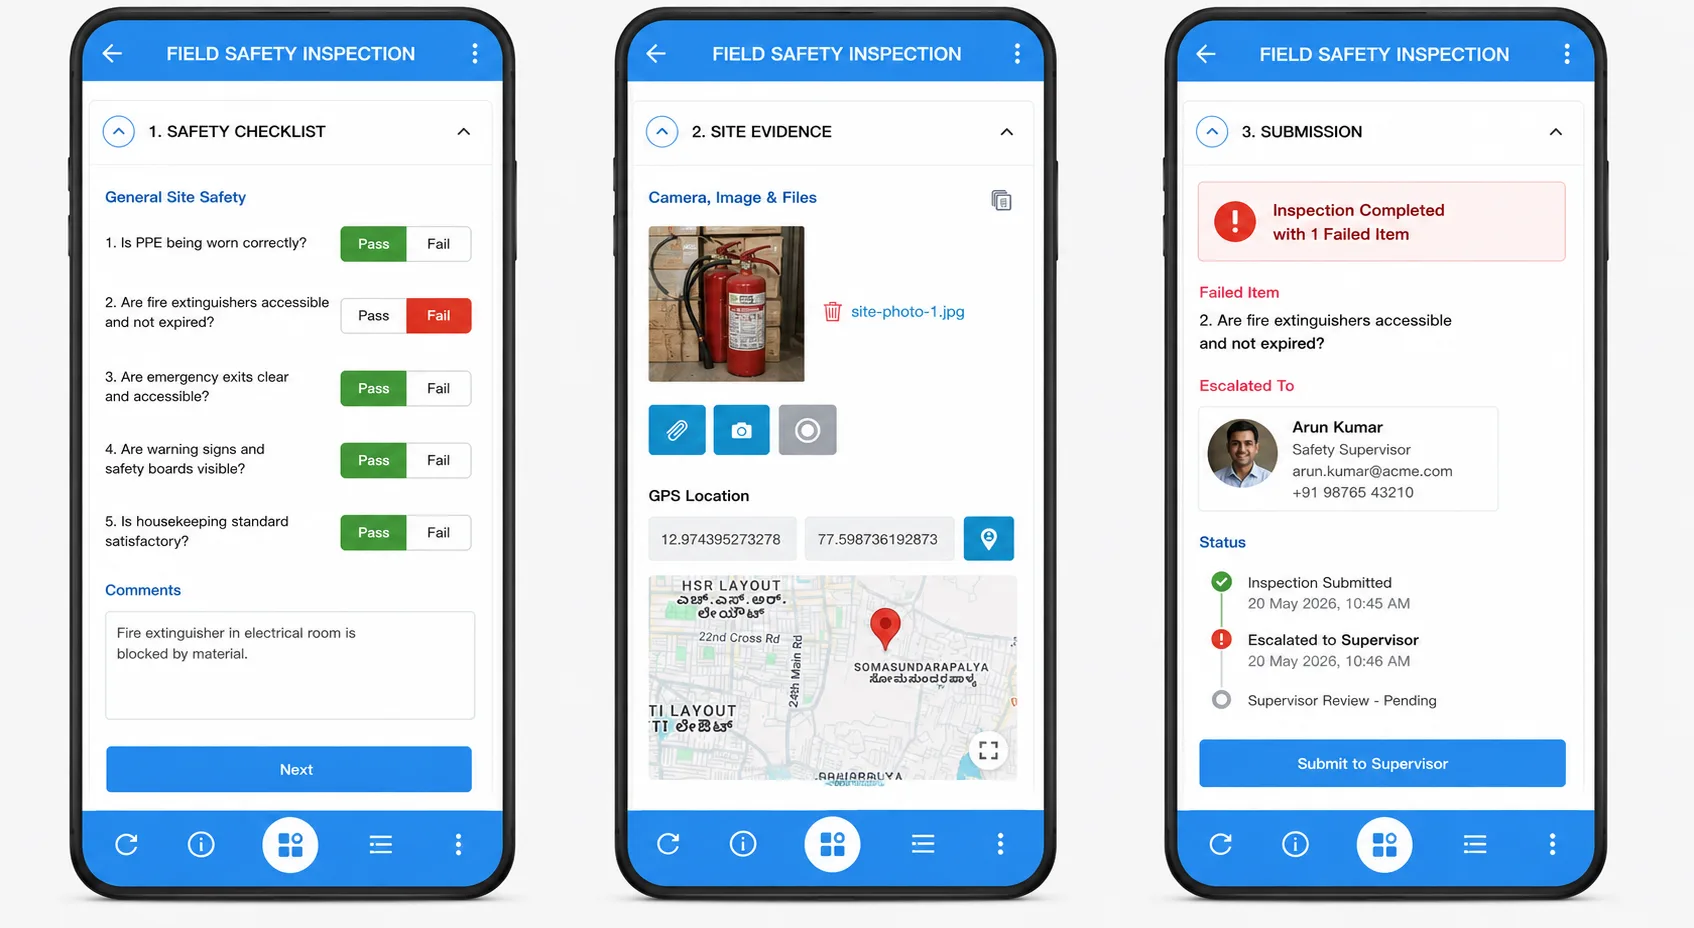
A technician completes a safety inspection on their phone - often offline - and it syncs when they reconnect. An IF node checks the result: "IF a check failed", an Email node instantly escalates to the supervisor with the submitted photos and GPS location, and an AI node can even summarize the hazard from the description. A passing inspection is simply logged. The failure that used to sit in a notebook until the end of the shift now reaches the right person the moment it's found.
The trigger → logic → actions pattern repeats across every team. Here's how it shows up in the processes people automate first:
| Team | Process | Trigger | What the workflow does |
|---|---|---|---|
| Finance | Expense & invoice approval | Claim submitted | Two IF nodes route by amount, an Approval node collects sign-off, an Email node notifies |
| HR | Employee onboarding | New-hire form submitted | Create-submission nodes open tasks; Email nodes alert IT and the manager |
| Operations | Field inspection | Inspection submitted offline | An IF node escalates a failed check; an Email node alerts the supervisor with photos |
| Sales | Quote / order handling | Order submitted | A REST API node pushes the order to the ERP; a Database node checks stock |
| Support | Ticket triage | Ticket submitted | An AI node classifies the issue; an IF node routes it to the right queue |
These aren't hypothetical - teams run exactly these on Clappia, from paperless approvals onward.
Workflow automation is no longer a big-IT project. If a process in your team still moves by email, spreadsheet, or paper, it's a candidate to automate this week. You can start building for free and turn your first repeatable process into a working app - with conditions, approvals, notifications, and a full audit trail - without writing a line of code.
Workflow automation is software that runs the steps of a repeatable process for you. When a trigger happens - like a form being submitted - it applies the rules you set and runs a sequence of actions (checking conditions, routing approvals, sending notifications, calling APIs, saving data) without anyone doing it by hand.
In Clappia, a form submission triggers the workflow, and the nodes you placed on the canvas run in order. Condition (IF) nodes decide the path, an Approval node routes sign-offs, and action nodes - Email, AI, Code, REST API, Database - do the work. Because each IF node checks one condition, a yes/no decision is built with two IF nodes.
Yes. The AI Workflow node runs AI tasks inside a workflow - generating content, analyzing an uploaded image or PDF, extracting data, or performing calculations - using models like OpenAI, Claude, and Gemini. Its output becomes a variable your next node can act on.
No. You build the form and the workflow visually by dragging in nodes. If you do need custom logic, the Code node lets you run JavaScript and call APIs - but most workflows never need it.
Faster cycle times, fewer errors, consistent and compliant execution with an automatic audit trail, real-time visibility through dashboards, and the ability to scale volume without adding headcount.
 Get Started – It’s Free
L374, 1st Floor, 5th Main Rd, Sector 6, HSR Layout, Bengaluru, Karnataka 560102, India
3500 S DuPont Hwy, Dover,
Kent 19901, Delaware, USA


.svg)




3500 S DuPont Hwy, Dover,
Kent 19901, Delaware, USA
L374, 1st Floor, 5th Main Rd, Sector 6, HSR Layout, Bengaluru, Karnataka 560102, India
.jpg)