
Still need help?

This article explains how to configure and use the Approval node. Learn more about using workflows here. Approval nodes can be used to get the approvals of multiple stakeholders in the organisation. This node is used to allow reviewers or admins to approve submissions by changing their status, based on an approval request initiated through a workflow.
To use the Approval node, your app must have Statuses configured in your app. Click here to know how.
You can use the Approval node in workflows to get status-based approvals from specific users (admins or reviewers). It is commonly used in use cases like:

When an Approval node is triggered in a workflow:
Note:
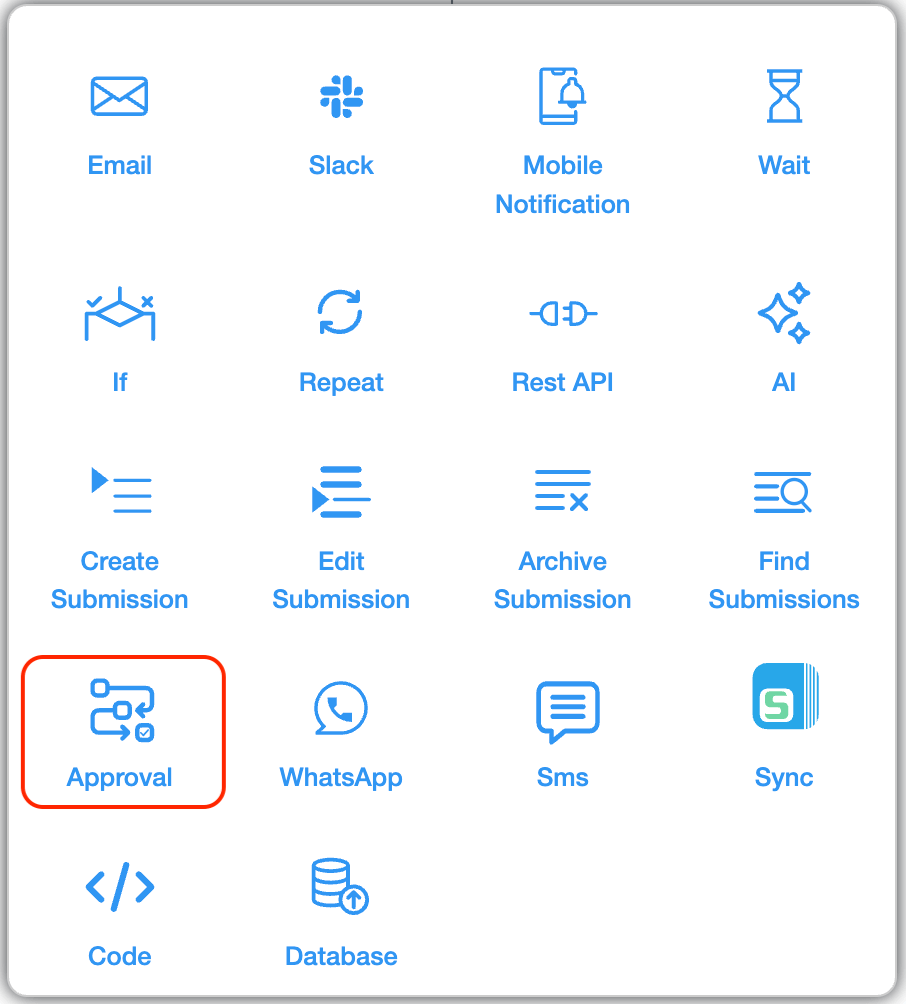
To configure the Approval node, go to Design App > Workflows. Click on Start or the ‘+’ symbol after a workflow node and select the Approval node.
You will see a configuration panel on the right. Below are the available options:
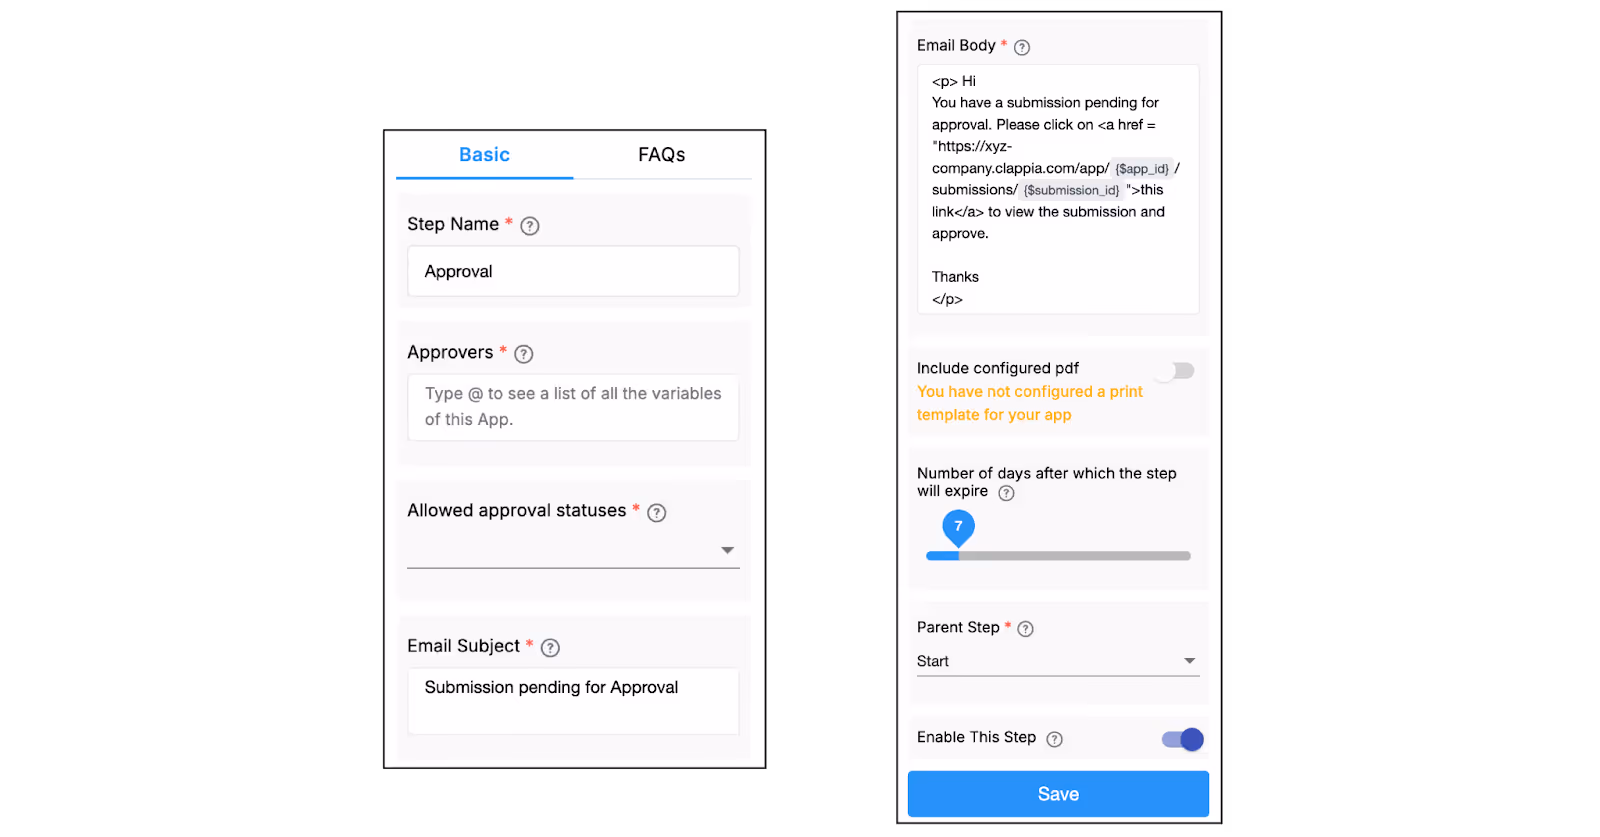
This is the name that appears for the node in the workflow editor.
You can name it anything meaningful, especially if you’re using multiple approval steps (e.g., “L1 Approval”, “Manager Approval”, “Final Approval”).

This is a required field.
Here, you define the list of people who can approve the submission by changing its status.
Note:
Only one of the listed approvers needs to update the status for the node to be marked complete. If your process requires multiple approvals, you can use multiple Approval nodes, each configured with different approvers and allowed statuses.
This is a required field.
To use the Approval node, your app must have Statuses configured.


Even if your app has many statuses, you can restrict each approval step to allow only specific ones. This is helpful when setting up multi-level approvals like L1 Approved, L2 Approved, etc.

If no statuses are configured, the Approval node will show an error and cannot be saved.

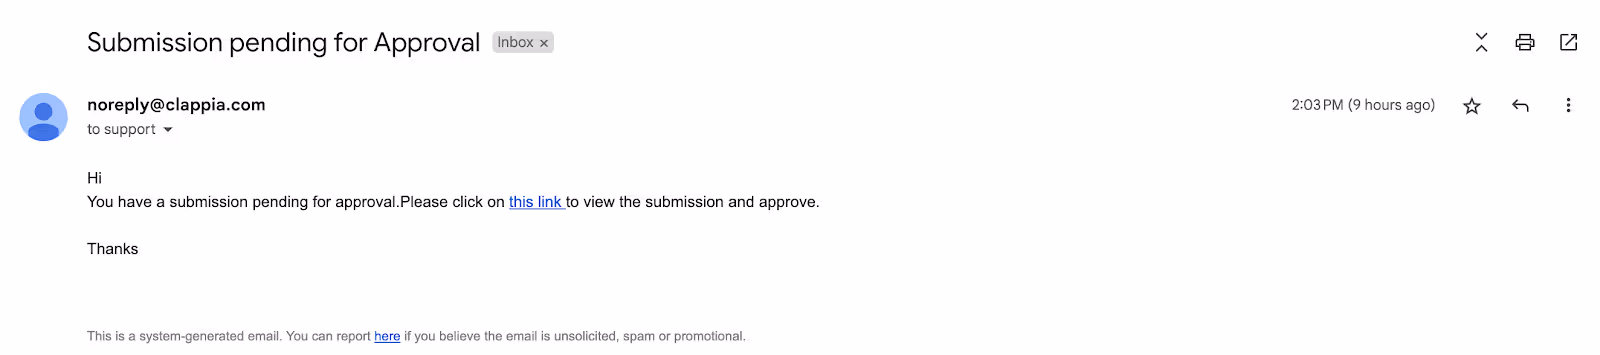
This is the subject line of the email that approvers receive.

This is the body of the email sent to the approvers.
By default, it includes a helpful link to the submission.

Best practice:
Do not remove the link to the submission unless absolutely necessary, as it makes it easy for approvers to access the exact record.
Toggle this ON if you want to attach a PDF of the submission in the approval email.


This allows you to set a time limit (1 to 50 days) for how long the Approval node will wait for the approver to act.

If an approver changes the status before the expiry, the node completes immediately and continues to the next steps below the approver node if any.
This defines the step immediately above the current node in the workflow chain.
Usually, this is the Start node unless you're placing it after another node.
This toggle is ON by default.
Turn this off if you want to temporarily disable this step and skip it during workflow execution.
Once the Approval node is triggered:

If none of the approvers update the status, the node waits for the configured number of days and then completes by itself (without any status change). You can design the workflow after this using IF nodes to branch based on whether it was approved or not.
You can combine the Approval node with the Repeat and Wait nodes to send reminder emails to approvers if they haven't taken action.

This setup helps automate follow-ups and improves the chance that the submission is reviewed on time.
If you need help setting up multi-level approvals, approval escalations, or reminders, feel free to reach out to support@clappia.com.
Yes. Once an approver reviews a submission, they can change the status again at any point. They can click on the link provided in the email again or visit the Submissions tab of the app to change the status later.
This is not possible as of now. Currently, as soon as one of the approvers reviews the submission, the Approval Flow is completed. However, you can add multiple 'Approval' nodes one after the other to act as a multi-level approval flow.
Yes, you can add a Wait node just before the 'Approval' node to set the amount of time you would like to wait before an approval mail gets sent.
L374, 1st Floor, 5th Main Rd, Sector 6, HSR Layout, Bengaluru, Karnataka 560102, India
3500 S DuPont Hwy, Dover,
Kent 19901, Delaware, USA


3500 S DuPont Hwy, Dover,
Kent 19901, Delaware, USA
L374, 1st Floor, 5th Main Rd, Sector 6, HSR Layout, Bengaluru, Karnataka 560102, India
.svg)
