

Embedding forms directly into your website creates a seamless experience that keeps visitors engaged without forcing them to navigate away from your page. When users complete forms without leaving your site, you see better completion rates, reduced drop-offs, and maintain control over the entire interaction. For businesses collecting leads, processing orders, tracking field activities, or managing employee data, embedded forms feel more professional and trustworthy than external links.
Google Forms provides a straightforward, free solution for basic form embedding that works across most website platforms. However, businesses with real-world operational needs—such as field data collection without internet, GPS-based attendance tracking, payment processing, or automated workflow notifications—quickly discover that Google Forms' limitations make it unsuitable for professional applications. This guide covers both how to embed Google Forms and when you need more powerful alternatives like Clappia for actual business operations.
Form embedding uses iframe technology to display content from one source within your webpage. When you embed a form, visitors interact with it directly on your site rather than clicking through to an external page. This seamless integration improves user experience, maintains your branding throughout the interaction, and increases form completion rates significantly.
For businesses, the right embedded form solution goes beyond basic data collection. Field teams need offline form capability to submit data in remote locations. Sales managers require GPS location verification to track field visits. Finance departments need integrated payment processing for order forms. Operations teams want automated WhatsApp and email notifications when forms are submitted. These real-world requirements separate simple form builders from professional business application platforms.

Start by opening your completed Google Form at forms.google.com. Make sure your form includes all questions and settings configured correctly, as changes you make later will automatically reflect in the embedded version. Click the three-dot menu button in the top-right corner of the form editor to access sharing options.
You'll see a dialog box with three tabs: the envelope icon for email sharing, the link icon for URL sharing, and the angle brackets (<>) icon for embed code. Click the angle brackets icon to access the HTML embed code. Google Forms displays the iframe code in a text box with options to adjust dimensions.
Consider your form's length when setting width and height. Longer forms with many questions need more vertical space to avoid awkward internal scrolling. The default width is 640 pixels and height is 800 pixels, but you can adjust these based on your layout. For sidebar placement, use narrower widths around 300-400 pixels. For full-width content areas, consider using percentage-based widths like 100% for responsive behavior. Copy the entire embed code to your clipboard once you're satisfied with the dimensions.
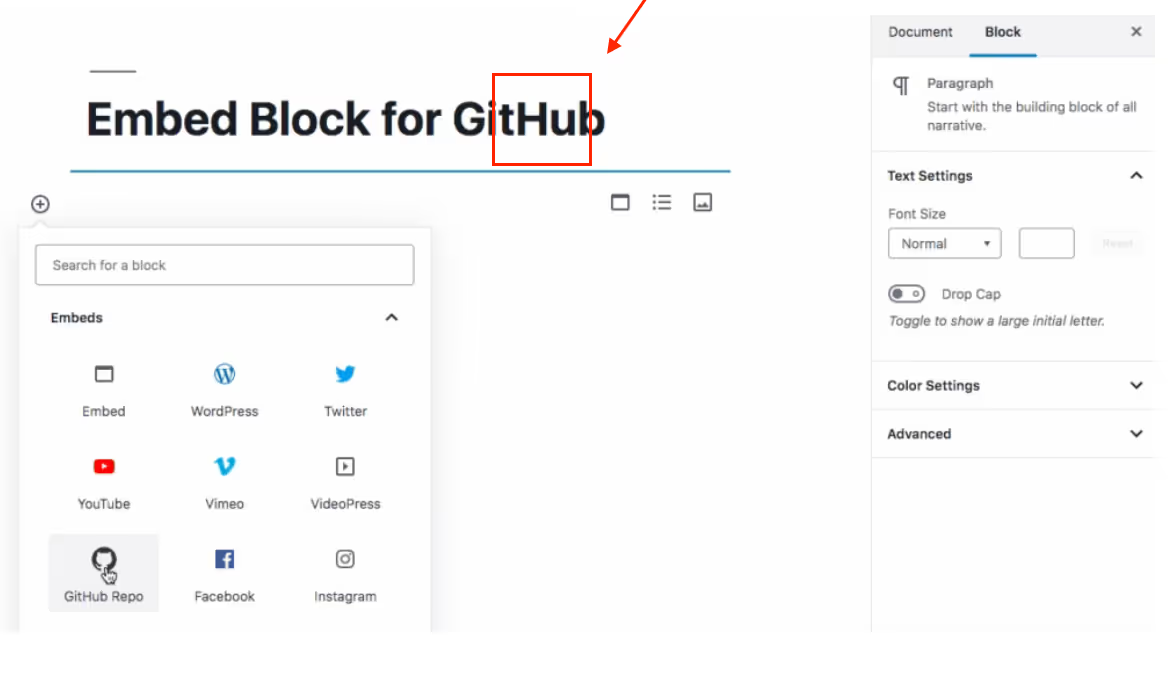
WordPress users have different processes depending on whether they use the Classic Editor or the Block Editor (Gutenberg). For the Block Editor, navigate to the page or post where you want to add your form. Click the plus icon (+) to add a new block, then search for "Custom HTML" in the block library. Add the Custom HTML block at your desired location on the page.
Paste your Google Forms embed code directly into the HTML block. Switch to the "Preview" tab to see how the form will appear, though the final published version may look slightly different. Always check the live page after publishing to confirm proper display. For the Classic Editor, switch from the "Visual" tab to the "Text" tab to view raw HTML. Find your desired insertion point and paste the embed code directly. Switch back to "Visual" to preview the form's appearance before publishing.
For websites built with custom HTML, the embedding process is most direct. Open your HTML file in a text editor and locate the section where you want the form to appear. Consider wrapping the iframe in a container div for better styling control:
<div class="form-container">
<iframe src="https://docs.google.com/forms/d/e/FORM_ID/viewform?embedded=true"
width="100%"
height="800"
frameborder="0"
marginheight="0"
marginwidth="0">
Loading…
</iframe>
</div>
You can add CSS styling to control how the form appears on your page. For responsive design, consider using percentage-based widths and CSS media queries to adjust the form's size on different devices:
.form-container {
max-width: 800px;
margin: 0 auto;
padding: 20px;
}
.form-container iframe {
width: 100%;
min-height: 800px;
border: none;
}
@media (max-width: 768px) {
.form-container iframe {
min-height: 1000px;
}
}
Save your HTML file and upload it to your web server. Open your website in multiple browsers and on different devices to ensure the form displays correctly everywhere.
Add CSS styling to control appearance and ensure responsive design across devices. Use percentage-based widths and media queries to adjust form size on different screen sizes. Save your HTML file and upload it to your web server, then test across multiple browsers and devices to ensure consistent display.
After embedding your form, thorough testing ensures it works properly across all scenarios. Open your published page on desktop computers, tablets, and smartphones to check responsive behavior. Test form submission from each device type and verify that responses appear correctly in your Google Sheets or Form responses tab.
Check that all form fields function properly, required field validation works, and any conditional logic displays correctly. Verify that the form height accommodates all content without excessive scrolling. Test on multiple browsers including Chrome, Safari, Firefox, and Edge to catch platform-specific rendering issues before directing traffic to your embedded form.
While Google Forms handles basic surveys and simple data collection, businesses with operational needs quickly encounter significant limitations. Understanding these constraints helps determine whether Google Forms meets your requirements or whether you need a more capable platform like Clappia for professional business applications.
Google Forms requires constant internet connectivity to function. When field teams visit remote construction sites, conduct inspections in areas with poor network coverage, or collect data in warehouses with limited WiFi, they cannot submit forms until connectivity returns. This limitation disrupts workflows, delays data collection, and creates frustration for mobile workers who need to capture information immediately.
Businesses conducting field data collection in remote locations, operating in areas with unreliable internet, or managing mobile workforces that move in and out of coverage areas need offline-capable forms that automatically sync data when connectivity returns. Google Forms' inability to work offline makes it unsuitable for these real-world operational scenarios.
Google Forms lacks built-in GPS tracking and geofencing capabilities that modern businesses require. Field sales teams need location verification to prove site visits. Service technicians require GPS coordinates for service calls. Attendance systems need geofencing to prevent buddy punching and ensure employees check in from designated work locations.
Without native GPS location capture with geofencing, businesses must rely on manual address entry or external systems to track where form submissions occur. This manual approach increases errors, enables location fraud, and provides no verification that field activities actually happened at claimed locations—critical information for field force management and compliance tracking.
Business operations frequently require photo documentation with automatic date-time stamps for verification and compliance. Quality inspectors need timestamped photos of defects. Delivery personnel require proof-of-delivery images. Maintenance teams must document equipment conditions before and after service.
Google Forms' file upload feature lacks automatic date-time stamping, metadata capture, or camera-only restrictions that prevent users from uploading old photos. This limitation makes Google Forms unsuitable for inspection workflows, proof-of-work documentation, delivery verification, and compliance tracking where timestamp verification is essential.
Businesses that need to collect payments through forms—such as event registrations, order processing, membership fees, or service bookings—find Google Forms completely inadequate. Google Forms offers no native payment processing capability, forcing businesses to redirect users to external payment pages or manually collect payment information through separate channels.
This fragmented approach creates poor user experiences, increases cart abandonment, and complicates order tracking. Professional businesses need forms with integrated payment gateway support for Razorpay, Stripe, or PayPal that allows customers to complete transactions without leaving the form environment—functionality Google Forms simply cannot provide.
Google Forms provides only basic email notifications with limited customization. Modern businesses need multi-channel notification capabilities including WhatsApp messages, SMS alerts, Slack notifications, and dynamic email content based on form responses. Field teams prefer WhatsApp notifications over email. Time-sensitive operations require immediate SMS alerts. Remote teams rely on Slack for real-time updates.
Google Forms' restriction to simple email notifications means businesses cannot implement the communication workflows their operations require. When a service request comes in, managers need instant WhatsApp alerts. When inventory reaches reorder points, purchasing teams need SMS notifications. These real-world communication needs exceed what Google Forms can deliver.
Business processes rarely end at form submission. Data must trigger approval workflows, update databases, create records in connected systems, send conditional notifications to different teams, or execute custom business logic based on submission content. Google Forms provides no built-in workflow automation capabilities beyond basic email notifications.
Businesses need AI-powered workflow automation that routes submissions through multi-level approval processes, updates external systems via APIs, executes conditional logic based on form data, and triggers complex business processes automatically. Without these capabilities, teams must manually process every submission—an inefficient approach that introduces delays and errors in business operations.
While Google Forms works in mobile browsers, it offers no native mobile app experience or offline capability for mobile users. Field teams need dedicated mobile apps that work offline, sync automatically when connectivity returns, provide optimized mobile interfaces, and deliver push notifications for assignments and updates.
Google Forms' browser-only access means poor performance on mobile devices, inability to work offline, no push notifications, and suboptimal user experiences for mobile workforces. Businesses with field teams need native mobile applications for both iOS and Android that provide full offline functionality and enterprise-grade mobile experiences—capabilities Google Forms cannot match.
Professional businesses need forms that match their brand identity without displaying third-party branding. Google Forms always shows "Google Forms" branding and provides limited customization options for colors, fonts, and layouts. This restriction undermines professional appearance and brand consistency, especially for customer-facing forms on company websites.
Businesses also need white-labeled solutions that allow complete brand customization, custom domains, and no external branding visible to end users. Google Forms' fixed appearance and mandatory Google branding make it unsuitable for businesses that require professional, fully branded form experiences integrated seamlessly with their corporate identity.
While Google Forms handles basic embedding, Clappia provides comprehensive business application capabilities that transform simple forms into complete operational systems. Clappia's no-code platform addresses every limitation that makes Google Forms unsuitable for real business use while maintaining the same ease of embedding.
Clappia's website embedding capability works just like Google Forms—copy an embed code and paste it into your website—but delivers dramatically better results. Embedded Clappia apps adapt intelligently to different screen sizes, maintain complete brand control without third-party logos, load faster with optimized code, and provide richer functionality than basic forms.
Generate shareable links for any app through Clappia's publishing interface. Forms shared via link or embedded in websites display in clean, professional interfaces without external branding. Visitors interact with your branded experience, not a Google-branded page, creating better trust and brand consistency throughout the user journey.
Embedded Clappia forms retain all platform capabilities that Google Forms lacks, making them suitable for actual business operations rather than just simple data collection. These advanced features work seamlessly within embedded forms without requiring users to leave your website.
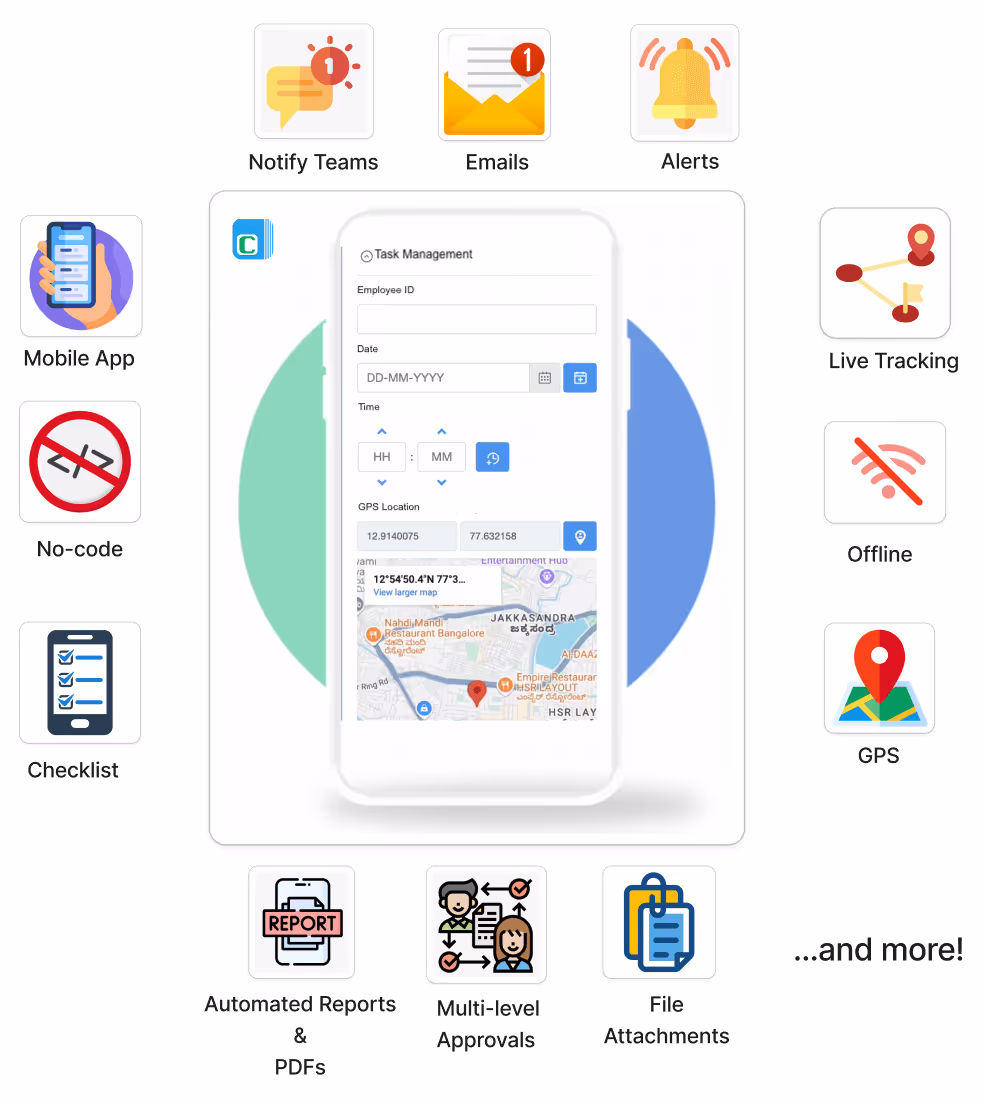
Offline Form Functionality: Clappia apps work completely offline on mobile devices, automatically syncing data when internet connectivity returns. Field teams can submit inspection reports, record attendance, log site visits, and capture customer information in remote areas without worrying about internet access. This offline capability is essential for construction sites, rural field operations, warehouse management, and any business activity in areas with unreliable connectivity.
GPS Location Tracking: Built-in GPS location capture with geofencing verifies where form submissions occur. Track field employee visits, enforce attendance check-ins from designated locations, capture precise coordinates for service calls, and prevent location fraud through automatic position verification. GPS data appears automatically in submissions without user intervention, ensuring accurate location tracking for field force management and compliance requirements.
Photo Capture with Timestamps: Camera and file upload blocks automatically embed date-time stamps, GPS coordinates, and metadata in captured photos. Restrict uploads to camera-only to prevent users from submitting old images. This capability is critical for inspection workflows, proof-of-delivery documentation, quality control processes, and compliance tracking where timestamp verification ensures authenticity.
Payment Gateway Integration: Process payments directly through embedded forms using Razorpay, Stripe, or PayPal integration. Customers complete transactions without leaving your website, dramatically improving conversion rates compared to external payment redirects. Collect registration fees, process orders, accept membership payments, and handle service bookings all within a single embedded form experience.
Multi-Channel Notifications: Send automated notifications through multiple channels when forms are submitted. Email workflows deliver rich HTML messages with dynamic content and attachments. WhatsApp integration sends instant messages to field teams who prefer mobile messaging. SMS notifications provide time-critical alerts. Slack integration posts updates to team channels for real-time collaboration. These multi-channel options ensure the right people receive information through their preferred communication methods.
AI-Powered Workflow Automation: When users submit embedded Clappia forms, powerful workflow automation executes complex business logic automatically. Send approval requests through multi-level workflows, update external databases via API integrations, generate and email PDF reports, create records in connected systems, execute conditional logic based on submission data, and trigger AI-powered content analysis or data extraction. This automation transforms simple form submissions into complete business processes.
Native Mobile Applications: Beyond web embedding, Clappia provides native iOS and Android mobile apps for your forms. Mobile users get optimized interfaces, complete offline functionality, automatic background synchronization, push notifications for assignments, and enterprise-grade mobile experiences. This flexibility lets you choose the right deployment method—web embedding, mobile apps, or both—based on your audience's needs.
Automated Calculations: Formula blocks within embedded forms perform real-time calculations as users complete forms. Compute totals, apply pricing rules, calculate taxes, determine shipping costs, score responses, and execute complex mathematical operations without manual effort. This eliminates calculation errors that plague Google Forms users who must handle math externally.
Conditional Logic: Dynamic sections show or hide form fields based on user responses, creating intelligent forms that adapt to each visitor's needs. Multi-step flows guide users through complex processes without overwhelming them with lengthy forms. This sophisticated logic creates better user experiences and ensures you collect only relevant information from each respondent.
Dynamic PDF Generation: Automatically generate branded PDF reports, invoices, certificates, and documents from form data using customizable templates. PDFs include form responses, calculated values, signatures, photos, and any other submission data formatted professionally with your company branding. This automated document generation eliminates manual report creation and ensures consistent formatting.
Understanding concrete use cases helps illustrate why businesses need capabilities beyond Google Forms' basic functionality. These real-world scenarios demonstrate how Clappia's advanced features solve actual operational challenges that Google Forms cannot address.
Restaurants, hotels, retail stores, and service businesses embed customer feedback forms on their websites to collect ratings, reviews, and improvement suggestions. However, basic feedback collection isn't enough—businesses need to incentivize responses and deliver value immediately to increase participation rates.
Clappia's embedded feedback forms include rating blocks for star ratings, emoji reactions, and NPS scores that make feedback engaging and visual. After customers submit their reviews, automated workflows trigger instantly to send thank-you emails with discount codes, loyalty points, or downloadable freebies directly to their inbox. This immediate gratification increases survey completion rates dramatically compared to forms that offer nothing in return.
The same forms capture digital signatures when needed for contest entries or promotional agreements, generate branded PDF certificates automatically as thank-you gifts, and route negative feedback to management through WhatsApp alerts for immediate follow-up. These sophisticated workflows transform simple feedback forms into complete customer engagement systems that Google Forms cannot support.
Event organizers need registration forms that collect payments securely. Restaurants want online order forms that process transactions immediately. Service businesses require booking forms with integrated payment capture. E-commerce operations need product order forms that complete checkout without external redirects.
Clappia's payment gateway integration allows businesses to embed complete order processing forms on their websites. Customers select products or services, see calculated totals with taxes and fees, and complete payment through Razorpay, Stripe, or PayPal—all within the embedded form experience. No redirects to external payment pages. No fragmented checkout flows. Just seamless transactions from form completion through payment confirmation.
After payment processing, automated workflows trigger immediately. Customers receive confirmation emails with order details and receipts. Vendors get inventory update notifications. Fulfillment teams receive shipping instructions. Finance systems log transactions through API integrations. This end-to-end automation from form submission through payment processing and business system updates creates complete operational workflows that Google Forms cannot support.
Businesses also generate professional invoices automatically from order form submissions, send automated delivery confirmations via WhatsApp, collect e-signatures for service agreements, and maintain complete audit trails of all transactions. These sophisticated workflows transform simple order forms into complete e-commerce and service booking systems—functionality far beyond what basic form builders can deliver.
Building professional embedded forms with Clappia takes minutes, not days. The platform's no-code interface makes creating sophisticated business applications accessible to anyone, regardless of technical skills. Sign up for free to start building unlimited apps with no credit card required.
Choose from pre-built templates for common business scenarios including attendance tracking, inspection checklists, order processing, and field data collection. Or start from scratch using the drag-and-drop interface to add exactly the fields and automation your business needs. The app designer provides 100+ blocks covering every aspect of business operations from basic text inputs through advanced GPS tracking and payment processing.
Configure workflows that execute automatically when forms are submitted. Set up email notifications, WhatsApp messages, approval routing, database updates, or any other business process your operations require. Test your app thoroughly using preview mode, then publish it to generate embed codes or mobile app access. The entire process from concept to deployed embedded form typically takes less than an hour for most business applications.
Embed your published app on your website using the same simple iframe method as Google Forms, but with dramatically more powerful functionality behind the clean interface. Or deploy through native mobile apps for field teams who need offline capability and optimized mobile experiences. Clappia's flexible deployment options ensure your forms work perfectly wherever your users need them.
Explore Clappia's complete feature set and pricing plans to understand which capabilities align with your business requirements. The free plan provides generous functionality including unlimited form submissions, making it perfect for small businesses and teams wanting to test the platform before committing to paid features like white-labeled mobile apps and increased automation limits.
Can embedded forms work without internet connection?
Google Forms requires constant internet connectivity and cannot work offline. Clappia forms work completely offline on mobile devices, automatically syncing captured data when internet connection returns. This offline capability makes Clappia essential for field operations in remote areas, warehouse environments, or any location with unreliable connectivity where data collection cannot wait for internet access.
How do I add GPS tracking to embedded forms?
Google Forms offers no GPS tracking capability. Clappia includes built-in GPS location blocks that automatically capture coordinates, implement geofencing boundaries to restrict submissions to designated areas, and embed location data in every submission without user intervention. This native GPS functionality enables attendance verification, field visit tracking, delivery confirmation, and location-based compliance requirements.
Can embedded forms integrate with payment gateways?
Google Forms cannot process payments. Clappia provides native integration with Razorpay, Stripe, and PayPal, allowing embedded forms to collect payments securely without redirecting users to external payment pages. This integrated payment processing improves conversion rates, simplifies checkout workflows, and enables complete order processing within embedded form experiences.
How do I send WhatsApp notifications from forms?
Google Forms supports only basic email notifications. Clappia integrates with WhatsApp Business API to send automated messages when forms are submitted, enabling instant mobile notifications that field teams prefer over email. Configure workflows to send WhatsApp messages with dynamic content based on form responses, providing real-time updates through the communication channels your teams actually use.
Do embedded forms support digital signatures?
Google Forms lacks signature capture functionality. Clappia includes a signature block that captures digital signatures directly within embedded forms, making it suitable for approval workflows, delivery confirmations, contract sign-offs, and any process requiring legally binding electronic signatures. Signatures automatically embed in submission data and generated PDF documents.
Can embedded forms generate PDF documents automatically?
Google Forms cannot generate PDFs. Clappia automatically creates branded PDF reports, invoices, certificates, and documents from form data using customizable templates. PDFs include all form responses, captured signatures, photos, and calculated values formatted professionally with your company branding—eliminating manual document creation and ensuring consistent formatting across all generated documents.
Embedding Google Forms into websites serves basic data collection needs with simple setup and zero cost. The process works across virtually all website platforms and requires only copying and pasting iframe code—making it attractive for casual surveys, simple contact forms, or event registrations where advanced functionality is unnecessary.
However, businesses with real operational requirements quickly discover that Google Forms' limitations make it unsuitable for professional applications. Field teams need offline data collection capability that Google Forms cannot provide. Sales organizations require GPS verification that doesn't exist in Google Forms. Finance departments need integrated payment processing that Google Forms lacks. Operations teams want automated WhatsApp and email notifications beyond Google Forms' basic capabilities.
Clappia addresses every Google Forms limitation while maintaining the same ease of website embedding. The platform provides offline-capable forms that work without internet, GPS tracking with geofencing for field operations, photo capture with automatic timestamps for verification, integrated payment processing for orders and registrations, multi-channel notifications through WhatsApp and SMS, AI-powered workflow automation for business processes, and native mobile apps for field teams—all accessible through simple website embedding or dedicated mobile applications.
With Clappia's free plan, you can build unlimited apps, embed them anywhere, and access core functionality without cost. Professional plans starting at $5/user/month unlock advanced features including white-labeled mobile apps, increased submission limits, and premium integrations that transform basic forms into complete business applications. Start building with Clappia today to experience what professional embedded forms can accomplish for your business operations.
 Get Started – It’s Free
Build Custom Apps With GPS Location Without CodingGet Started - It's free!
L374, 1st Floor, 5th Main Rd, Sector 6, HSR Layout, Bengaluru, Karnataka 560102, India
3500 S DuPont Hwy, Dover,
Kent 19901, Delaware, USA


3500 S DuPont Hwy, Dover,
Kent 19901, Delaware, USA
L374, 1st Floor, 5th Main Rd, Sector 6, HSR Layout, Bengaluru, Karnataka 560102, India
.svg)


