
Still need help?

Workplace Admins can configure multiple settings for their Workplaces, such as adding users to the Workplace so they can access the apps assigned to them, setting up overall preferences for the Workplace like notification settings, SMTP settings, date and time formats, and more. If upgrades or changes are needed, Workplace Admins can also manage billing and licenses at any time.
In your Clappia dashboard, you will find the option Workplace Settings on the left panel.

Users
Preferences
Billing

When you click on Workplace Settings, the Workplace Information is displayed on the right panel.

You can set up the details of your workplace such as the name of the workplace, address of your company, country where the company is located and the email address of the company.
In the URL, the subdomain refers to the part before clappia.com (e.g., https://companyname.clappia.com/, where companyname is the subdomain). You can change this subdomain if the desired name is available.
To change the subdomain:


If the name is unavailable, this will be indicated.
You can type in a maximum of 15 characters.
In case of any errors, you can reach out to the Clappia Support Team for assistance by raising a support request.
The name of the Workplace can also be changed. This change will be reflected in two places:

Note: When you first sign in, the subdomain is usually set as the Workplace name. However, changing the Workplace name later will not affect the subdomain in the URL.
If you are unable to make changes to the Workplace name, it might be that the Address is blank, fill this option and you should be able to change the Workplace name as well.
To know more about adding users to the workplace, click here.
Workplace Managers can deactivate users directly from Workplace Settings without removing them from the workplace.
When a user is marked as Deactivated:
Deactivated users do not count toward the licensed user limit. This allows you to free up license usage without deleting the user or their data.
All submissions created by a deactivated user remain available in the system. Existing submission data is not affected, and submissions will continue to display the correct user information. Deactivated users are not shown as “unknown users” in submission records.
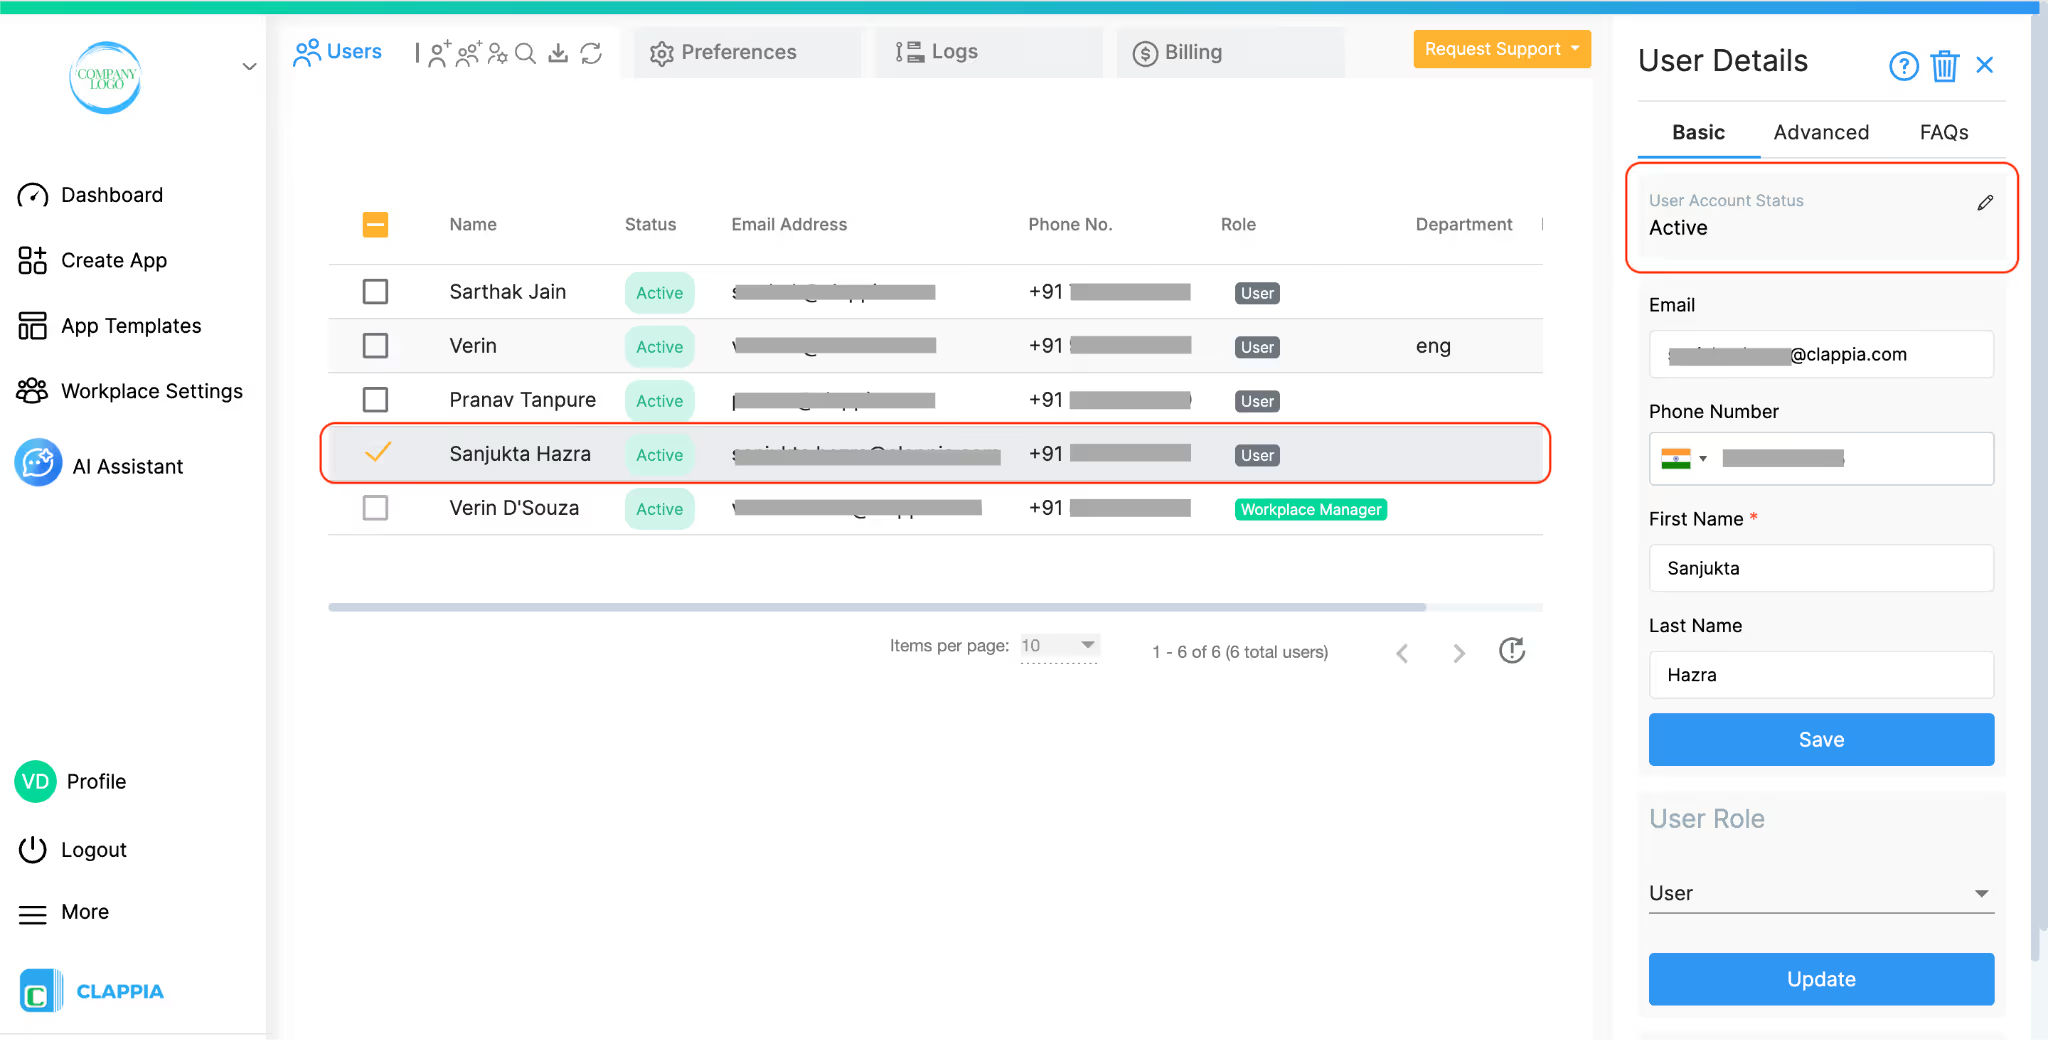
To deactivate a user from Workplace Settings, click on the user you want to deactivate.
In the right panel, locate User Account Status.
Click the edit icon next to the status.
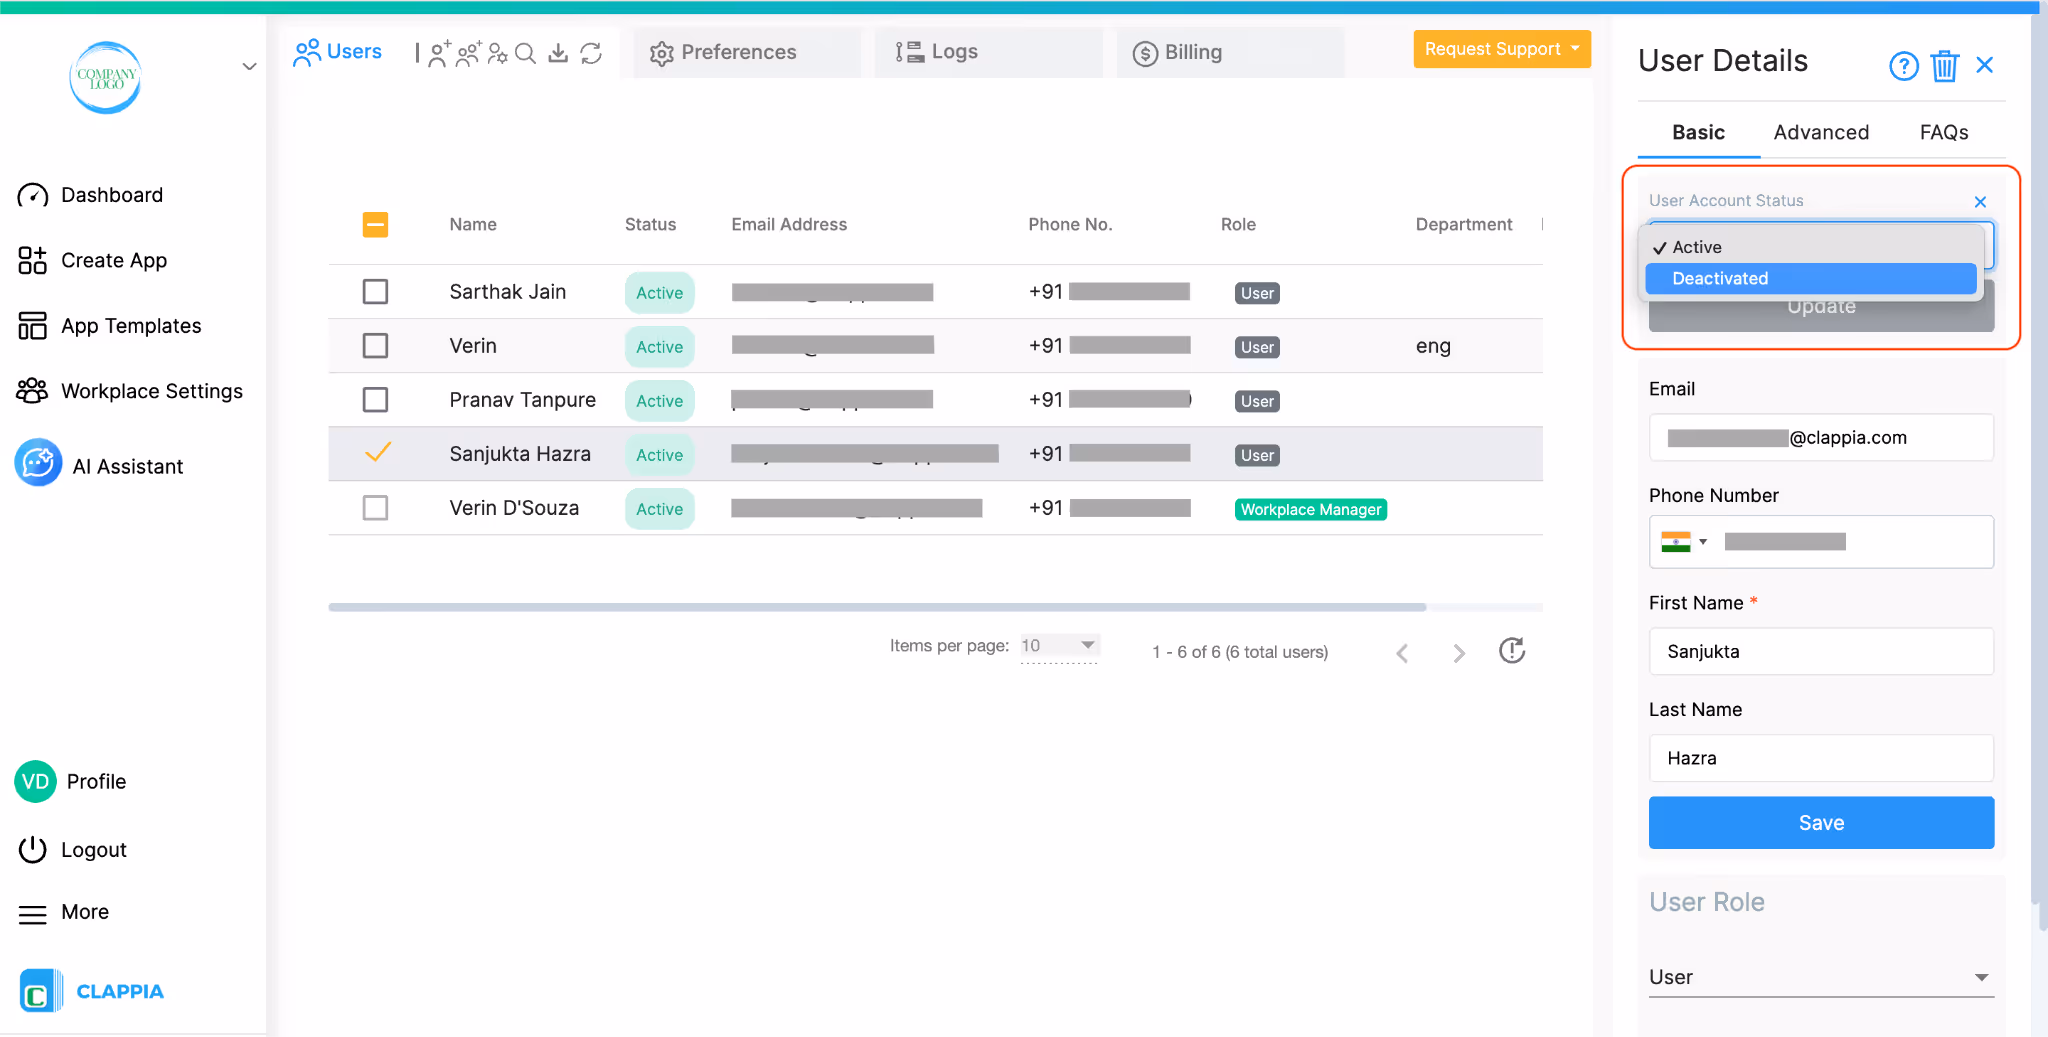
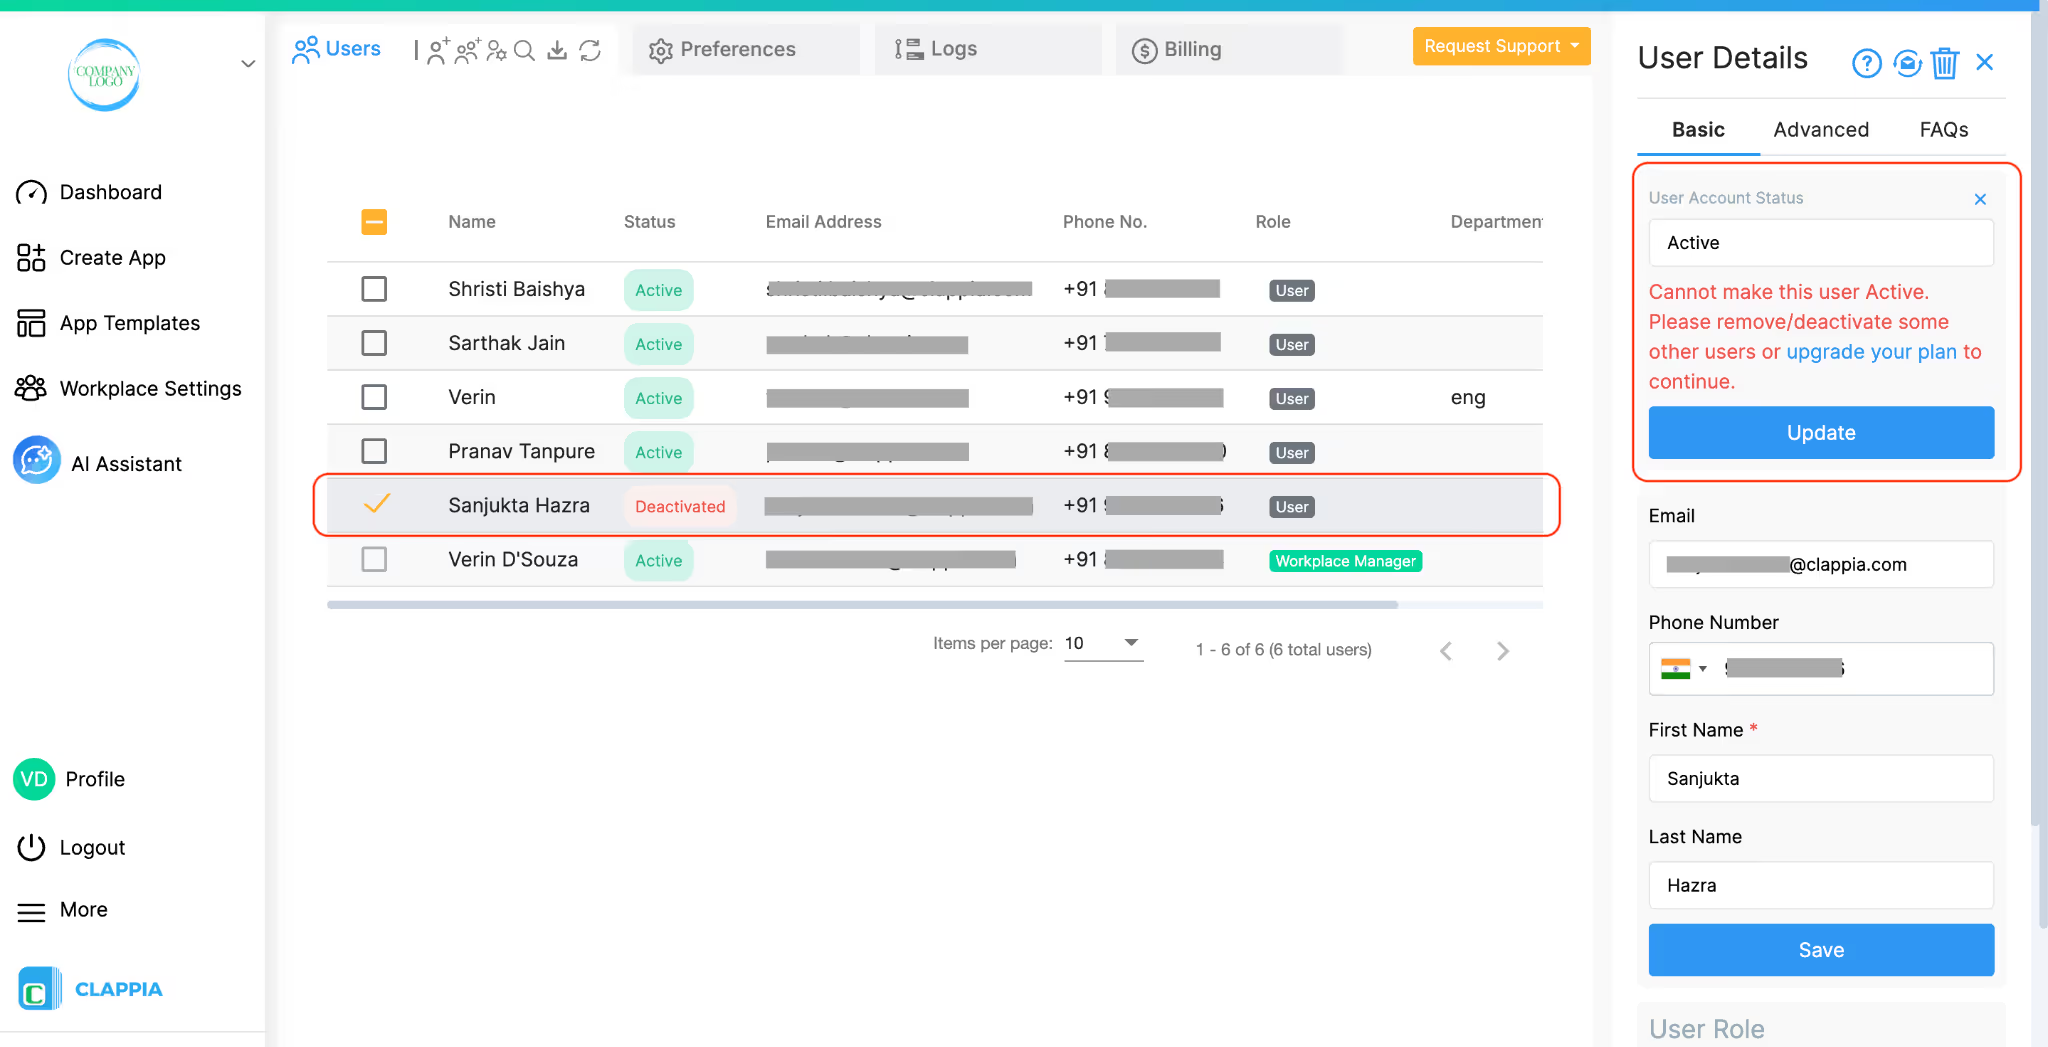
Change the status to Deactivated and save. The user will be immediately deactivated after this change.
Deactivating a user frees up a license slot in the workplace.
For example:
If you later want to reactivate a deactivated user, sufficient licenses must be available at that time.
Important Notes
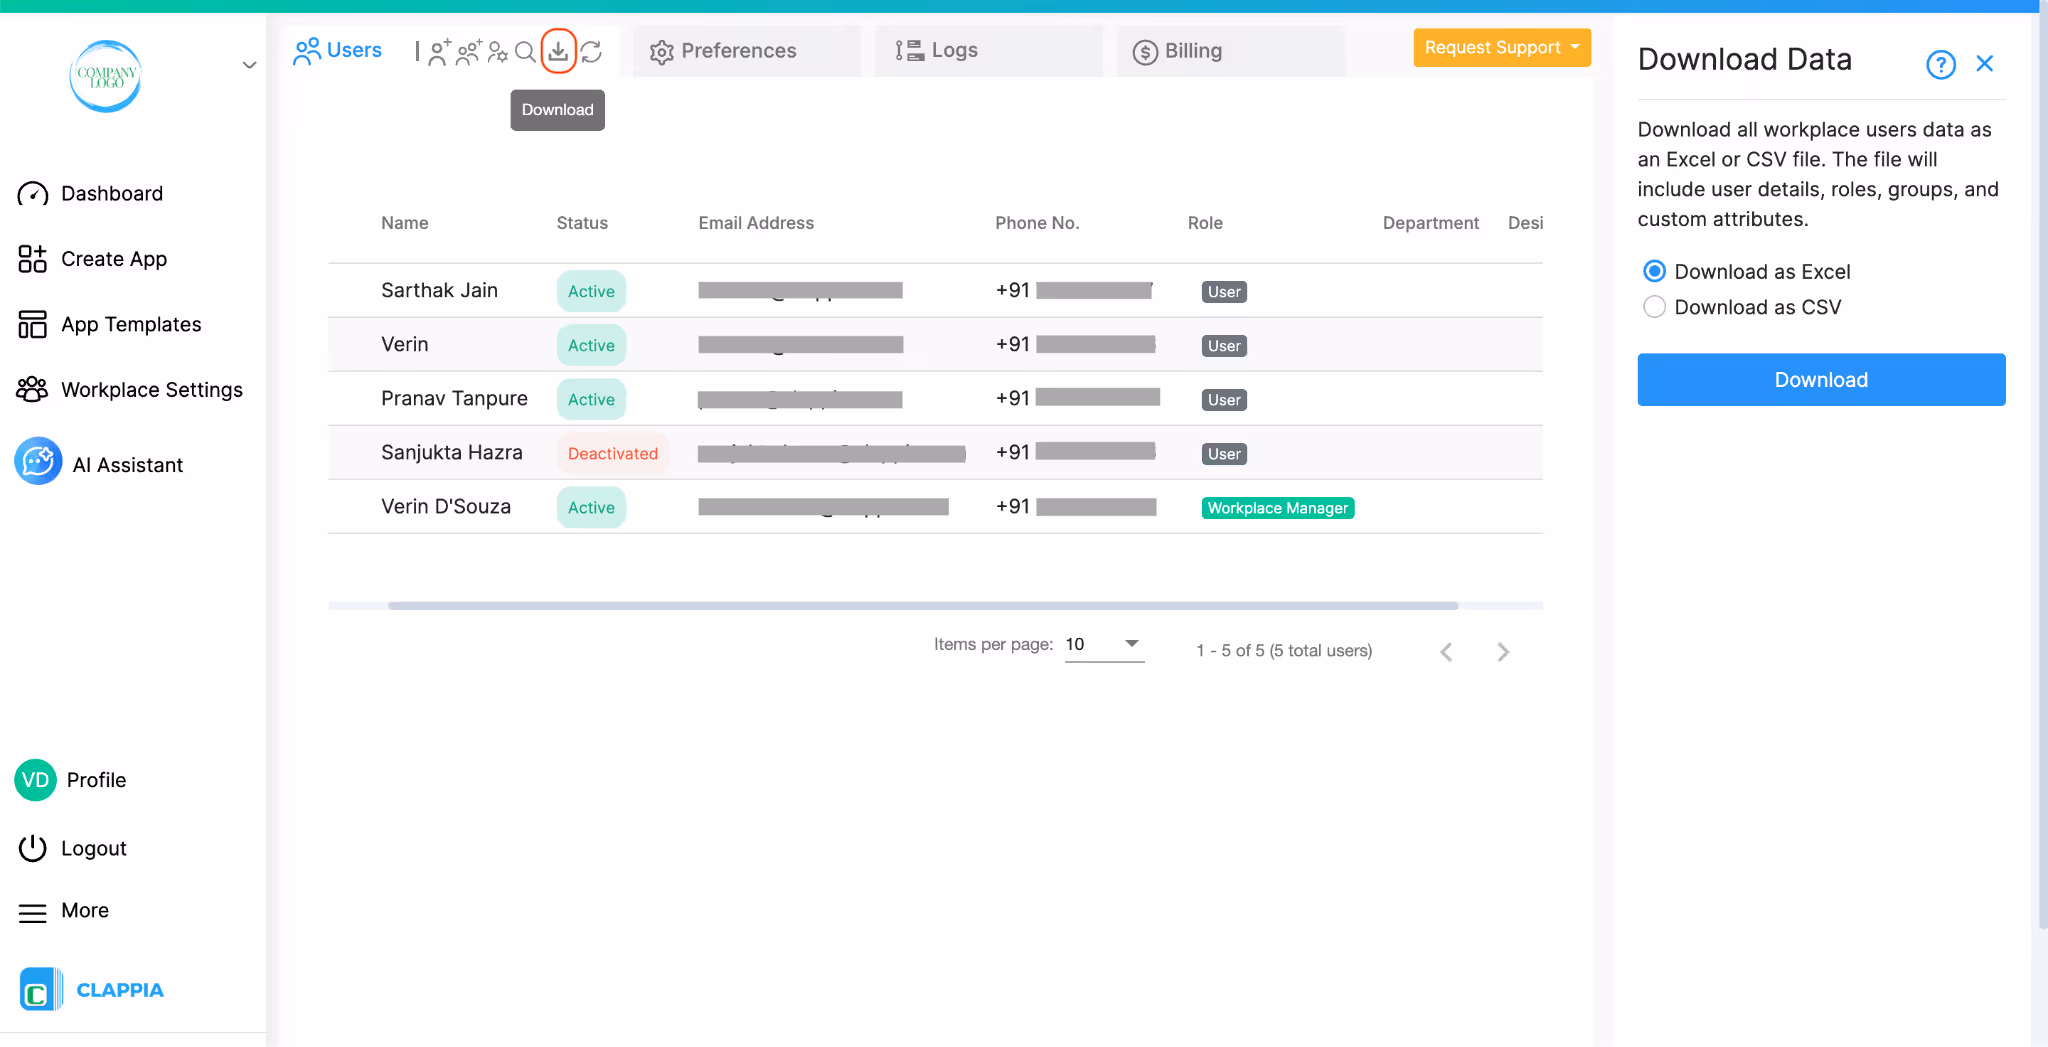
Workplace Managers can download a complete list of users who are part of the workplace.
To download a user list:
The downloaded file will include:
You can use filters before downloading to export only a subset of users (for example, all deactivated users or all users in a particular role).
To change platform usage mode, you can go to the Billing tab to upgrade or change plans, click here to know more on free/paid plans.
This page will now go into details about the Preferences tab.
The Preferences tab allows you to customize and manage various settings for your Workplace. Below are the sections available within Preferences, which can be configured to suit your specific needs.

Once you click on the Edit Logo tab, you can add the logo of your company on the right panel. The logo will then be displayed on the top left corner of the workplace.


You can edit the theme of your workplace using the right panel. Clappia offers a set of predefined colors to choose from.


Additionally, if you prefer a custom color scheme, you can select the ‘Custom’ option and manually set the primary and secondary colors to match your branding.


This appearance will also be reflected in the Clappia mobile app.
If you require further customization, such as modifying the app appearance to align completely with your business identity, you can consider a white-labeled app, which comes at an additional charge.
This tab is used to turn ON/OFF Email and Mobile app notifications for all apps and all users of the Workplace.

Notification Options Available:
These notifications can be individually toggled ON or OFF based on the preferences of the Workplace Admin.
Important Note:
This tab allows you to control how users log in to your Clappia Workplace.

Toggle ON/OFF the login methods available for your users:
When “Login with Email and Password” is enabled, you can configure the password strength policy for all users:
If a higher policy is selected from the current password, you will be prompted with a Password Check message when navigating to the rest of the dashboard. You will be required to update your password.

To update the password:

Add an extra layer of security by enabling 2 Factor Authentication:
Users will be prompted to enter an OTP sent to the selected medium after entering their credentials during login.
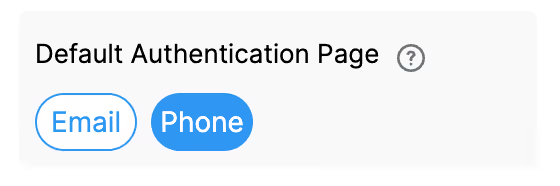
The Default Authentication Page option lets you decide which login screen users see first when they try to sign in to your workplace.
You can choose between:
This setting does not enable or disable any login methods. It only controls the default login screen that appears first. Users can still switch to other available login options from the login page, based on what is enabled in your workplace.
This is useful when most users in your organisation are expected to log in using a specific method, as it reduces friction and speeds up the login process.

SMTP (Simple Mail Transfer Protocol) settings allow you to configure how emails generated from your Clappia workflows are sent. By default, these emails go out from noreply@clappia.com, but if you want them to come directly from your company’s email account, you can set that up here. This helps ensure that notifications and workflow emails look like they are coming from your own domain, making them more recognizable to your users and customers.
For the full setup process, available authentication methods, and detailed notes on configuring SMTP in your workplace, click here.
The File Size Limits option allows Workplace Managers to control the maximum size of files uploaded from the device gallery to apps within the workplace.
This setting applies to gallery-based uploads in blocks such as the Camera, Images & Files block and other attachment-style blocks like PDF/Image/Video Viewer blocks and Attached Files block.
This limit does not apply to live camera images or live video recordings captured directly through the Camera block.
The maximum file size depends on the workplace plan:

You can use these settings to configure your own WhatsApp Business Number to send WhatsApp messages using Clappia WhatsApp Workflows. Read more about the WhatsApp Workflows here.

Once you enable the option "Configure WhatsApp Number", you will get an option to enter the Phone Number Id and Auth Token. You can get both these values from your developers.facebook.com account. For more details on these, you can check this guide.

You can set up the format of the date and time in your workplace.

The Date/Time settings allow Workplace Managers to configure how date and time values are displayed and processed across all apps in the Workplace. These settings ensure consistency and accuracy when handling date and time data, particularly in workflows, submissions, and reporting.
Configuration Options:
Note:
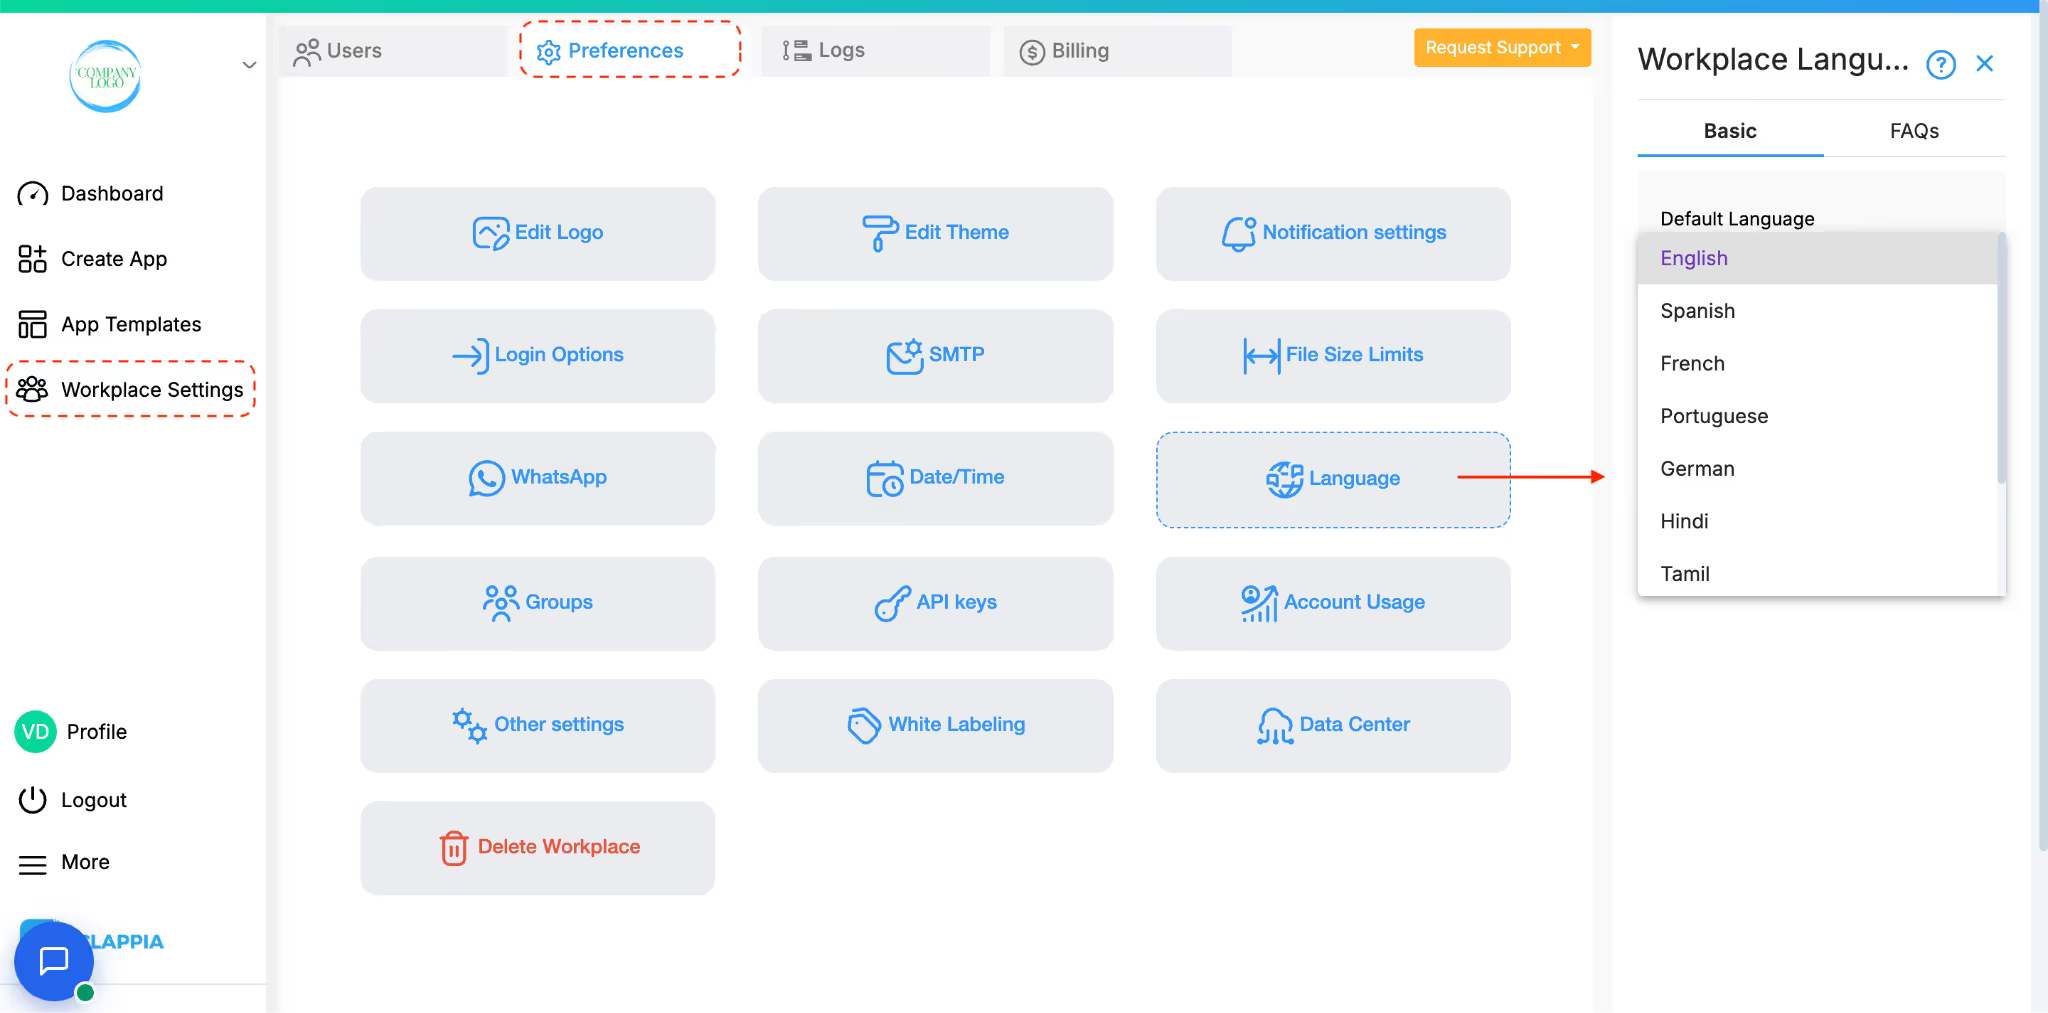
The Language setting allows admins to change the default language of the Clappia dashboard to one of the available options. This helps admins and users view the interface in a language they are more comfortable with.
At present, changing the language applies only to the navigation tabs of the dashboard (such as Dashboard, Create App, App Templates, Workplace Settings). Support for all tabs, blocks, and other areas of Clappia is being expanded and more languages will be added over time.
Once saved, the navigation tabs in the dashboard will switch to the selected language. For example, if you select Portuguese, menu options like Dashboard, Create App, and Workplace Settings will immediately appear in Portuguese.
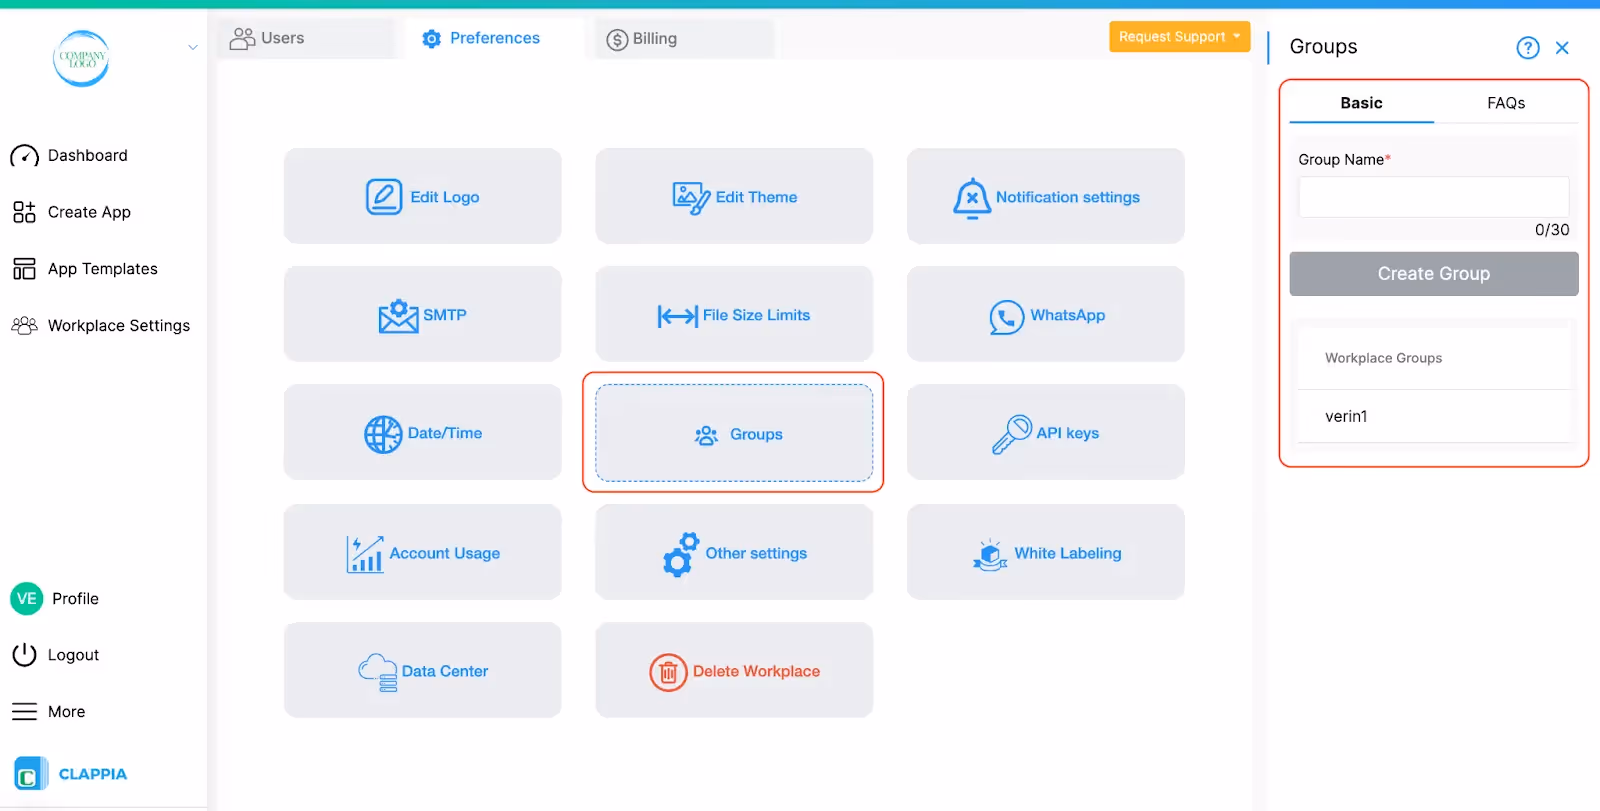
Workplace admins can create and manage groups to organise users within a Workplace. For example, if a company operates in multiple locations, groups can be created for each location (e.g., Location 1, Location 2, etc.) to manage app access and submissions efficiently. Apps are independent of groups and users from different groups can be assigned to the same app. However, submission viewing is group-specific, meaning users can only view submissions made by users within their assigned groups, even if they have app admin permissions.
You can generate unique API Keys for your Workplace. These API Keys can be used to call the public APIs of Clappia such as createSubmission, editSubmission, updateSubmissionStatus etc. You can get more details about the APIs and their signatures at developer.clappia.com or refer to our detailed article: Clappia Public APIs.
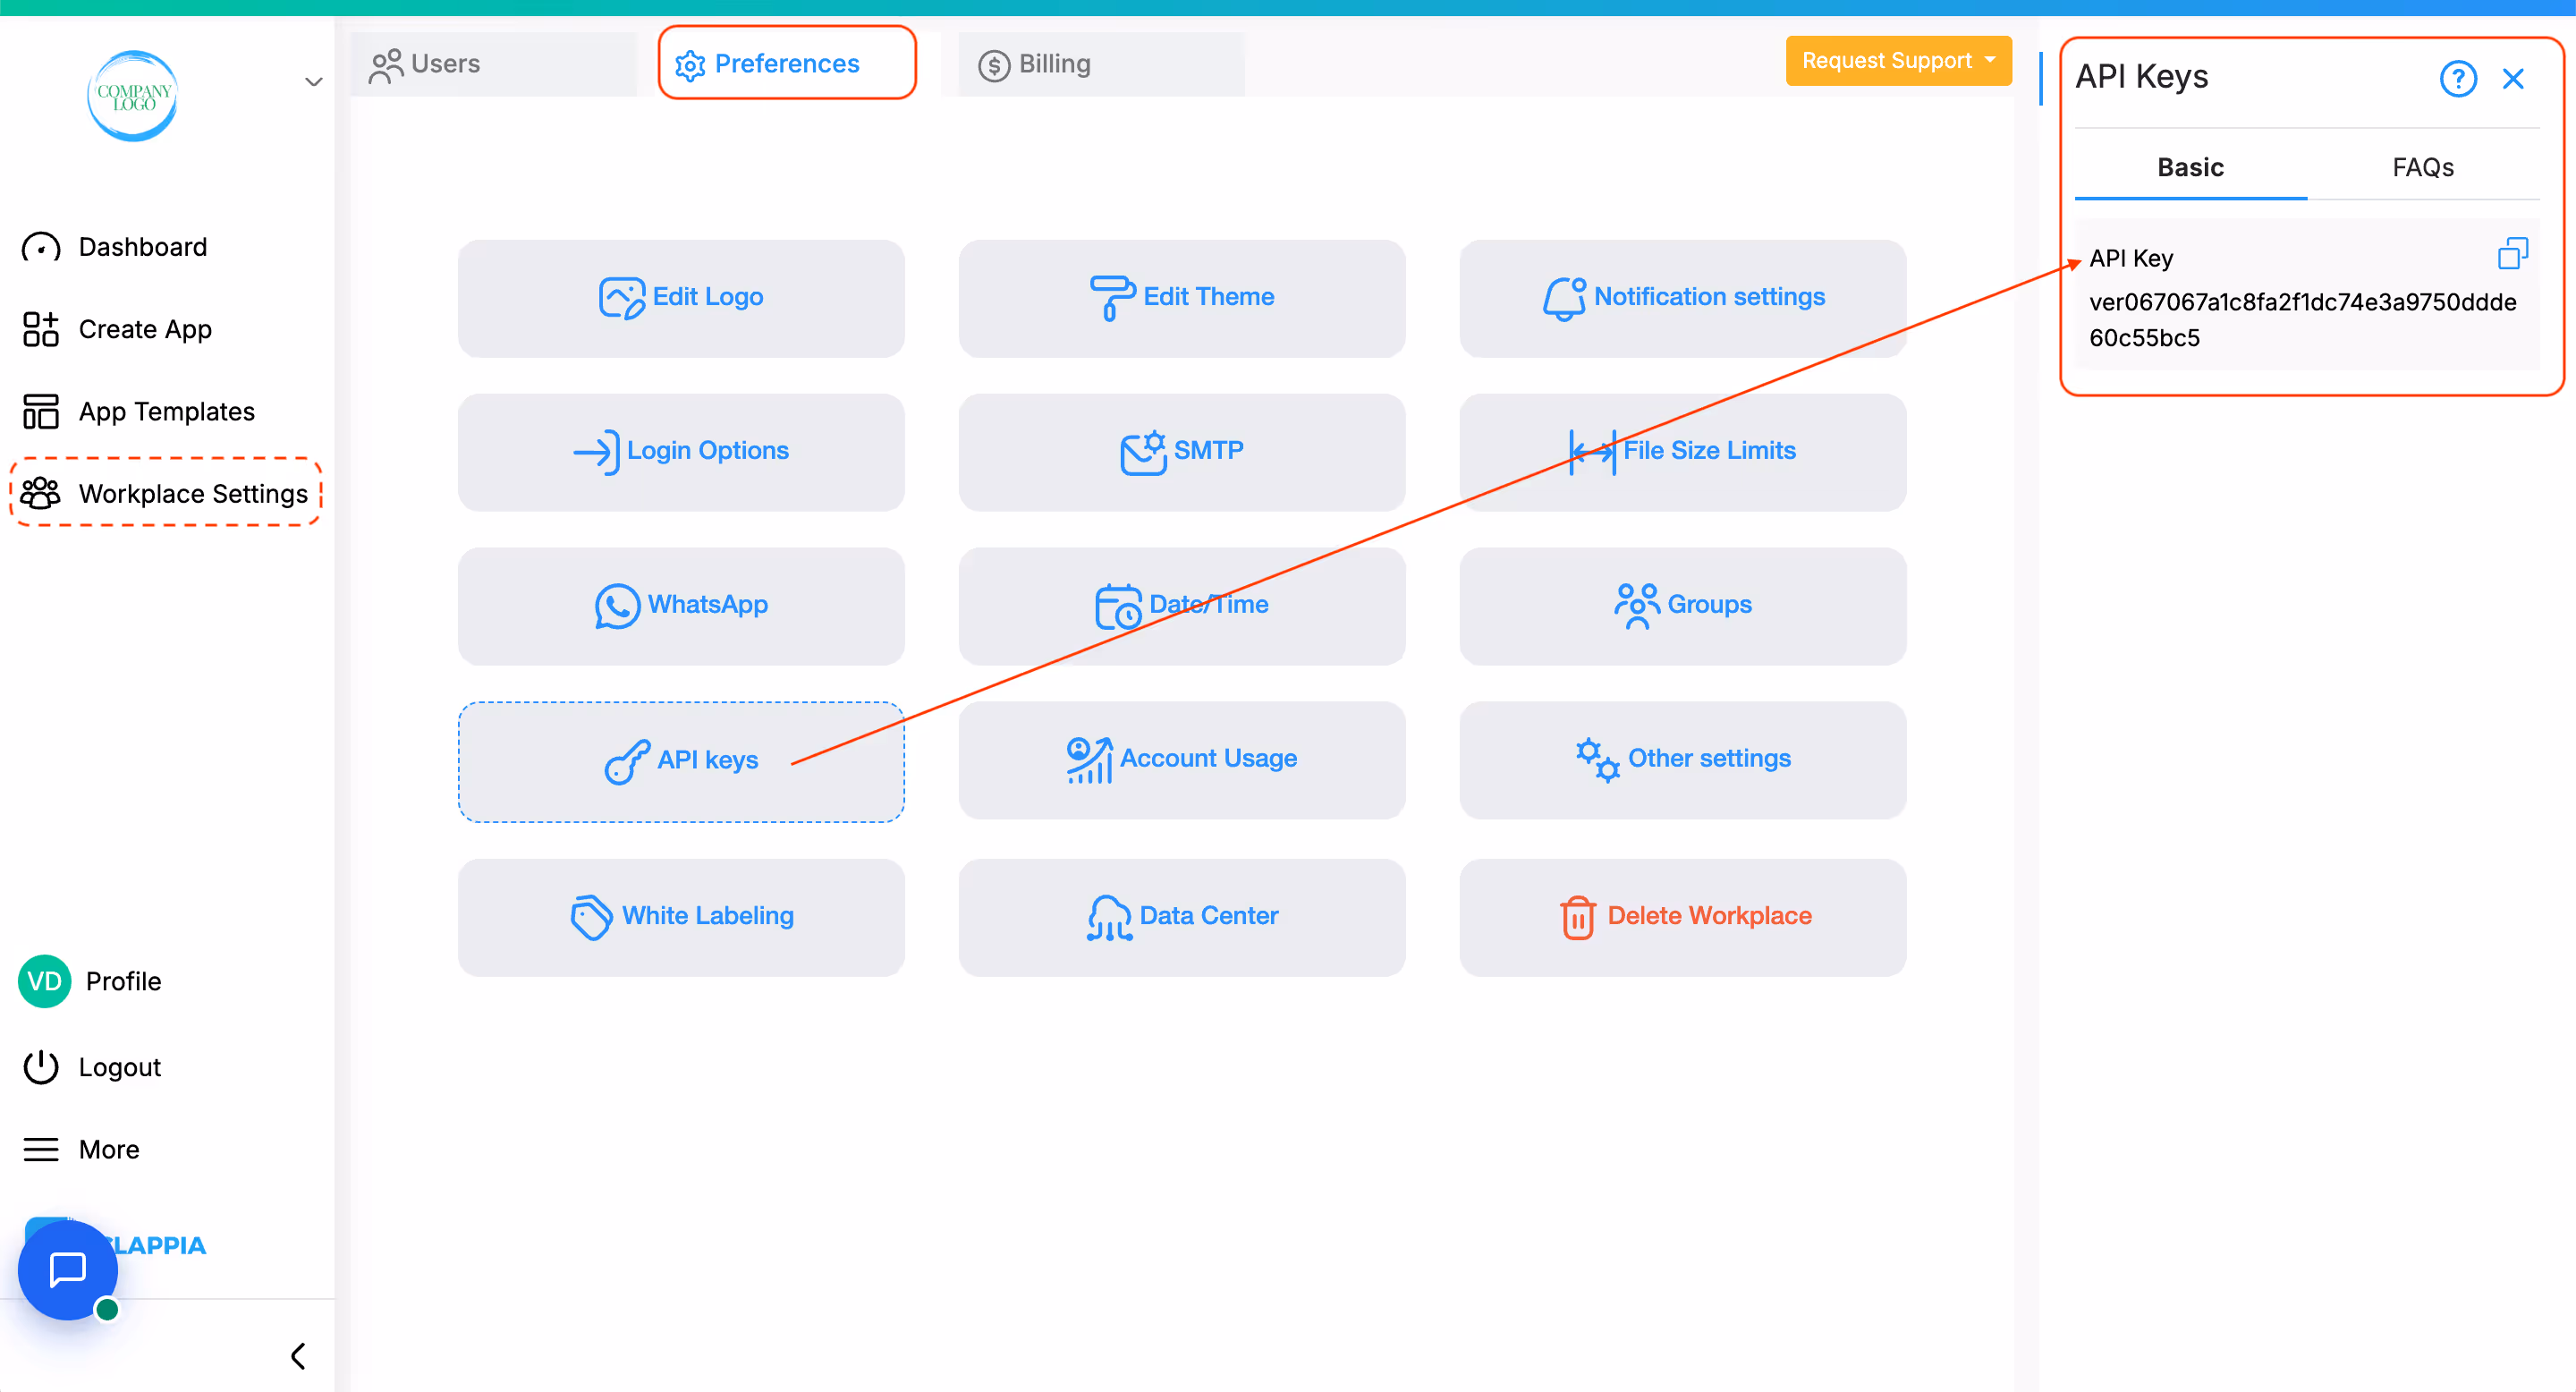
When you create your Workplace, there will not be any API Keys for the Workplace. You can generate a new key by clicking on "Generate API Key".

Once a key is generated, a default usage limit is applied automatically:
To purchase more API calls:
The pricing for each add-on will be visible during this process.
You can also monitor your current month's API usage directly from the Billings page.

The Other Settings option under the Preferences tab allows Workplace Managers to configure additional controls for app usage, file access, navigation, and data operations. These settings provide flexibility in managing access and permissions across the Workplace.

The White Labeling settings allow you to customize the Clappia platform and apps with your business branding. By configuring these settings, you can provide your users with a seamless and professional experience under your company's logo and domain. With white-labeling, your company logo will appear on the Play Store or App Store, making it visible to others for download and use while the Clappia platform interface remains unchanged.

Under the Basic tab, you can:
For more detailed steps and explanations, check out the White-Labeled Apps Help Guide.

The Advanced tab allows you to integrate important business-specific URLs into your white-labeled app, ensuring your users have easy access to essential resources:
These advanced options ensure that your white-labeled app remains compliant with your business policies and offers a professional, user-friendly experience.
Note: White labeled apps are free for a trial basis up to 30 days following which additional charges will incur to continue usage. Whitelabeled apps have a separate charge from paid plans. You can check out the pricing page for White-labeled apps here.
The Data Center option in Workplace Settings allows you to request the relocation of your workplace's data to a different AWS Data Center. By default, Clappia stores all data in the AWS Data Center located in India. However, if your organization has specific data localization requirements, you can request to move your data to other AWS Data Centers, including those in Australia, Europe, the Middle East, North America, and South America.
For detailed information and step-by-step instructions, please refer to the Relocation of Data Center Help Guide.

Navigation Options let you manage the left panel by reordering existing items or adding new ones that link to apps. You can also control when items are shown using workplace attributes. Click here to know more.
You can submit a request to delete the workplace by simply selecting the option of delete workplace, type 'delete workplace' in the input box on the right panel and click on the Delete button. The input box is case sensitive.

Click here to know more on deleting a workplace.
<iframe width=\"200\" height=\"100\" src=\"https://www.youtube.com/embed/Tmi_mlGkYL0\" title=\"Formatting Date & Time Part 1 ● Clappia App Building ● No-Code Low-Code Platform\" frameborder=\"0\" allow=\"accelerometer; autoplay; clipboard-write; encrypted-media; gyroscope; picture-in-picture; web-share\" allowfullscreen></iframe>
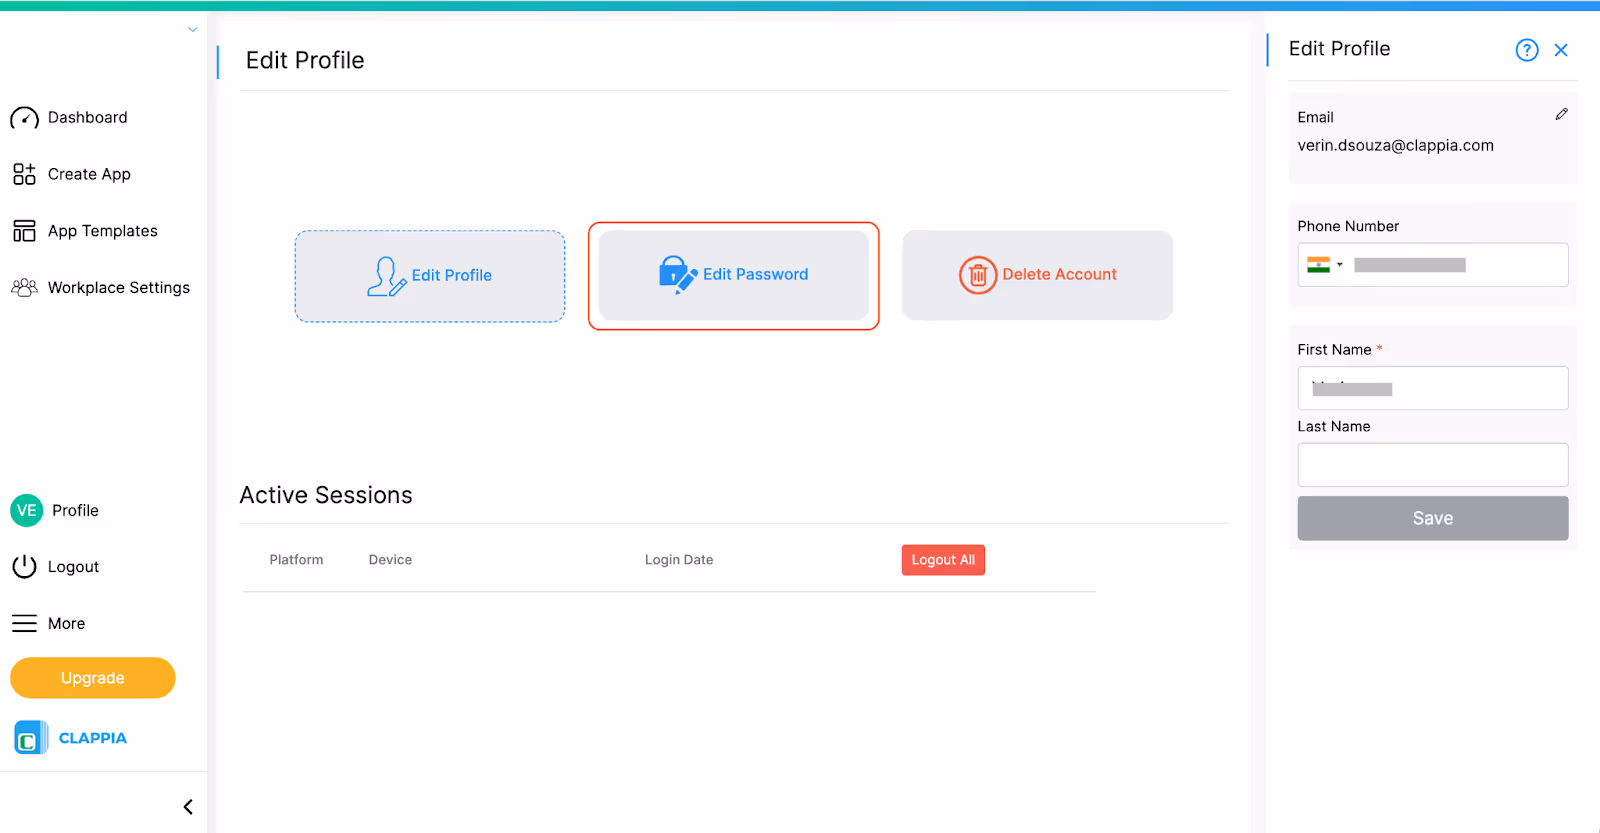
An admin cannot change a user’s password if that user is part of multiple workplaces.
The password is linked to the user’s email ID and is used to sign in across all workplaces associated with that email. It cannot be changed for just one workplace.
If the user needs to update their password, they can do so themselves from the login screen by clicking Forgot Password before signing in.
L374, 1st Floor, 5th Main Rd, Sector 6, HSR Layout, Bengaluru, Karnataka 560102, India
3500 S DuPont Hwy, Dover,
Kent 19901, Delaware, USA


3500 S DuPont Hwy, Dover,
Kent 19901, Delaware, USA
L374, 1st Floor, 5th Main Rd, Sector 6, HSR Layout, Bengaluru, Karnataka 560102, India
.svg)
